1. Introduktion
This manual provides essential information for the proper installation, operation, and maintenance of your Beetronics 12-Inch Full HD IPS Monitor, model 12HD7M. Please read this manual thoroughly before using the product to ensure optimal performance and safety.
Nøglefunktioner:
- Full HD 1920 x 1080 resolution IPS panel with 178° viewing vinkler.
- Multiple video inputs: HDMI, VGA, BNC, and RCA.
- Durable metal housing designed for continuous 24/7 operation.
- Bred input voltage range (9-36 Volts) and dimmable backlight.
- Flexible mounting options: Collapsible stand and 75mm VESA mount.
2. Pakkens indhold
Verify that all items listed below are included in your product package. If any items are missing or damaged, please contact Beetronics support.
- Beetronics 12-Inch Full HD IPS Monitor (12HD7M)
- Strømforsyning og ledning
- Fjernbetjening
- Flush Mounting Brackets
- Sammenklappeligt stativ
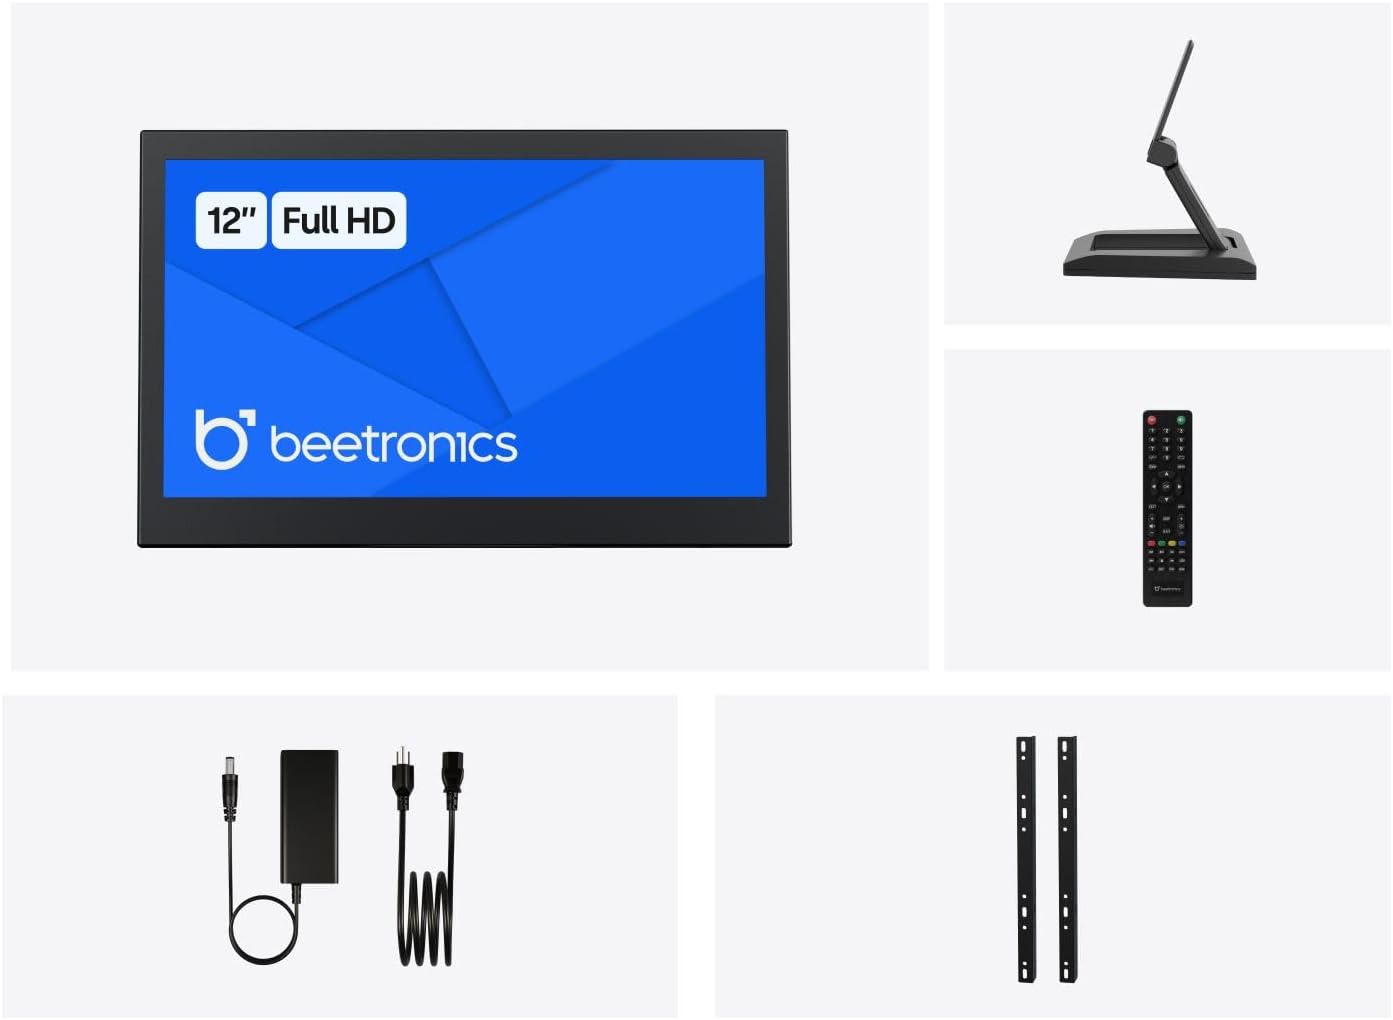
Figur 2.1: Package Contents. This image displays the Beetronics 12HD7M monitor along with its standard accessories, including the power adapter, remote, mounting brackets, and desktop stand.
3. Produktet er slutview
Monitor Dimensions and Design:
The Beetronics 12HD7M monitor features a robust metal housing, designed for industrial environments. Its compact form factor allows for versatile integration.

Figur 3.1: Monitor Dimensions. This image illustrates the physical dimensions of the 12HD7M monitor, including width (279 mm), height (179 mm), and stand height adjustment (50-64 mm).
Input/output porte:
The monitor is equipped with a comprehensive set of rear-facing, downward-oriented input ports for easy cable management and installation.

Figur 3.2: Rear I/O Ports. This image provides a clear view of the monitor's rear panel, detailing the DC power input, HDMI, VGA, USB, AV, BNC, and audio input/output ports. Control buttons for power, menu, and volume are also visible.
- DC strømindgang: Til tilslutning af den medfølgende strømadapter.
- HDMI: High-Definition Multimedia Interface for digital video and audio.
- VGA: Video Graphics Array for analog video input.
- BNC: Bayonet Neill-Concelman connector, commonly used for professional video applications.
- RCA (AV): Composite video and stereo audio inputs.
- USB: Til service eller specifikke perifere forbindelser.
- Lyd ind/ud: 3.5mm jacks for audio connectivity.
4. Opsætning
4.1 Monteringsmuligheder
The 12HD7M monitor offers flexible mounting solutions to suit various environments.
Installation af bordstativ:
The included collapsible stand allows for desktop placement and angle adjustment. Ensure the stand is securely attached to the monitor and placed on a stable, flat surface.
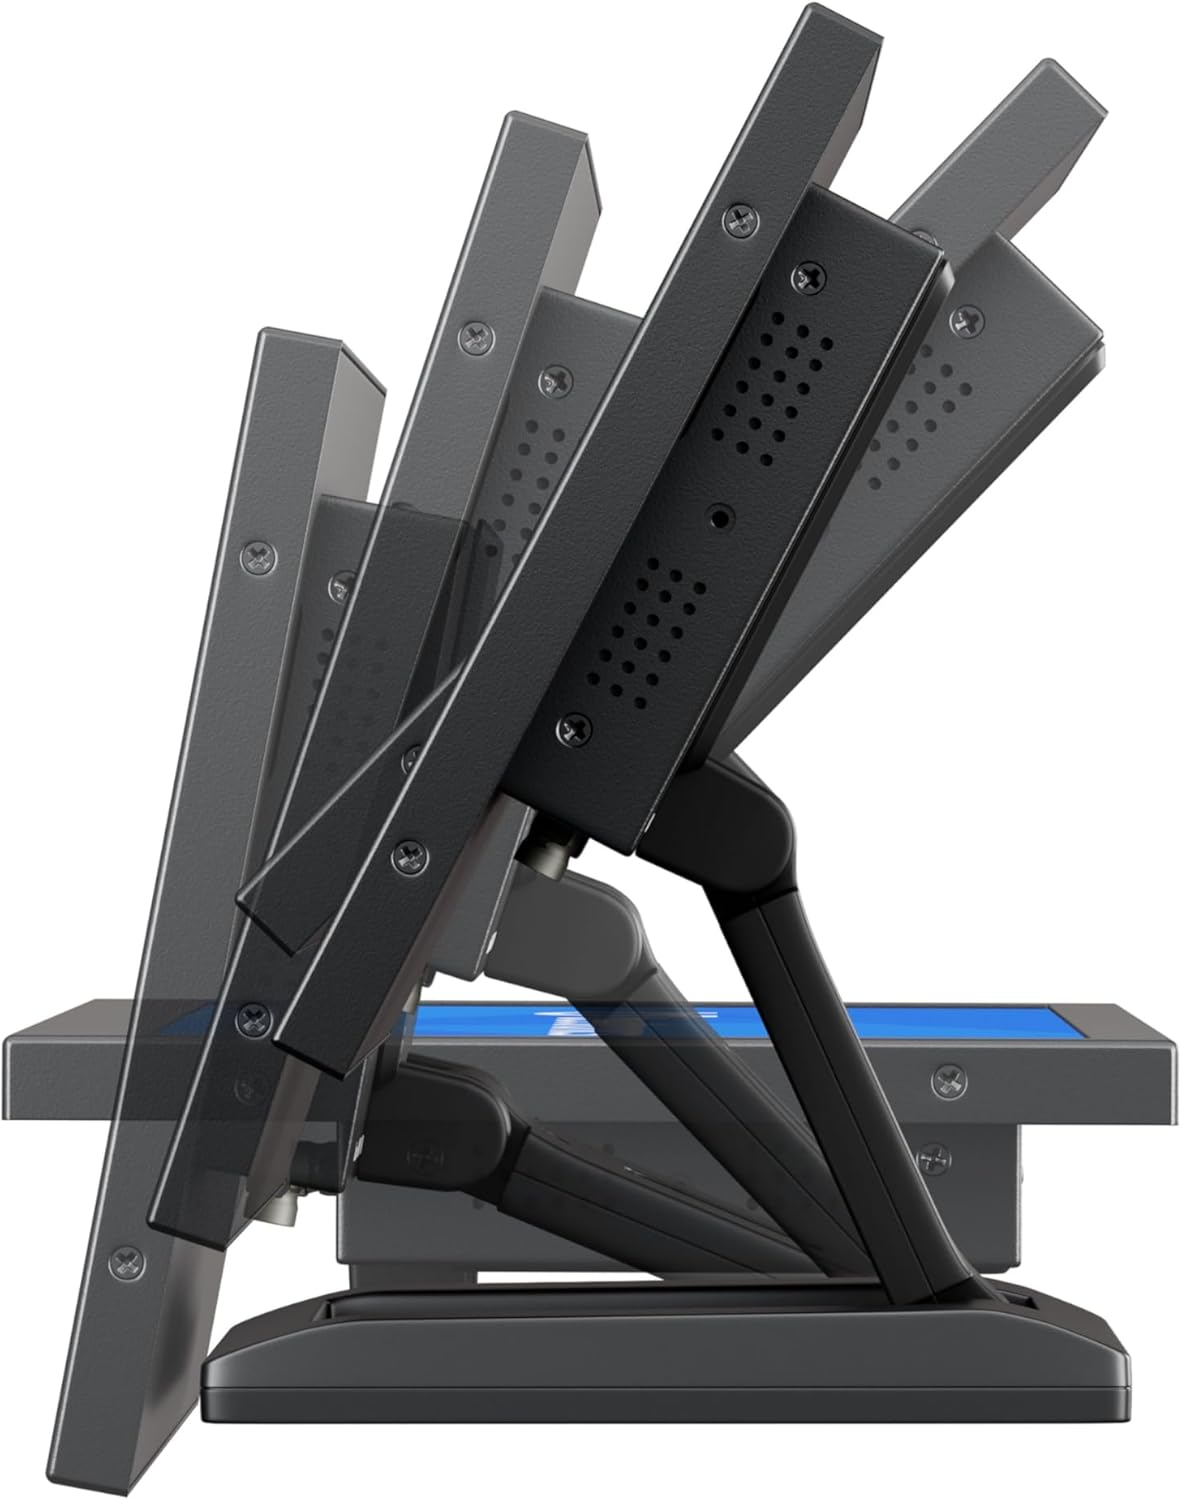
Figur 4.1: Adjustable Stand. This image shows the monitor's side profile, highlighting the flexibility of the collapsible stand to adjust the screen's tilt angle for optimal viewing.
VESA Wall/Panel Mounting:
The monitor features a 75mm VESA mount pattern on the rear, allowing it to be mounted on compatible VESA arms, wall mounts, or integrated into panels using the flush mounting brackets. Ensure appropriate screws (M4) are used and tightened securely.

Figur 4.2: VESA Mount Points. This image displays the back of the monitor, indicating the standard VESA mounting points for secure attachment to compatible brackets or arms.
4.2 Tilslutning af strøm
- Connect the power adapter cable to the DC input port on the rear of the monitor.
- Plug the power adapter into a suitable electrical outlet. The monitor supports a wide input voltage område på 9-36V DC.
4.3 Tilslutning af videokilder
Connect your video source (e.g., computer, camera, media player) to the desired input port on the monitor using appropriate cables.
- HDMI: For high-quality digital video and audio.
- VGA: For analog video connections.
- BNC: For professional video equipment.
- RCA (AV): For composite video and analog audio.
5. Betjeningsvejledning
5.1 Tænd/sluk
Press the 'ON/OFF' button located on the rear panel or on the remote control to power the monitor on or off.
5.2 Menunavigation (OSD)
The On-Screen Display (OSD) menu allows you to adjust various monitor settings. Use the 'MENU' button to access the OSD, and the '+', '-', 'AUTO' buttons to navigate and adjust settings. The remote control can also be used for easier navigation.
5.3 Indgangsvalg
To switch between different video input sources, press the 'AUTO' button on the rear panel or the 'Input' button on the remote control. Cycle through HDMI, VGA, BNC, and AV inputs until the desired source is displayed.
5.4 Billedindstillinger
Få adgang til OSD-menuen for at justere indstillinger for billedkvalitet:
- Lysstyrke: Justerer skærmens samlede lysstyrke.
- Kontrast: Kontrollerer forskellen mellem lyse og mørke områder.
- Farvetemperatur: Vælger forudindstillede farvetilstande (f.eks. Varm, Kold, Bruger).
- Aspektforhold: Adjusts the display ratio (e.g., 16:9, 4:3).
- Skarphed: Forbedrer kantdefinitionen.
5.5 Lydindstillinger
If an audio source is connected, adjust the volume using the '+' and '-' buttons on the rear panel or remote control. Further audio settings may be available in the OSD menu.
6. Vedligeholdelse
6.1 Rengøring af monitoren
- Sluk altid skærmen og tag stikket ud, inden du rengør den.
- Brug en blød, fnugfri klud lidt damprengøres med vand eller et mildt, ikke-slibende skærmrensemiddel.
- Do not spray liquid directly onto the screen or into any openings.
- Undgå at bruge skrappe kemikalier, opløsningsmidler eller slibende materialer.
6.2 Generel pleje
- Undgå at placere tunge genstande på skærmen.
- Udsæt ikke skærmen for ekstreme temperaturer, fugtighed eller direkte sollys.
- Sørg for tilstrækkelig ventilation omkring skærmen for at forhindre overophedning.
7. Fejlfinding
Hvis du støder på problemer med din skærm, kan du se følgende almindelige problemer og løsninger.
| Problem | Mulig årsag | Løsning |
|---|---|---|
| Ingen strøm | Power cable not connected; Power adapter faulty; Power outlet not working. | Check power cable connections; Test power adapter with another device; Try a different power outlet. |
| Intet signal | Video cable not connected; Incorrect input source selected; Video source not active. | Ensure video cable is securely connected; Select the correct input source using the 'Input' button; Verify video source is powered on and outputting a signal. |
| Billedet er forvrænget eller sløret | Forkert opløsning; Løst videokabel; Skærmindstillinger. | Set the video source to the monitor's native resolution (1920x1080); Reconnect video cable; Adjust 'Sharpness' or 'Auto' settings in the OSD. |
| Ingen lyd | Audio cable not connected (for VGA/BNC/RCA); Volume too low; Audio source not active. | Ensure audio cable is connected (if not using HDMI); Increase monitor volume; Check audio output from the source device. |
8. Specifikationer
Detailed technical specifications for the Beetronics 12HD7M monitor.
| Feature | Specifikation |
|---|---|
| Modelnummer | 12HD7M |
| Skærmstørrelse | 11.6 tommer (diagonalt) |
| Opløsning | 1920 x 1080 (Fuld HD) |
| Paneltype | IPS |
| Aspektforhold | 16:9 |
| Viewi vinkel | 178° (Horisontal/Lodret) |
| Billedlysstyrke | 500 Candela |
| Skærmoverflade | Mat |
| Videoindgange | HDMI, VGA, BNC, RCA (AV) |
| Audioindgange / -udgange | 3.5mm Audio In, 3.5mm Audio Out |
| Strømindgang | 9-36 volt (jævnstrøm) |
| Produktdimensioner | 1.4 x 11 x 9.6 tommer (35.6 x 279.4 x 243.8 mm) |
| Varens vægt | 3.7 pund (1.68 kg) |
| Montering | 75mm VESA, Collapsible Stand |
9. Garanti og support
9.1 Garantioplysninger
The Beetronics 12HD7M monitor comes with a solid 2 års garanti, reflecting our commitment to quality and reliability. This warranty covers defects in materials and workmanship under normal use. Please retain your proof of purchase for warranty claims.
9.2 Teknisk support
For technical assistance, troubleshooting beyond this manual, or warranty inquiries, please contact Beetronics customer support. Refer to the official Beetronics webwebstedet for de seneste kontaktoplysninger og supportressourcer.
Webwebsted: www.beetronics.com


