1. Introduktion
Welcome to the user manual for your iRobot Roomba Combo i5 (i5172) Robot Vacuum and Mop. This innovative device is designed to simplify your home cleaning routine by offering both powerful vacuuming and efficient mopping capabilities in one intelligent robot. With advanced navigation, smart mapping, and app control, the Roomba Combo i5 ensures a thorough clean for various floor types.
This manual provides essential information on setting up, operating, maintaining, and troubleshooting your robot to ensure optimal performance and longevity.

The iRobot Roomba Combo i5 robot vacuum and mop.
2. Hvad er der i æsken
Sørg for, at alle komponenter er til stede, før du starter opsætningen:
- 1x Roomba Combo i5 Robot Vacuum and Mop
- 1x Home Base Charging Station
- 1x Replaceable Roomba Combo Collection Bin (for vacuuming)
- 1x Replaceable Roomba Combo Water Tank (for mopping)
- 2x High-Performance Filters
- 1x Microfiber Mop Pad
- 1 x drypbakke
- 1x strømkabel

The Roomba Combo i5 robot with its included accessories: the Home Base, the Combo Bin, a spare filter, power cable, and mop pads.
3. Opsætningsvejledning
3.1 Opladning af robotten
- Place the Home Base Charging Station against a wall in an open, uncluttered area. Ensure there is at least 0.5 meters (1.5 feet) of clear space on each side of the Home Base and 1.2 meters (4 feet) in front of it.
- Plug the power cable into the Home Base and then into a wall outlet.
- Place your Roomba Combo i5 onto the Home Base. The light ring around the CLEAN button will pulse white to indicate charging. Allow the robot to charge for at least 3 hours before its first use.

The Roomba Combo i5 robot docked on its Home Base charging station.
3.2 Forbindelse til iRobot Home-appen
The iRobot Home App unlocks the full potential of your Roomba Combo i5, allowing you to schedule cleanings, view cleaning maps, and customize settings.
- Download the iRobot Home App from the App Store (iOS) or Google Play Store (Android).
- Følg instruktionerne i appen for at forbinde din robot til dit Wi-Fi-hjemmenetværk. Note: The robot requires a 2.4 GHz Wi-Fi network for setup and operation. Your phone can return to 5 GHz after setup.
3.3 Installing the Cleaning Bins
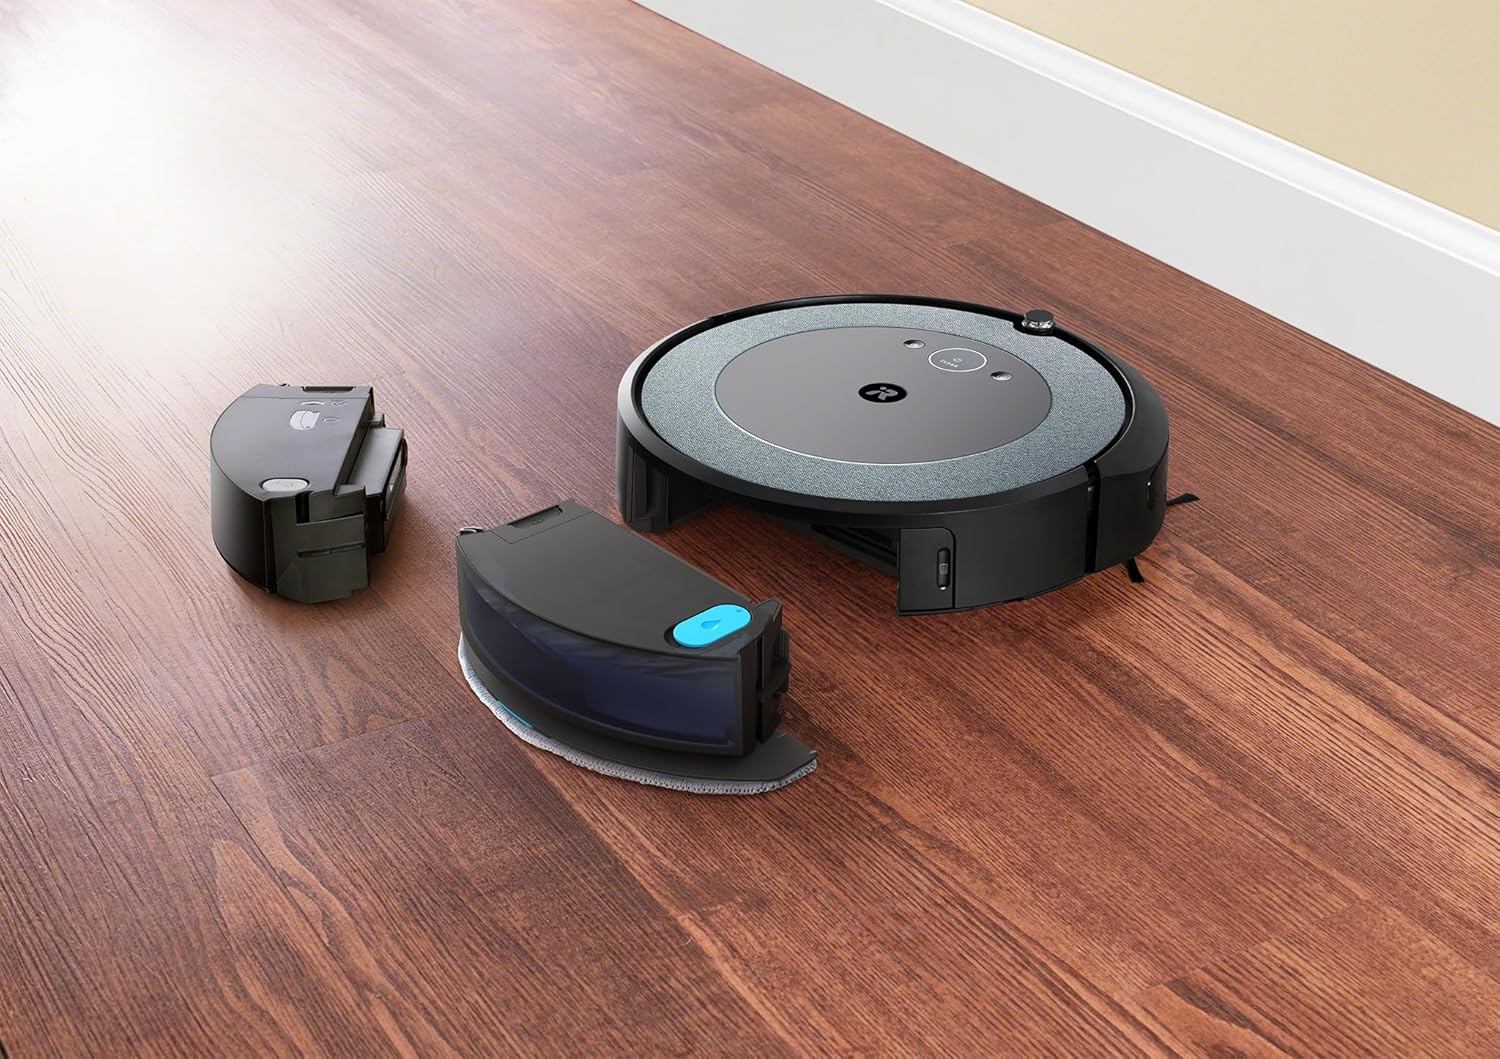
The Roomba Combo i5 uses interchangeable bins for vacuuming and mopping:
- Støvsugning: Insert the Roomba Combo Collection Bin (dust bin) into the robot until it clicks into place.
- Mopping: Remove the dust bin. Fill the Roomba Combo Water Tank with water or a compatible cleaning solution (check iRobot's recommendations). Attach the microfiber mop pad to the tank and slide the tank into the robot until it clicks.

The Roomba Combo i5 robot with its mop bin detached, showing the interchangeable design.

A hand filling the water tank of the Roomba Combo i5 mop bin.
5. Betjeningsvejledning
5.1 Start af en rengøringscyklus
- Fra robotten: Press the CLEAN button on the robot to start or pause a cleaning cycle. Press it again to send the robot back to its Home Base.
- Fra appen: Use the iRobot Home App to start, pause, or stop cleaning cycles. You can also schedule cleanings, select specific rooms, or define "Keep Out Zones."

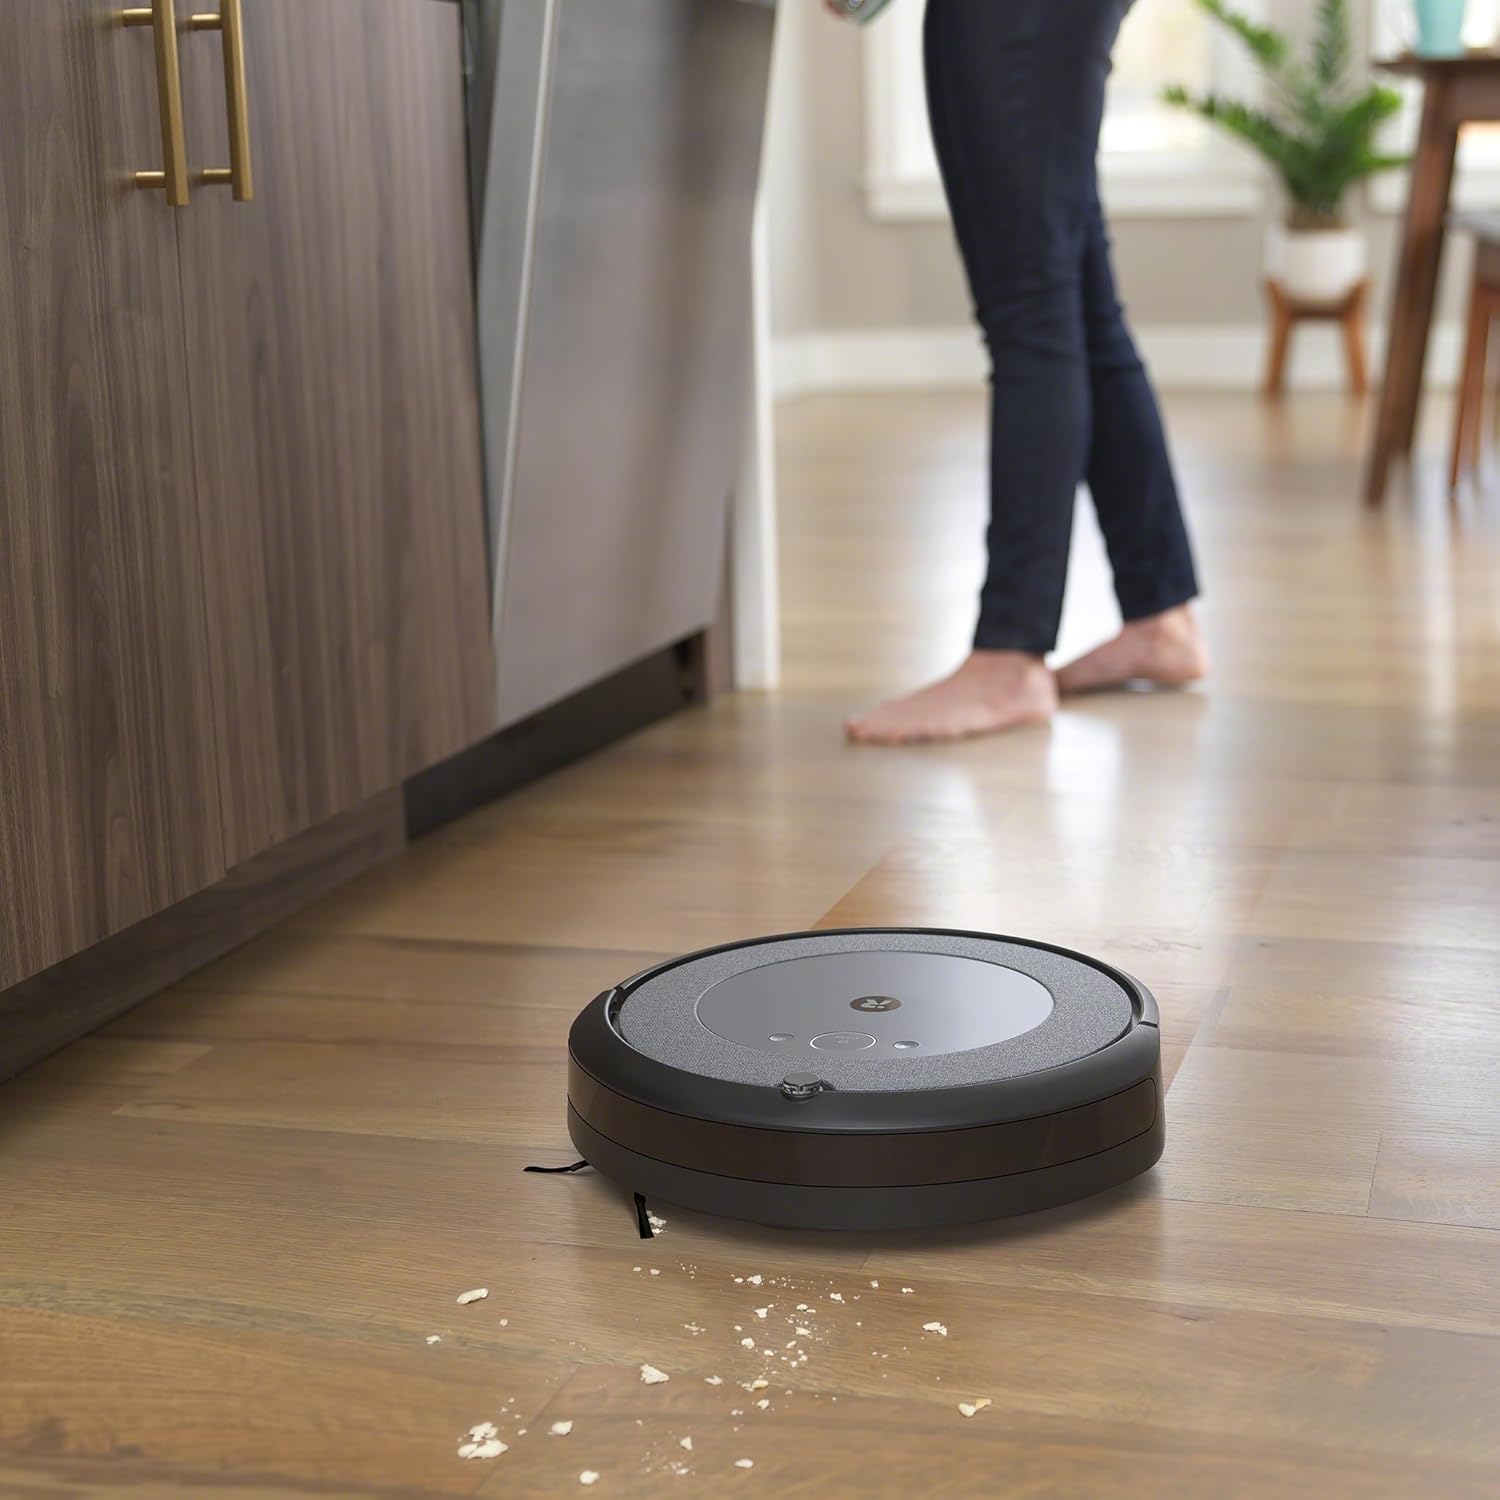
The Roomba Combo i5 robot actively cleaning a wooden floor, demonstrating its efficient movement.
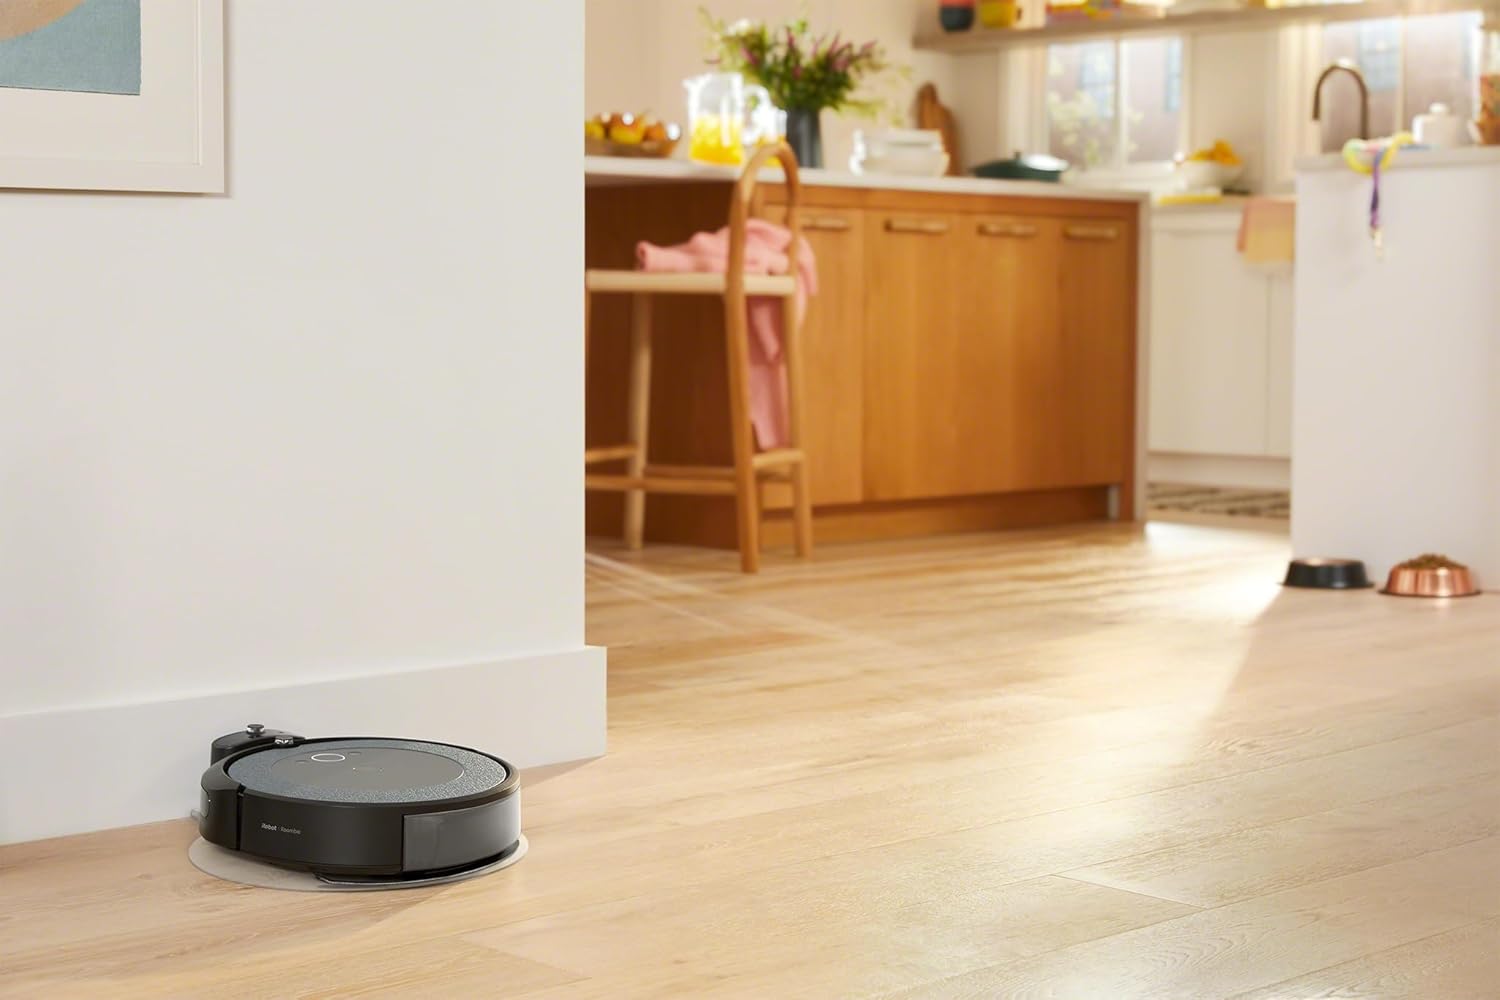
The Roomba Combo i5 robot cleaning close to a wall, highlighting its edge-cleaning capability.
5.2 Rengøringstilstande
The Roomba Combo i5 automatically detects which bin is installed and adjusts its cleaning mode:
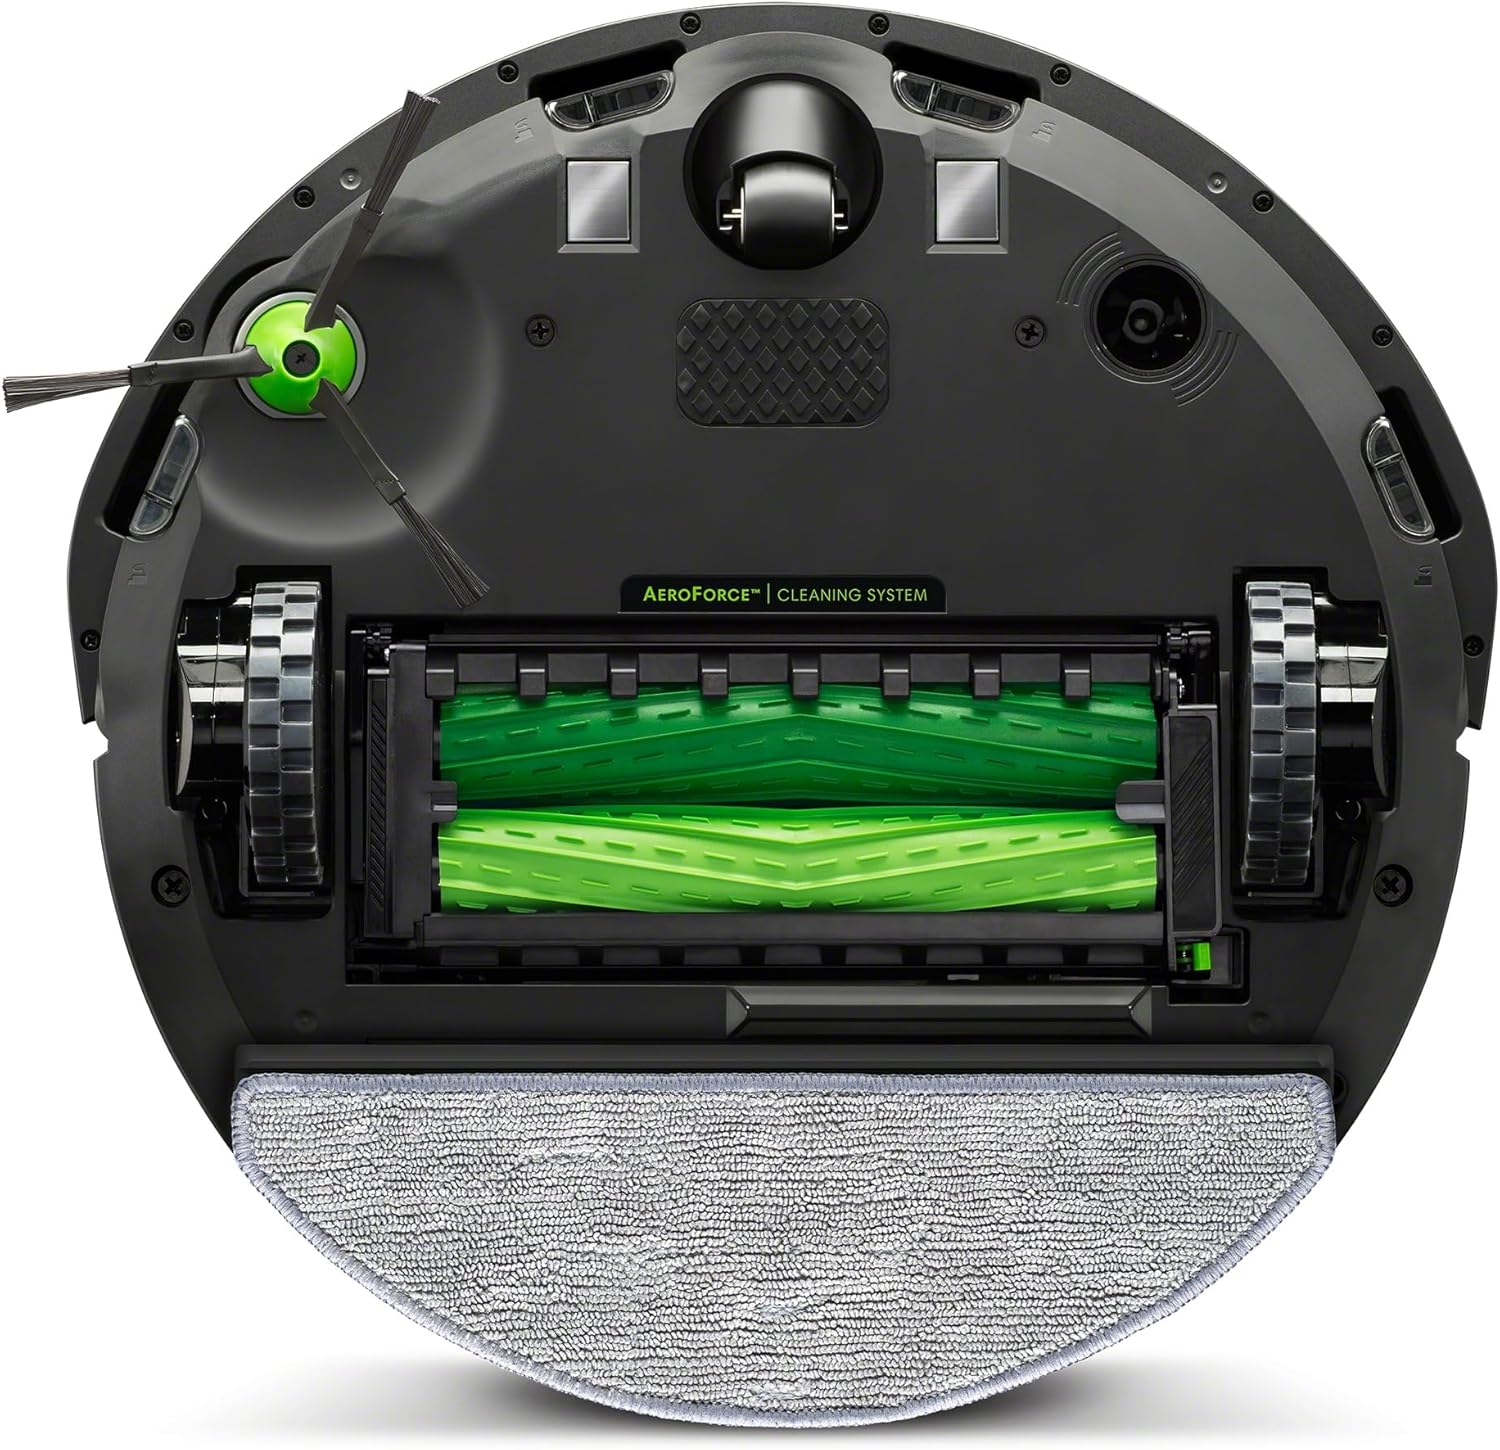
- Kun vakuumtilstand: When the Roomba Combo Collection Bin (dust bin) is installed, the robot will perform a powerful vacuum cleaning using its 4-stage cleaning system, including two multi-surface rubber brushes, strong suction, and an edge-sweeping brush.
- Støvsuger- og moppetilstand: When the Roomba Combo Water Tank is installed, the robot will vacuum and mop simultaneously. It uses the microfiber mop pad to wipe hard floors while continuing to vacuum.

The Roomba Combo i5 robot cleaning under kitchen cabinets, demonstrating its low profile.
5.3 Smart Features and iRobot OS
Powered by iRobot OS, your robot learns your home and cleaning habits to offer personalized suggestions and control options:
- Værelsesspecifik rengøring: Direct the robot to clean specific rooms or areas using the app.
- DirtDetect Technology: The robot identifies dirtier areas and cleans them more thoroughly when the standard dust bin is in use.
- Genopladning og genoptag: If the battery runs low during a cleaning cycle, the robot will return to its Home Base to recharge and then resume cleaning from where it left off.
- Voice Assistant-kompatibilitet: Control your Roomba Combo i5 with voice commands through compatible devices like Google Home, Google Assistant, Amazon Alexa, and Siri.
The Roomba Combo i5 robot returning to its charging base, with an overlay indicating battery status and path.
Officiel videoshowasing the iRobot Roomba Combo i5 Robot Vacuum and Mop's features and capabilities.
Another official video demonstrating the iRobot Roomba Combo i5 Robot Vacuum and Mop's cleaning process and smart functions.
6. Vedligeholdelse
Regular maintenance is crucial for keeping your Roomba Combo i5 performing at its best. Always turn off the robot and remove it from the Home Base before performing any maintenance.
6.1 Tømning af støvbeholderen
Empty the dust bin after each cleaning cycle or when indicated by the app.
- Press the bin release tab and pull the bin out.
- Åbn skraldespandens låge, og tøm affaldet i en skraldespand.
- Bank skraldespanden mod skraldespanden for at fjerne eventuelle resterende affald.
The Roomba Combo i5 robot with its dust bin removed for emptying or filter access.
6.2 Rengøring af børsterne
The Roomba Combo i5 uses two multi-surface rubber brushes that prevent pet hair tangles. Clean them weekly or as needed.
- Pinch the brush frame release tabs and lift the frame.
- Remove the brushes and clear any hair or debris from the brushes and their caps.
- Reinsert the brushes, ensuring they are properly seated.
The underside of the Roomba Combo i5, displaying its dual multi-surface rubber brushes and edge-sweeping brush.
6.3 Rengøring af filteret
Clean the filter weekly. Replace it every 2-3 months, or as indicated by the app.
- Fjern støvbeholderen.
- Pull the filter out from the bin.
- Tap the filter against a trash can to remove debris. Do not wash the filter.
- Reinsert the clean filter.
6.4 Rengøring af moppepude og vandtank
Clean the mop pad after each mopping session. The water tank can be rinsed as needed.
- Remove the Roomba Combo Water Tank from the robot.
- Detach the microfiber mop pad. The mop pad is washable and reusable. Follow care instructions on the pad.
- Empty any remaining water from the tank and rinse it thoroughly. Allow it to air dry.
7. Fejlfinding
If your Roomba Combo i5 encounters an issue, the robot will play an audible alert and the light ring will flash. Consult the iRobot Home App for specific error messages and troubleshooting steps.
- Robot Stuck or Off-Course: Clear any obstacles around the robot. Ensure the Home Base is in an open area.
- Dårlig rengøringsevne: Check and clean the dust bin, filter, and brushes. Ensure the mop pad is clean and the water tank is filled for mopping.
- Forbindelsesproblemer: Ensure your Wi-Fi network is 2.4 GHz. Restart your router and the robot. Re-attempt connection through the iRobot Home App.
- Batteri oplades ikke: Ensure the robot is properly seated on the Home Base and the power cable is securely plugged in. Clean the charging contacts on both the robot and the Home Base.
For more detailed troubleshooting, refer to the iRobot Home App's help section or visit the official iRobot support webwebsted.
8. Specifikationer
| Feature | Detalje |
|---|---|
| Modelnummer | i517240 |
| Farve | Afkøle |
| Produktmål (L x B x H) | 34.2 x 34 x 9.25 cm |
| Varens vægt | 3.18 kilo |
| Støvbeholderkapacitet | 389 milliliter |
| Runtime | 1 Time (ca.) |
| Rengøringssystem | 4-Stage Cleaning, Dual Multi-Surface Rubber Brushes, Edge-Sweeping Brush, Strong Suction |
| Navigation | Intelligent Navigation, DirtDetect Technology, Recharge & Resume |
| Forbindelse | Wi-Fi (2.4 GHz), iRobot Home App |
| Stemmeassistentkompatibilitet | Google Home, Google Assistant, Amazon Alexa, Siri |
9. Garanti og support
iRobot stands by the quality of its products. For warranty information, product registration, or technical support, please visit the official iRobot website or contact their customer service. Keeping your product registered can help with future support needs and warranty claims.
iRobot's commitment to innovation and customer satisfaction is backed by over 30 years of experience in robotics.


