Indledning
This manual provides detailed instructions for the setup, operation, and maintenance of your ClocTeck Transparent Digital Alarm Clock. Please read this manual thoroughly before using the product to ensure proper function and longevity.
Sikkerhedsoplysninger
- Udsæt ikke enheden for ekstreme temperaturer, direkte sollys eller høj luftfugtighed.
- Undgå at tabe eller udsætte enheden for kraftige stød.
- Hold enheden væk fra vand og andre væsker.
- Forsøg ikke selv at skille enheden ad eller reparere den. Kontakt kvalificeret personale for service.
- Use only the specified Type-C charging cable for power.
Pakkens indhold
Kontroller venligst pakkens indhold ved udpakning:
- ClocTeck Transparent Digital Alarm Clock (Gold)
- Type-C USB-opladningskabel
- Brugervejledning (dette dokument)
Produkt overview
The ClocTeck Transparent Digital Alarm Clock features a clear LCD display that shows time, date, day of the week, temperature, humidity, and a weather icon. It is designed with a sleek aluminum alloy case.
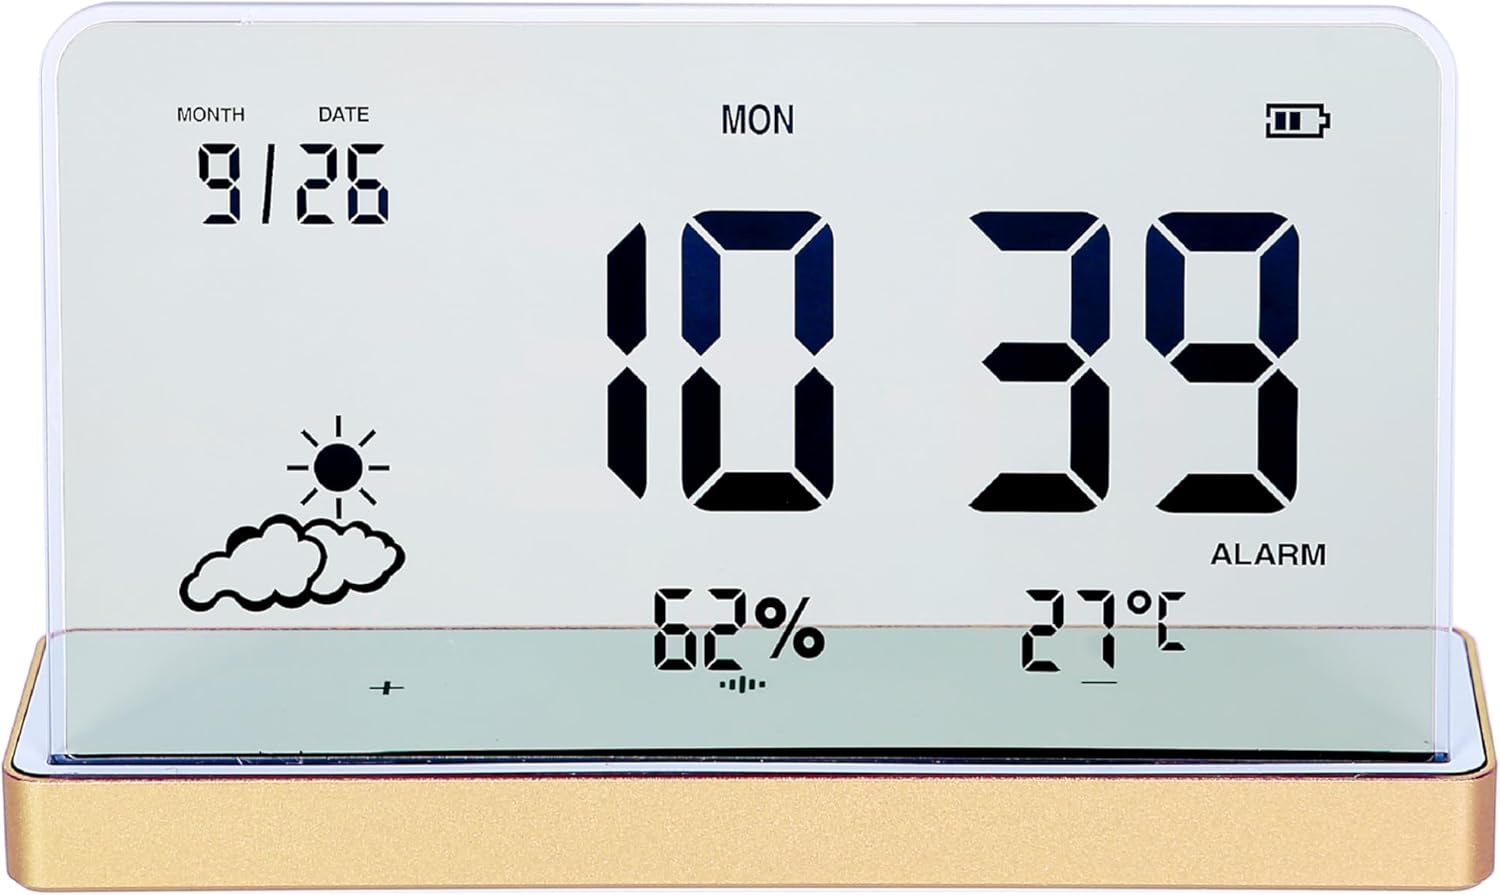
Figur 1: Forside view of the ClocTeck Transparent Digital Alarm Clock. The display shows the current time (10:39), date (9/26), day (MON), humidity (62%), temperature (27°C), and a partly cloudy weather icon. A battery indicator is visible in the top right corner.
Nøglefunktioner:
- Transparent LCD Display
- Time, Date, and Day Display
- Indoor Temperature and Humidity Monitoring
- Up to 3 Programmable Alarms
- Rechargeable Battery with long standby time
- Durable Aluminum Alloy Case
Opsætning
1. Tænd og opladning
The clock is powered by a built-in rechargeable battery. Before first use, or if the battery indicator is low, connect the provided Type-C USB charging cable to the charging port on the back or side of the clock and plug the other end into a standard USB power adapter (not included).
- A full charge provides approximately 75 days of operation.
- Batteriindikatoren på displayet viser opladningsstatus.
2. Indledende placering
Place the clock on a stable, flat surface. For accurate temperature and humidity readings, avoid placing it near heat sources, direct sunlight, or in areas with extreme drafts.
Betjeningsvejledning
The clock features several buttons, typically located on the back or bottom, for setting time, alarms, and other functions. Refer to the specific button labels on your device.
1. Indstilling af tid og dato
- Tryk på SÆT knappen for at gå ind i tidsindstillingstilstand.
- Brug UP og NED knapperne for at justere timetallet. Tryk på SÆT for at bekræfte og gå til minutter.
- Gentag for minutter, år, måned og dato.
- Trykke SÆT igen for at afslutte indstillingstilstand.
2. Indstilling af alarmer
Uret understøtter op til 3 uafhængige alarmer.
- Tryk på ALARM button to cycle through Alarm 1, Alarm 2, Alarm 3, and alarm off modes.
- When an alarm is selected, press and hold the ALARM button to enter alarm setting mode for that specific alarm.
- Brug UP og NED buttons to set the alarm hour and minutes. Press ALARM to confirm each step.
- After setting the time, you may be prompted to set the alarm's activation days (e.g., weekdays, weekends, daily). Use UP/NED og ALARM at vælge.
- To activate or deactivate an alarm, short press the ALARM button until the alarm icon appears or disappears next to the corresponding alarm number on the display.
3. Temperatur- og fugtighedsvisning
The clock continuously displays indoor temperature and humidity. The temperature range is -20°C to 65°C, and the humidity range is 10% to 99%.
- Temperature is displayed in Celsius (°C).
- Humidity is displayed as a percentage (%).
4. Snooze-funktion
When an alarm sounds, press any button (other than the alarm off button, if present) to activate the snooze function. The alarm will sound again after a short interval (typically 5-10 minutes).
5. Justering af displayets lysstyrke
The clock may feature automatic brightness adjustment or manual control. Consult the device's physical buttons for a dedicated brightness control button or a combination of buttons to adjust display intensity.
Opretholdelse
- For at rengøre displayet og casinBrug en blød, tør klud. Brug ikke slibende rengøringsmidler eller opløsningsmidler.
- Sørg for, at opladningsporten er fri for støv og snavs.
- Opbevar uret et køligt og tørt sted, når det ikke er i brug i længere perioder.
Fejlfinding
| Problem | Mulig årsag | Løsning |
|---|---|---|
| Skærmen er tom eller svag. | Low battery or power saving mode. | Charge the device using the Type-C cable. Check brightness settings. |
| Alarmen lyder ikke. | Alarmen er ikke aktiveret, eller lydstyrken er for lav. | Ensure the alarm is set and activated (alarm icon visible). Check if there's a volume setting. |
| Forkerte temperatur-/fugtighedsmålinger. | Device placed in an unsuitable environment. | Relocate the clock away from direct heat, cold, or high drafts. Allow time for readings to stabilize. |
| Knapperne reagerer ikke. | Midlertidig softwarefejl eller lavt batteri. | Recharge the device. If issue persists, try a soft reset (refer to manual for reset procedure, if available, or let battery drain and recharge). |
Specifikationer
- Model: ClocTeck-CL01
- Dimensioner: Approximately 12.5 cm (Width) × 3.2 cm (Depth) × 8 cm (Height)
- Kropsvægt: Cirka 0.13 kg
- Etui materiale: Aluminiumslegering
- Skærmtype: Transparent LCD Digital Display
- Temperaturområde: -20°C til 65°C
- Fugtighedsområde: 10 % til 99 %
- Strømkilde: Genopladeligt batteri (Type-C USB-opladning)
- Batterilevetid: Approximately 75 days on a full charge
- Alarmer: 3 programmerbare alarmer

Figure 2: Dimensions of the ClocTeck Transparent Digital Alarm Clock. The image shows the clock with labels indicating a height of 8cm and a width of 12.5cm.
Garanti og support
ClocTeck provides a 12-month refund and exchange guarantee fra købsdatoen. Denne garanti dækker fabrikationsfejl og problemer, der opstår ved normal brug.
If you encounter any problems or have questions regarding your ClocTeck Transparent Digital Alarm Clock, please do not hesitate to contact our customer support team. We are committed to providing assistance and ensuring your satisfaction.
For support, please refer to the contact information provided on the product packaging or the seller's page where you purchased the item.


