Indledning
This manual provides detailed instructions for the installation, operation, and maintenance of your SJCODE 1080P Wireless Outdoor Security Camera. Designed for home security, this camera features a solar panel for continuous power, color night vision, PIR motion detection, and two-way audio communication. Please read this manual thoroughly before using the product to ensure proper functionality and safety.
Hvad er der i æsken
- Sikkerhedskamera
- Solar Panel (Included 120-inch cable)
- Monteringsbeslag og skruer
- USB opladningskabel
- Brugermanual

Image: The SJCODE 1080P Wireless Outdoor Security Camera and its accompanying solar panel, along with a smartphone displaying the live camera feed.
Specifikationer
| Feature | Detalje |
|---|---|
| Modelnummer | M6/R6 |
| Indendørs/Udendørs brug | Udendørs |
| Strømkilde | Solcelledrevet |
| Forbindelse | Wi-Fi (2.4 GHz) |
| Video opløsning | 1080p (1920 x 1080 Pixels) |
| Nattesyn | Farve Nattesyn |
| Bevægelsesdetektion | PIR Motion Sensor, AI Human Detection |
| Lyd | Tovejs-samtale |
| Opbevaring | Cloud Storage (Subscription Sold Separately) |
| Vejrbestandighed | IP65 vandafvisende |
| Batterikapacitet | 6000 mAh Lithium Polymer |
| Felt af View | 120 grader |
| Dimensioner | 2.8 x 1.7 x 3.4 tommer |
| Vægt | 1.19 pund |
Opsætning
1. Første opladning
Before first use, fully charge the camera's internal battery using the provided USB cable. Connect the USB cable to the camera's charging port and a standard 5V USB power adapter (not included). The indicator light will show charging status.
2. App Installation
Download the companion mobile application (e.g., Aiwit app, as mentioned in reviews) from your smartphone's app store. Søg efter "Aiwit" or scan the QR code provided in the quick start guide that came with your product.
3. Parring og tilslutning
- Sørg for, at din smartphone er forbundet til et 2.4 GHz Wi-Fi-netværk.
- Åbn appen, og opret en konto, eller log ind.
- Follow the in-app instructions to add a new device. This typically involves powering on the camera and scanning a QR code displayed on your phone with the camera's lens.
- Når du har oprettet forbindelse, kan du navngive dit kamera og konfigurere de indledende indstillinger.
4. Montering
Select an optimal outdoor location for your camera and solar panel. The solar panel should receive direct sunlight for most of the day to ensure continuous charging. Use the included mounting bracket and screws to securely attach the camera and solar panel to a wall or other stable surface. Ensure the 120-inch cable from the solar panel can reach the camera's charging port.

Image: Illustration of the solar panel providing continuous power to the security camera when mounted outdoors.
Betjeningsvejledning
1. Lev View
Open the app on your smartphone to access the live video feed from your camera. You can monitor your property in real-time from anywhere with an internet connection.
2. To-vejs snak
The camera supports two-way audio communication. While in live view, tap the microphone icon in the app to speak through the camera's speaker. This allows you to communicate with visitors or deter unwanted guests. Release the icon to listen.
3. Bevægelsesdetektion og advarsler
The camera is equipped with a PIR motion sensor and AI human detection. When motion is detected, the camera will record and send real-time alerts to your smartphone. You can configure sensitivity settings and enable human detection in the app to reduce false alarms from pets or vehicles.

Image: The AI Human Detection feature accurately identifies human movement while filtering out non-human triggers like pets.
4. Farve nattesyn
The camera provides clear 1080p imagery and color night vision. Built-in infrared night vision lights and intelligent infrared sensors enable bright, colorful video even in low-light conditions, enhancing visibility and detail at night.
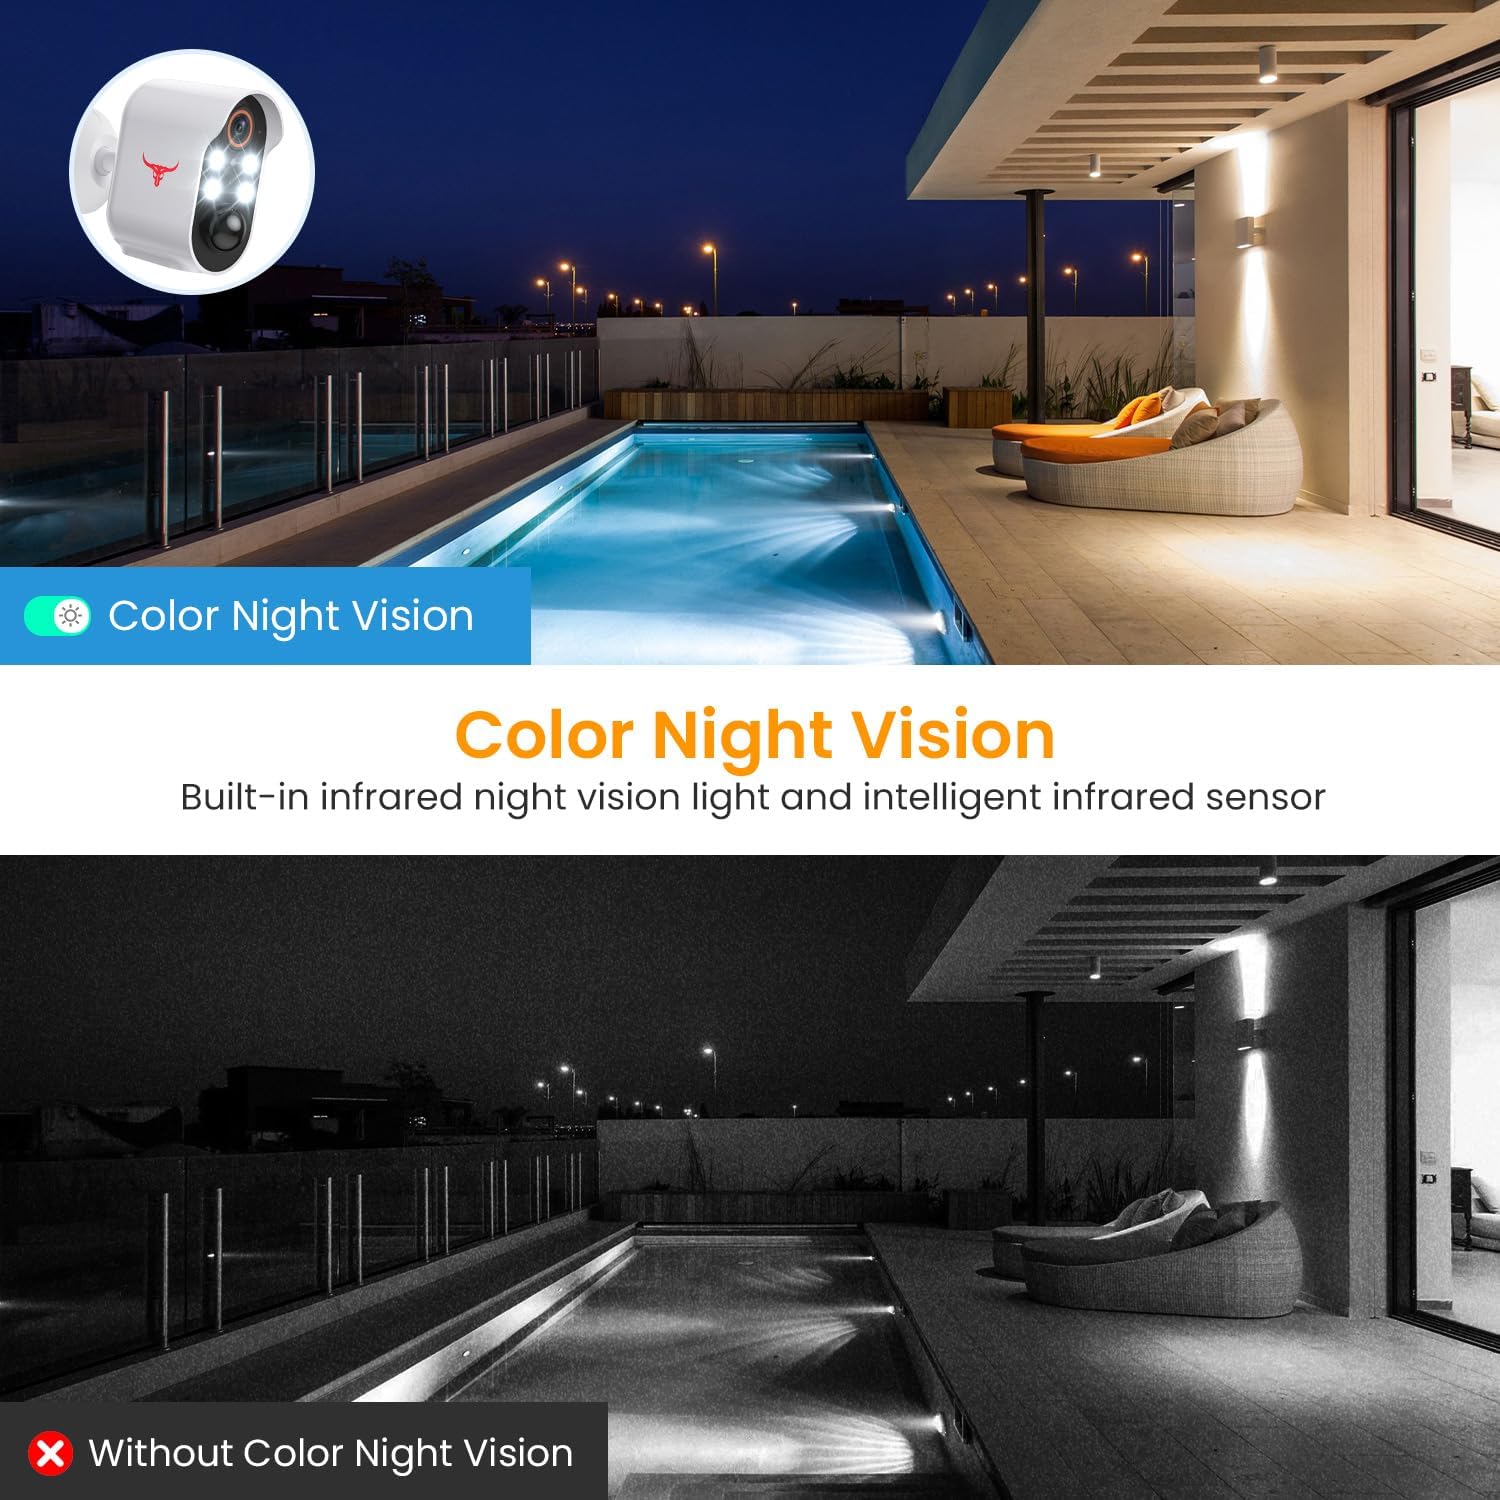
Image: A visual comparison demonstrating the clarity and color provided by the camera's color night vision feature compared to traditional infrared night vision.
5. Cloud Storage
Optaget footage is securely stored in the cloud with AES-128 encryption. An optional subscription plan (sold separately) is required to access and review recorded events. A 30-day free trial is typically included with your purchase.

Image: Visual representation of how the camera's footage is securely uploaded to cloud storage for remote access and review.
Opretholdelse
1. Solar Panel Cleaning
Regularly inspect and clean the solar panel surface to ensure maximum sunlight absorption. Dust, dirt, or debris can reduce charging efficiency. Use a soft, damp cloth to gently wipe the panel.
2. Batteripleje
While the solar panel provides continuous power, extreme weather conditions or prolonged periods of low sunlight may affect battery levels. Monitor the battery status via the app. If the battery level drops significantly, you may need to temporarily charge the camera using the USB cable.
3. Vejrbestandighed
The camera is IP65 water resistant, designed to withstand various weather conditions including rain, shine, and snow. However, avoid submerging the camera in water or exposing it to high-pressure water jets.

Image: The camera and solar panel are designed to withstand various weather conditions, including sun, rain, and snow.
Fejlfinding
1. Kameraet opretter ikke forbindelse til Wi-Fi
- Sørg for, at dit Wi-Fi-netværk er 2.4 GHz. Kameraet understøtter ikke 5 GHz-netværk.
- Check Wi-Fi signal strength at the camera's location. Move the camera closer to the router if necessary.
- Genstart din Wi-Fi-router og kameraet.
- Bekræft, at den indtastede Wi-Fi-adgangskode i appen er korrekt.
2. Frequent False Alerts
- Adjust the motion detection sensitivity in the app.
- Enable AI Human Detection to filter out non-human movements.
- Ensure the camera is not pointed at busy streets or areas with constant movement that is not relevant to security.
3. Batteriet oplader ikke
- Ensure the solar panel is clean and free of obstructions.
- Verify the solar panel is receiving adequate direct sunlight throughout the day.
- Check the connection between the solar panel cable and the camera's charging port.
- If issues persist, try charging the camera directly with the USB cable to rule out battery issues.
4. No Two-Way Audio
- Sørg for, at din telefons mikrofon er aktiveret til appen.
- Tjek lydstyrkeindstillingerne på både din telefon og i appen.
- Verify a stable internet connection for real-time audio transmission.
Officiel produktvideo
Video: En officiel produktvideoasing the features of the SJCODE Wireless Outdoor Security Camera, including its solar power, two-way talk, and night vision capabilities.
Garanti og support
For warranty information and technical support, please refer to the contact details provided on the product packaging or within the mobile application. You can also visit the official SJCODE website for frequently asked questions and further assistance.


