Produkt overview
The OMTech 150W CO2 Laser Engraver is designed for precision cutting and engraving on various non-metallic materials. This machine features autofocus, autolift, and a three-way air assist system to enhance your workflow and ensure consistent results.

Image: The OMTech 150W CO2 Laser Engraver, showcasing its robust blue and gray chassis.
Video: En overview of OMTech laser engravers, highlighting their versatility and ease of use for various applications.
Opsætning og installation
Proper setup is crucial for the safe and efficient operation of your laser engraver. Follow these steps carefully.
1. Udpakning og placering
Carefully unbox the machine and place it on a stable, level surface capable of supporting its weight. Ensure adequate space around the machine for ventilation and access.
2. Strømtilslutning
Connect the power cable to a grounded electrical outlet that meets the machine's power requirements. Refer to the specifications section for details.
3. Ventilationssystem
Connect the provided exhaust hose to the machine's ventilation port and direct it to an external exhaust system or a suitable air filtration unit. Proper ventilation is essential to remove smoke and fumes generated during operation.
4. Water Cooling System
Ensure the water cooling system (chiller, if applicable) is properly connected and filled with distilled water. The laser tube requires continuous cooling during operation to prevent overheating and damage.
5. Air Assist Connection
Connect the 3-way air assist system to an external air compressor. The air assist helps to clear debris and smoke from the laser's path, protecting the lens and improving cut quality.
6. Workbed Configuration
The machine includes both a honeycomb bed and an aluminum blade bed. Select the appropriate bed for your material and project. The 40"x63" work area accommodates most projects.

Image: Illustration of the dual engraving beds (honeycomb and aluminum blade) and their dimensions, highlighting the large 40"x63" work area.
7. Autofocus and Autolift
This model features pre-installed autofocus and autolift capabilities. The workbed can be adjusted up and down with the touch of a button, and the autofocus system will automatically set the correct focal distance for your material.

Billede: Nærbillede view of the laser head demonstrating the automatic focusing feature, where the laser automatically adjusts to the material's surface.

Image: Diagram illustrating the rapid autofocus function, which eliminates manual adjustments for laser focusing.
8. Software installation
Install the necessary software (e.g., LightBurn) on your computer. The machine is compatible with LightBurn, CorelDRAW, and AutoCAD. Refer to the software's documentation for installation and basic usage.
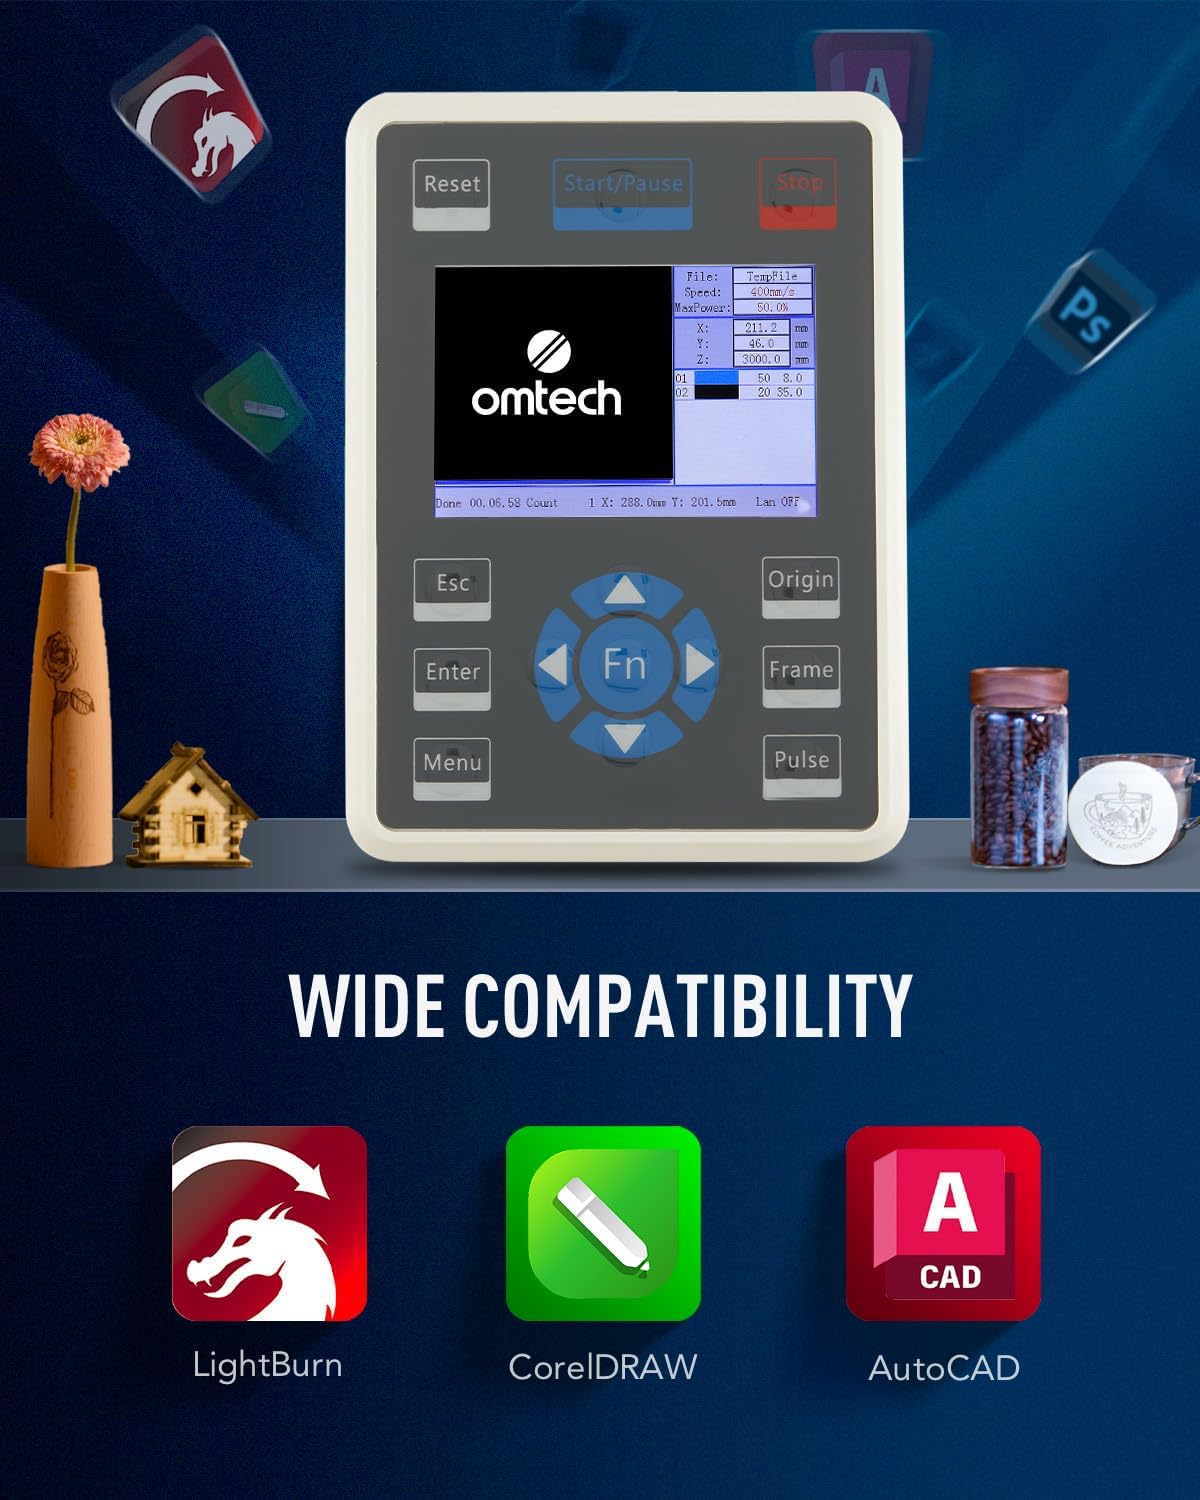
Image: The Ruida control panel of the laser engraver, displaying compatibility with LightBurn, CorelDRAW, and AutoCAD software.

Image: The Ruida control panel, emphasizing its compatibility with feature-packed software for convenient operation.
Betjeningsvejledning
This section provides guidance on operating your OMTech 150W CO2 Laser Engraver.
1. Power On and Initial Checks
Turn on the main power switch. Ensure the water cooling system, air assist, and ventilation are active and functioning correctly before starting any laser operation.
2. Indlæsning af materiale
Place your material flat on the workbed. For larger items, utilize the three-way pass-through doors located on the front, back, and side of the machine.

Image: Diagram illustrating the three-way pass-through design, allowing the processing of materials larger than the workbed.
3. Design Preparation and Settings
Prepare your design in the compatible software. Adjust laser settings (speed, power, DPI) according to your material and desired outcome. For photo engraving, experiment with dither settings, contrast, gamma, and enhance radius to achieve optimal results. Lower speeds and appropriate DPI settings generally yield better detail and contrast.
Video: A detailed guide on how to laser engrave a photo onto wood using a CO2 laser engraver, including software settings and material preparation.
4. Graverings- og skæreproces
Once settings are finalized, send the job to the laser engraver. Monitor the process through the widened, flame-retardant viewing window. The machine operates at speeds up to 23.6 ips (600 mm/s).
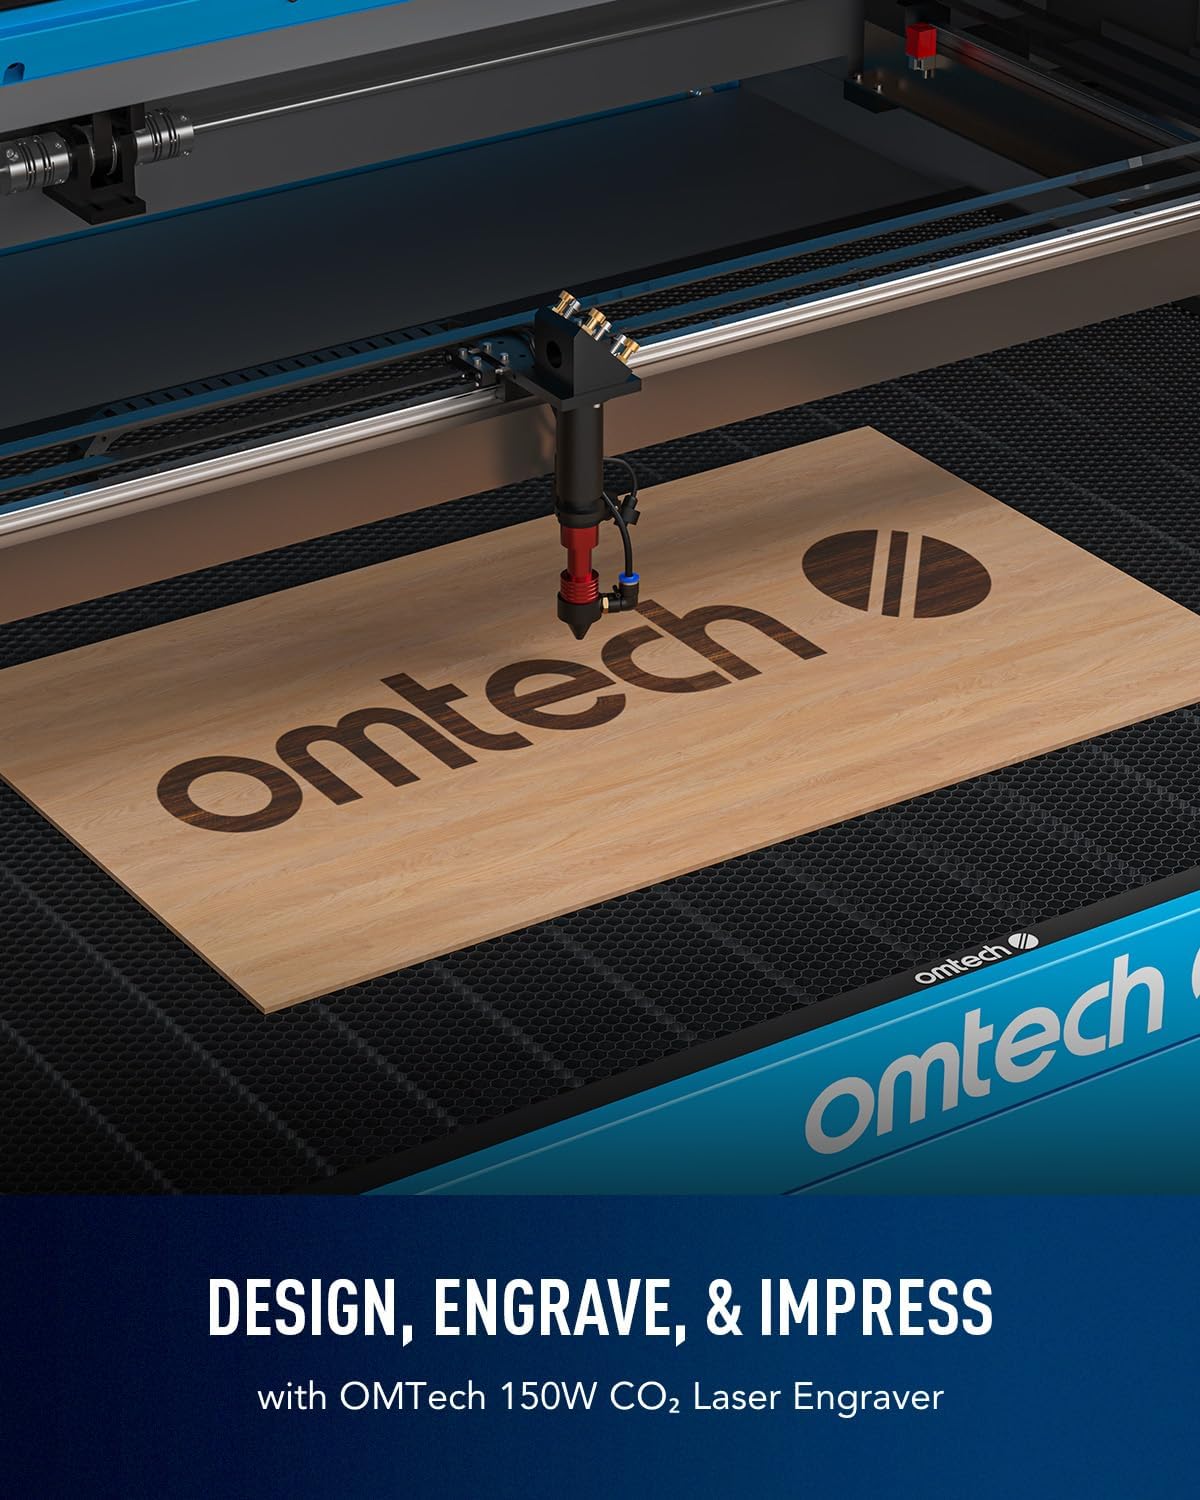
Image: The laser head actively engraving the 'omtech' logo onto a piece of wood, demonstrating the precision of the machine.

Image: Infographic highlighting productivity gains of up to 250-300% with an engraving speed of 600 mm/s.

Image: Dynamic view of the laser head operating at 600 mm/s, illustrating the high-speed engraving capability.
Video: A demonstration of laser engraving and cutting on acrylic mirror, providing practical examples of material processing.
5. Safety Observation
The widened viewing window is made from flame-retardant material, allowing you to safely track your process. Always ensure the lid is closed during operation.

Image: The flame-resistant viewing window, emphasizing safe observation during the laser engraving process.
Opretholdelse
Regelmæssig vedligeholdelse sikrer din lasergravørs levetid og optimale ydeevne.
- Rensning: Regularly clean the workbed, laser lenses, and reflective mirrors to prevent residue buildup, which can affect laser performance and accuracy.
- Lufthjælp: Ensure the air assist nozzle is clear and free from debris. The air assist efficiently removes smoke and dust, protecting optical components.
- Laserrør: The high-performance Yongli A8s tube delivers 150W of power and has a lifespan of up to 7,000 hours. Consistent use at lower settings can extend its lifespan. Monitor the water cooling system to maintain optimal tube temperature.

Image: Illustration of the high-performance Yongli H2 tube, highlighting its efficiency and extended lifespan.
Fejlfinding
Dette afsnit omhandler almindelige problemer, du kan støde på.
- Poor Engraving Quality/Banding: This can be caused by incorrect speed/power settings, uneven material, or insufficient DPI. Experiment with lower speeds, higher DPI, and adjust contrast/gamma in your software. Ensure the material is laid flat on the workbed.
- Laser affyres ikke: Check power connections, emergency stop button, water cooling system (flow sensor), and ensure the laser tube is properly seated.
- Inkonsekvente nedskæringer: Verify that the material is flat, the focal distance is correct (use autofocus), and the lenses/mirrors are clean and aligned.
Specifikationer
| Feature | Detalje |
|---|---|
| Produktdimensioner | 86.6 x 60.6 x 37 tommer |
| Varemodelnummer | RYGEL-USB1610US |
| ASIN | B0CB5GKX7K |
| Laser klasse | Klasse 2, 0.827 mW udgangseffekt |
| Maks. Graveringshastighed | 600 mm/s (23.6 ips) |
| Arbejdsområde | 40 x 63 cm |
| Laserrørets levetid | Up to 7,000 hours (Yongli A8s) |
| Forbindelse | USB-kabel, Ethernet-kabel, USB-flashdrev, offline |
| Maskinvægt | 816 lb. |
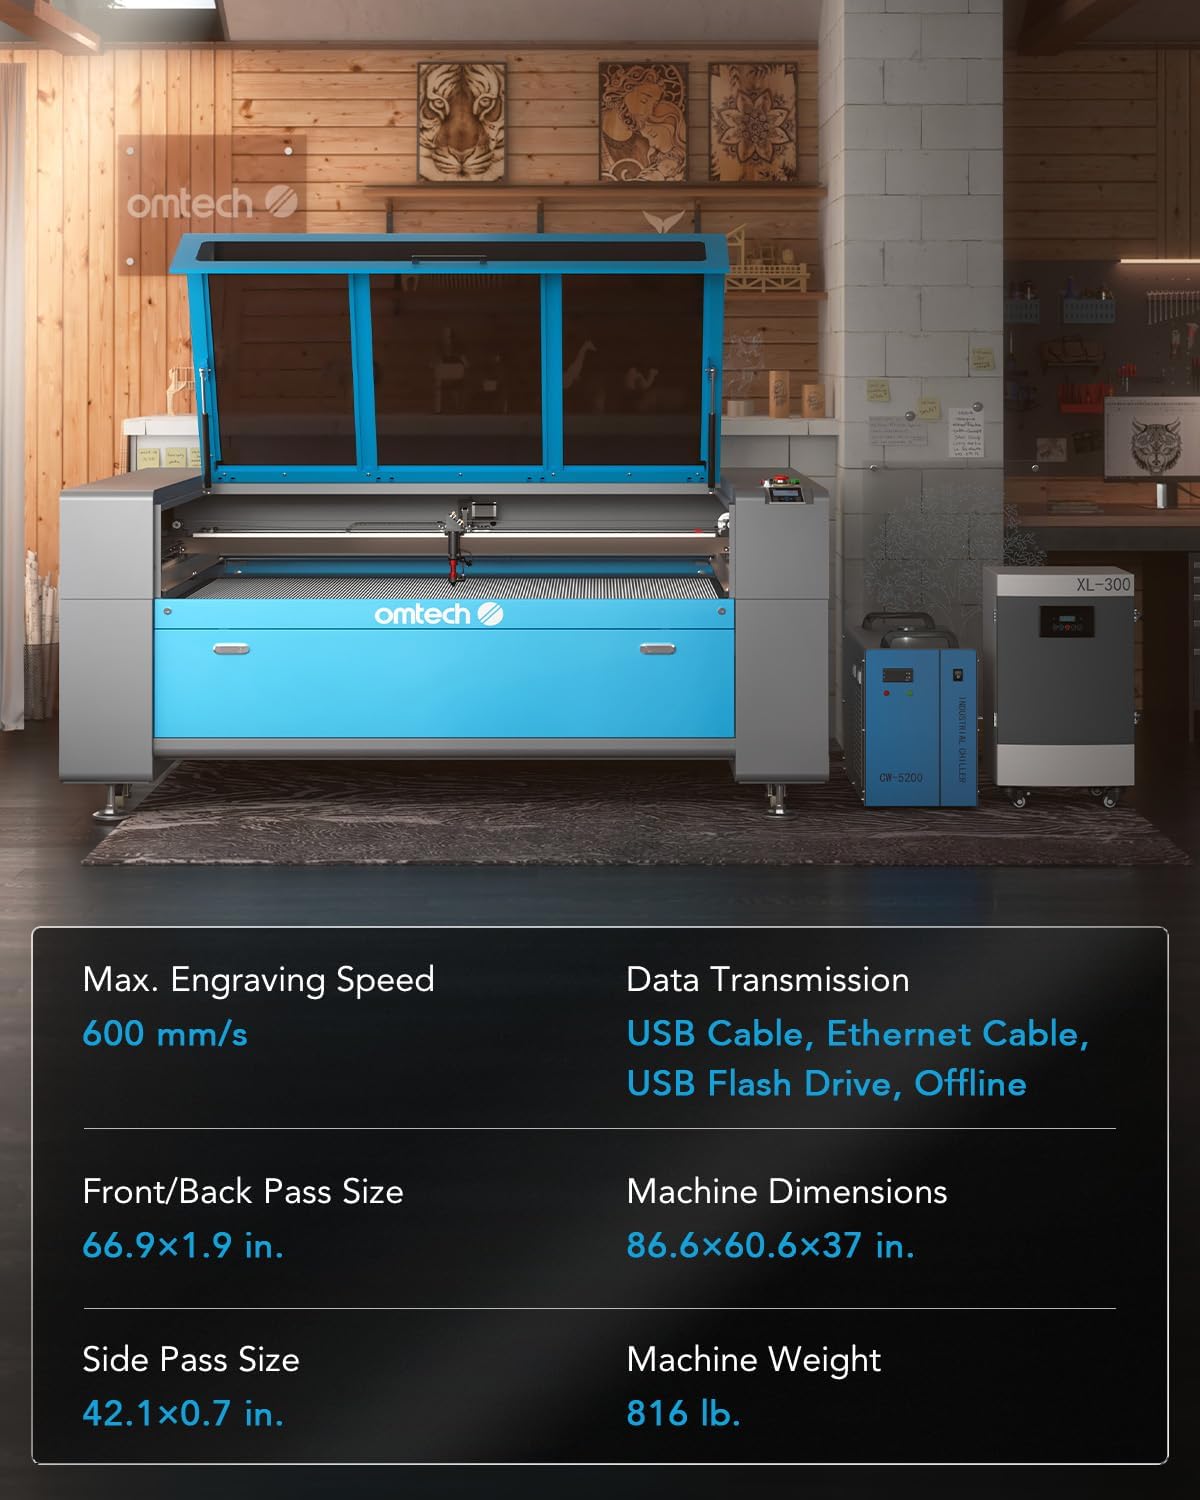
Image: A visual representation of the key specifications and dimensions of the OMTech 150W CO2 Laser Engraver.
Garanti og support
For warranty information, technical support, or any inquiries regarding your OMTech 150W CO2 Laser Engraver, please contact OMTech Direct customer service. Refer to your purchase documentation for specific warranty terms and contact details.


