1. Introduktion
This manual provides comprehensive instructions for the installation, operation, maintenance, and troubleshooting of the Vivotek FE9391-EHV-V2 12MP Outdoor Fisheye IR Illumination Camera. Please read this manual thoroughly before using the product to ensure proper setup and functionality. Retain this manual for future reference.
2. Produktet er slutview
2.1 Nøglefunktioner
- 12 Megapixel Effective Still Resolution for high-quality imaging.
- Fisheye Lens with 1.2mm focal length for wide-area surveillance.
- Integrated IR Illumination for clear night vision up to 20 meters.
- WDR Pro technology for optimal image visibility in high contrast lighting.
- H.265/H.264/MJPEG compression for efficient video streaming.
- IP66-rated weather-resistant enclosure for outdoor use.
- Motion-only alert type for event detection.
- Wi-Fi Connectivity Protocol for flexible network integration.
2.2 Pakkens indhold
Bekræft at alle varer er til stede i pakken:
- Vivotek FE9391-EHV-V2 Camera Unit
- Mounting Kit (screws, anchors)
- Vandtæt stik
- Hurtig installationsvejledning
- Software CD (or download link information)
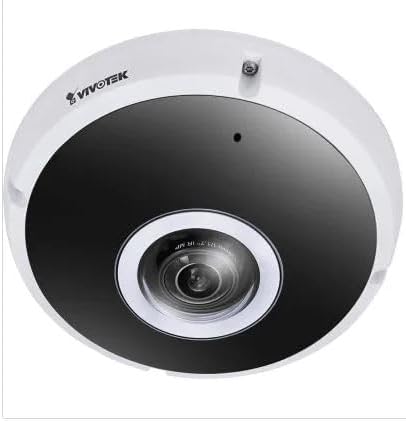
Figur 2.1: Forside view of the Vivotek FE9391-EHV-V2 12MP Outdoor Fisheye IR Illumination Camera, showing the lens and IR illuminators.
3. Sikkerhedsoplysninger
- Læs alle instruktioner omhyggeligt før installation og drift.
- Ensure the power source matches the camera's requirements (Corded Electric).
- Forsøg ikke at skille kameraet ad eller ændre det. Dette vil ugyldiggøre garantien.
- Avoid pointing the camera directly at strong light sources for extended periods.
- Installationen skal udføres af kvalificeret personale i overensstemmelse med lokale el-forskrifter.
- Protect cables from being walked on or pinched.
4. Opsætning og installation
4.1 Monteringssted
Select a suitable outdoor location for mounting. Consider the desired surveillance area, proximity to power, and network connectivity (Wi-Fi or wired Ethernet). The camera is IP66 rated for outdoor use.

Figure 4.1: Dimensional drawing of the Vivotek FE9391-EHV-V2 camera, showing a diameter of 150mm and height of 68.2mm.
4.2 Fysisk installation
- Forbered monteringsoverfladen: Use the provided mounting template (if included) to mark drill holes.
- Bore huller: Bor forhuller og isæt vægankre om nødvendigt.
- Sikre kameraet: Attach the camera base securely to the mounting surface using the provided screws.
- Tilslut kabler:
- Magt: Tilslut strømkablet til en passende strømkilde.
- Netværk: Connect an Ethernet cable for wired network access, or ensure Wi-Fi signal strength is adequate for wireless connection. Use the waterproof connector for outdoor Ethernet connections.
- Juster kameravinkel: Loosen the adjustment screws (if applicable) to position the fisheye lens for optimal coverage. Tighten screws once adjusted.

Figure 4.2: An Ethernet cable with an RJ45 connector, used for wired network connectivity.
4.3 Indledende netværkskonfiguration
After physical installation and power-up, the camera needs to be configured on your network.
- Opdag kameraet: Use the Vivotek IP Utility software (available on the manufacturer's website) to discover the camera on your network.
- Tildel IP-adresse: Assign a static IP address or ensure it obtains an IP address via DHCP.
- Adgang Web Interface: Åbn a web browseren og indtast kameraets IP-adresse for at få adgang til dens web-baseret konfigurationsgrænseflade.
- Login: Enter the default username and password (refer to the Quick Installation Guide for defaults). Change the default password immediately for security.
- Wi-Fi Setup (if applicable): Navigate to the network settings and configure the Wi-Fi connection if you are using wireless connectivity.
5. Betjeningsvejledning
5.1 Live View
Once configured, you can access the live video feed through the web interface or compatible Vivotek surveillance software.
- Web Browser: Log ind på kameraets web interface and navigate to the "Live View" section.
- Surveillance Software: Add the camera to your Vivotek NVR or VMS (Video Management Software) for centralized monitoring.
- Mobil app: Download the Vivotek mobile app and add your camera for remote viewing.

Figur 5.1: Eksample of surveillance footage from multiple cameras displayed on a tablet device, demonstrating remote monitoring capabilities.

Figure 5.2: A monitor displaying a split-screen view of four camera feeds, labeled CAM1 through CAM4, illustrating a typical surveillance setup.
5.2 Optagelse og opbevaring
The camera supports various recording options:
- Lokal opbevaring: Insert a microSD card (not included) into the camera's slot for edge recording. Configure recording schedules and event triggers (e.g., motion detection).
- Netværksvideooptager (NVR): Connect the camera to a compatible NVR for continuous or event-based recording.
- Cloud Storage: Some Vivotek models or third-party services may offer cloud storage integration. Refer to the camera's web interface for specific options.
5.3 Bevægelsesdetektion og advarsler
Configure motion detection zones and sensitivity settings in the camera's web interface. When motion is detected, the camera can trigger actions such as:
- Recording video to local storage or NVR.
- Sending email notifications with snapshots.
- Uploading footage to an FTP server.
6. Vedligeholdelse
- Rengøring af linser: Gently wipe the camera lens with a soft, clean cloth. For stubborn dirt, use a lens cleaning solution designed for optical surfaces. Do not use abrasive cleaners.
- Rengøring af bolig: Rengør kamerahuset med en sprayamp cloth. Avoid using strong detergents or solvents.
- Firmwareopdateringer: Regularly check the Vivotek website for firmware updates. Updating firmware can improve performance, add features, and enhance security.
- Kabelinspektion: Periodically inspect all cables for signs of wear or damage, especially for outdoor installations.
- Miljøtjek: Sørg for, at kameraets driftsmiljø forbliver inden for de angivne temperatur- og fugtighedsområder.
7. Fejlfinding
7.1 Ingen videofeed
- Tjek strøm: Ensure the camera is receiving power. Verify power adapter and cable connections.
- Netværks forbindelse: Confirm the Ethernet cable is securely connected or that the Wi-Fi signal is strong and the camera is connected to the correct network.
- IP-adresse: Verify the camera's IP address and ensure it is not conflicting with another device on the network.
- Firewall: Check if any firewall settings on your network or computer are blocking access to the camera.
7.2 Dårlig billedkvalitet
- Ren linse: Sørg for, at kameralinsen er ren og fri for støv eller pletter.
- Lysforhold: Adjust camera settings for optimal exposure in varying light conditions. Ensure IR illuminators are functioning at night.
- Opløsningsindstillinger: Verify that the video resolution and quality settings are configured appropriately in the camera's web interface.
- Netværks båndbredde: Insufficient network bandwidth can lead to choppy or low-quality video. Check network load.
7.3 Bevægelsesdetektion virker ikke
- Aktivér bevægelsesdetektion: Ensure motion detection is enabled in the camera's settings.
- Sensitivity and Zones: Adjust motion detection sensitivity and define detection zones correctly.
- Optagelsesplan: Verify that the recording schedule is active for motion-triggered events.
8. Specifikationer
| Feature | Detalje |
|---|---|
| Modelnummer | FE9391-EHV-V2 |
| Effektiv stillopløsning | 12 MP |
| Linse | 1.2mm Fisheye Lens |
| IR-belysningsområde | 20m |
| WDR teknologi | WDR Pro |
| Videokomprimering | H.265 / H.264 / MJPEG |
| Forbindelsesprotokol | Wi-Fi |
| International Protection Rating | IP66 |
| Strømkilde | Elektrisk med ledning |
| Produktmål (L x B x H) | 5.9 x 5.9 x 2.68 tommer (150 x 150 x 68.2 mm) |
| Fabrikant | Vivotek Inc. |
| Anbefalede anvendelser | Udendørs sikkerhed |
9. Garanti og support
For warranty information, technical support, and additional resources, please visit the official Vivotek webwebsted eller kontakt deres kundeserviceafdeling.
- Fabrikant: Vivotek Inc.
- Webwebsted: www.vivotek.com (Eksamplinket, det faktiske link kan variere)
- Kontakte: Der henvises til webwebsted for kontaktoplysninger til regional support.
Please have your model number (FE9391-EHV-V2) and purchase date available when contacting support.


