Indledning
The SilverStone Technology Permafrost PF240W-ARGB V2 is a 240mm all-in-one liquid cooler designed for efficient CPU cooling with integrated addressable RGB lighting. This manual provides essential information for the proper installation, operation, and maintenance of your liquid cooler.

Image: SilverStone Permafrost PF240W-ARGB V2 240mm White Liquid Cooler with illuminated fans and pump.
Pakkens indhold
Bekræft at alle komponenter er til stede i din pakke:
- Permafrost PF240W-ARGB V2 Liquid Cooler (240mm radiator with two 120mm ARGB fans attached)
- Mounting Kit for Intel and AMD sockets
- Termisk fedt
- Adresserbar RGB-controller
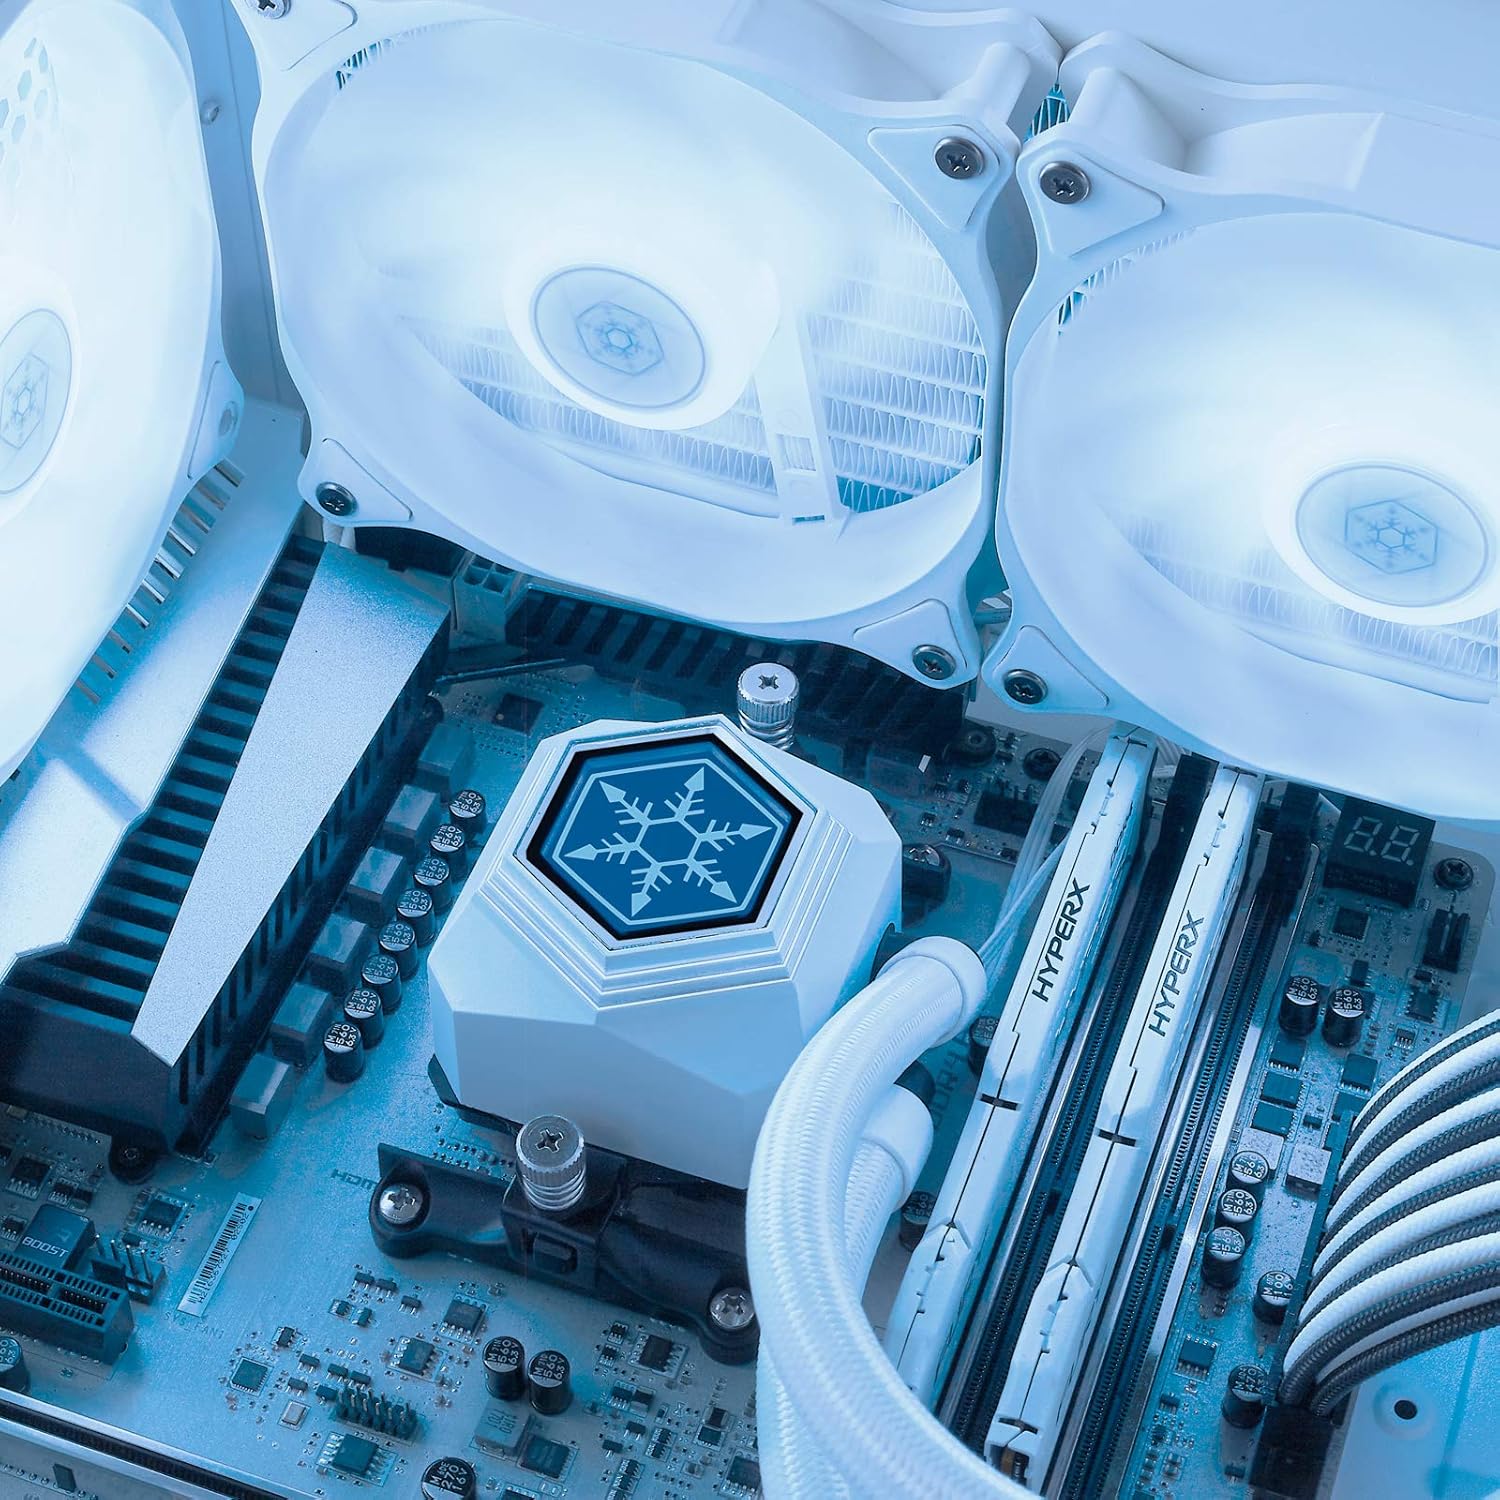
Image: All included accessories, including the mounting kit, thermal grease, and ARGB controller.
Specifikationer
| Feature | Detalje |
|---|---|
| Mærke | Sølvsten |
| Modelnummer | SST-PF240W-ARGB-V2 |
| Afkølingsmetode | Vand |
| Radiatorstørrelse | 240 mm |
| Fan størrelse | 120 mm |
| Maksimal rotationshastighed | 2200 RPM |
| Støjniveau | 7.4 decibel |
| Materiale | Copper, Rubber |
| Strømstik type | 4-benet |
| Kompatible enheder | Desktop |
Kompatibilitet
The Permafrost PF240W-ARGB V2 is compatible with a wide range of CPU sockets:
- Intel: LGA115x/1200/1700/1851/2011/2066
- AMD: AM2/AM3/AM4/AM5/FM1/FM2 sockets
Opsætning og installation
Follow these steps for proper installation of your liquid cooler. Refer to your motherboard manual for specific header locations.
1. Klargøring af bundkortet
Depending on your CPU socket (Intel or AMD), select the appropriate mounting hardware from the kit. For Intel sockets, install the backplate behind the motherboard and secure the standoffs. For AMD sockets, utilize the existing retention brackets on the motherboard.
2. Installing the Water Block
- Apply a small amount of the provided thermal grease to the center of your CPU's Integrated Heat Spreader (IHS).
- Attach the correct retention bracket to the water block.
- Carefully place the water block onto the CPU, aligning the mounting holes with the standoffs (Intel) or retention clips (AMD).
- Secure the water block using the thumb screws or spring screws provided, tightening them in a diagonal pattern until snug. Do not overtighten.

Image: Close-up of the water block with its mounting bracket, ready for installation.
3. Mounting the Radiator and Fans
- Determine the optimal mounting location for the 240mm radiator within your PC case (e.g., top, front, or rear).
- Secure the radiator to the case using the appropriate screws. Ensure proper airflow direction for the fans (intake or exhaust).
- The fans come with rubber pads to reduce vibration and noise.
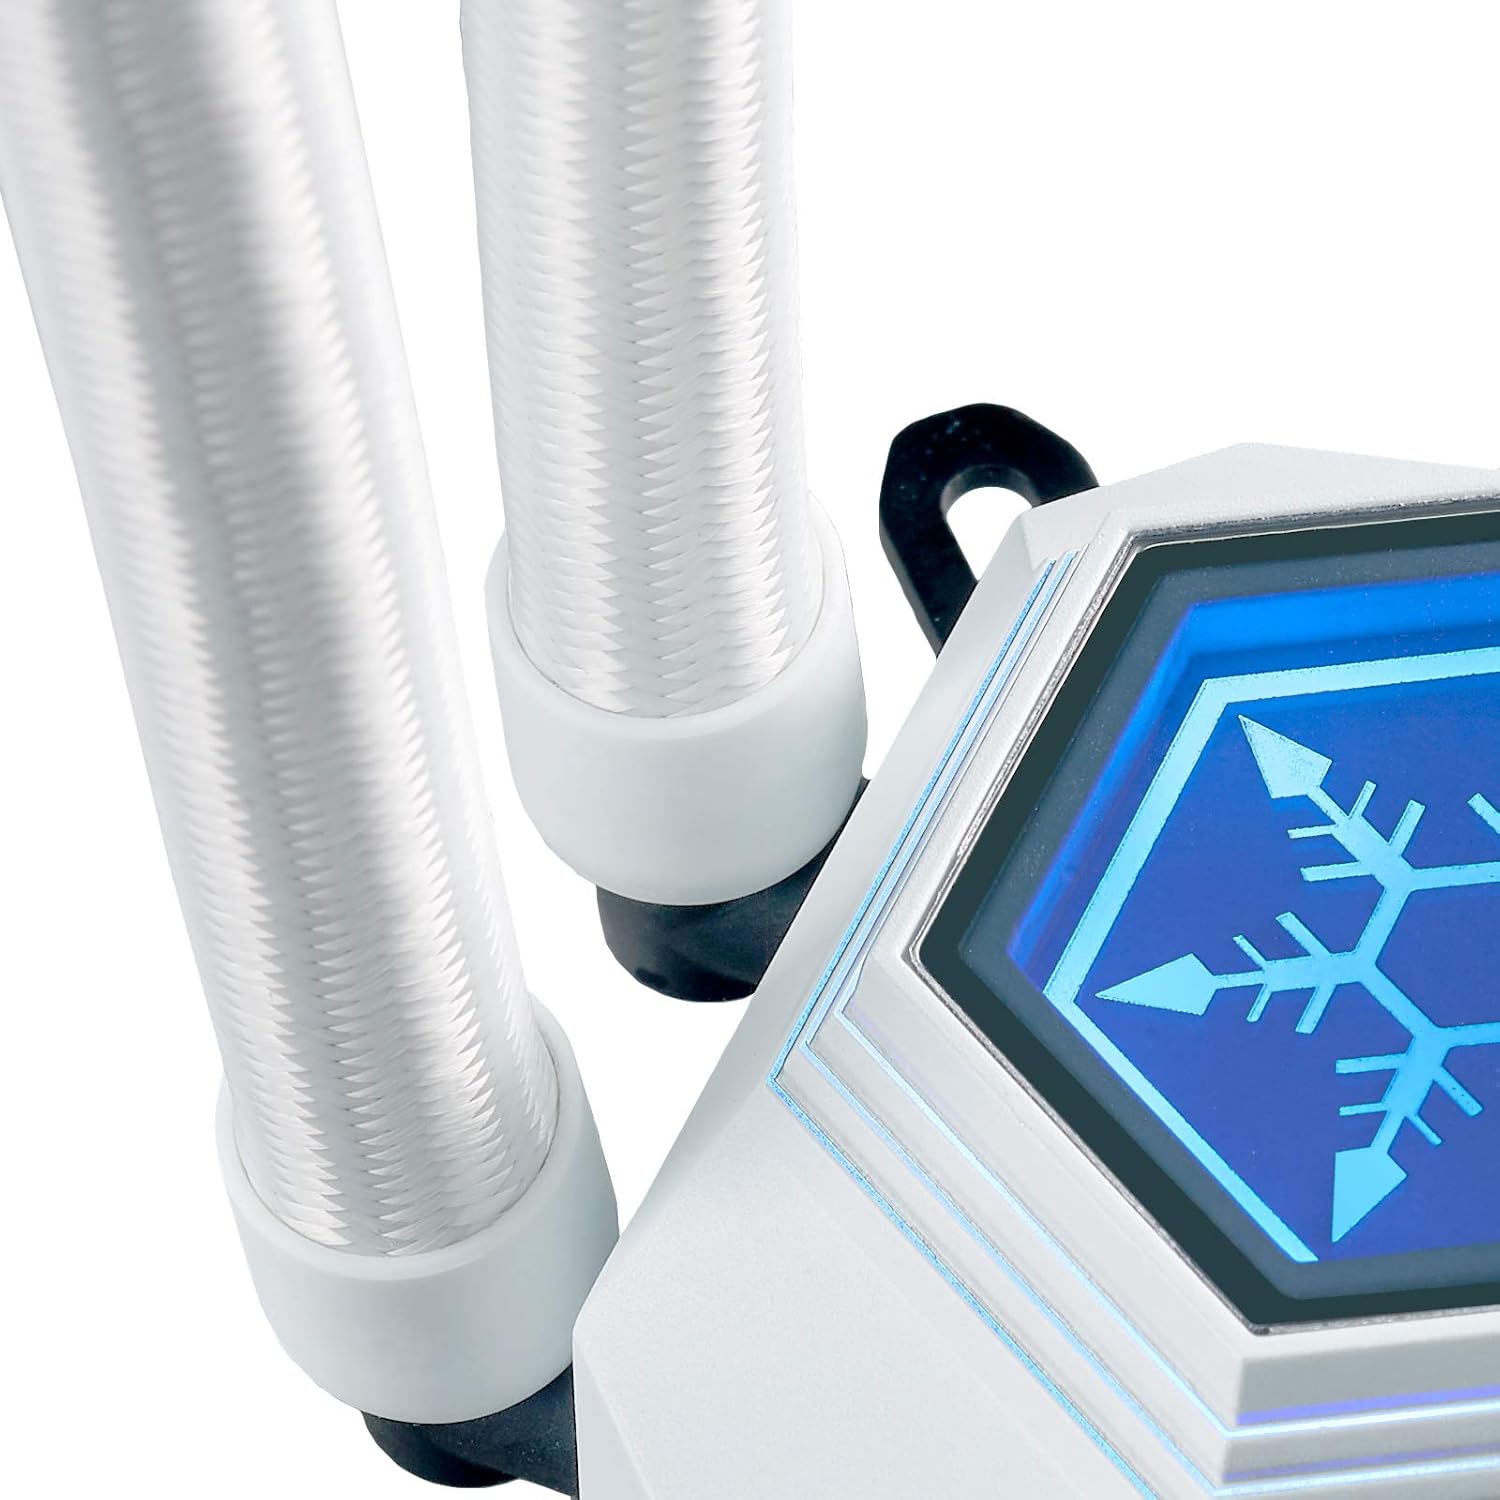
Image: The 240mm radiator component of the liquid cooler.
4. Tilslutningskabler
- Connect the 4-pin PWM cables from the fans to the motherboard's CPU_FAN or a dedicated fan header. Use the included 3-to-1 PWM splitter if connecting multiple fans to a single header.
- Connect the 3-pin Addressable RGB (ARGB) cables from the fans and water block to the included ARGB controller or directly to a compatible 5V ARGB header on your motherboard.
- If using the included ARGB controller, connect its SATA power connector to your power supply.

Image: A 3-to-1 PWM splitter cable for connecting multiple fans to a single motherboard header.
Operation
ARGB-lysstyring
The Permafrost PF240W-ARGB V2 features integrated addressable RGB lighting on both the water block and fans. You can control the lighting in two ways:
- Bundkort synkronisering: If your motherboard has a compatible 5V ARGB header, connect the cooler's ARGB cables directly to it. You can then control the lighting effects using your motherboard's RGB software (e.g., ASUS Aura Sync, MSI Mystic Light Sync, Gigabyte RGB Fusion, ASRock Polychrome Sync).
- Included ARGB Controller: If your motherboard lacks a 5V ARGB header, use the included ARGB controller. This controller offers 10 lighting modes and allows you to adjust brightness and color changing speeds via its buttons. Ensure the controller is powered via a SATA connector from your power supply.

Image: The included addressable RGB controller with buttons for mode, speed, and brightness adjustments.
Ventilator kontrol
The 120mm PWM fans can be controlled via your motherboard's fan control software or BIOS settings. This allows you to adjust fan speeds based on CPU temperature, optimizing for either quiet operation or maximum cooling performance.
Opretholdelse
Regular maintenance helps ensure optimal performance and longevity of your liquid cooler:
- Støvrensning: Rengør kølerribberne og ventilatorbladene med jævne mellemrum for at forhindre støvophobning, som kan hæmme luftstrømmen og køleeffektiviteten. Brug trykluft eller en blød børste.
- Tjek forbindelser: Ensure all power and signal cables (PWM, ARGB) are securely connected to the motherboard and power supply.
- Inspicer slange: Occasionally check the liquid tubing for any signs of kinks, leaks, or damage.
Fejlfinding
If you encounter issues with your liquid cooler, consider the following common solutions:
- Ingen strøm/Ventilatorer drejer ikke: Verify that the 4-pin PWM cables are correctly connected to the motherboard and that the pump's power cable (if separate) is connected to a SATA power connector.
- Ingen RGB-belysning: Check that the 3-pin ARGB cables are properly connected to either the motherboard's 5V ARGB header or the included ARGB controller. Ensure the ARGB controller is receiving SATA power.
- Høje CPU-temperaturer: Confirm that the water block is securely mounted to the CPU and that thermal paste was applied correctly. Ensure fans are spinning and oriented for proper airflow. Check BIOS settings for fan speed curves.
- Usædvanlig støj: Inspect fans for any obstructions. Ensure the pump is running smoothly.
Garanti og support
For detailed warranty information and technical support, please refer to the official SilverStone Technology website or the comprehensive manual provided by the manufacturer.
You can find the official product manual her.


