Indledning
Thank you for choosing the ErGear Single Monitor Arm. This manual provides detailed instructions for the installation, operation, and maintenance of your new monitor arm. Designed for screens from 13 to 34 inches and supporting up to 22 lbs, this gas spring monitor mount offers ergonomic flexibility and helps optimize your workspace. Please read this manual thoroughly before installation and keep it for future reference.
Produktspecifikationer
| Specifikation | Detalje |
|---|---|
| Mærke | ErGear |
| Modelnummer | EGSS15B-EU |
| Kompatibel skærmstørrelse | 13-34 tommer |
| Vægt kapacitet | Op til 22 lbs (10 kg) |
| VESA-kompatibilitet | 75x75mm, 100x100mm |
| Monteringstype | C-Clamp or Grommet Base |
| C-Clamp Skrivebords tykkelse | 0.39" - 2.76" (10-70 mm) |
| Tykkelse på skrivebordet | 0.39" - 2.17" (10-55 mm) |
| Materiale | Luftfartsgodkendt aluminiumslegering |
| Tilt rækkevidde | -35° til +90° |
| Drejningsområde | 180° |
| Rotationsområde | 360° |
| Max Vertical Extension | 17.5 tommer |
| Max Horizontal Extension | 15.3 tommer |
| Farve | Sort |
Pakkens indhold
Before beginning installation, please ensure all parts are present and undamaged. Refer to the included hardware kit for specific component identification.
- Skærmarmsamling
- C-Clamp Monteringshardware
- Grommet Base Mounting Hardware
- VESA Plate Screws (various sizes)
- Unbrakonøgler / Justeringsværktøjer
- Instruktionsmanual (dette dokument)
Opsætning og installation
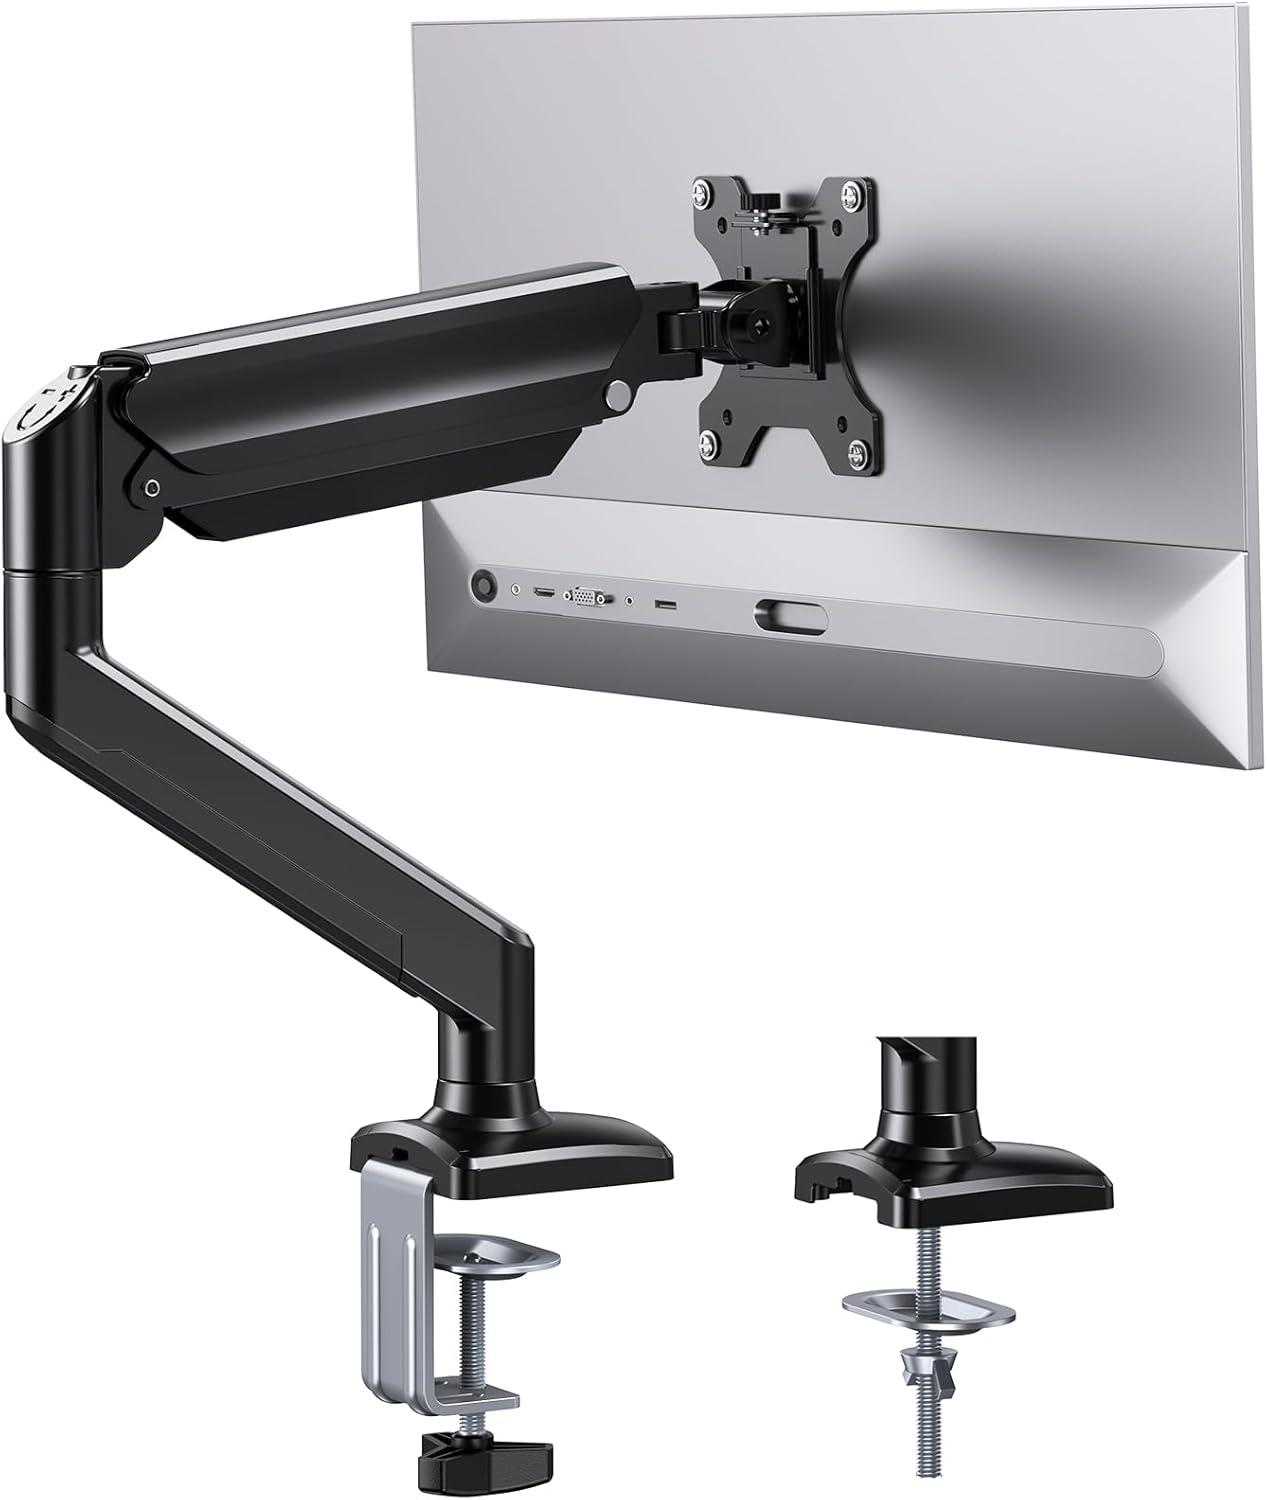
The ErGear monitor arm offers two primary installation methods: C-clamp and Grommet Base. Choose the method most suitable for your desk.
1. Vælg din monteringsmetode

- C-Clamp Montering: Ideal for desks with edges, supporting thicknesses from 0.39" to 2.76".
- Grommet Base Mounting: Requires an existing hole in your desk (or drilling one), supporting thicknesses from 0.39" to 2.17".
2. Easy 3-Step Installation Process
Follow these general steps for quick setup. Detailed instructions are provided in the included manual and can be found in the PDF document linked in the support section.
- Monter basen: Securely attach the chosen base (C-clamp or grommet) to your desk. Ensure it is tightened firmly to prevent wobbling.
- Fastgøring af armene: Slide the monitor arm assembly onto the mounted base. Ensure it clicks into place or is secured according to the specific mechanism.
- Hæng skærme op: Attach the VESA plate to the back of your monitor using the appropriate screws. Then, slide the monitor with the attached VESA plate onto the arm's VESA head.

Kompatibilitetskontrol: Before installation, verify your monitor's size, weight, and VESA pattern. This arm supports 13"-34" screens, up to 22 lbs, and VESA 75x75mm or 100x100mm.

Betjening og justeringer
The ErGear monitor arm is designed for maximum flexibility to achieve your ideal viewing angle and ergonomic setup.
Ergonomisk fleksibilitet
Utilize the gas-spring mechanism for fluid, one-finger adjustments. This allows you to easily position your monitor to reduce neck strain and improve productivity.
- Vip: Adjust your screen from -35° to +90° to eliminate glare and find the perfect vertical angle.
- Drejelig: Rotate your monitor 180° horizontally to share your screen or change viewperspektiver.
- Rotation: Pivot your screen 360° for quick transitions between landscape and portrait modes.
- Udvidelse: Extend your screen up to 17.5 inches vertically and 15.3 inches horizontally for optimal eye-level comfort.


Spændingsjustering
If your monitor sags or does not stay in position, you may need to adjust the gas spring tension. Use the included hex key to adjust the tension screw located on the arm.
- Tur "+" (clockwise) for heavier monitors to increase tension.
- Tur "-" (counter-clockwise) for lighter monitors to decrease tension.

Opretholdelse
Regular maintenance ensures the longevity and optimal performance of your ErGear monitor arm.
- Rensning: Wipe down the arm with a soft, damp klud. Undgå slibende rengøringsmidler eller opløsningsmidler.
- Kabelstyring: Utilize the integrated cable clips to route and organize your monitor cables. This not only keeps your desk tidy but also prevents cables from snagging or interfering with arm movement.

- Periodisk kontrol: Kontrollér regelmæssigt alle skruer og forbindelser for at sikre, at de forbliver fastspændte. Spænd efter om nødvendigt.
- Gas Spring Endurance: The gas spring is designed for over 20,000 cycles, ensuring long-term durability.

Fejlfinding
If you encounter any issues with your monitor arm, please refer to the following common solutions:
| Problem | Mulig årsag/løsning |
|---|---|
| Monitor sags or won't stay in position |
|
| Arm is too stiff to move |
|
| Skærmen vakler efter installation |
|
| Cannot achieve desired height/extension |
|
Garanti og support
ErGear products are built with quality and durability in mind. While specific warranty details are not provided in this manual, please retain your proof of purchase for any warranty claims.
For further assistance, technical support, or to download the full installation manual in PDF format, please visit the official ErGear website or contact customer support through your retailer.
You can also refer to the official installation manual PDF: ErGear Monitor Arm Installation Manual (PDF)


