1. Vigtige sikkerhedsoplysninger
Læs venligst alle instruktioner omhyggeligt, inden du bruger affugteren. Gem denne manual til senere brug.
- Ensure the unit is placed on a level, stable surface to prevent water spillage.
- Maintain adequate clearance (at least 20 cm) around the unit for proper airflow.
- Do not operate the unit with a damaged power cord. Contact customer support for replacement.
- Tag stikket ud af affugteren, før du rengør eller udfører vedligeholdelse.
- Stik ikke genstande ind i luftindtaget eller -udtaget.
- Hold enheden væk fra varmekilder og direkte sollys.
- Dette apparat er ikke beregnet til brug af personer (inklusive børn) med nedsatte fysiske, sensoriske eller mentale evner, eller mangel på erfaring og viden, medmindre de har fået opsyn eller instruktion i brugen af apparatet af en person, der er ansvarlig for deres sikkerhed.
2. Produktet er slutview
The Waykar 80 Pints Dehumidifier is designed to efficiently remove excess moisture from your environment, improving air quality and comfort. It is suitable for spaces up to 5,000 square feet.

Figur 2.1: Forside view of the Waykar 80 Pints Dehumidifier.

Figure 2.2: Dehumidifier operating in a room, illustrating its coverage capability and adjustable humidity range (30-80% RH).
Nøglefunktioner omfatter:
- 80 pint kapacitet: Fjerner op til 80 pints fugt om dagen.
- Energy Star-certificeret: Designed for high energy efficiency.
- Wide-Angle Swing: Automatic 30°-90° swing function for improved air circulation.
- Stille drift: Fungerer helt ned til 42 dB.
- Smart Touch Control: Intuitive panel for easy settings adjustment.
- 24-timers timer: Schedule operations for convenience.
- Auto Defrost & Memory Restart: Ensures stable performance and resumes settings after power interruption.
- Flexible Drainage: Options for manual tank emptying or continuous drainage.
- Vaskbart luftfilter: Nem at rengøre og vedligeholde.
- 360° Swivel Wheels & Integrated Handle: For nem mobilitet.
3. Opsætning og installation
3.1 Udpakning
Carefully remove the dehumidifier from its packaging. Inspect the unit for any signs of damage. If any damage is found, do not operate the unit and contact customer support.
3.2 Placering
Place the dehumidifier on a firm, level surface in a location where the ambient temperature will not fall below 5°C (41°F). Ensure there is at least 20 cm (8 inches) of space around the unit for proper air circulation. Avoid placing the unit near heat-generating appliances or in direct sunlight.

Figure 3.1: The dehumidifier features 360° swivel wheels and an integrated handle for easy movement, along with tidy cable storage.
3.3 Strømtilslutning
Sæt netledningen i en jordet stikkontakt. Sørg for, at lydstyrken er korrekt.tage and frequency of the power supply match the specifications on the unit's rating label.
4. Betjeningsvejledning
The control panel allows you to manage all functions of the dehumidifier.
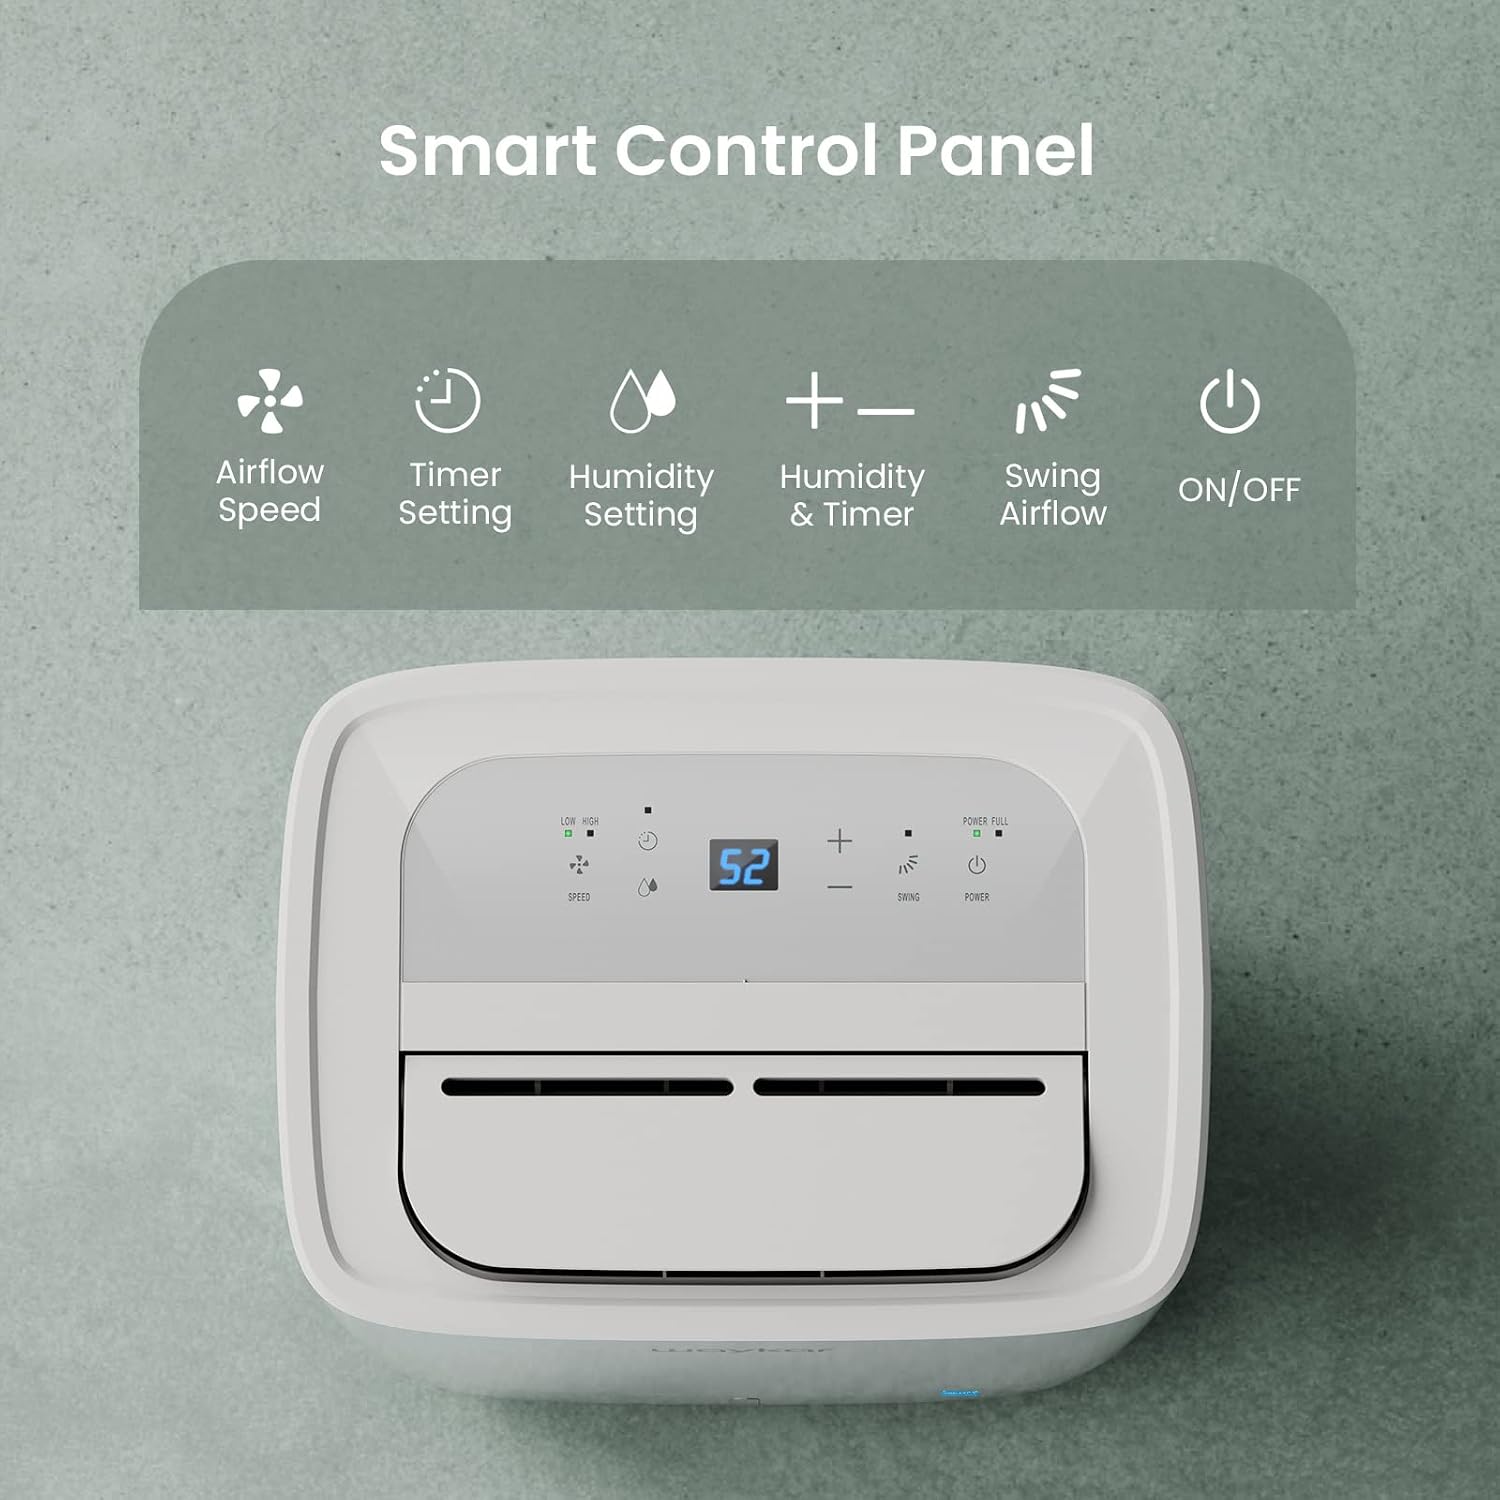
Figure 4.1: Smart Control Panel with buttons for Airflow Speed, Timer Setting, Humidity Setting, Swing Airflow, and ON/OFF.
4.1 Tænd/sluk
- Tryk på Magt knappen for at tænde eller slukke enheden.
4.2 Indstilling af fugtighedsniveau
- Tryk på + or - buttons to adjust the desired humidity level between 30% and 80% Relative Humidity (RH). The unit will operate until the set humidity level is reached, then cycle ON/OFF to maintain it.
4.3 blæserhastighed
- Tryk på Hastighed -knappen for at skifte mellem lav og høj ventilatorhastighed.
4.4 Timer funktion
- Tryk på Timer button to set a delay for the unit to turn ON or OFF. The timer can be set from 0.5 to 24 hours.
4.5 Swing Airflow
- Tryk på Svinge button to activate the automatic 30°-90° airflow oscillation. This helps distribute dehumidified air more evenly.
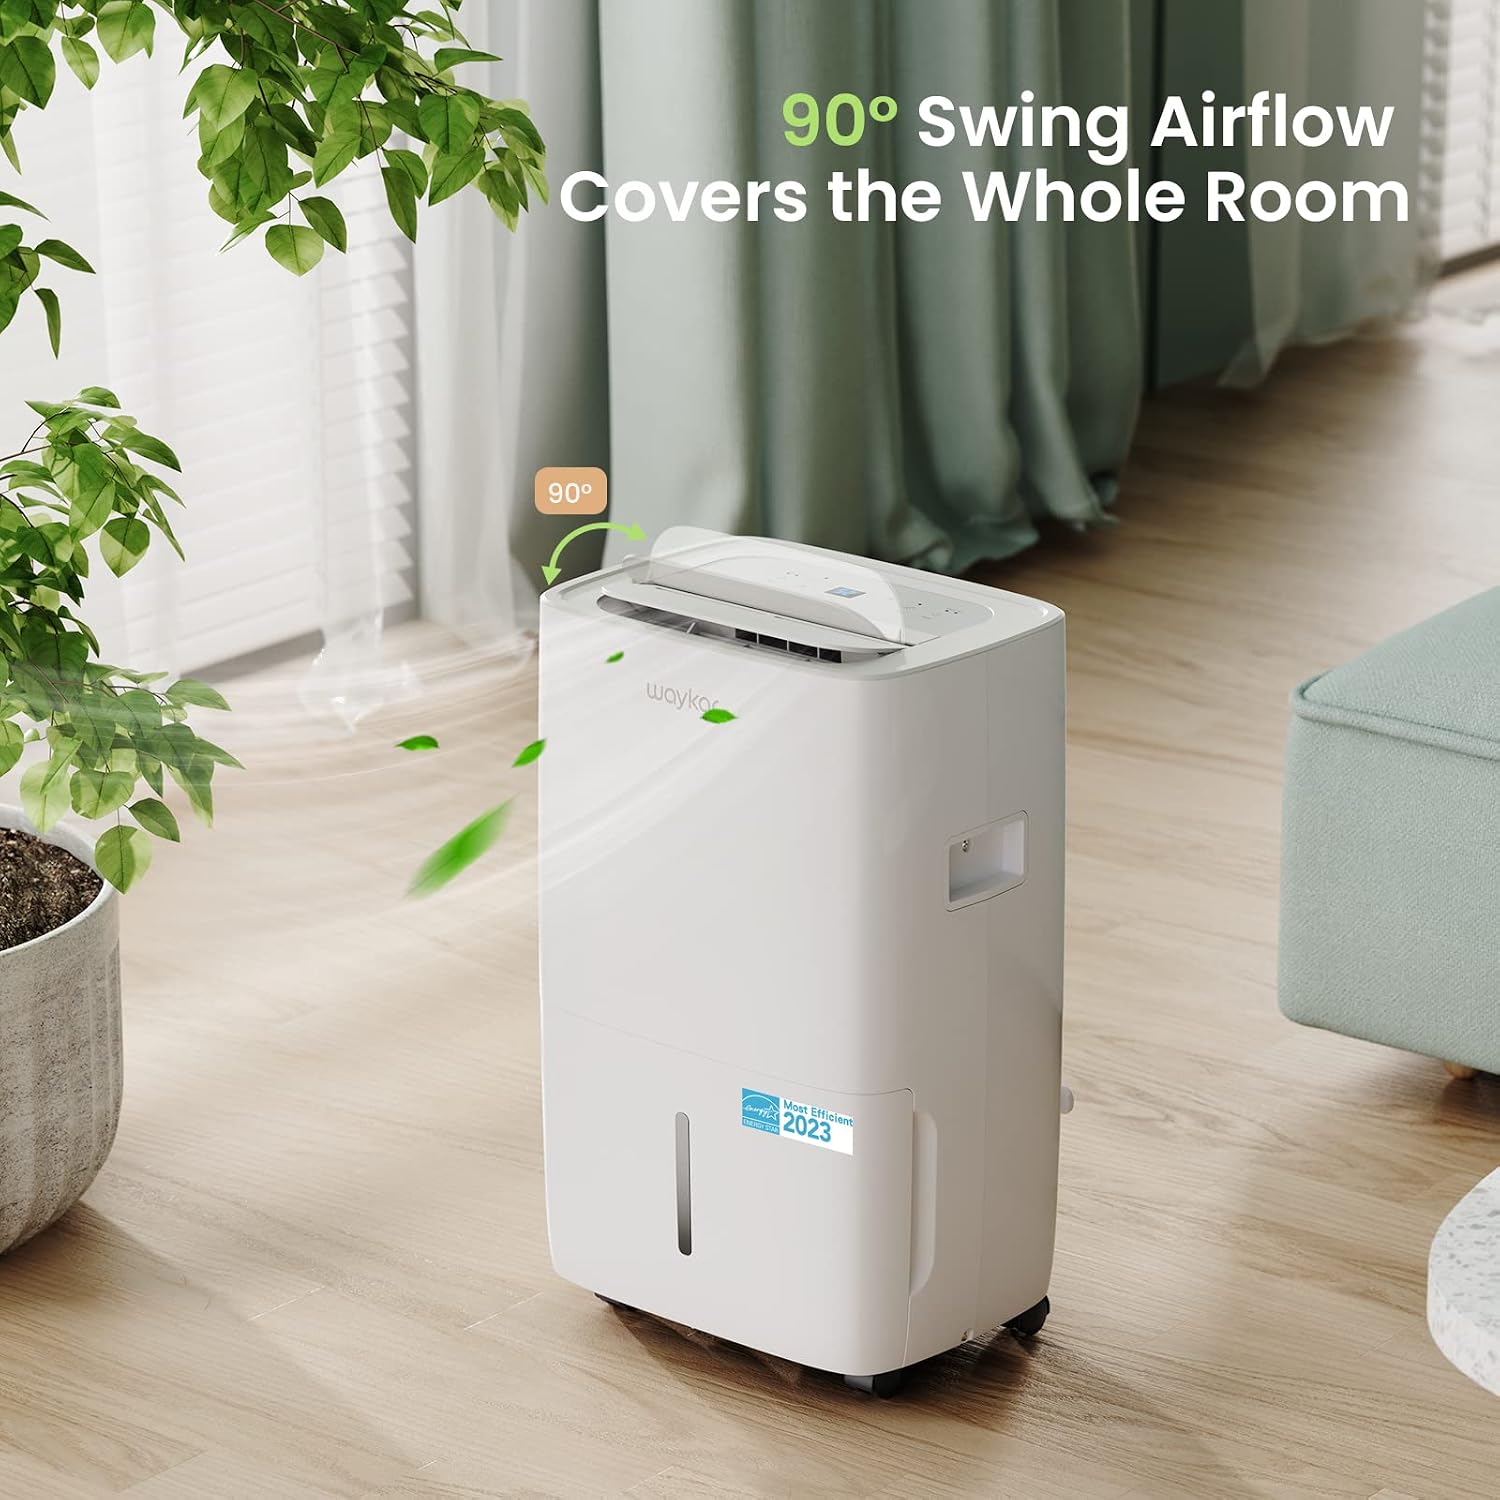
Figure 4.2: The 90° swing airflow feature helps cover the entire room for efficient dehumidification.
4.6 Børnelås
- For at aktivere børnesikringen skal du trykke på og holde Timer button for 3 seconds. The control panel will be locked to prevent accidental changes. Repeat to unlock.
4.7 Auto Defrost and Memory Restart
- The unit features an automatic defrost function that activates when frost builds up on the evaporator coils, ensuring efficient operation in cooler environments.
- I tilfælde af en magt outage, the Memory Restart function will automatically resume the previous settings once power is restored.
5. Dræningsmuligheder
The Waykar dehumidifier offers two convenient drainage methods:
5.1 Manuel tømning (vandtank)
- When the 1.14-gallon (4.3L) water tank is full, the unit will automatically shut off and an indicator light will illuminate on the control panel.
- Træk forsigtigt vandtanken ud fra enhedens forside.
- Tøm det opsamlede vand.
- Slide the empty tank back into the unit until it clicks into place. The unit will then resume operation.
5.2 Kontinuerlig dræning (afløbsslange)
- For continuous operation without needing to empty the tank, attach the included 3.3 ft (1 m) drain hose to the drainage outlet at the back of the unit.
- Ensure the hose is securely tightened to prevent leaks.
- Direct the other end of the hose to a suitable drain (e.g., floor drain, sink). Ensure the hose is sloped downwards to allow gravity drainage.

Figure 5.1: Illustration of both manual drainage (left) and continuous drainage (right) options.
6. Vedligeholdelse
Regelmæssig vedligeholdelse sikrer optimal ydeevne og levetid for din affugter.
6.1 Rengøring af luftfilteret
The washable air filter should be cleaned regularly (approximately every 250 hours of operation or when the filter indicator light illuminates) to maintain efficiency.
- Sluk for enheden, og tag stikket ud af stikkontakten.
- Fjern luftfilteret fra bagsiden af enheden.
- Vask filteret med varmt sæbevand. Skyl grundigt.
- Lad filteret lufttørre helt, før du sætter det i enheden igen.
- Once the filter is reinstalled, press and hold the Filter button for 3 seconds to reset the filter indicator.

Figure 6.1: The detachable and washable water tank, featuring a visible water level indicator.
6.2 Rengøring af vandtanken
Clean the water tank periodically to prevent mold and bacteria growth.
- Fjern vandtanken fra enheden.
- Wash the tank with warm water and a mild detergent.
- Skyl grundigt og tør, inden det sættes tilbage i affugteren.
6.3 Udvendig rengøring
- Tør ydersiden af enheden af med en blød, damp klæde. Brug ikke skrappe kemikalier eller slibende rengøringsmidler.
7. Fejlfindingsvejledning
Før du kontakter kundesupport, bedes du læse følgende almindelige problemer og løsninger:
| Problem | Mulig årsag | Løsning | ||||||||||
|---|---|---|---|---|---|---|---|---|---|---|---|---|
| Dehumidifier does not turn ON | No power supply; Power cord not plugged in; Water tank full or incorrectly installed. | Check power outlet; Plug in power cord securely; Empty and correctly reinstall water tank. | ||||||||||
| Unit is running but not dehumidifying | Luftfilter tilstoppet; Rumtemperatur for lav; Luftfugtighedsindstillingen for høj. | Clean air filter; Ensure room temperature is above 5°C (41°F); Lower desired humidity setting. | ||||||||||
| Enheden er støjende | Enheden står ikke på en plan overflade; Luftfilteret er tilstoppet. | Place unit on a flat, stable surface; Clean air filter. | ||||||||||
| Vand lækker fra enheden | Water tank incorrectly installed; Drain hose not securely attached (continuous drainage). | Reinstall water tank correctly; Securely tighten drain hose connection. | ||||||||||
Fejlkode
Relaterede dokumenter - JD025CE-80-CA
|


