1. Introduktion
The Briidea Chair Alarm System is designed to assist caregivers in monitoring individuals who may be at risk of falling or wandering from their chairs. This system provides an audible and visual alert when pressure is removed from the sensor pad, indicating that the user has left their seat. This manual provides essential information for the proper setup, operation, and maintenance of your chair alarm system.
2. Produktkomponenter
The Briidea Chair Alarm System includes the following components:
- Alarmenhed: The main device that emits sound and light alerts.
- Pressure Sensor Pad: A PVC seat cushion that detects when a user leaves their seat.
- Tilslutningskabel: To connect the sensor pad to the alarm unit.
- Monteringstilbehør: Screws, 3M adhesive tape, and a hanging rope for installation.
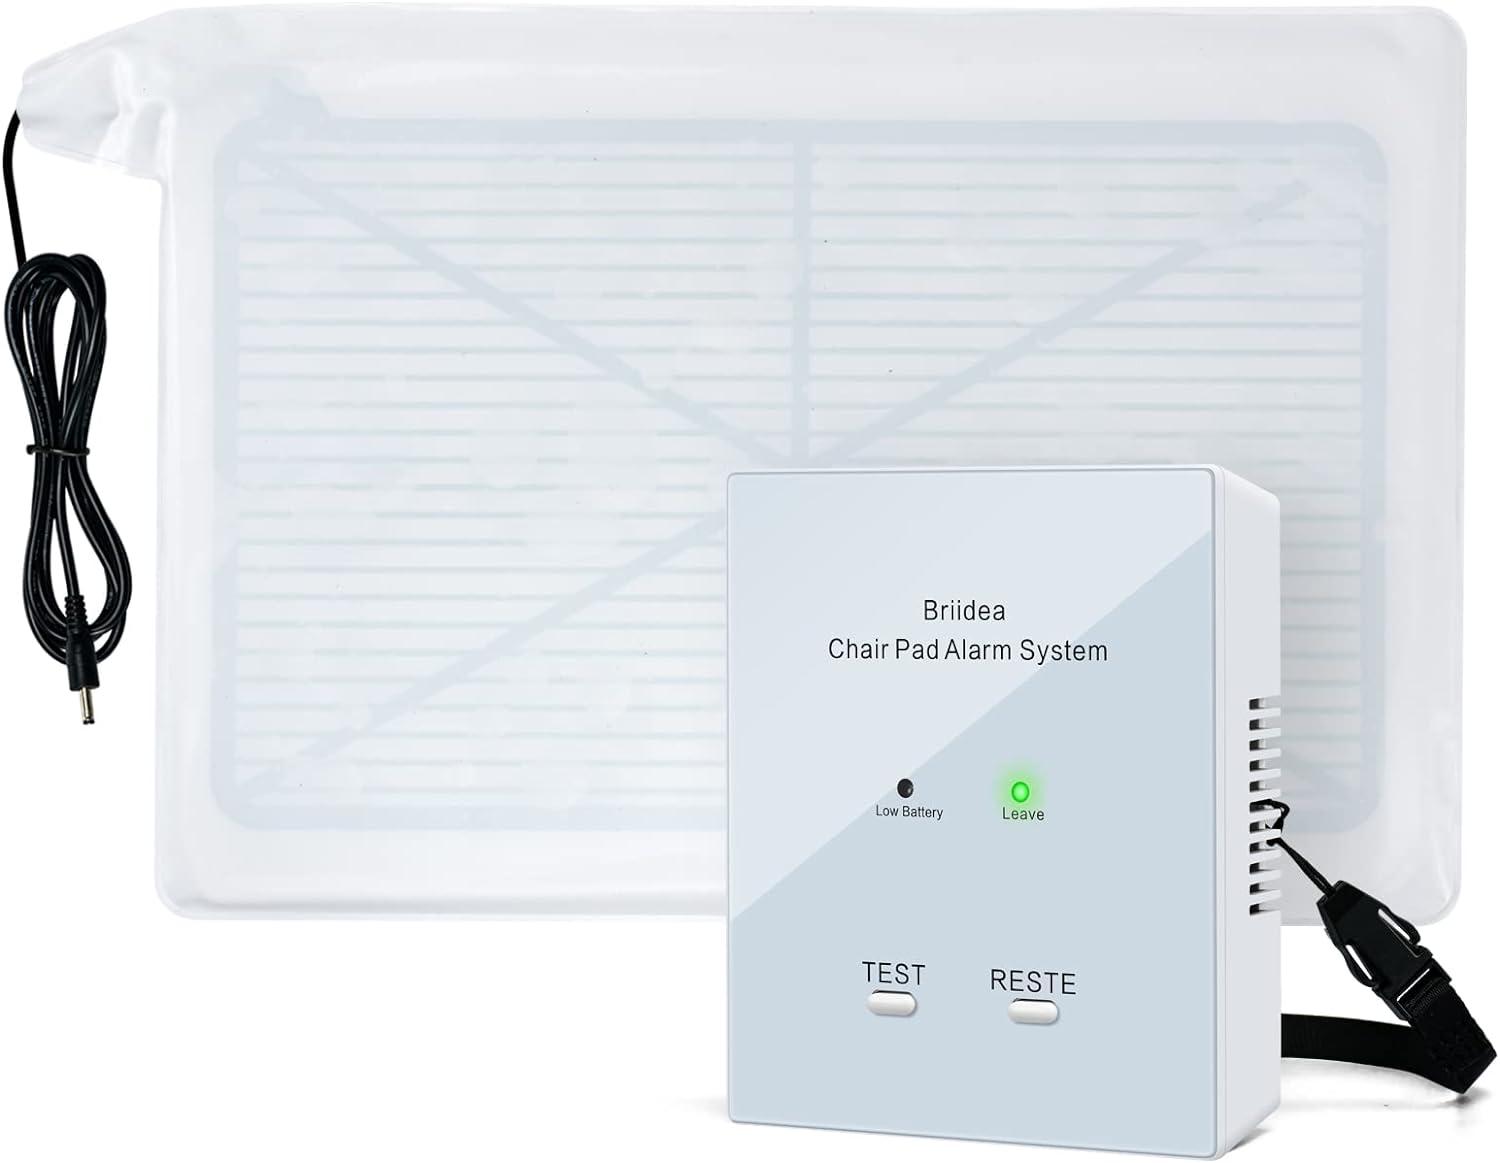
Figure 2.1: Briidea Chair Alarm System, showing the alarm unit and pressure sensor pad.
3. Opsætning og installation
Follow these steps to set up your Briidea Chair Alarm System:
- Indsæt batterier: Open the battery compartment on the alarm unit and insert the required batteries (not included).
- Place Sensor Pad: Position the pressure sensor pad on the seat of the chair or wheelchair where the user will be sitting. Ensure it is flat and securely placed.
- Connect Pad to Alarm Unit: Plug the connection cable from the sensor pad into the designated port on the alarm unit.
- Mount Alarm Unit: Choose one of the following installation methods for the alarm unit:
- Installation af skruer: Use the provided screws to attach the alarm unit to a stable surface, such as the back of a wheelchair.
- 3M selvklæbende tape: Apply the 3M adhesive tape to the back of the alarm unit and press firmly onto a clean, dry surface.
- Hængende reb: Use the hanging rope to secure the alarm unit to a suitable location, ensuring it is easily accessible for caregivers.
- Test systemet: Press the 'TEST' button on the alarm unit to ensure it is functioning correctly. The alarm should sound and the LED light should flash.


Figure 3.1: Various installation methods for the alarm unit: screw, 3M adhesive, and hanging rope.
Video 3.1: This video demonstrates the functionality and placement of Smart Caregiver weight sensing pads, which are similar in principle to the Briidea Chair Alarm's sensor pad. It illustrates how these pads detect changes in pressure to alert caregivers.
4. Betjeningsvejledning
Once the system is set up, it operates as follows:
- Aktivering: When the user sits on the pressure sensor pad, the system is armed. The 'Leave' indicator light on the alarm unit may illuminate or change status to show it's monitoring.
- Alarmudløser: If the user removes their weight from the sensor pad (e.g., stands up or attempts to leave the chair), the alarm will activate.
- Advarsler: The alarm unit will emit a loud sound (up to 80 decibels) and flash its LED lights to alert caregivers.
- Nulstilling af alarmen: To silence and reset the alarm, ensure the user is safely back in the chair or press the 'RESTE' (Reset) button on the alarm unit.

Figure 4.1: Illustration of the alarm activation when a user leaves their wheelchair seat.

Figure 4.2: Dual alert system with audible sound and flashing LED lights.
Video 4.1: Denne video giver en oversigtview of the TL-2100B Fall Monitor, detailing its features such as low battery indicator, status light, and volume control. It helps users understand the basic operation of a fall monitor unit.
5. Nøglefunktioner
- Dobbelt beskyttelse: Provides both an 80-decibel audible alarm and LED flashing lights for comprehensive alerts.
- Holdbar og vandtæt: The PVC seat cushion is designed to be waterproof, ensuring durability and ease of cleaning.
- Sensitive Sensor: Equipped with a highly sensitive sensor and excellent anti-interference performance for reliable detection.
- Alsidig anvendelse: Suitable for various environments including personal homes, medical facilities, and nursing homes.

Figure 5.1: Features of the PVC seat cushion and LED flashing light.
6. Specifikationer
| Specifikation | Detalje |
|---|---|
| Modelnummer | HOBA-02 |
| Varens vægt | 13.7 ounce |
| Produktdimensioner | 1 x 1 x 3 inches (Alarm Unit) |
| Materiale | Plastic (Alarm Unit), PVC (Sensor Pad) |
| Støjniveau | Up to 80 Decibels |
| Kontrolmetode | Røre |
| Strømkilde | Battery Powered (Alkaline, not included) |
| Sensor Technology | Kontakt sensor |

Figure 6.1: Dimensions of the Briidea Chair Alarm System components.
7. Vedligeholdelse
To ensure the longevity and proper functioning of your Briidea Chair Alarm System:
- Rensning: The PVC seat cushion is waterproof and can be easily cleaned with a damp cloth and mild soap. Do not immerse the alarm unit in water.
- Udskiftning af batteri: Replace batteries promptly when the 'Low Battery' indicator light illuminates to ensure continuous operation.
- Opbevaring: Opbevar systemet et køligt og tørt sted, når det ikke er i brug.
8. Fejlfinding
If you encounter issues with your Briidea Chair Alarm System, refer to the following common problems and solutions:
- Alarmen lyder ikke/blinker ikke:
- Check if the alarm unit is powered on and batteries are correctly inserted and charged.
- Ensure the sensor pad is properly connected to the alarm unit.
- Verify that the sensor pad is placed flat and free from obstructions.
- Test the system by pressing the 'TEST' button.
- Falske alarmer:
- Ensure the sensor pad is completely flat and not creased or folded.
- Confirm that no external pressure is being applied to the pad when the user is not present.
- Check for proper connection between the pad and the alarm unit; a loose connection can cause intermittent signals.
- Indikator for lavt batteri:
- Replace the batteries in the alarm unit with new ones.
9. Sikkerhedsoplysninger
Overhold venligst følgende sikkerhedsretningslinjer:
- This device is an aid for fall prevention and monitoring; it is not a substitute for direct supervision by a caregiver.
- Ensure the alarm unit is placed within hearing range of the caregiver.
- Hold enheden væk fra overdreven fugt eller ekstreme temperaturer.
- Forsøg ikke selv at ændre eller reparere enheden. Kontakt kundesupport for at få hjælp.
10. Garanti og support
For warranty information or technical support, please refer to the product packaging or contact Briidea customer service. Keep your purchase receipt as proof of purchase.


