1. Introduktion
Thank you for choosing the FNIRSI HS-01 Mini Digital Soldering Iron. This portable soldering iron features dual DC and PD power input, fast heating capabilities, and an OLED screen for precise temperature control. Designed for versatility, it is suitable for various applications including jewelry repair, mobile phone repair, and general electronics work. This manual provides detailed instructions for safe and effective use, setup, operation, maintenance, and troubleshooting.
2. Sikkerhedsoplysninger
Please read and understand all safety instructions before using the FNIRSI HS-01 Soldering Iron. Failure to follow these instructions may result in electric shock, fire, or serious injury.
- Høj temperaturfare: The soldering iron tip reaches very high temperatures (up to 420°C / 780°F). Avoid direct contact with the tip and allow it to cool completely before handling or storing.
- Ventilation: Use the soldering iron in a well-ventilated area to avoid inhaling fumes from solder and flux.
- Øjenbeskyttelse: Brug altid sikkerhedsbriller for at beskytte dine øjne mod loddedampe og -stænk.
- Strømforsyning: Ensure the power adapter meets the specified voltage and current requirements (9-24V, up to 96W DC or 65W PD). Using an inadequate power supply can cause the device to malfunction or restart.
- Elektrisk sikkerhed: Do not use the soldering iron with wet hands or in damp environments. Inspect the power cable for damage before each use.
- Opbevaring: Store the soldering iron in a safe place, away from flammable materials and out of reach of children. Use the provided tip cover when storing.
- Børnelås: Utilize the child lock feature to prevent accidental operation.
3. Pakkens indhold
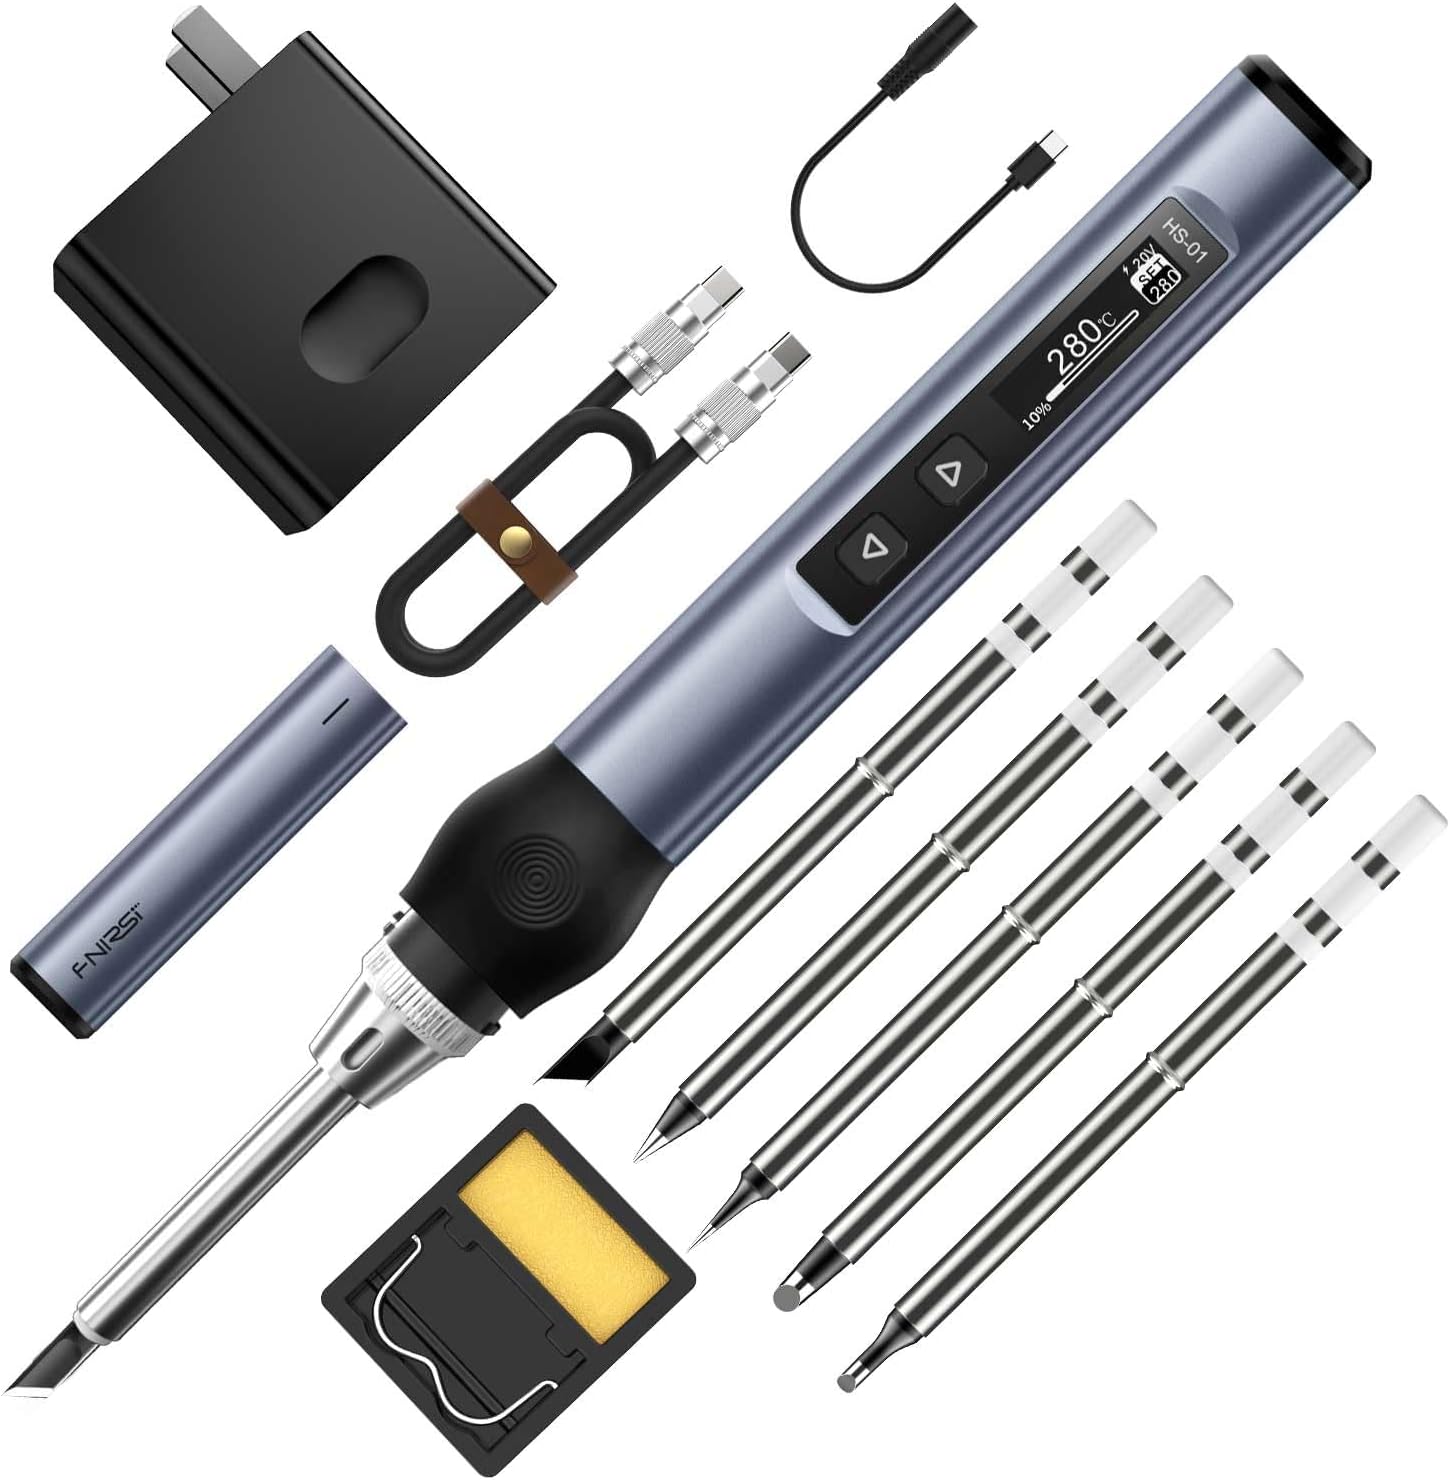
Bekræft, at alle nedenstående varer er inkluderet i din pakke:
- FNIRSI HS-01 Soldering Iron Unit
- 65W PD strømadapter
- Loddejernsstativ
- 6 Soldering Iron Tips (various types)
- Type-C kabel
4. Produktet er slutview
The FNIRSI HS-01 is a compact and intelligent digital soldering iron designed for precision work. Its ergonomic design ensures comfortable handling, while the OLED display provides clear information on temperature and settings.
4.1 Nøglefunktioner
- Dobbelt strømindgang: Supports DC (up to 96W) and PD (up to 65W) power sources via a Type-C interface.
- Hurtig opvarmning: Reaches operating temperature in seconds.
- Digital OLED Screen: Displays current and set temperatures, voltage og andre statusindikatorer.
- Justerbar temperatur: Precise temperature control from 80°C to 420°C (180°F to 780°F).
- Smarte funktioner: Includes sleep mode, automatic power-off, and child lock for safety and energy efficiency.
- Ergonomisk design: Lightweight body with a comfortable silicone grip for extended use.
- PID-styring: Advanced PID algorithm ensures stable and accurate temperature control with less than 2% accuracy deviation.


5. Opsætning
5.1 Tilslutning af strømforsyningen
The HS-01 supports both DC and PD power inputs. Ensure your power adapter provides sufficient wattage for optimal ydeevne.
- Connect the Type-C cable to the soldering iron's Type-C port.
- Connect the other end of the Type-C cable to the provided 65W PD power adapter or a compatible DC power source (9-24V).
- Sæt strømadapteren i en stikkontakt.
- The OLED screen will illuminate, indicating the device is powered on.
Note on Power Requirements:
- Standard driftsvoltage is 20V. If your adapter's maximum output is less than 20V, the iron will operate at that lower voltage.
- If the power adapter does not support the PD fast charging protocol, the operating voltage will be the input voltage.
- Insufficient power (e.g., less than 3.25A at 20V for 65W) may cause the iron to restart after heating. If this occurs, select a lower working voltage or use a more powerful adapter.

5.2 Installing Soldering Tips
The HS-01 uses integrated soldering iron tips where the heating element is part of the tip for rapid heat transfer.
- Ensure the soldering iron is powered off and cool before changing tips.
- Unscrew the retaining cap at the base of the tip.
- Carefully pull out the current tip.
- Insert the desired soldering tip, ensuring it is fully seated.
- Screw the retaining cap back on securely. Do not overtighten.
6. Betjening
6.1 Tænd/sluk
Once connected to a power source, the iron will automatically power on. To power off, disconnect the power supply. The device also features an auto-sleep and auto-power-off function.
6.2 Temperaturjustering
The temperature can be adjusted using the control buttons and viewed on the OLED screen.
- Tryk på Up or Ned knapper til at øge eller sænke den ønskede temperatur.
- The OLED screen will display the set temperature and the current tip temperature.
- The iron will rapidly heat up to the set temperature.

6.3 Left/Right Hand Mode
The display orientation can be switched for left-handed or right-handed users.
- Refer to the device's menu settings to toggle between left and right-hand display modes. (Specific button combination or menu navigation may vary, consult on-screen prompts).

6.4 Smarte funktioner
- Sove mode: The iron will automatically enter sleep mode after a period of inactivity to conserve energy and prolong tip life.
- Automatisk slukning: If left in sleep mode for an extended period, the iron will automatically power off for safety.
- Børnesikringstilstand: This feature prevents accidental temperature changes or operation. Activate/deactivate through the device's menu.
7. Vedligeholdelse
Proper maintenance ensures the longevity and performance of your soldering iron.
7.1 Pleje af loddespids
- Fortinning: Always tin the tip with a thin layer of solder before and after use to prevent oxidation.
- Rensning: Brug annonceamp sponge or brass wool to clean the tip regularly during soldering. Avoid abrasive materials.
- Opbevaring: Ensure the tip is tinned and cool before attaching the protective cap and storing the iron.
- Udskiftning: Replace tips when they become excessively pitted or corroded, as this affects heat transfer and soldering quality.
7.2 Generel rengøring
- Wipe the body of the soldering iron with a soft, dry cloth. Do not use solvents or harsh chemicals.
- Keep the Type-C port free of dust and debris.
8. Fejlfinding
If you encounter issues with your FNIRSI HS-01, refer to the table below for common problems and solutions.
| Problem | Mulig årsag | Løsning |
|---|---|---|
| "Low Vol" error on screen. | Input voltage er under 9V. | Ensure your power adapter provides at least 9V. Check the Type-C cable for damage or compatibility. |
| Soldering iron restarts after heating. | Insufficient output power from the adapter for the selected operating voltage. | Replace with a more powerful adapter (e.g., 65W PD or 96W DC). Alternatively, select a lower operating voltage on the soldering iron to match your adapter's capabilities. For example, if your adapter is 12V/2.5A (30W), set the iron to 12V. |
| Iron does not heat up or heats slowly. | Incorrect tip installation, faulty tip, or insufficient power. | Ensure the tip is correctly installed and the retaining cap is secure. Try a different tip. Verify power supply output as per the "restarts after heating" solution. |
| Temperaturvisningen er unøjagtig. | Tip oxidation or internal sensor issue. | Clean and re-tin the soldering tip. If the problem persists, consider replacing the tip. |
9. Specifikationer
| Feature | Detalje |
|---|---|
| Mærke | FNIRSI |
| Model | HS-01 |
| Strømkilde | PD/DC (Type-C) |
| Max Wattage (DC) | 96 watt |
| Max Wattage (PD) | 65 watt |
| Operation Voltage | 9-24V |
| Temperaturområde | 80°C - 420°C (180°F - 780°F) |
| Temperaturkontrol nøjagtighed | < 2 % |
| Vise | OLED skærm |
| Særlige funktioner | Ergonomic Handles, Heat Resistance, Portable, Auto Sleep, Auto Power-off, Child Lock |
| Varens vægt | 200 gram (7.1 ounce) |
| Produktdimensioner | 7.28 x 0.63 x 0.63 tommer |
| Inkluderede komponenter | Soldering Iron, 65W PD Adapter, Soldering Iron Stand, Soldering Iron Tips (6 types), Type-C Cable |
10. Garanti og support
The FNIRSI HS-01 Soldering Iron comes with a 60-day manufacturer's warranty covering defects in materials and workmanship from the date of purchase.
For technical support, warranty claims, or further inquiries, please contact FNIRSI customer service through the retailer where the product was purchased or visit the official FNIRSI webwebsted.
Du kan også besøge FNIRSI Store on Amazon for yderligere information og produktopdateringer.


