1. Introduktion
This manual provides detailed instructions for the setup, operation, and maintenance of your DreamSky DS2201 Wooden Digital Alarm Clock. Designed for bedrooms, this electric desk clock features large, easy-to-read numbers, a convenient USB charging port, and adjustable settings for alarm volume and display brightness. Please read this manual thoroughly to ensure proper use and to maximize the functionality of your device.
2. Nøglefunktioner
- Stort digitalt display: Features 1.8-inch large numbers for clear visibility from a distance.
- Justerbar lysstyrke: Offers 5 levels of display brightness, including an 'OFF' option, to suit various lighting conditions.
- Batteri-sikkerhedskopi: Requires 2 AAA alkaline batteries (not included) to maintain alarm function during power outages. The display will not illuminate when operating on battery power alone.
- Customizable Alarm: Provides 5 levels of adjustable alarm volume, suitable for both light and heavy sleepers. The alarm sounds for 2 minutes.
- Snooze-funktion: A dedicated snooze button on the top allows for an additional 9 minutes of sleep.
- USB opladningsport: Includes a convenient USB port for charging smart devices and other gadgets.
- Sommertid (DST): Equipped with a manual DST button for easy time adjustments.
- Wood Décor Design: A sleek wooden finish integrates well with various room aesthetics.
3. Pakkens indhold
Ved udpakning skal du sørge for, at alle nedenstående varer er til stede og i god stand:
- DreamSky DS2201 Digitalt vækkeur i træ
- 5V/1A strømadapter
- Brugervejledning (dette dokument)

Figure 3.1: Package contents including the alarm clock, power adapter, and user manual.
4. Opsætning
4.1 Strømtilslutning
- Connect the provided 5V/1A power adapter to the DC 5V port on the back of the alarm clock.
- Sæt strømadapteren i en almindelig stikkontakt. Urdisplayet lyser.

Figure 4.1: Powering the clock and using the USB charging port.
4.2 Batteriinstallation (backup)
For alarm backup during power outages, install 2 AAA alkaline batteries (not included) into the battery compartment on the back of the clock. The display will not be active when running on battery power alone; only the alarm function is maintained.
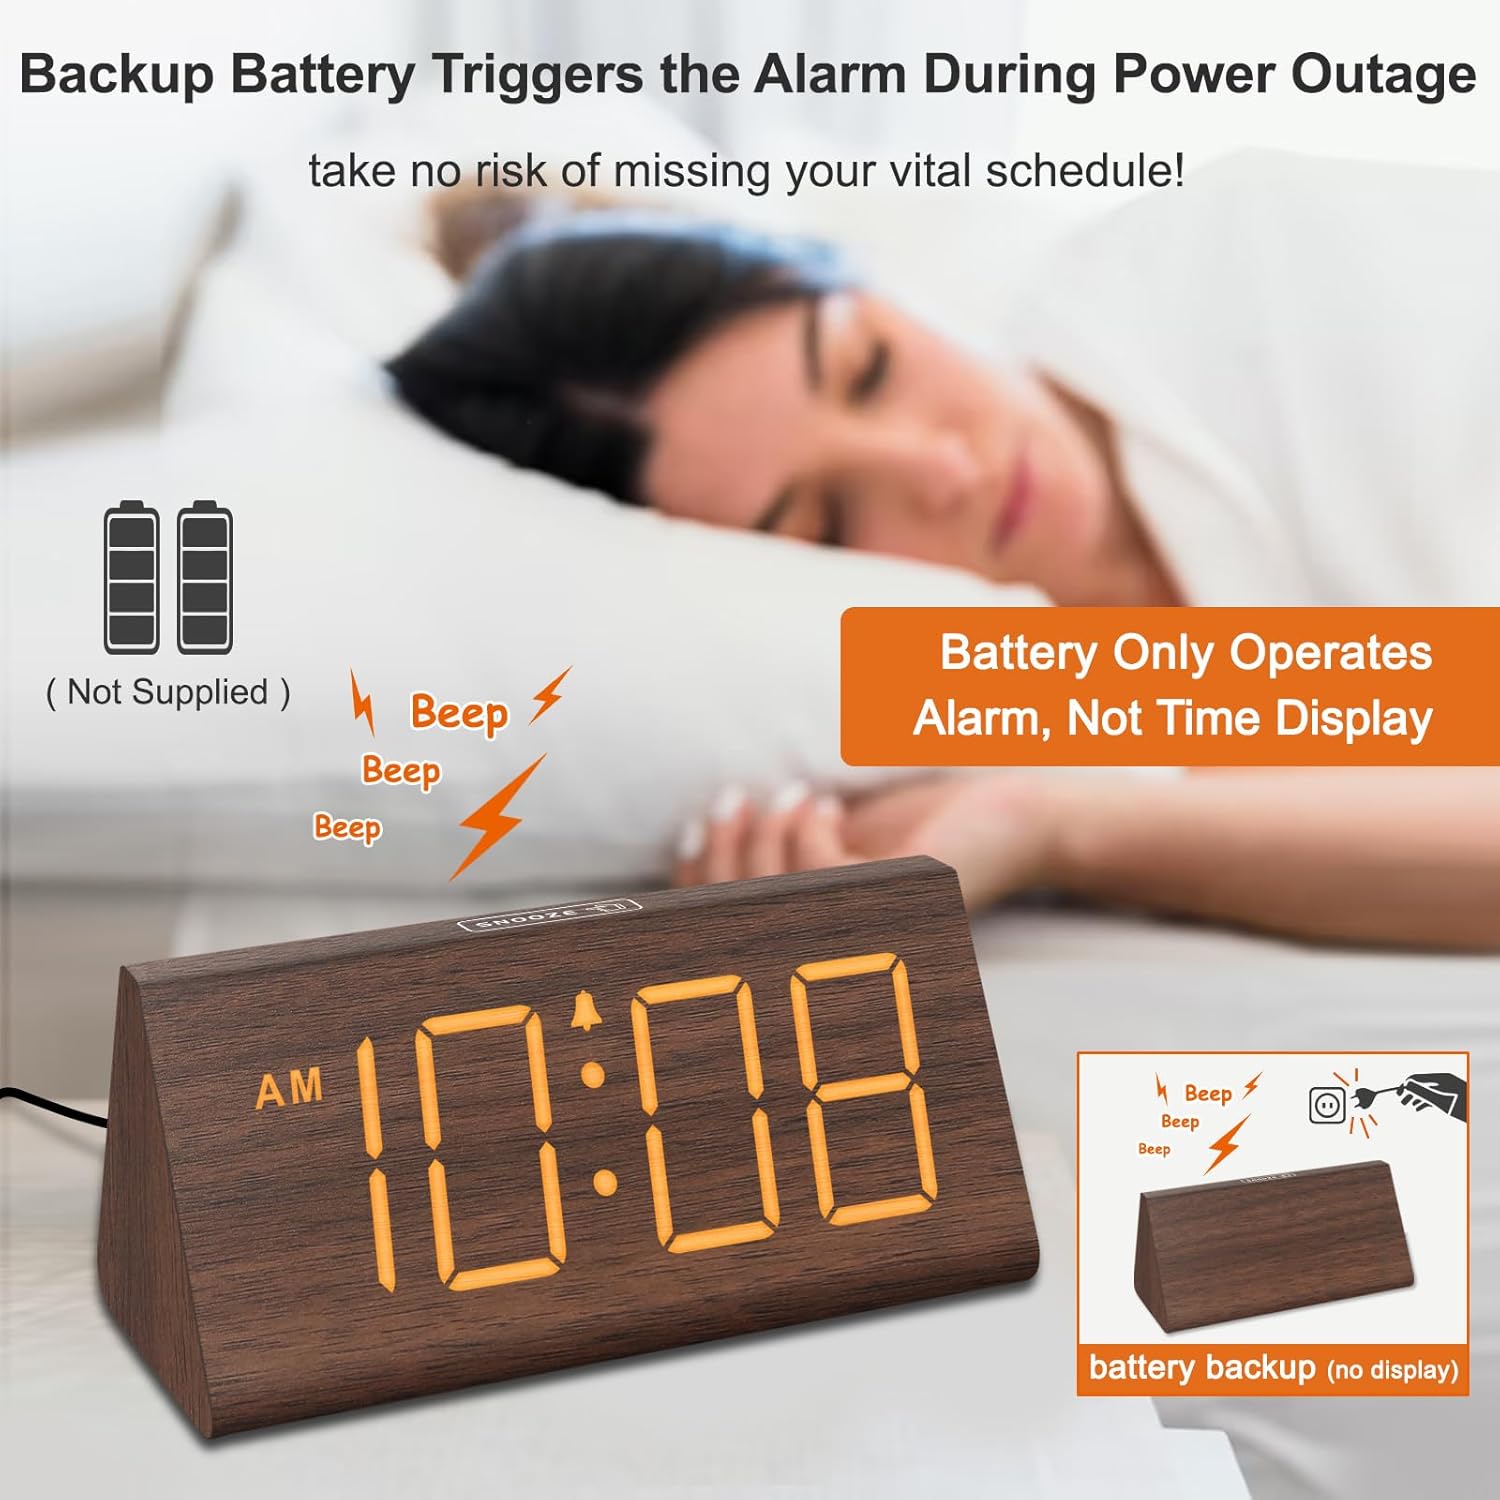
Figure 4.2: Battery compartment for alarm backup.
5. Betjeningsvejledning
5.1 Tidsindstilling
- Tryk på TIDSINDSTILLING knappen på bagsiden af uret. Timecifrene vil blinke.
- Brug + og - knapper for at justere timen.
- Trykke TIDSINDSTILLING igen for at indstille minutterne. Minuttiffrene vil blinke.
- Brug + og - knapper for at justere minutterne.
- Trykke TIDSINDSTILLING en tredje gang for at bekræfte og afslutte tidsindstillingstilstanden.
- For at skifte mellem 12-timers og 24-timers format skal du trykke på 12/24 timer knap.
5.2 Alarmindstilling
- Tryk på ALARM SÆT knappen. Alarmtimecifrene blinker.
- Brug + og - knapper for at justere alarmtiden.
- Trykke ALARM SÆT igen for at indstille alarmens minutter. Minuttiffrene vil blinke.
- Brug + og - knapper til at justere alarmens minutter.
- Trykke ALARM SÆT en tredje gang for at bekræfte og afslutte alarmindstillingstilstand.
- For at tænde eller slukke alarmen skal du trykke på ON/OFF knappen. Et alarmikon vises på displayet, når alarmen er aktiv.
5.3 Snooze -funktion
Når alarmen lyder, skal du trykke på SLUM button located on the top of the clock to temporarily silence the alarm for 9 minutes. The alarm will sound again after 9 minutes. To turn off the alarm for the day, press any button on the back of the clock.

Figure 5.1: Snooze button and alarm volume control.
5.4 Justering af lysstyrke
Tryk på DIMMER button on the back of the clock to cycle through 5 levels of brightness (L01 to L05) and an 'OFF' option for the display.

Figure 5.2: Display brightness levels.
5.5 Lydstyrkejustering
Brug VOL+ og VOL- buttons on the back of the clock to adjust the alarm volume across 5 available levels.
5.6 Sommertid (DST)
For at aktivere eller deaktivere sommertid skal du trykke på DST ON / OFF button. When activated, the time will advance by one hour, and 'DST' will appear on the display. Press again to revert to standard time.
5.7 USB-opladningsport
The USB port on the back of the clock can be used to charge compatible smart devices. Simply connect your device's USB charging cable to the port.
6. Vedligeholdelse
- Clean the clock's surface with a soft, dry cloth.
- Avoid using abrasive cleaners, solvents, or harsh chemicals, as these may damage the finish.
- Hold uret væk fra direkte sollys, ekstreme temperaturer og høj luftfugtighed.
7. Fejlfinding
| Problem | Mulig årsag | Løsning |
|---|---|---|
| Skærmen er slukket eller svag. | Power adapter not connected; brightness set to OFF or lowest level; running on battery backup. | Ensure the power adapter is securely plugged in. Press the DIMMER button to adjust brightness. Remember, the display does not light up when on battery backup. |
| Alarmen lyder ikke. | Alarm is not activated; alarm volume is too low. | Tryk på ON/OFF button to activate the alarm (check for alarm icon on display). Adjust volume using VOL+. |
| Tidspunktet er forkert. | Time not set correctly; DST setting incorrect. | Follow instructions in section 5.1 to set the time. Check DST setting using the DST ON / OFF knap. |
| USB-opladning virker ikke. | Device not compatible; cable faulty; clock not powered. | Ensure your device is compatible with USB charging. Try a different USB cable. Verify the clock is connected to AC power. |
8. Specifikationer
- Mærke: DreamSky
- Model: DS2201
- Skærmtype: Digital
- Strømkilde: Elektrisk med ledning
- Produktdimensioner: 5.96 cm B x 2.7 cm H
- Materiale: Træ
- Varens vægt: 11.1 ounce
- Batterier: 2 AAA batteries required (not included, for alarm backup only)
- Forbindelse: USB
9. Garanti og support
Your DreamSky DS2201 Wooden Digital Alarm Clock comes with a 1 års udskiftningsgaranti.
For kundesupport eller forespørgsler, kontakt venligst:
E-mail: info@dreamsky4u.com


