1. Introduktion
The Deity TC-SL1 is a sophisticated wireless timecode smart clapper slate designed for professional film and video production. It features Bluetooth control, a super bright dot matrix timecode display, and dual NP-F550 battery bays for extended operation. This manual provides detailed instructions for setting up, operating, and maintaining your TC-SL1.
- Wireless control and synchronization via the Sidus Audio app.
- Dual NP-F550 battery bays with hot-swapping capability.
- USB-C charging port for convenient power-ups.
- Supports all SMPTE formats with minimal drift.
- Dimmable backlight and flippable timecode display.
2. Opsætning
2.1. Batteriinstallation
The TC-SL1 utilizes two NP-F550 batteries. Locate the dual battery bays on the bottom of the unit.

Figur 2.1: Nederst view of the TC-SL1 showing the dual NP-F550 battery bays. Note the green and amber indicator lights for battery status.
- Ensure the TC-SL1 is powered off before installing or removing batteries.
- Slide an NP-F550 battery into each bay until it clicks into place.
- The unit supports hot-swapping, allowing you to replace one battery while the other powers the device.
2.2. Opladning
The TC-SL1 features a USB-C charging port. Connect a USB-C cable to the port and a compatible power adapter (up to 30W) to charge the installed NP-F550 batteries.

Figur 2.2: Bagside view of the TC-SL1, highlighting the USB-C charging port, 5-pin LEMO, and 1/4-inch TRS timecode input/output ports.
Note: While the unit can charge batteries, for optimal and faster charging, it is recommended to use an external NP-F550 battery charger.
2.3. Tænd/sluk
Locate the power button on the side of the unit. Press and hold the power button for approximately 3 seconds to power on or power off the TC-SL1.
2.4. Bluetooth-parring
The TC-SL1 can be controlled wirelessly via the Sidus Audio app. Download the Sidus Audio app from your device's app store.
- Sørg for, at Bluetooth er aktiveret på din mobilenhed.
- Power on the TC-SL1.
- Open the Sidus Audio app. The app will automatically scan for nearby Deity devices.
- Select your TC-SL1 from the list of available devices to establish a connection.
3. Betjeningsvejledning
3.1. Grundlæggende betjening
The TC-SL1 features a large, bright dot matrix display for timecode and a traditional wooden clapper for visual and audio synchronization.
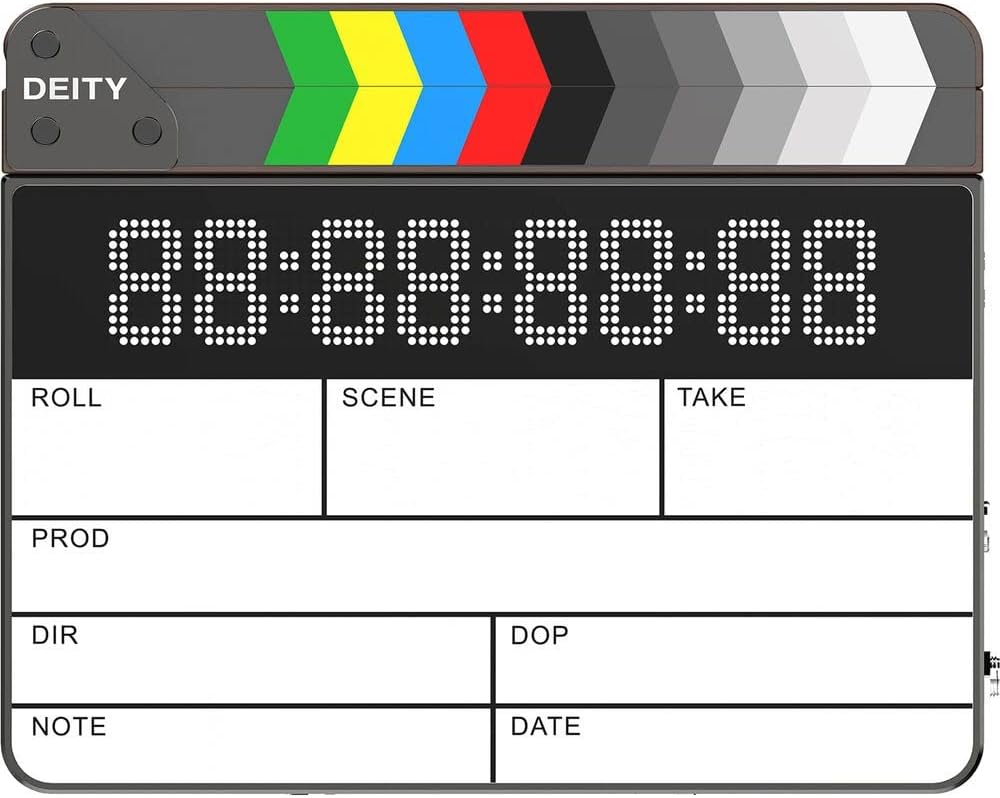
Figur 3.1: Forside view of the TC-SL1, displaying the timecode screen and the wooden clapper sticks.
- Clapper Sticks: Use the wooden clapper sticks for traditional visual and audio synchronization cues at the beginning or end of a take.
- Timecode Display: The dot matrix display shows the current timecode. This display is dimmable and can be flipped for tail slating.
- Enhåndsbetjening: The design allows for easy one-handed operation during production.
3.2. Tidskodesynkronisering
The TC-SL1 supports all SMPTE timecode formats and can be synchronized via the Sidus Audio app or through its physical I/O ports.
- App-synkronisering: Use the Sidus Audio app to wirelessly set, jam sync, or continuously sync the timecode with other compatible devices.
- Physical I/O: The unit features dual TC I/O ports: a 5-Pin LEMO connector and a 1/4-inch TRS connector. These allow for wired timecode input and output with professional audio and video equipment.
3.3. Skærmindstillinger
- Dimmable Backlight: Adjust the brightness of the timecode display via the Sidus Audio app to suit various lighting conditions.
- Flippable Display: The timecode display can be electronically flipped 180 degrees, making it convenient for tail slating without physically reorienting the slate. This setting is also controlled via the app.
4. Vedligeholdelse
4.1. Rensning
- Use a soft, dry cloth to clean the exterior of the TC-SL1.
- Til skærmen skal du bruge en mikrofiberklud, der er specielt designet til elektronik.
- Avoid using harsh chemicals, solvents, or abrasive materials, as they may damage the finish or display.
4.2. Batteripleje
- Always use genuine Deity NP-F550 batteries for optimal performance and safety.
- Opbevar batterierne på et køligt, tørt sted, når de ikke er i brug.
- Hvis batterierne opbevares i længere perioder, skal de oplades til cirka 50% kapacitet.
- Udsæt ikke batterier for ekstreme temperaturer eller direkte sollys.
4.3. Opbevaring
When not in use, store the TC-SL1 in its original packaging or a protective case to prevent damage from dust, moisture, and impacts. Ensure the unit is powered off before storage.
5. Fejlfinding
| Problem | Mulig årsag | Løsning |
|---|---|---|
| Enheden tænder ikke. | Low or depleted batteries; improperly installed batteries. | Charge batteries via USB-C or external charger. Ensure batteries are correctly seated in bays. |
| Timecode display is dim or unreadable. | Backlight setting is too low; environmental lighting conditions. | Adjust backlight brightness via the Sidus Audio app. Move to a more suitable lighting environment. |
| Kan ikke oprette forbindelse via Bluetooth. | Bluetooth is off on mobile device; unit is too far; interference. | Ensure Bluetooth is enabled. Move closer to the unit. Restart both the TC-SL1 and the mobile device. Check for app updates. |
| Timecode drift. | Environmental factors; long periods without re-sync. | Re-sync timecode frequently, especially during long shoots. Ensure stable operating temperature. |
| Batteries not charging inside unit. | Low power USB-C adapter; faulty cable. | Use a USB-C power adapter with at least 30W output. Try a different USB-C cable. Consider using an external battery charger. |
6. Specifikationer
| Feature | Detalje |
|---|---|
| Modelnummer | TC-SL1 |
| Dimensioner | 14 x 12.5 x 5 tommer |
| Varens vægt | 3.97 pund |
| Batteritype | Dual NP-F550 (3350mAh recommended) |
| Opladningsport | USB-C (up to 30W) |
| Timecode I/O | 5-Pin LEMO, 1/4-inch TRS |
| Trådløs kontrol | Bluetooth via Sidus Audio app (up to 250 feet) |
| Timecode Formats | All SMPTE formats |
| Clapper Material | Sustainably farmed walnut lumber |
7. Garanti og support
Deity Microphones products are designed and manufactured to the highest quality standards. For detailed warranty information, please refer to the official Deity Microphones webwebstedet eller garantikortet, der følger med dit produkt.
For teknisk support, hjælp til fejlfinding eller serviceforespørgsler, besøg venligst Deity Microphones official store page or contact their customer service directly. Keep your proof of purchase for warranty claims.


