1. Introduktion
This manual provides detailed instructions for the safe and effective use of your Technaxx TX-219 4-in-1 Multifunction Device. This versatile unit combines a jump starter, an air compressor, a power bank, and an LED light, designed for automotive and portable power needs. Please read this manual thoroughly before operation and retain it for future reference.
2. Sikkerhedsinstruktioner
Overhold altid følgende sikkerhedsforanstaltninger for at forhindre personskade eller beskadigelse af enheden eller køretøjet:
- Læs alle instruktioner før brug.
- Opbevares utilgængeligt for børn.
- Brug øjenbeskyttelse, når du bruger jumpstarteren.
- Udsæt ikke enheden for regn eller fugt.
- Do not operate if the device or cables are damaged.
- Sørg for ordentlig ventilation under brug.
- Tilslut jumpstarteren clamps correctly: positive to positive, negative to negative. Avoid short-circuiting.
- Forsøg ikke at sætte gang i et frosset batteri.
- Disconnect the jump starter from the vehicle battery within 30 seconds after the engine starts.
- Do not use the air compressor continuously for more than 10 minutes to prevent overheating. Allow it to cool down.
- Opbevar enheden på et køligt, tørt sted, når det ikke er i brug.
3. Pakkens indhold
Bekræft at alle varer er til stede i pakken:
- Technaxx Jump Starter TX-219 Unit
- Adapter Cable with Battery Clamps
- AC Adapter
- Compressed Air Hose
- USB kabel
- Biladapterkabel
- Brugermanual

Figur 3.1: Overview of the Technaxx TX-219 package contents, showing the main unit, battery clamps, various charging cables, and the air hose.
4. Produktet er slutview
Familiarize yourself with the components of your Technaxx TX-219 device.

Figur 4.1: Vinklet view of the Technaxx TX-219 unit, showing the digital display, control buttons, USB ports, and LED light.
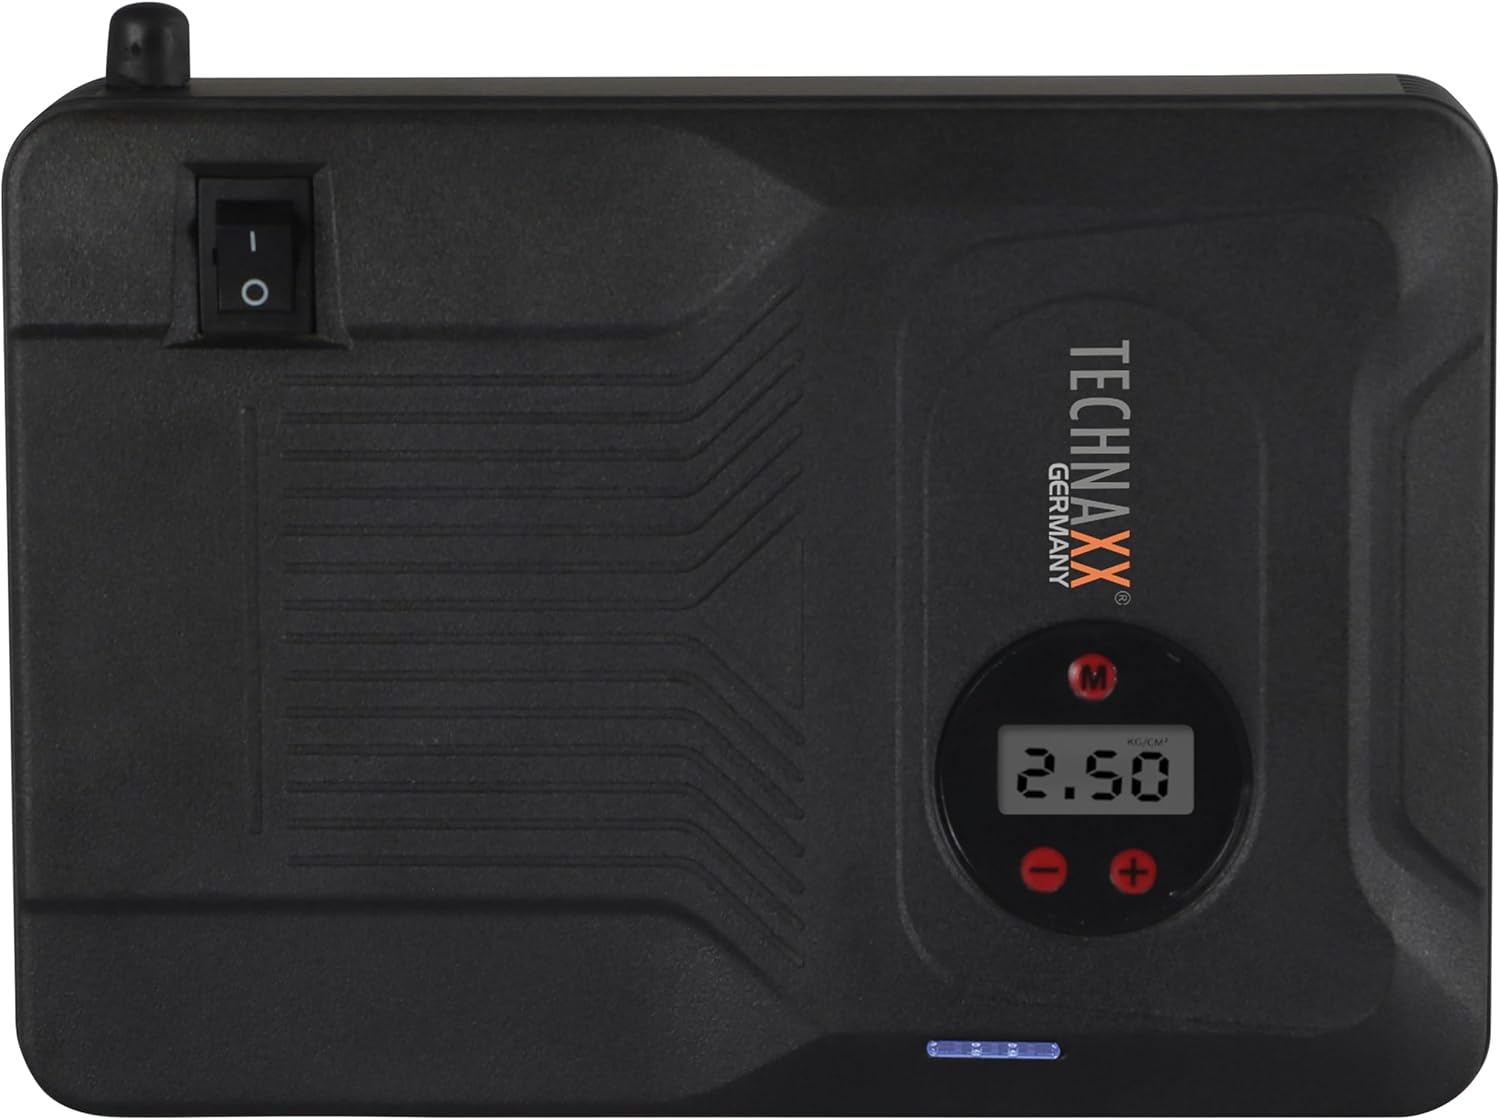
Figur 4.2: Top view of the device, highlighting the power switch and the digital display for pressure readings.

Figur 4.3: Front view of the device, showing the digital display, pressure adjustment buttons, and the power indicator lights.
Nøglekomponenter:
- Digital skærm: Shows air pressure for the compressor and battery status.
- Kontrolknapper: For adjusting pressure settings and operating the device.
- USB-A Output Ports (5V/1A, 5V/2A): Til opladning af eksterne elektroniske enheder.
- 15V/0.4A Input Port: For charging the internal battery of the TX-219.
- Jump Start Output Port: Connects to the battery clamp kabel.
- LED lys: Giver belysning.
- Afbryderen: On/Off control for the device.
- Tilslutning af luftslange: For the air compressor function.
5. Setup and Charging the Device
Before first use, fully charge the Technaxx TX-219 unit. It is recommended to recharge the device every 3 months to maintain battery health.
- Connect the AC adapter to the 15V/0.4A input port on the TX-219.
- Sæt AC-adapteren i en almindelig stikkontakt.
- The battery indicator lights on the device will illuminate to show charging progress. All lights will be solid when fully charged.
- Alternatively, use the car adapter cable to charge the device from a vehicle's 12V accessory socket.

Figur 5.1: The Technaxx TX-219 unit being charged or used as a power bank to charge a smartphone.
6. Betjeningsvejledning
6.1. Start af et køretøj med startkabler
The TX-219 can jump start gasoline engines up to 4.0L and diesel engines up to 3.0L.
- Ensure the TX-219 is sufficiently charged (at least 75% battery indicated).
- Sluk bilens tænding og alt tilbehør.
- Tilslut den røde (+) clamp til den positive (+) pol på køretøjets batteri.
- Tilslut den sorte (-) clamp til en ren, umalet metaldel af køretøjets motorblok eller chassis, væk fra batteriet. Do not connect to the negative (-) battery terminal directly unless specified by vehicle manufacturer.
- Connect the adapter cable to the jump start output port on the TX-219.
- Start køretøjets motor. Hvis den ikke starter med det samme, skal du vente 30 sekunder, før du prøver igen. Tørn ikke i mere end 3 sekunder pr. forsøg.
- Once the engine starts, immediately disconnect the adapter cable from the TX-219.
- Frakobl derefter den sorte (-) kabelamp, efterfulgt af den røde (+) kl.amp fra køretøjets batteri.

Figur 6.1: The Technaxx TX-219 connected to a vehicle battery using the provided clamps for jump starting.

Figur 6.2: A close-up of the jump starter connected to a car battery, illustrating the process of jump starting.
6.2. Brug af luftkompressoren
The integrated air compressor can inflate tires up to 3.5 Bar (approximately 50 PSI) and features an automatic shut-off.
- Connect the compressed air hose to the air hose connection port on the TX-219.
- Fastgør den anden ende af slangen til dækventilen.
- Turn on the TX-219. The digital display will show the current tire pressure.
- Use the '+' and '-' buttons to set the desired pressure. The display supports Bar, KPA, kg/cm², and PSI units.
- Press the compressor start button to begin inflation.
- Kompressoren stopper automatisk, når det forudindstillede tryk er nået.
- Disconnect the air hose from the tire valve and the TX-219.

Figur 6.3: The Technaxx TX-219 being used to inflate a car tire, demonstrating the air compressor function.

Figur 6.4: A user inflating a tire with the TX-219, showing the digital display and the air hose connection.
6.3. Brug som powerbank
The 14000 mAh battery can charge various USB-powered devices.
- Connect your device's USB charging cable to one of the USB-A output ports (5V/1A or 5V/2A) on the TX-219.
- The TX-219 will automatically begin charging your device.
- Monitor your device's charging status. Disconnect once fully charged.

Figur 6.5: The Technaxx TX-219 connected to a smartphone via USB, illustrating its power bank functionality.

Figur 6.6: The TX-219 acting as a portable power bank, charging a mobile device.
6.4. Brug af LED-lyset
The integrated LED light can be used for illumination in dark environments.
- Locate the LED light button on the device.
- Tryk én gang på knappen for at tænde LED-lyset.
- Press again to cycle through different light modes (e.g., steady, strobe, SOS, if available).
- Tryk og hold knappen nede for at slukke LED-lyset.

Figur 6.7: The TX-219's LED light providing illumination in a vehicle's engine compartment.
7. Specifikationer
| Feature | Specifikation |
|---|---|
| Model | TX-219 |
| Batteritype | Lithium jernfosfat |
| Batterikapacitet | 14000 mAh |
| Startaktuel | 350 A (maks. 600 A) |
| Jump Start Voltage | 12 volt |
| Motorkompatibilitet (benzin) | Op til 4.0 L |
| Motorkompatibilitet (diesel) | Op til 3.0 L |
| USB-A udgang 1 | 5 V, 2 A |
| USB-A udgang 2 | 5 V, 1 A |
| Luftkompressor | 12 V / 100 W, Max 3.5 Bar (approx. 50 PSI) |
| Opladningsindgang | 15 V, 0.4 A (maks.) |
| LED lys | Flere funktioner |
| Dimensioner (L x B x H) | 19 x 13 x 5.5 cm |
| Vægt | 1.16 kg |
| Certificeringer | CE |
8. Vedligeholdelse
- Rensning: Tør enheden af med en blød, tør klud. Brug ikke skrappe kemikalier eller slibende rengøringsmidler.
- Opbevaring: Store the TX-219 in a cool, dry place, away from direct sunlight and extreme temperatures.
- Genopladning: Recharge the unit every three months, even if not in use, to prolong battery life.
- Kabelinspektion: Regularly inspect all cables and clampKontroller for tegn på skader, slid eller korrosion. Udskift om nødvendigt.
9. Fejlfinding
| Problem | Mulig årsag | Løsning |
|---|---|---|
| Enheden tændes ikke. | Batteriet er afladet. | Charge the TX-219 fully. |
| Køretøjet starter ikke med startkabler. | Forkert klamp connection; TX-219 battery too low; vehicle battery severely damaged. | Sørg for, at clamps are connected correctly (+ to +, - to chassis). Recharge TX-219. Consult a mechanic if vehicle battery is faulty. |
| Luftkompressoren puster sig ikke op. | Hose not securely connected; desired pressure already reached; device battery low. | Check hose connections. Verify desired pressure setting. Recharge TX-219. |
| USB-opladning virker ikke. | USB cable faulty; device not compatible; TX-219 battery low. | Try a different USB cable. Ensure your device is compatible. Recharge TX-219. |
| LED lys virker ikke. | Battery depleted; light button not pressed correctly. | Recharge TX-219. Press the LED button firmly. |
10. Garanti og support
For warranty information and technical support, please refer to the warranty card included with your product or visit the official Technaxx webwebstedet. Behold din købskvittering som købsbevis.
Fabrikant: Technaxx
Modelnummer: 5031


