1. Introduktion
Thank you for choosing the SEVERIN KA 4850 FILKA Coffee Maker. This manual provides essential information for the safe and efficient operation, maintenance, and troubleshooting of your appliance. Please read these instructions carefully before first use and keep them for future reference.
2. Sikkerhedsinstruktioner
- Always connect the appliance to a properly installed and grounded power outlet.
- Apparatet, netledningen eller stikket må ikke nedsænkes i vand eller andre væsker.
- Opbevar apparatet utilgængeligt for børn.
- Unplug the appliance from the power outlet when not in use, before cleaning, and during assembly or disassembly.
- Do not operate the appliance if the power cord or plug is damaged, or if the appliance malfunctions or has been damaged in any way. Contact authorized service personnel.
- Use the appliance only for its intended purpose of brewing coffee.
- Undgå kontakt med varme overflader. Brug håndtag eller knopper.
- Ensure the water tank is filled only with fresh, cold water.
- Never open the filter holder or water tank lid during the brewing cycle.
3. Produktet er slutview
Familiarize yourself with the components of your SEVERIN KA 4850 FILKA coffee maker.
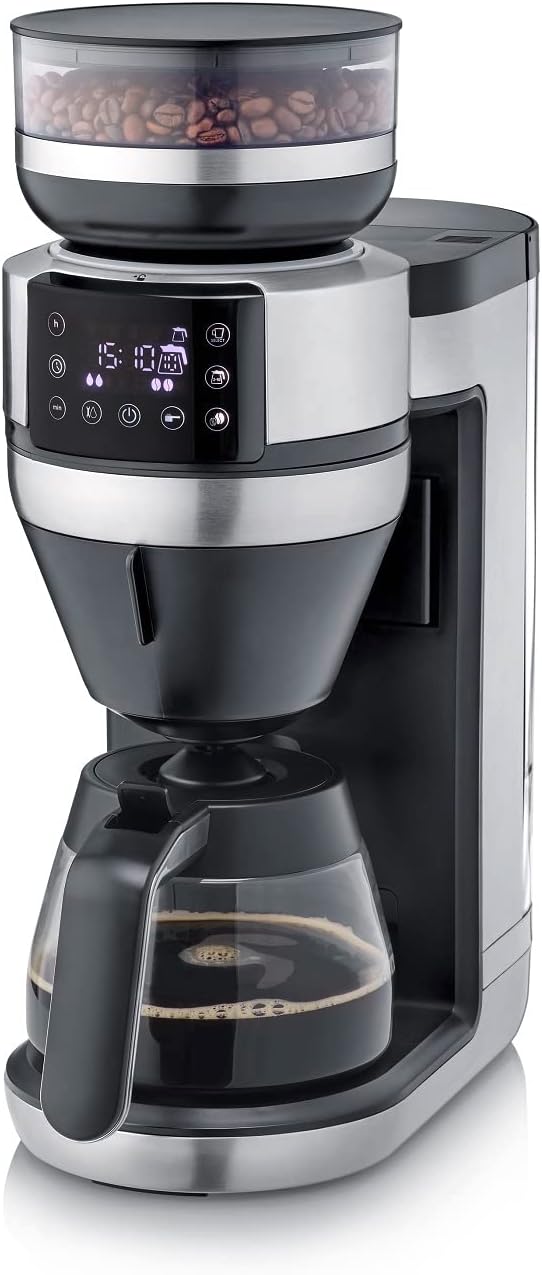
Figur 1: Forside view of the SEVERIN KA 4850 FILKA Coffee Maker with glass carafe.

Figur 2: Kaffemaskinen placeret på en køkkenbordplade, klar til brug.

Figure 3: Detachable water tank being removed from the side of the coffee maker for easy filling and cleaning.

Figure 4: The transparent container for whole coffee beans, located at the top of the appliance.

Figure 5: Close-up of the digital control panel with various function buttons and a display showing time and settings.

Figure 6: The filter holder with a disposable paper filter and ground coffee inside.

Figure 7: The reusable gold-tone permanent filter placed in the filter holder, containing ground coffee.

Figure 8: The coffee maker displayed with its included accessories: glass carafe, gold-tone filter, and adjustable cup stand.
4. Opsætning
4.1 Udpakning og første rengøring
- Fjern alle emballagematerialer og klistermærker.
- Clean the glass carafe, filter holder, and water tank with warm soapy water. Rinse thoroughly and dry.
- Aftør ydersiden af apparatet med adamp klæde.
4.2 Første brug (skyllecyklus)
- Fyld vandtanken med frisk, koldt vand op til det maksimale niveau.
- Placer den tomme glaskande med låget på varmepladen.
- Insert the empty filter holder (without coffee or filter paper).
- Sæt apparatet i en stikkontakt.
- Run a full brewing cycle without coffee to rinse the internal components. Discard the water.
- Gentag denne proces en eller to gange for at sikre grundig rengøring.
5. Betjeningsvejledning
5.1 Påfyldning af vandtanken
- Sørg for, at apparatet er taget ud af stikkontakten.
- Remove the detachable water tank (Figure 3).
- Fill the tank with the desired amount of fresh, cold water. The appliance features "Cup Control" which automatically draws the necessary water for your selected coffee quantity (100-350ml for single cups).
- Reinsert the water tank securely.
5.2 Tilsætning af kaffebønner eller malet kaffe
- Til hele bønner: Open the lid of the bean container (Figure 4) and fill with whole coffee beans. Close the lid firmly.
- Til formalet kaffe: Open the filter holder. Insert either a paper filter (Figure 6) or the reusable gold-tone filter (Figure 7). Add the desired amount of pre-ground coffee. Close the filter holder.
5.3 Brewing Coffee (Carafe)
- Placer glaskanden med låget på varmepladen.
- Select the desired number of cups on the control panel (Figure 5).
- Adjust coffee strength if available.
- Press the start button to begin brewing. The appliance will grind the beans (if selected) and brew the coffee.
5.4 Brewing Coffee (Single Cup / To-Go Mug)
The 5-in-1 compatibility allows brewing directly into small cups, large cups, or to-go mugs.
- Adjust the cup stand to the appropriate height for your chosen cup or mug (Figure 8).
- Place your cup or mug on the stand.
- Select the single-cup brewing option and desired volume (100-350ml) on the control panel.
- Press the start button. The appliance will automatically dispense the correct amount of water and brew your coffee.
5.5 Programmerbare funktioner
Refer to the control panel (Figure 5) for setting the timer and other programmable functions. This allows you to set a specific time for your coffee to start brewing automatically.
6. Vedligeholdelse og rengøring
6.1 Daglig rengøring
- Tag altid stikket ud af stikkontakten før rengøring.
- Wash the glass carafe, filter holder, and reusable gold-tone filter with warm soapy water after each use. These parts are often dishwasher-safe; refer to specific product markings.
- Tør ydersiden af apparatet af med en blød, damp klæde. Brug ikke slibende rengøringsmidler eller skuresvampe.
- Tøm og rengør vandtanken regelmæssigt.
6.2 Cleaning the Bean Container and Grinder
- Ensure the bean container is empty.
- Carefully remove the bean container. Clean it with a dry brush or cloth.
- Use a small brush to clean any residual coffee grounds from the grinder mechanism. Do not use water directly on the grinder.
6.3 Afkalkning
Regular descaling is crucial for optimal performance and longevity of your coffee maker, especially in areas with hard water. The frequency depends on water hardness and usage.
- Use a commercially available descaling solution suitable for coffee makers, or a mixture of white vinegar and water (1:2 ratio).
- Fill the water tank with the descaling solution according to the manufacturer's instructions.
- Stil den tomme karaffel på varmepladen.
- Run a brewing cycle. Stop the cycle halfway through and let the solution sit for about 15-30 minutes.
- Resume and complete the brewing cycle.
- After descaling, run at least two full cycles with fresh, clean water to rinse out any descaling residue.
7. Fejlfinding
| Problem | Mulig årsag | Løsning |
|---|---|---|
| Kaffe brygges ikke. | No water in tank; appliance not plugged in; power outage; filter holder not correctly placed. | Fill water tank; check power connection; ensure filter holder is properly seated. |
| Kaffe smager svagt. | Too little coffee; coffee too coarsely ground; appliance needs descaling. | Add more coffee; adjust grinder to finer setting; descale the appliance. |
| Coffee tastes bitter or has sediment. | Coffee too finely ground; too much coffee; appliance needs cleaning. | Adjust grinder to coarser setting; use less coffee; clean the filter and filter holder thoroughly. |
| Apparatet slukker uventet. | Incorrect operation; safety feature activated. | Unplug, wait a few minutes, then plug back in and restart. Ensure all components are correctly assembled and settings are valid. |
| Grinder is noisy or not grinding. | Bean container empty; foreign object in grinder; grinder clogged. | Refill beans; check for and remove any foreign objects; clean the grinder. |
8. Specifikationer
| Feature | Detalje |
|---|---|
| Mærke | SEVERIN |
| Modelnummer | KA 4850 |
| Farve | Brushed, matte, black, silver |
| Dimensioner (L x B x H) | 46 x 17 x 38.2 cm |
| Kapacitet | 350 Milliliters (for single cup, carafe capacity not specified but typically larger) |
| Voltage | 230 volt |
| Materiale | Rustfrit stål |
| Særlige funktioner | Permanent filter, Programmable, Integrated grinder, 5-in-1 compatibility, Cup Control |
| Type af kaffemaskine | Elektrisk filter kaffemaskine |
9. Garanti og support
This SEVERIN appliance comes with a manufacturer's warranty. Please refer to the warranty card included with your product for specific terms and conditions. For technical support, spare parts, or service inquiries, please contact SEVERIN customer service or visit the official SEVERIN webwebsted.
Gem din købskvittering som købsbevis i tilfælde af garantikrav.


