1. Introduktion
This manual provides essential information for the proper installation and maintenance of your Funmit high-efficiency filter replacements. These filters are designed to maintain the optimal performance of your compatible Roomba vacuum cleaner.
1.1 Pakkens indhold
Din pakke indeholder følgende varer:
- 6 x Funmit High-Efficiency Filter Replacements
- 1 x rengøringsbørste

Image: Six Funmit high-efficiency filters and one cleaning brush, as included in the package.
1.2 Kompatibilitet
These Funmit high-efficiency filters are compatible with the following Roomba vacuum cleaner models:
- I-serien: i7, i7+, i3, i3+, i4, i4+, i6, i6+, i8, i8+, j7
- E-serien: E5, E6, E7
- J Series: j7, j7+
Please verify your Roomba model number before installation to ensure proper fit and function.
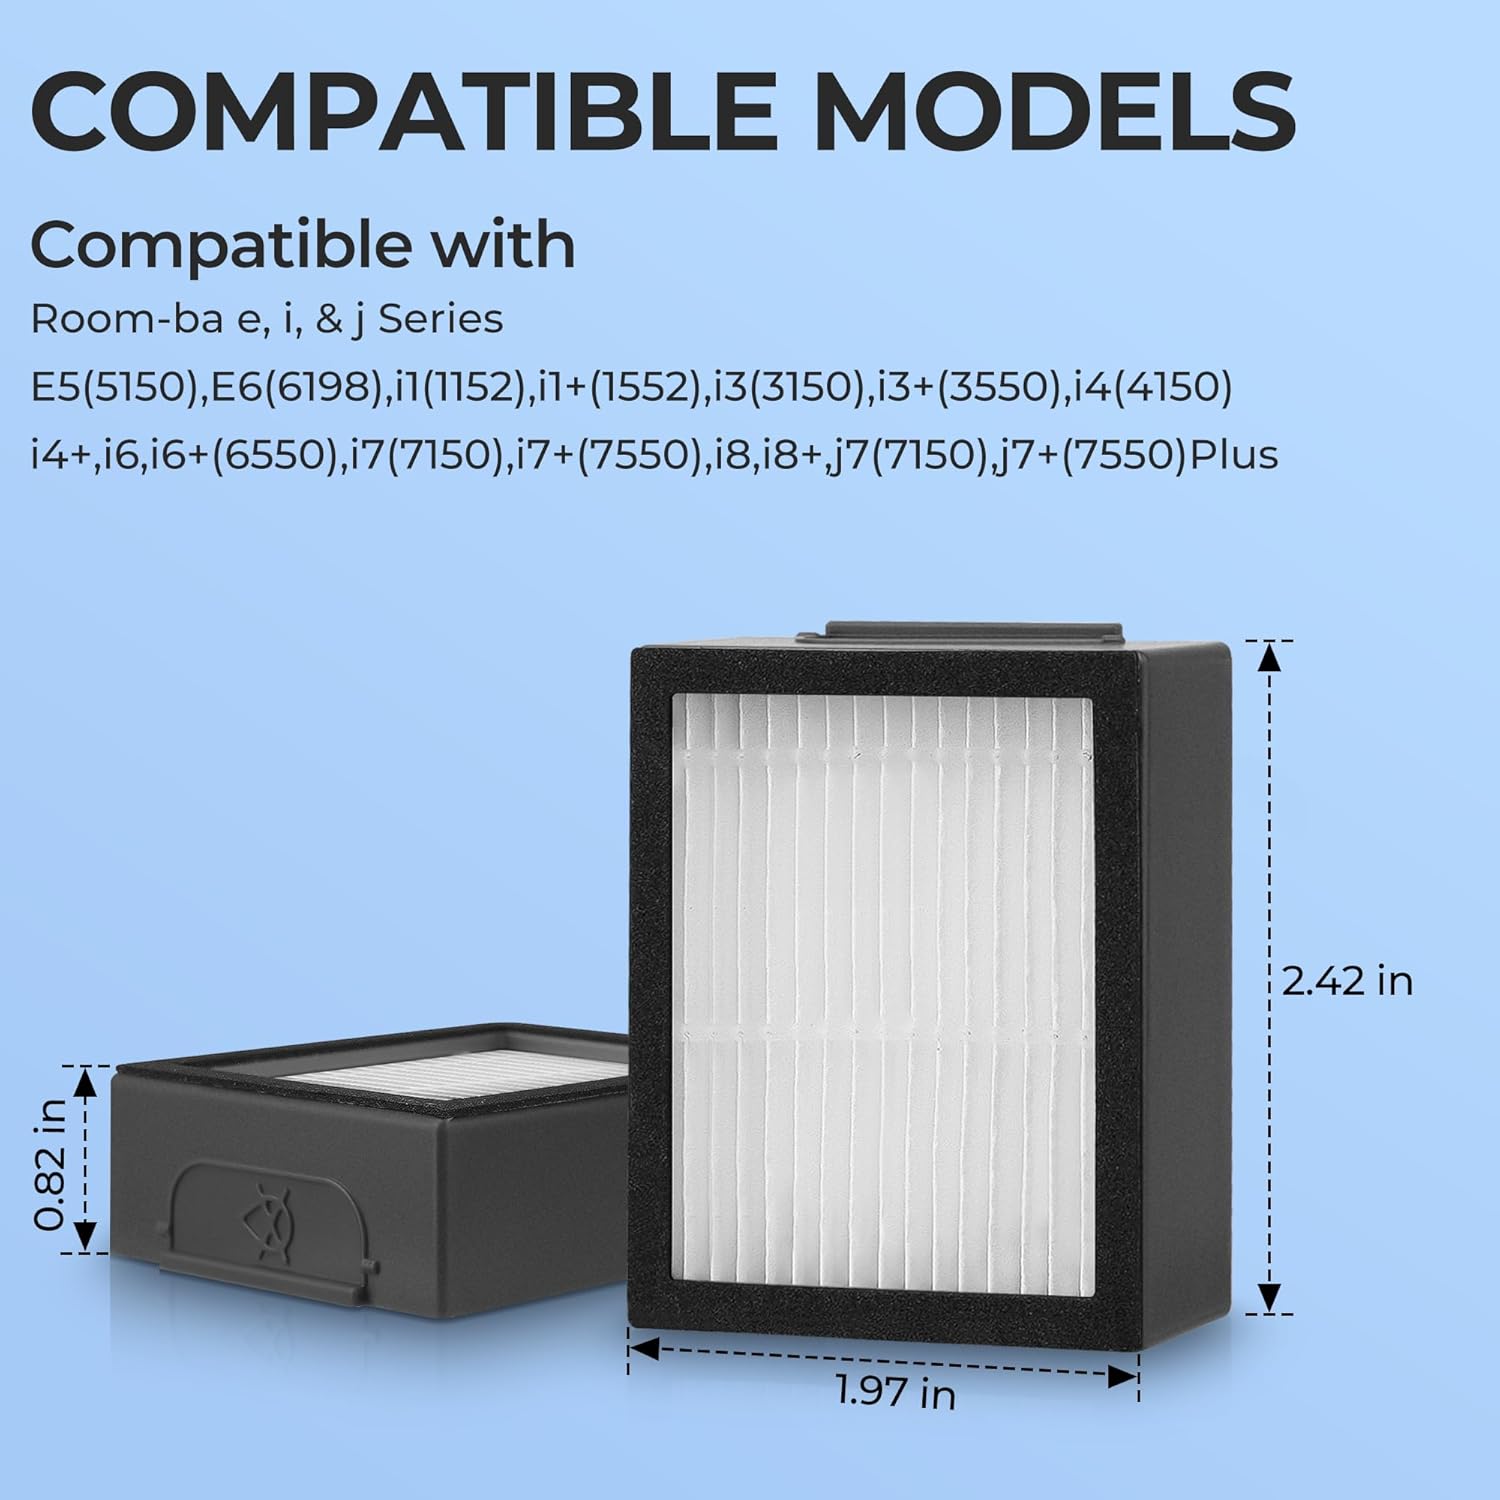
Image: A visual representation of the filter's dimensions (2.42 inches height, 1.97 inches width, 0.82 inches depth) and a list of compatible Roomba models from the I, E, and J series.
2. Installationsvejledning
Replacing the filter in your Roomba vacuum cleaner is a straightforward process that requires no special tools.
- Step 1: Access the Filter Box
Locate the filter compartment on your Roomba. This is typically found by opening the dust bin. Gently press the release tab or button to open the dust bin and remove it from the vacuum. - Step 2: Remove the Old Filter
Once the dust bin is removed, you will see the old filter. Grasp the filter by its edges and pull it out of its slot. Dispose of the old filter responsibly. - Step 3: Insert the New Filter
Take a new Funmit high-efficiency filter. Ensure the pleated side is facing the correct direction as indicated by your Roomba's dust bin design. Slide the new filter firmly into the filter slot until it clicks into place or sits securely. - Step 4: Reinstall the Dust Bin
Place the dust bin back into your Roomba vacuum cleaner, ensuring it is properly aligned and latches securely.

Image: A visual guide demonstrating the three steps for filter replacement: removing the dust bin, exchanging the old filter for a new one, and reinserting the dust bin into the Roomba.
3. Filterfunktion og -betjening
Funmit high-efficiency filters are engineered to capture a significant percentage of airborne particles, contributing to a cleaner home environment.
These filters utilize a multi-layer filtration design made from high-strength nonwoven polymer. This construction allows them to effectively trap 99.97% of household dirt, debris, pet hair, and other particles as small as 0.3 microns. This includes common allergens and fine dust, helping to maintain air quality during vacuum operation.

Image: An illustration detailing the filter's capability to capture various particles such as hair, dirt, lint, smoke, fine crumbs, and pet dander, highlighting its high-efficiency filtration performance.
4. Vedligeholdelse
Regular maintenance of your filters ensures your Roomba operates at peak efficiency and prolongs the lifespan of the vacuum cleaner.
4.1 Rengøring af filteret
It is recommended to clean the filter periodically using the provided cleaning brush. Gently brush away accumulated dust and debris from the pleated surface of the filter. This helps maintain airflow and filtration effectiveness between replacements.
Important: These filters are NOT washable. Washing the filter may damage the electrostatic attraction properties and negatively affect its adsorption capabilities, leading to reduced performance.

Image: A hand demonstrating the use of the included cleaning brush to remove debris from the filter. A warning icon indicates that the filter should not be washed with water.
4.2 Replacement Frequency
For optimal performance of your Roomba vacuum cleaner, it is recommended to replace the filter every 2-3 months. This frequency may vary depending on usage and the presence of pets or high levels of dust in your environment.

Image: A graphic illustrating the recommendation to replace the filter every 2-3 months for optimal performance, noting that a package of 6 filters provides approximately one year's worth of replacements.
5. Fejlfinding
Hvis du støder på problemer efter udskiftning af dit filter, kan du overveje følgende almindelige fejlfindingstrin:
- Reduceret sugekraft:
- Ensure the new filter is installed correctly and seated firmly in the dust bin.
- Check if the filter is clogged. Clean it with the provided brush. If heavily soiled, replace it with a new one.
- Verify that the dust bin is empty and properly reinstalled in the Roomba.
- Filteret passer ikke:
- Double-check the compatibility list in Section 1.2 to ensure the filter is designed for your specific Roomba model.
- Inspect the filter for any manufacturing defects or damage.
- Usædvanlige lyde:
- Ensure the filter is securely in place and not vibrating loosely.
- Check for any debris trapped around the filter or in the dust bin compartment.
If problems persist after following these steps, please refer to your Roomba vacuum cleaner's original instruction manual or contact Funmit customer support.
6. Specifikationer
| Mærke | Funmit |
| Model info | i7 Filter |
| Varens vægt | 3.52 ounce |
| Produktdimensioner | 2.55 x 0.86 x 2 tommer (6.48 x 2.18 x 5.08 cm) |
| Materiale Type | High-strength and environmentally friendly nonwoven polymer |
| Særlige funktioner | Captures 99% of fine dust through the filter, keeping hair, debris, sand, dirt as small as 0.1 microns. |
| Kompatible enheder | i-Robot Room-ba Vacuum Cleaner I, E and J Series (i7, i7+, i3, i3+, i4, i4+, i6, i6+, i8, i8+, j7, E5, E6, E7) |
| Inkluderede komponenter | 6 x i3 i3+ replacement parts and 1 free cleaning brush |
| Genanvendelighed | Not reusable (disposable after recommended period) |
7. Garanti og support
Funmit is committed to providing high-quality replacement parts. While specific warranty details are not provided in this manual, if you encounter any quality issues with your Funmit filters, please contact Funmit customer service. They are dedicated to assisting you and resolving any concerns.
For yderligere hjælp, besøg venligst Funmit Store on Amazon.


