1. Introduktion
The KanDao QooCam EGO is a state-of-the-art stereoscopic 3D camera designed to capture immersive photos and videos with exceptional clarity. Featuring a unique dual-lens system that mimics human vision, it delivers true-to-life 3D content that can be instantly viewed on its integrated magnetic viewer or shared across various platforms and devices, including VR headsets, AR glasses, and projectors.
This manual provides comprehensive instructions for setting up, operating, maintaining, and troubleshooting your QooCam EGO camera, ensuring you get the most out of its advanced capabilities.

Image: The KanDao QooCam EGO camera, showcasing its compact design and the detachable magnetic viewer displaying a captured scene.
2. Hvad er der i æsken
Upon unboxing your KanDao QooCam EGO, please verify that all the following components are included:
- QooCam EGO Camera Unit
- Magnetic 3D Viewer
- Rechargeable Battery (1 LR44 battery included)
- USB opladningskabel
- Selfie Spejl
- Håndstrop
- Opbevaringspose
- Linse Rengøringsklud
3. Opsætningsvejledning
3.1. Opladning af batteriet
Before first use, fully charge the camera's battery. Connect the provided USB charging cable to the camera's USB port and a compatible USB power adapter (not included). The charging indicator light will show the charging status.

Image: A hand placing a battery into a charging dock, illustrating the charging process.
3.2. Indsættelse af et Micro SD-kort
The QooCam EGO requires a Micro SD card (not included) for storing photos and videos. Locate the Micro SD card slot on the camera body. Insert the card with the gold contacts facing down until it clicks into place. Ensure the camera is powered off before inserting or removing the card.
3.3. Attaching the 3D Viewer
The magnetic 3D viewer easily attaches to the top of the camera. Align the viewer with the magnetic contacts on the camera until it snaps securely into place. This allows for instant 3D playback directly on the device.

Image: A user demonstrating the use of the QooCam EGO with its magnetic viewer attached, providing an instant 3D viewoplevelse.
3.4. Tænd/sluk
To power on the camera, press and hold the power button located on the top of the device until the screen illuminates. To power off, press and hold the power button again until the screen shuts down.
4. Betjeningsvejledning
4.1. Optagelse af fotos og videoer
The QooCam EGO captures 24MP 3D photos and 4K 60FPS stereoscopic 3D videos. The dual-lens system, with a 65mm inter-lens distance, is designed to replicate human eye vision for realistic 3D depth.
- Fototilstand: Select photo mode on the camera interface. Frame your shot using the screen or the attached viewer. Press the shutter button to capture a 24MP 3D image (JPG for quick sharing, DNG for professional editing).
- Videotilstand: Switch to video mode. Press the record button to start and stop recording 4K 60FPS 3D video. The camera features built-in IMU sensor and image stabilization for smooth footage.
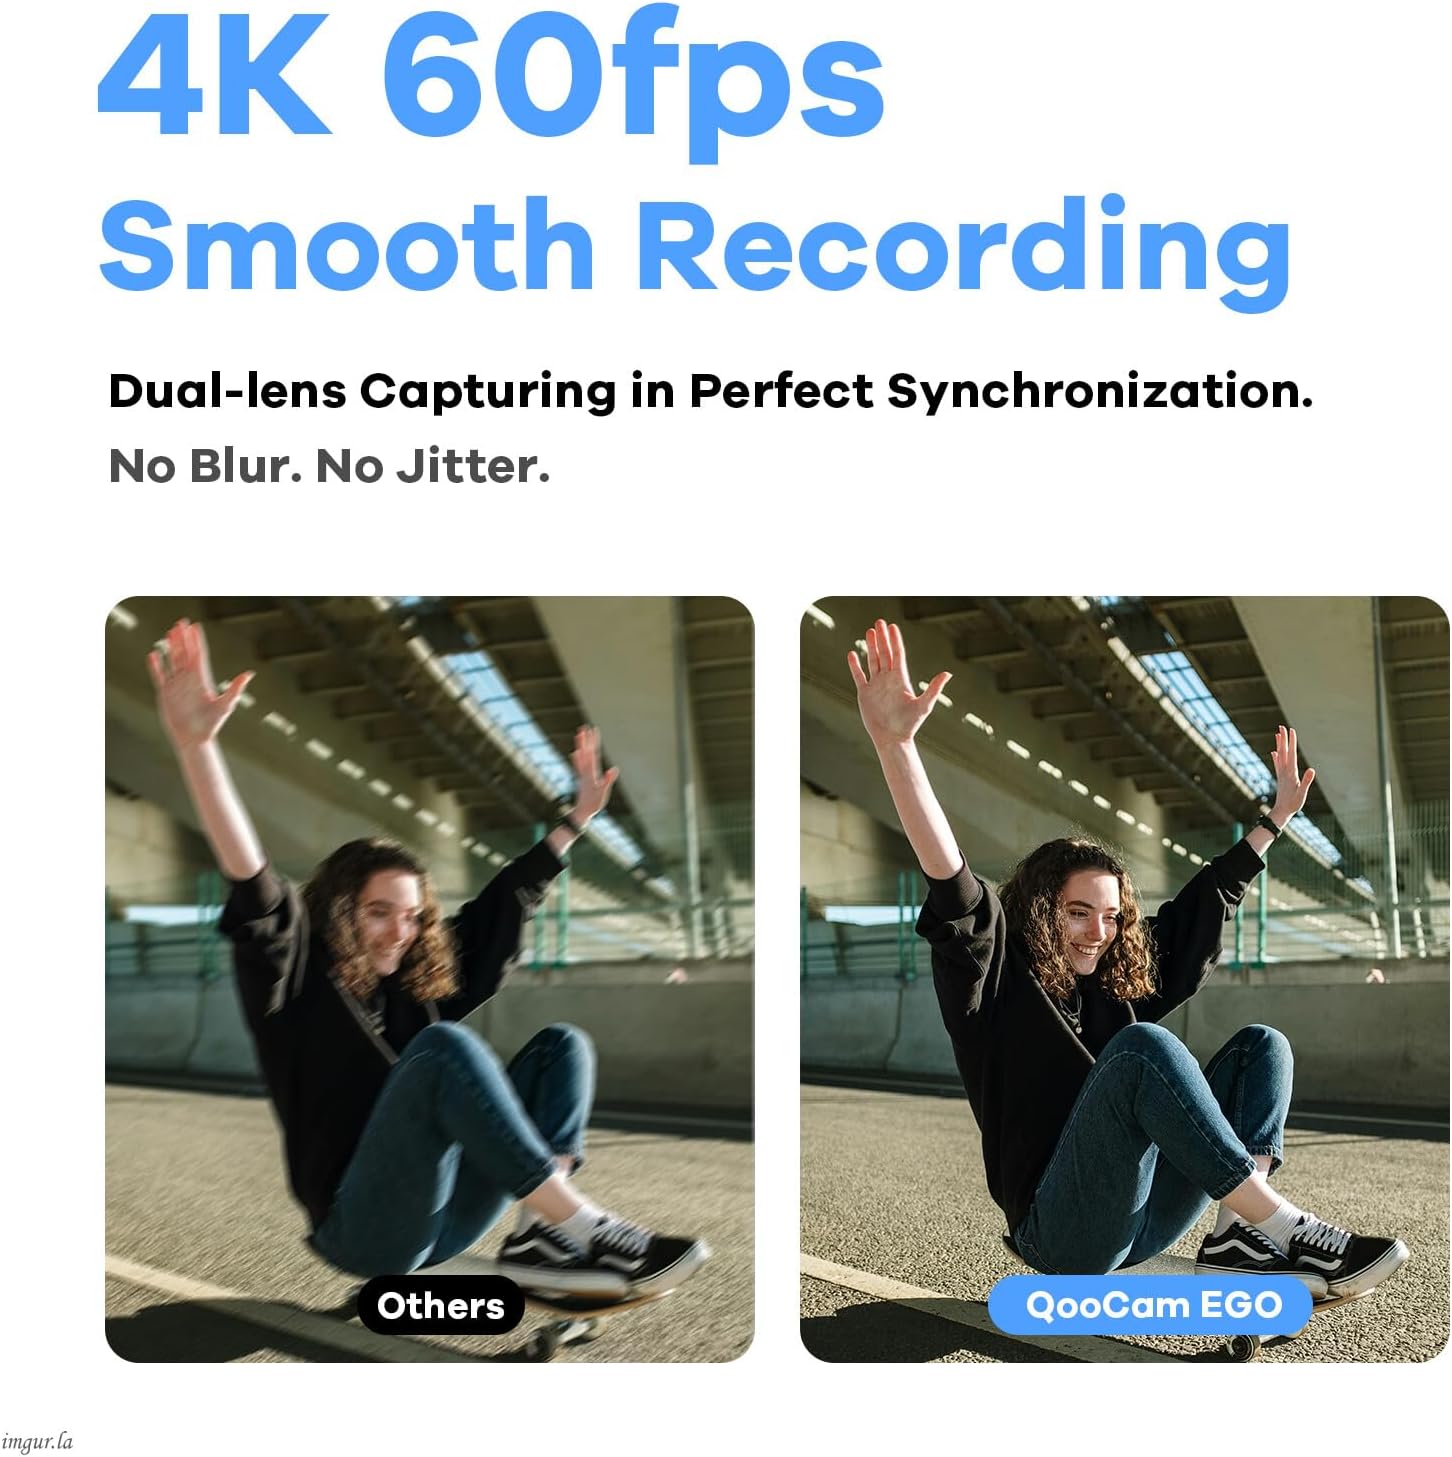
Image: Visual comparison demonstrating the superior smoothness of 4K 60FPS video recording with QooCam EGO, highlighting its effective image stabilization.
4.2. Precision Focus Control
The QooCam EGO offers both manual and auto dual focus modes, allowing you to achieve pinpoint accuracy for every shot. Access focus settings through the camera's touchscreen interface to adjust as needed for different subjects and distances.

Image: The QooCam EGO's display interface, illustrating the precision focus control feature with a focus box highlighting a subject.
4.3. Viewing and Sharing Content
Your captured 3D content can be viewed and shared in multiple ways:
- Øjeblikkelig afspilning: Use the magnetic 3D viewer for immediate stereoscopic playback directly from the camera.
- QooCam APP: Download the QooCam APP to your smartphone or tablet. Connect the camera via Wi-Fi to easily edit, manage, and export your photos and videos.
- VR Headsets & AR Glasses: Export side-by-side MP4 videos for seamless viewing on major VR headsets. Transform your real-world surroundings into interactive augmented reality experiences by overlaying 3D-captured elements onto your view with AR glasses.
- Projektorer: Connect your QooCam EGO to a compatible projector to display your 3D images and videos on a large screen, creating a unique 3D viewing event.
- Sociale medier: Share your content directly to platforms like Facebook and YouTube through the QooCam APP.
- Apple Vision Pro Integration: Utilize the transcoding tool to convert QooCam EGO content into spatial videos and photos for an enhanced stereoscopic effect and clear visuals on Apple Vision Pro.

Image: A collage demonstrating the versatility of the QooCam EGO, capturing 3D content for various viewing platforms including VR headsets, AR glasses, and projectors.
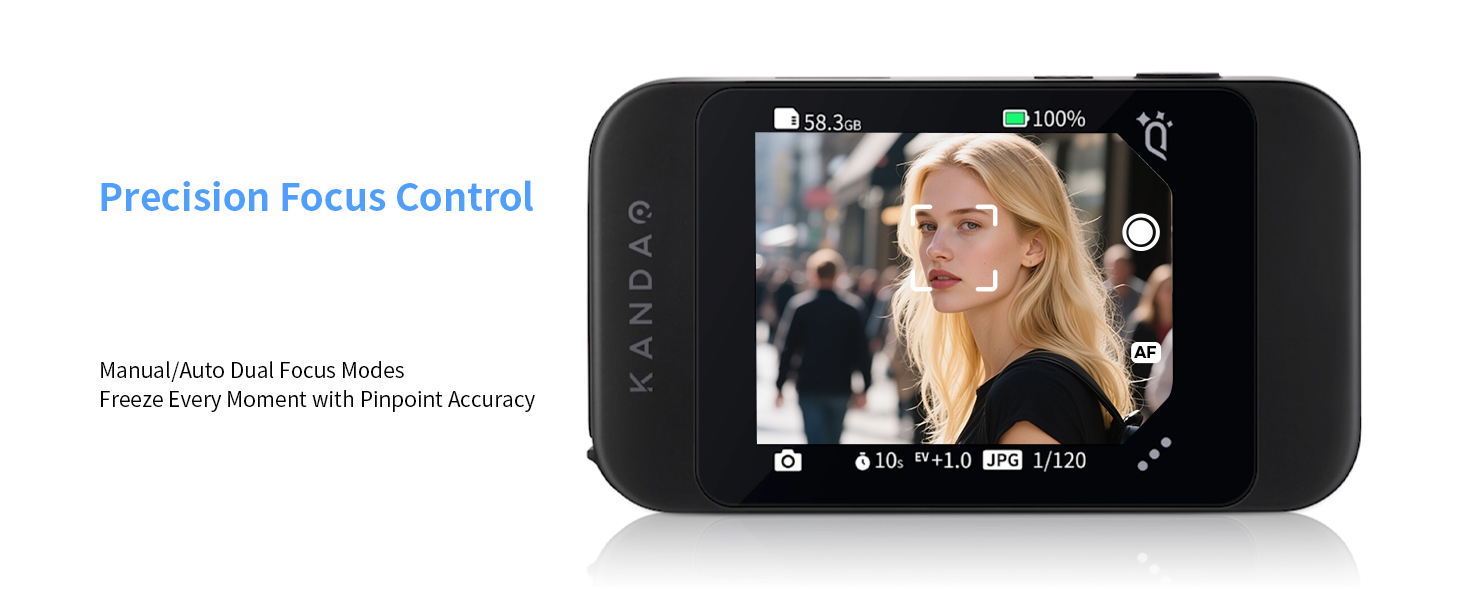
Image: The QooCam EGO camera positioned in front of a person wearing an Apple Vision Pro, highlighting its seamless integration for spatial content creation.
5. Vedligeholdelse
5.1. Rengøring af kameraet
Regular cleaning helps maintain optimal performance and image quality. Use the provided lens cleaning cloth to gently wipe the camera lenses and screen. For the camera body, use a soft, dry cloth. Avoid using harsh chemicals or abrasive materials.
5.2. Batteripleje
To prolong battery life, avoid exposing the camera to extreme temperatures. If storing the camera for an extended period, ensure the battery is partially charged (around 50%) and recharge it every few months.
5.3. Opbevaring
When not in use, store the QooCam EGO in its provided storage bag in a cool, dry place, away from direct sunlight and moisture. This protects the camera from dust and potential damage.
6. Fejlfinding
If you encounter issues with your QooCam EGO, please refer to the following common troubleshooting steps:
| Problem | Mulig årsag | Løsning |
|---|---|---|
| Kameraet tænder ikke. | Lavt batteri; batteriet er ikke isat korrekt. | Oplad batteriet helt. Sørg for, at batteriet er isat korrekt. |
| Cannot record photos/videos. | Intet Micro SD-kort; SD-kortet er fuldt eller beskadiget. | Insert a Micro SD card. Delete unnecessary files or format the card (backup data first). Try a different SD card. |
| 3D viewer display is blurry. | Viewer not attached correctly; dirty lenses/screen. | Ensure the magnetic viewer is securely attached. Clean the camera lenses and viewer screen with the provided cloth. |
| Wi-Fi connection issues with APP. | Incorrect password; camera too far from device; interference. | Double-check Wi-Fi password. Move closer to the camera. Restart both camera and device. |
For more detailed troubleshooting or issues not listed here, please refer to the official KanDao QooCam EGO User Manual (PDF) eller kontakt kundesupport.
7. Specifikationer
| Feature | Detalje |
|---|---|
| Modelnummer | QG7018 |
| Foto opløsning | 8000x3000 (24MP) |
| Video opløsning | 3840x1080 @ 60FPS |
| Lens Distance | 65 mm |
| Fotosensorteknologi | CMOS |
| Maksimal blænde | 1.8 f |
| Flash-hukommelsestype | Micro SD |
| Videooptagelsesformat | MP4 |
| Understøttet lydformat | AAC(16bit/dual track/48KHz) |
| Skærmstørrelse | 2.54 tommer |
| Forbindelsesteknologi | USB, Wi-Fi |
| Varens vægt | 1.26 pund (ca. 570 g) |
| Batteritype | 1 LR44 batteri (medfølger) |
8. Garanti og support
8.1. Garantioplysninger
The KanDao QooCam EGO typically comes with a 12-month / 1-year warranty from the date of purchase. Please retain your proof of purchase for warranty claims. Extended protection plans may also be available for purchase.
8.2. Kundesupport
For technical assistance, product inquiries, or warranty service, please contact KanDao customer support. KanDao is committed to providing quick responses and technical support to ensure a satisfactory user experience.
- Officiel Webwebsted: Besøg KanDao Store on Amazon for produktinformation og supportressourcer.
- Firmware optimering: KanDao regularly releases firmware updates to improve camera performance and add new features. Check the official website or QooCam APP for the latest updates.


Image: Icons representing KanDao's commitment to quick response, 1-year warranty, technical support, and firmware optimization.


