1. Introduktion
This instruction manual provides comprehensive guidance for the proper installation, operation, and maintenance of your MAXSafes Biometric Gun Safe, Model 10001V. Please read this manual thoroughly before using the safe to ensure optimal performance and security. Keep this manual for future reference.
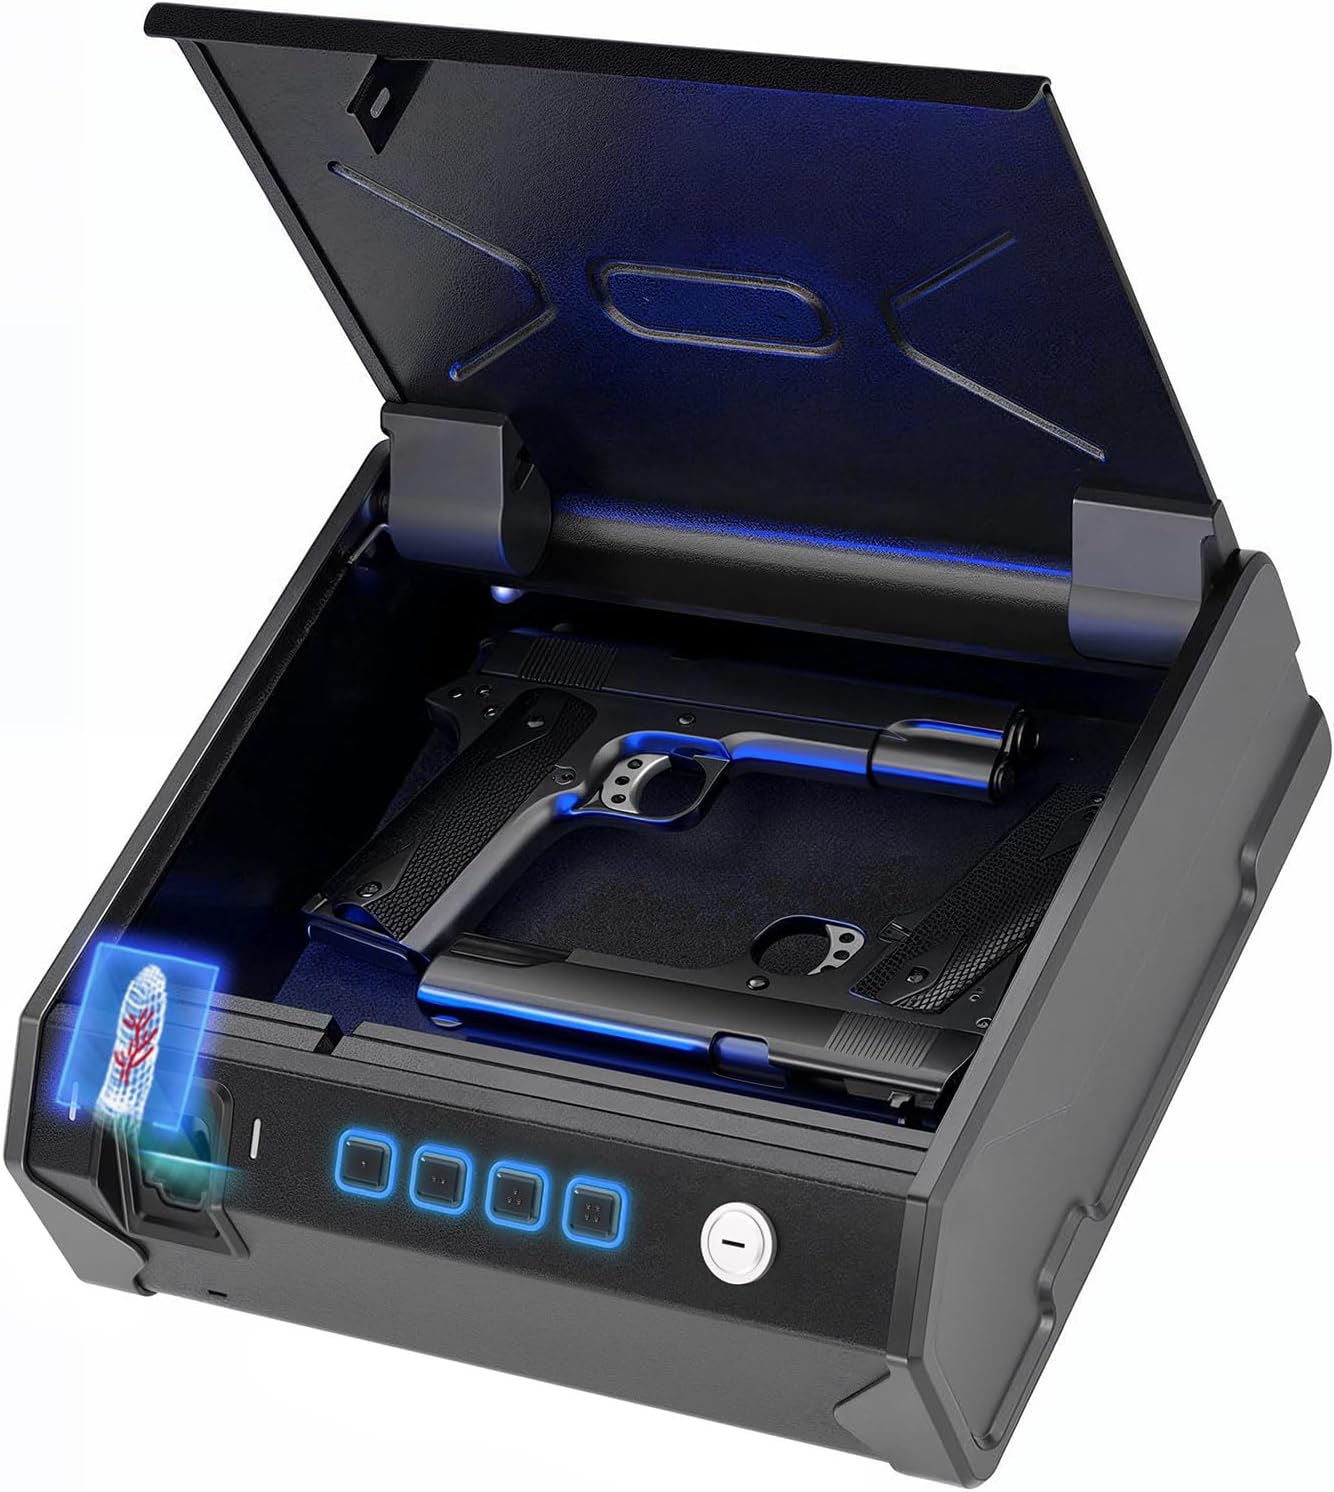
Image 1.1: MAXSafes Biometric Gun Safe, Model 10001V, with the lid open and a pistol stored inside. The biometric scanner and keypad are visible on the front panel.
2. Sikkerhedsoplysninger
- Opbevar altid skydevåben uladte og aflåste.
- Keep the safe locked and keys stored in a secure location, away from children and unauthorized individuals.
- Do not store ammunition inside the safe with firearms.
- Sørg for, at pengeskabet er sikkert monteret for at forhindre uautoriseret fjernelse.
- Never share your access codes or registered finger vein data with unauthorized persons.
3. Produktet er slutview
3.1 Nøglefunktioner
- Advanced Finger Vein Recognition: Provides secure and quick access, unaffected by sweaty, wet, oily, or damaged fingers.
- Kraftig konstruktion: Crafted from 16-gauge carbon steel housing and a robust 16-gauge pry-resistant door.
- Quick-Access Auto Open Lid: Allows swift and secure access to contents.
- Flere adgangsmetoder: Finger vein, keypad, and backup key.
- Rummeligt interiør: Designed to accommodate up to two full-size handguns.
- Monteringsmuligheder: Easily mountable to nightstands, desks, or inside vehicles using pre-drilled holes and included security cable.
- Alarmsystem: Anti-theft alarm feature.
- Indvendigt lys: Sensor light for visibility in low-light conditions.
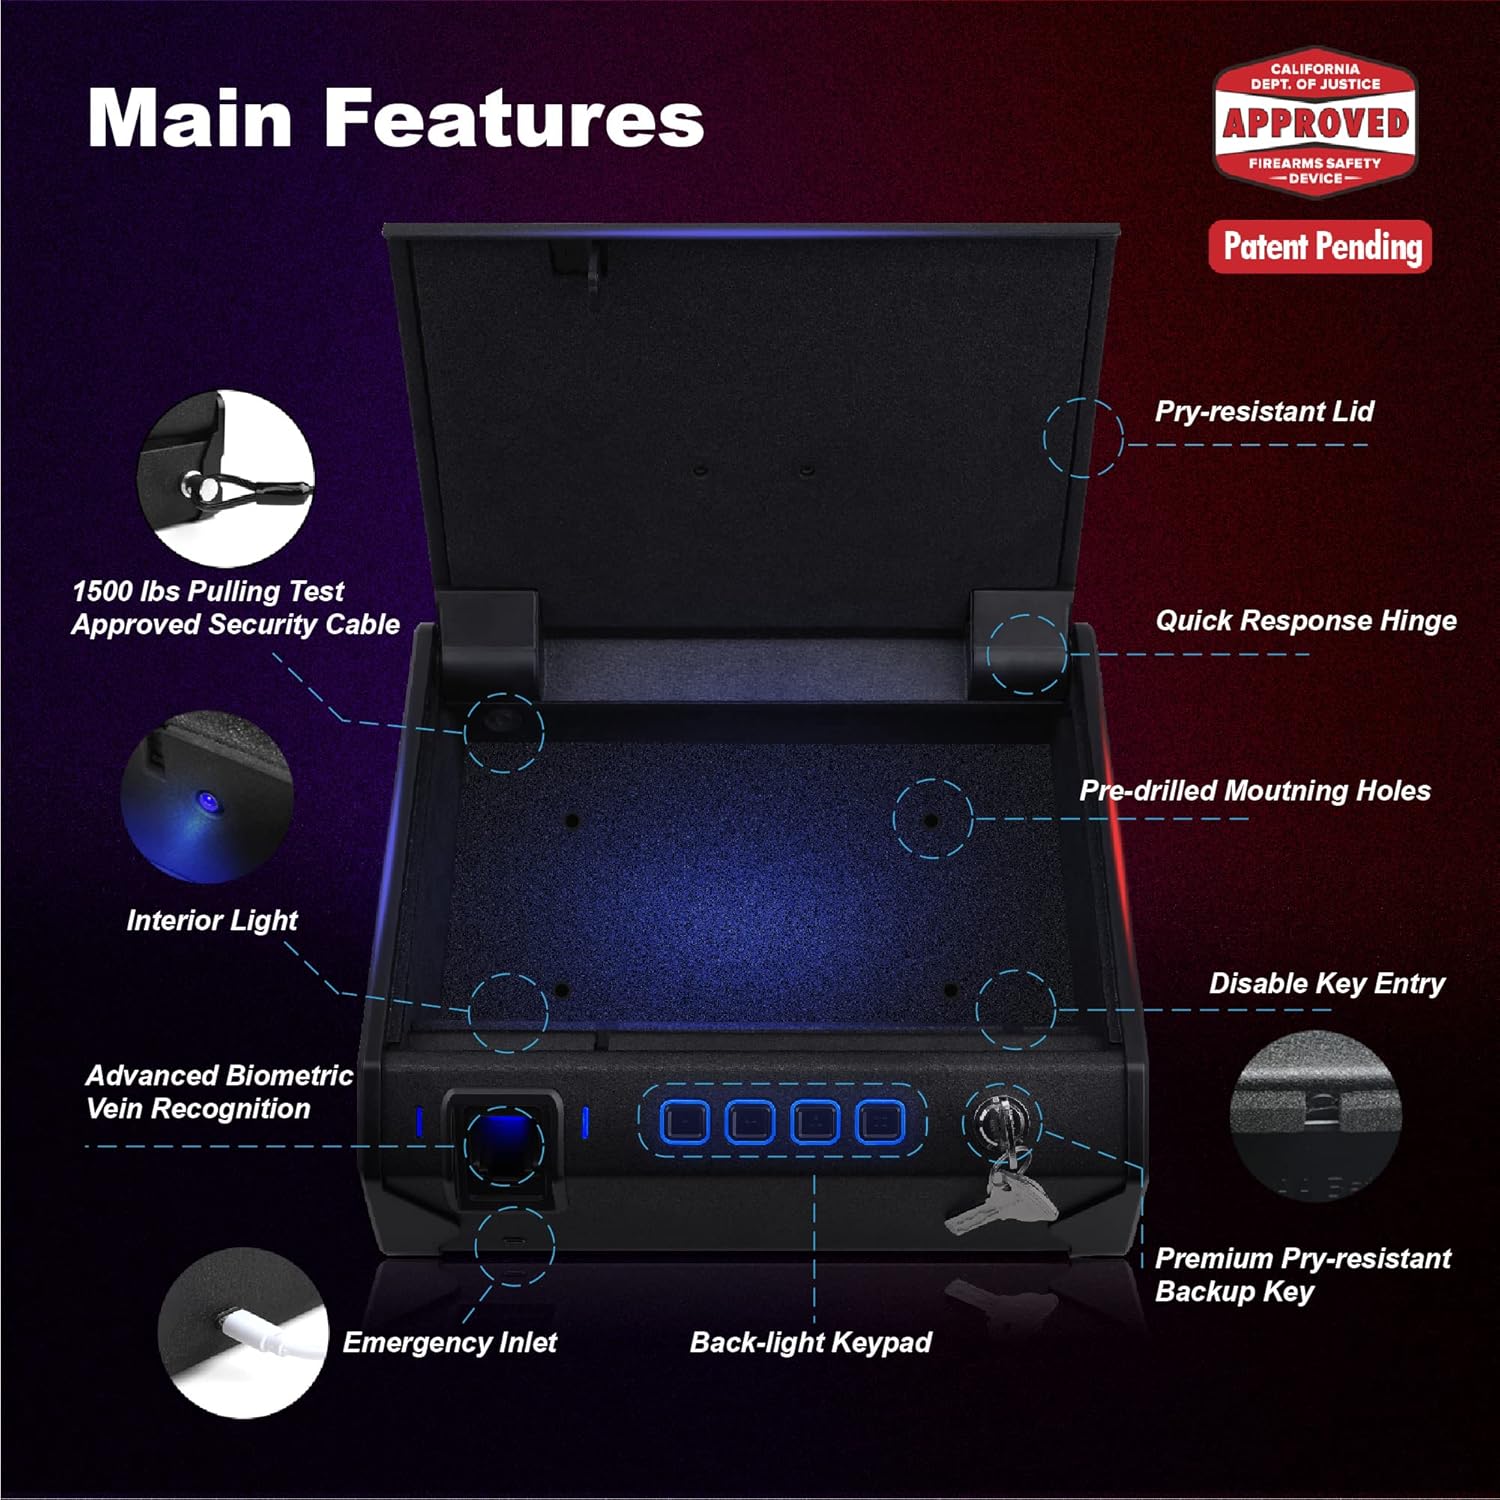
Image 3.1: Diagram illustrating the main features of the safe, including the pry-resistant lid, quick response hinge, pre-drilled mounting holes, interior light, advanced biometric vein recognition, emergency inlet, back-light keypad, and premium pry-resistant backup key.
3.2 Medfølgende komponenter
- MAXSafes Biometric Gun Safe
- Backup nøgler (2)
- Interior Leather Pad
- Monteringsskruer (4)
- Sikkerhedskabel
- Brugermanual

Image 3.2: The safe is displayed with its exterior and interior dimensions, along with all included accessories: backup keys, interior leather pad, mounting screws, security cable, and user manual.
4. Opsætning
4.1 Batteriinstallation
- Locate the battery compartment on the underside or rear of the safe.
- Åbn batterirummets dæksel.
- Isæt 4 AA-batterier (medfølger ikke), og sørg for korrekt polaritet (+/-).
- Luk batterirummets dæksel forsvarligt.
4.2 Initial Finger Vein Registration
The safe utilizes finger vein recognition for enhanced security. It is recommended to register multiple fingers and scan each finger several times from slightly different angles to improve recognition accuracy.
- With the safe open, press and hold the registration button (refer to Image 3.1 for location) until the indicator light changes.
- Place your finger flat and fully into the finger vein scanner. Ensure your finger is positioned correctly as shown in Image 4.1.
- The indicator light will confirm a successful scan. Remove your finger.
- Repeat the scanning process for the same finger 3-5 times, slightly adjusting the angle each time, to create a robust vein pattern profile.
- Repeat steps 2-4 for any other fingers you wish to register. The safe can store up to 50 finger vein IDs.
- Press the registration button again to exit registration mode.

Image 4.1: Correct finger placement for optimal vein recognition. The finger should be placed flat and fully into the scanner.

Billede 4.2: Eks.amples of incorrect finger placement that may lead to failed vein recognition.
4.3 Opsætning af tastaturkode
- With the safe open, press the registration button.
- Indtast din ønskede 4-8-cifrede kode på tastaturet.
- Press the '#' button to confirm.
- Re-enter the same code and press '#' again to verify.
- The indicator light will confirm successful code registration.
5. Betjeningsvejledning
5.1 Opening with Finger Vein Recognition
- Place a registered finger flat and fully into the finger vein scanner.
- If the vein pattern is recognized, the safe lid will automatically open.

Image 5.1: Visual representation of the finger vein recognition technology identifying a registered vein pattern.
The finger vein recognition system is designed to function reliably even with hands that are wet, dirty, or oily, or if the skin is damaged. This ensures consistent access under various conditions.

Image 5.2: The finger vein scanning technology maintains functionality even when exposed to water, dirt, or grease.
5.2 Opening with Keypad
- Enter your registered 4-8 digit code on the keypad.
- Press the '#' button.
- If the code is correct, the safe lid will automatically open.
5.3 Åbning med nødnøgle
In case of battery failure or forgotten codes, the safe can be opened using the backup keys.
- Locate the keyhole on the front panel of the safe.
- Insert one of the backup keys into the keyhole.
- Turn the key clockwise to unlock the safe. The lid will open manually.
The safe features a unique key texture designed to increase the difficulty of key duplication, enhancing security.

Image 5.3: The unique texture of the backup key, designed to prevent unauthorized duplication.
5.4 Nødstrøm
If the batteries are completely depleted, the safe can be temporarily powered using a Micro USB cable connected to an external power source (e.g., power bank, USB wall adapter). This allows you to open the safe using your registered finger vein or keypad code.

Image 5.4: The Micro USB emergency power inlet, allowing the safe to be powered externally when batteries are low or depleted.
6. Monteringsvejledning
The MAXSafes Biometric Gun Safe can be mounted to various surfaces such as nightstands, desks, or inside vehicles.
- Choose a Secure Location: Select a stable and discreet location for mounting.
- Utilize Pre-Drilled Holes: The safe features pre-drilled mounting holes on its base. Position the safe and mark the drilling points on the desired surface.
- Fastgør med skruer: Use the provided mounting screws to firmly attach the safe to the surface. Ensure the screws are tightened securely.
- Use Security Cable (Optional but Recommended): For additional security, especially in vehicles or when mounting to less robust surfaces, thread the included security cable through the designated anchor point on the safe and secure it to a fixed object.

Billede 6.1: Eks.amples of the safe mounted in different environments, including a nightstand, desk, car, and living room shelf.
7. Vedligeholdelse
- Udskiftning af batteri: Replace batteries annually or when the low battery indicator activates. Always use 4 new AA alkaline batteries.
- Rensning: Wipe the exterior of the safe with a soft, dry cloth. Avoid using abrasive cleaners or solvents.
- Finger Vein Scanner: Keep the finger vein scanner clean and free of debris for optimal performance.
8. Fejlfinding
| Problem | Mulig årsag | Løsning |
|---|---|---|
| Finger vein recognition fails consistently. | Incorrect finger placement; insufficient registration scans; finger conditions (though less common with vein tech). | Ensure finger is placed flat and fully into the scanner. Re-register the finger, scanning multiple times from slightly different angles. |
| Tastaturet reagerer ikke. | Low batteries; incorrect code entry. | Replace batteries. Ensure correct code is entered. |
| Pengeskabet åbner ikke. | Low batteries; system error. | Replace batteries. Use emergency key or Micro USB emergency power. |
| Alarmen lyder uventet. | Multiple failed access attempts; tampering detected. | Open the safe using a valid method (finger vein, keypad, or key) to silence the alarm. |
9. Specifikationer
| Feature | Detalje |
|---|---|
| Mærke | MAXSafes |
| Modelnummer | 10001V |
| Udvendige mål (D x B x H) | 10.6 cm x 13 cm x 4 cm |
| Låsetype | Biometric (Finger Vein), Key, Key Pad |
| Materiale | Kulstofstål |
| Varens vægt | 13.37 pund |
| Strømkilde | 4 x AA batterier (medfølger ikke) |
| Særlige funktioner | Alarm System, Anti-Theft, Biometric Finger Vein, Portable, Sensor Light |
| Monteringstype | Fritstående, Bordplade |
| UPC | 769838056978 |
10. Garanti og support
MAXSafes offers a 30-day money-back guarantee, a 12-month warranty, and lifetime technical support for the Biometric Gun Safe, Model 10001V. For warranty claims or technical assistance, please contact MAXSafes customer support.


