1. Introduktion
The Pelsee P12 Mirror Dash Cam is an advanced automotive recording system designed to enhance driving safety and provide reliable evidence in case of incidents. This device integrates a 12-inch full touch display, dual cameras (front 1440P and rear), GPS tracking, voice control, and various driver assistance features. This manual provides detailed instructions for installation, operation, maintenance, and troubleshooting to ensure optimal performance of your Pelsee P12 dash cam.
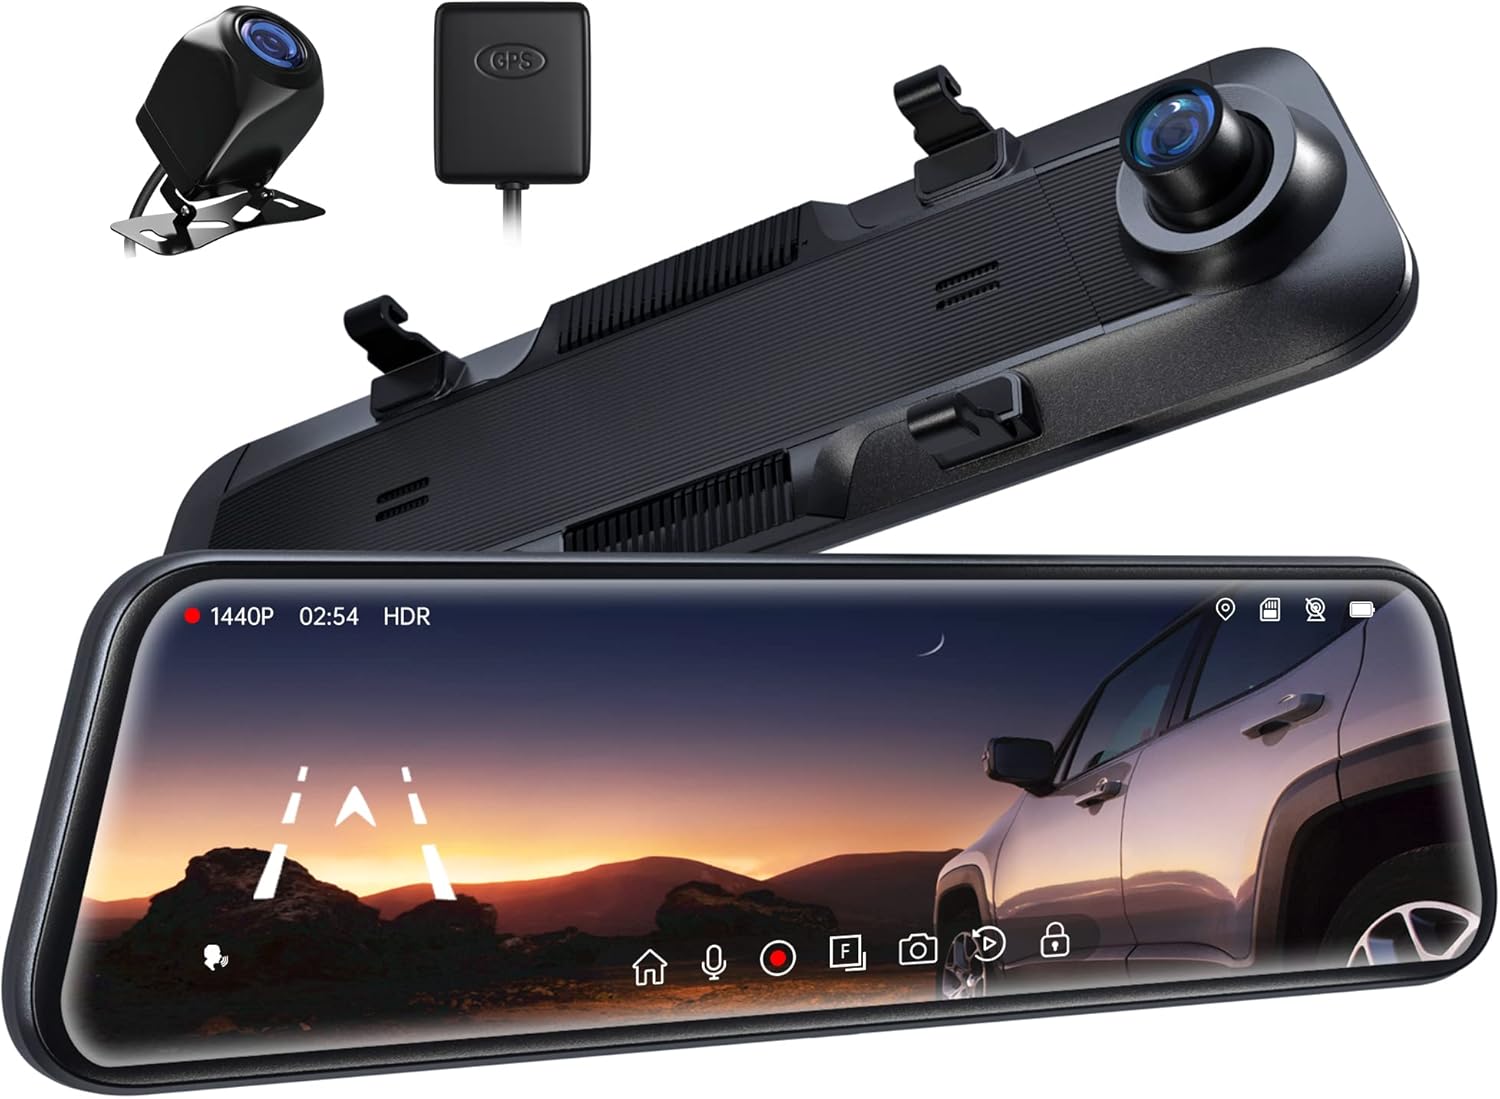
Figure 1.1: Pelsee P12 Mirror Dash Cam components including the main mirror unit, rear camera, and GPS module.
2. Produktet er slutview
2.1 Pakkens indhold
- Pelsee P12 Mirror Dash Cam Unit
- Bagkamera
- GPS modul
- Strømkabel (Type-C)
- Forlængerkabel til bagkamera
- Monteringsstropper/-bånd
- Brugermanual
2.2 Enhedslayout
Familiarize yourself with the various ports and components of the Pelsee P12 dash cam.
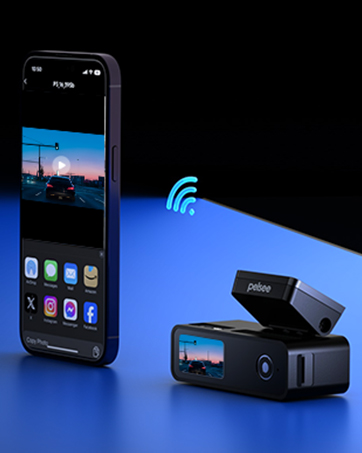
Figure 2.1: Main unit ports including Type-C power input, TF (MicroSD) card slot, GPS interface, and AV-IN for the rear camera.
- Type-C port: Til strømtilførsel og dataoverførsel.
- TF-kortslot: Insert MicroSD card for video storage.
- GPS-grænseflade: Connect the external GPS module.
- AV-IND: Connect the rear camera cable.
3. Opsætning og installation
3.1 Montering af Mirror Dash Cam
- Secure the Pelsee P12 unit over your vehicle's existing rearview mirror using the provided rubber mounting straps/bands. Ensure the unit is firmly attached and does not obstruct your view or the vehicle's original mirror buttons.
- Adjust the dash cam's front lens to ensure it captures the road ahead clearly without obstruction from the vehicle's original mirror or sun visor.
3.2 Installation af bagkameraet
- Determine the optimal mounting location for the rear camera, typically above the license plate or inside the rear window. Ensure the camera has a clear, unobstructed view.
- Route the rear camera cable from the mounting location to the main dash cam unit. Carefully tuck the cable along the vehicle's headliner, A-pillar, and dashboard to conceal it.
- Tilslut bagkamerakablet til AV-IN-porten på hovedenheden.
- For reversing assistance, connect the red wire from the rear camera cable to your vehicle's reverse light power wire. This enables automatic display of the rear view with parking guidelines when shifting into reverse.
3.3 Tilslutning af GPS-modulet
- Attach the GPS module to the vehicle's windshield, ideally in an area with a clear view af himlen for at sikre optimal signalmodtagelse.
- Connect the GPS module cable to the GPS Interface port on the main unit.
3.4 Power Connection and MicroSD Card
- Connect the provided Type-C power cable to the dash cam's Type-C port and plug the other end into your vehicle's 12V power outlet (cigarette lighter socket).
- Insert a high-speed MicroSD card (Class 10 or higher, up to 256GB recommended) into the TF Card slot. Ensure the card is inserted correctly until it clicks into place.
- Upon first use, or if experiencing recording issues, format the MicroSD card directly on the dash cam unit via the settings menu.
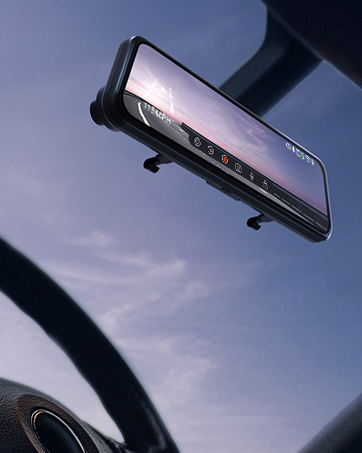
Figure 3.1: The Pelsee P12 mirror dash cam installed in a vehicle, providing a wide view af vejen.
4. Betjeningsvejledning
4.1 Grundlæggende betjening
- Tænd/sluk: The device automatically powers on and begins recording when the vehicle's ignition is turned on. It powers off automatically when the ignition is turned off.
- Skærm til/fra: Tap the screen to turn it on or off. You can also set an automatic screen-off timer in the settings to use the device as a traditional rearview spejl.
- Berøringsskærmgrænseflade: The 12-inch full touch display allows for intuitive navigation through menus and settings. Swipe gestures can be used to adjust camera views (front, rear, split screen) and screen brightness.

Figure 4.1: The 12-inch full touch display offers 1440P resolution with HDR for clear image capture.
4.2 Optagelsestilstande
- Loop-optagelse: Dashcam'et optager kontinuerligt video i korte segmenter (f.eks. 1, 3 eller 5 minutter). Når hukommelseskortet er fuldt, vises det ældste ulåste kort. files are automatically overwritten to ensure continuous recording.
- G-Sensor (Emergency Capture): Den indbyggede G-sensor registrerer pludselige stød eller kollisioner. Når den udløses, låser den automatisk det aktuelle videosegment og forhindrer det i at blive overskrevet af loop-optagelse. Disse låste files gemmes i en separat mappe.
- Time-lapse-optagelse: This feature compresses long periods of recording into short, viewable videos, saving storage space and allowing for quick review of extended events.

Figure 4.2: The G-sensor automatically detects collisions and locks video footage.

Figure 4.3: Loop recording ensures continuous operation by overwriting the oldest files.
4.3 Avancerede funktioner
- Stemmestyring: Command the dash cam hands-free for safer driving. Common commands include:
- "Start Recording"
- "Stop Recording"
- "Take Picture"

Figure 4.4: AI Voice Control allows hands-free operation for increased safety.
- GPS-sporing: The external GPS module accurately records your vehicle's location, speed, and driving route. This data can be viewed using a dedicated GPS player on a computer, providing crucial information in case of an accident.

Figure 4.5: GPS tracking provides detailed route and speed information.
- 24-timers parkeringsovervågning: With an optional ACC hardwire kit (sold separately), the dash cam can monitor your vehicle for impacts even when parked. If a collision is detected, it will automatically record a short, locked video.

Figure 4.6: The 24H Parking Monitor provides surveillance when your vehicle is parked.
- ADAS Collision Avoidance Technology: The Advanced Driver-Assistance System detects nearby obstacles and provides alerts for safer driving. This includes:
- Forlæns kollision advarsel
- Advarsel mod fodgængerkollision
- Advarsel om vognbaneskift
- Headway Monitoring
- Forward Movement Detection
- BSD Algorithm (Blind Spot Detection): Intelligent blind spot detection warns of potential collisions by monitoring dangerous blind spot areas, particularly when changing lanes or reversing.
- Reverse Parking Assistance: When the vehicle is in reverse, the dash cam displays the rear camera view with adjustable parking guidelines, assisting with precise parking maneuvers. The screen can be swiped to adjust the view.

Figure 4.7: Reverse parking assistance with guidelines for easier maneuvering.
- HDR-teknologi: High Dynamic Range technology minimizes glare and overexposure from bright lights (e.g., headlights, sunlight), ensuring clear video capture in various lighting conditions, especially at night.

Figure 4.8: Ultra Clear Night Vision with anti-glare technology for enhanced visibility.

Figure 4.9: HDR technology optimizes image quality in varying light conditions.
5. Vedligeholdelse
- Rensning: Use a soft, dry cloth to clean the dash cam screen and lenses. Avoid using abrasive cleaners or solvents that could damage the surfaces.
- Vedligeholdelse af microSD-kort: Regularly format the MicroSD card (at least once a month) through the dash cam's settings menu. This helps prevent data corruption and ensures optimal recording performance. Back up any important files før formatering.
- Firmwareopdateringer: Check the official Pelsee website periodically for firmware updates. Updates can improve performance, add new features, or resolve known issues. Follow the provided instructions carefully when updating firmware.
- Temperaturovervejelser: Avoid exposing the dash cam to extreme temperatures for prolonged periods. If the vehicle is parked in direct sunlight, consider removing the dash cam or using a sunshade to prevent overheating.
6. Fejlfinding
This section addresses common issues you might encounter with your Pelsee P12 dash cam.
- Dash Cam tænder ikke:
- Ensure the power cable is securely connected to both the dash cam and the vehicle's 12V power outlet.
- Check the vehicle's 12V power outlet for functionality.
- Verify the vehicle's ignition is on (if not hardwired for constant power).
- Recording Issues (e.g., not recording, freezing):
- Ensure a high-speed (Class 10 or higher) MicroSD card is inserted correctly.
- Format the MicroSD card via the dash cam's settings.
- Prøv et andet MicroSD-kort for at udelukke kortfejl.
- Kontroller om loop-optagelse er aktiveret.
- Poor Video Quality (blurry, dark, overexposed):
- Rengør kameralinserne.
- Sørg for, at beskyttelsesfilmen er fjernet fra linserne.
- Adjust exposure settings in the menu if available.
- Verify HDR is enabled for challenging lighting conditions.
- GPS-signal ikke fundet:
- Ensure the GPS module is connected and mounted in an area with a clear view of the sky (e.g., dashboard, windshield).
- Flyt køretøjet til et åbent område væk fra høje bygninger eller tæt bevoksning.
- Stemmestyring reagerer ikke:
- Tal tydeligt og direkte mod dashcam'et.
- Reducer baggrundsstøj i køretøjet.
- Sørg for, at stemmestyringsfunktionen er aktiveret i indstillingerne.
- Original Mirror Buttons Blocked by Mounting Bands:
- Adjust the position of the rubber mounting bands to avoid obstructing critical buttons on your vehicle's original rearview spejl.
- Bagkamera View Appears Zoomed In or Narrow:
- Ensure the rear camera is mounted correctly and not upside down, as image flipping may not be supported.
- De viewing angle is fixed; ensure the camera is positioned to capture the desired area.
- Screen On/Off Button Malfunction:
- Utilize the automatic screen-off timer feature in the settings to minimize manual button presses.
- Potential Car Battery Drain (when parked):
- If using the 24H Parking Monitor, an ACC hardwire kit is required to prevent draining the car battery. Without it, unplug the dash cam when the vehicle is off for extended periods.
7. Specifikationer
| Mærke | pelsee |
| Modelnavn | P12 |
| Produktdimensioner | 30.5 x 2 x 7.4 cm; 256 g |
| Videooptagelsesopløsning | 1440p (Forside) |
| Orientering | For & Bag |
| Type køretøjstjeneste | Bil, lastbil |
| Forbindelsesteknologi | USB |
| Særlige funktioner | Built-In GPS, Night Vision, Real 1440P + HDR, Voice Control, ADAS, BSD, Loop Recording, G-sensor, 24H Parking Monitor |
| Inkluderede komponenter | P12 Pro mirror dash cam, Rear Camera, GPS Module, Power Cable, Mounting Straps |
| Monteringstype | Bagview Spejlmontering |
| Farve | Sort |
| Batterier | 1 Lithium Metal batteri (medfølger) |
8. Garanti og support
Pelsee is committed to providing high-quality products and customer satisfaction.
- Free Return: 30 dage
- Penge-tilbage-garanti: 30 dage
- Garanti: 18 måneder
For technical support, warranty claims, or any inquiries, please contact us:
E-mail: support@pelsee.com

Figure 8.1: Pelsee's customer assurance and service information.


