1. Produktet er slutview
The ROCAM CR1002 DAB Digital Alarm Clock Radio is a versatile device designed for various environments such as bedrooms, offices, and kitchens. It features a unique spherical design and integrates multiple functions including DAB/DAB+/FM radio, dual alarms, a 7-color night light, and USB charging ports.
Nøglefunktioner omfatter:
- DAB/DAB+/FM Digital Radio for clear audio reception.
- Dual Alarm settings with adjustable volume and choice of buzzer, DAB, or FM tones.
- 7-Color Night Light for ambient lighting.
- Snooze function for additional sleep time.
- USB-A and USB-C charging ports for external devices.
- Justerbar skærmens lysstyrke.
- Sleep Timer funktion.
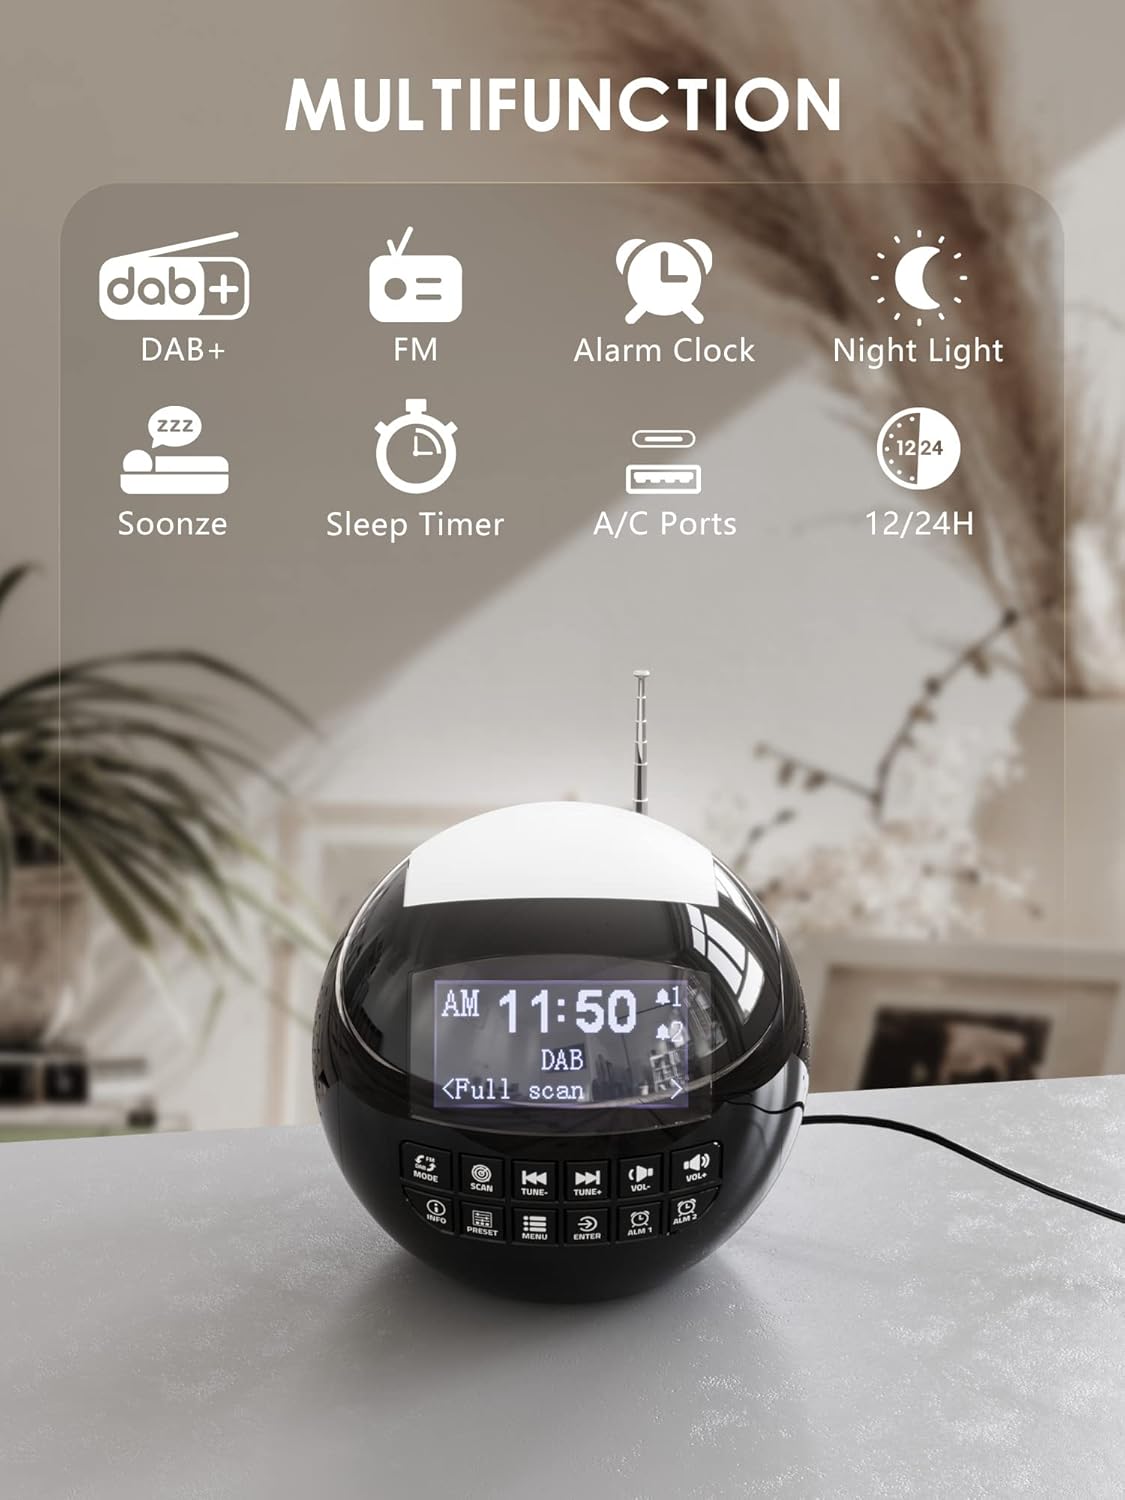
Billede 1.1: Overview of the ROCAM CR1002 DAB Digital Alarm Clock Radio highlighting its multifunction capabilities including DAB+, FM radio, alarm clock, night light, snooze, sleep timer, and USB-A/USB-C charging ports.
2. Sikkerhedsoplysninger
- Sørg for, at enheden er placeret på en stabil, flad overflade.
- Udsæt ikke enheden for vand, fugt eller ekstreme temperaturer.
- Undgå at blokere ventilationsåbninger.
- Use only the provided power adapter or a compatible one.
- Opbevares utilgængeligt for børn.
- Forsøg ikke selv at skille enheden ad eller reparere den. Kontakt kvalificeret servicepersonale.
3. Opsætning
3.1 Strømtilslutning
- Tilslut strømadapteren til DC IN-porten på bagsiden af vækkeuret.
- Plug the power adapter into a standard wall outlet (220 Volts).
- The device will power on and the display will illuminate.
3.2 Installation af backupbatteri
Sådan bevarer du tids- og alarmindstillinger under strømafbrydelsetage, installer backup-batterier.
- Find batterirummet i bunden af enheden.
- Åbn dækslet til rummet.
- Insert 2 "AAA" batteries (not included), ensuring correct polarity (+/-).
- Luk batterirummets dæksel forsvarligt.
3.3 Justering af antenne
Extend the telescopic antenna fully for optimal DAB/DAB+ and FM radio reception. Adjust its position for the best signal.
4. Betjeningsvejledning
4.1 Grundlæggende betjening
- Tænd/sluk: Tryk på MODE knappen for at tænde eller slukke for enheden.
- Lydstyrkejustering: Brug VOL- og VOL+ buttons to adjust the volume (levels 1-16).
- Skærmens lysstyrke: The display has 3 adjustable brightness levels. Refer to the menu settings for adjustment.
4.2 DAB/DAB+ radio
- Tryk på MODE knappen for at vælge DAB-tilstand.
- Tryk på SCAN button to perform an automatic scan for available DAB/DAB+ stations. The radio will store all found stations.
- Brug TUNE- og TUNE+ knapperne til at navigere gennem de gemte stationer.
- Trykke INFO til view stationsoplysninger (f.eks. programtype, signalstyrke).
- For at gemme en station som forudindstilling skal du trykke på og holde FORUDINDSTILLING knappen, og brug derefter TUNE-/TUNE+ for at vælge et forudindstillet nummer (1-10) og tryk på ENTER for at bekræfte.
- For at genkalde en forudindstilling skal du trykke på FORUDINDSTILLING knappen kort, og brug derefter TUNE-/TUNE+ to select the desired preset and press ENTER.

Image 4.1: The radio in DAB mode, showing the "Full scan" process to find and store available digital radio stations.
4.3 FM radio
- Tryk på MODE knappen for at vælge FM-tilstand.
- Tryk og hold på SCAN button to automatically scan for FM stations. The radio will stop at the next strong signal.
- Alternativt kan du bruge TUNE- og TUNE+ knapper til manuel indstilling.
- Saving and recalling FM presets follows the same procedure as DAB presets (Section 4.2).
4.4 Indstilling af alarmer
Enheden understøtter to uafhængige alarmer (Alarm 1 og Alarm 2).
- Tryk og hold enten ALM 1 or ALM 2 button to enter alarm setup.
- Bruge TUNE-/TUNE+ for at justere timetallet, og tryk derefter på ENTERGentag i flere minutter.
- Select the alarm source: Summer, DAB, eller FM. If DAB/FM is selected, choose a preset station. Press ENTER.
- Adjust the alarm volume (1-16) using TUNE-/TUNE+, og tryk derefter på ENTER.
- Select the alarm frequency: Once, Daily, Weekdays, or Weekends. Press ENTER for at bekræfte.
- For at aktivere/deaktivere en alarm skal du kort trykke på ALM 1 or ALM 2Et alarmikon vil vises/forsvinde på displayet.

Image 4.2: Illustration of the dual alarm function with customizable wake-up sounds (FM, DAB, or Buzzer).
4.5 Snooze -funktion
Når en alarm lyder, skal du trykke på den store SNOOZE/NIGHTLIGHT button on top to temporarily silence the alarm for 9 minutes. The alarm will sound again after this period.

Image 4.3: The snooze function in action, providing an additional 9 minutes of sleep.
4.6 Sleep Timer
Sleep-timeren gør det muligt for radioen at spille i et indstillet tidsrum, før den automatisk slukker.
- Tryk på MENU knap.
- Navigate to "Sleep Timer" using TUNE-/TUNE+ og tryk ENTER.
- Select a duration from 10 to 90 minutes. Press ENTER for at bekræfte.
4.7 Natlysfunktion
The device features a 7-color night light.
- Briefly press the large SNOOZE/NIGHTLIGHT button on top to cycle through the 7 colors or turn the night light off.
- The night light can be used independently of the alarm function.

Image 4.4: The night light feature illuminating the top of the alarm clock in blue, one of the seven available colors.
4.8 USB-opladningsporte
The alarm clock is equipped with a standard USB-A port and a USB-C port for charging external devices.
- Tilslut din enheds opladningskabel til enten USB-A- eller USB-C-porten på bagsiden af vækkeuret.
- Ensure the alarm clock is powered on and connected to a wall outlet for charging functionality.
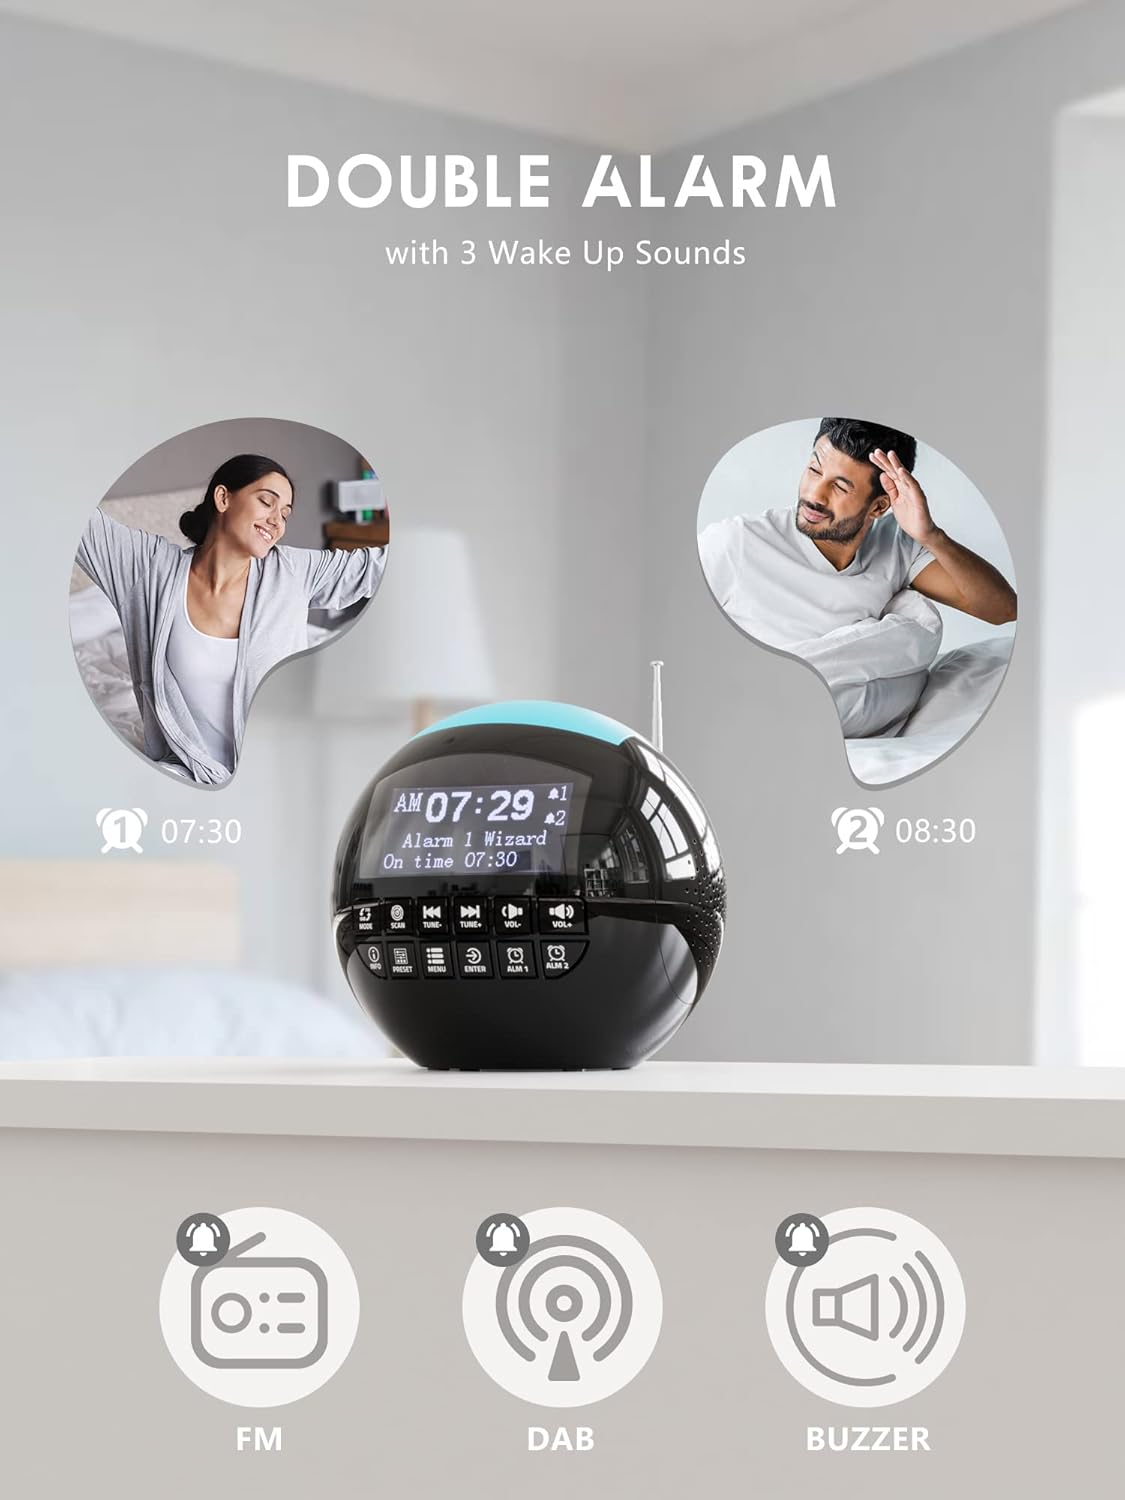
Image 4.5: The USB-A and USB-C charging ports in use, simultaneously charging a smartphone and wireless earbuds.
5. Vedligeholdelse
- Rensning: Tør enheden af med en blød, tør klud. Brug ikke slibende rengøringsmidler eller opløsningsmidler.
- Opbevaring: Hvis enheden opbevares i en længere periode, skal den afbrydes til strømmen og backupbatterierne fjernes.
6. Fejlfinding
| Problem | Mulig årsag | Løsning |
|---|---|---|
| Enheden tænder ikke. | Ingen strømtilslutning. | Sørg for, at strømadapteren er korrekt tilsluttet enheden og en fungerende stikkontakt. |
| Dårlig radiomodtagelse (DAB/FM). | Antennen er ikke strakt ud, eller signalet er dårligt i området. | Extend the telescopic antenna fully and adjust its position. Try moving the unit to a different location. Perform a full scan for DAB stations. |
| Alarmen lyder ikke. | Alarmen er ikke aktiveret, eller lydstyrken er for lav. | Check if the alarm icon is displayed. Ensure alarm volume is set to an audible level (1-16). Verify alarm time and frequency settings. |
| USB-opladning virker ikke. | Unit not powered or cable issue. | Ensure the alarm clock is connected to a wall outlet. Check the charging cable for damage and ensure it is properly connected to both the alarm clock and the external device. |
| Skærmen er for lys/mørket. | Lysstyrkeindstillingen skal justeres. | Adjust the display brightness through the menu settings. |
7. Specifikationer
| Feature | Detalje |
|---|---|
| Mærke | ROCAM |
| Modelnummer | CR1002 DAB |
| Farve | Sort |
| Dimensioner (L x B x H) | 15.9 x 3.81 x 16.2 cm |
| Vægt | 468 gram |
| Voltage | 220 volt |
| Materiale | Plast |
| Display Type | Digital |
| Særlige funktioner | Adjustable Brightness, Radio (DAB/DAB+/FM), Dual Alarm, 7-Color Night Light, USB-A & USB-C Charging Ports, Snooze, Sleep Timer |
| Strømkilde | Elektrisk med ledning |
| Backup batteri | 2 x AAA (medfølger ikke) |
8. Garanti og support
For warranty information or technical support, please refer to the documentation included with your purchase or contact ROCAM customer service through their official webwebstedet eller forhandleren, hvor produktet blev købt.
Please have your model number (CR1002 DAB) and purchase details ready when contacting support.


