1. Introduktion
Tak for købetasing the 4DRC V8 Mini Drone. This manual provides essential information for the safe operation, maintenance, and troubleshooting of your new drone. Please read this manual thoroughly before operating the drone to ensure proper use and to maximize your flying experience. This drone is designed for beginners and children, offering easy controls and stable flight characteristics.
2. Produktet er slutview
2.1 Pakkens indhold
- 4DRC V8 Mini Drone
- Fjernbetjening
- Rechargeable Lithium-Ion Batteries (2 included)
- USB opladningskabel
- Reserve propeller
- Brugermanual

Figure 2.1: Complete package contents of the 4DRC V8 Mini Drone.
2.2 Nøglefunktioner
- 720P HD-kamera: Real-time FPV (First Person View) video transmission for immersive flight.
- Nem kontrol: Features like Altitude Hold, Headless Mode, and One-Key Take-off/Landing simplify operation for beginners.
- Multifunctional Flight: Includes custom flight path (Trajectory Flight), 360° Flips, Gesture Control for selfies, and 3-speed settings.
- Forlænget flyvetid: Comes with two rechargeable batteries, providing up to 20 minutes of flight time.
- Sikkert og holdbart design: Propellers are protected by four frames, and the high-quality ABS shell protects against impacts.
- Tyngdekraftsinduktion: Allows control by tilting your smartphone.
3. Opsætning
3.1 Opladning af dronens batteri
- Tilslut dronens batteri til USB-opladerkablet.
- Plug the USB cable into a 5V/1A USB adapter (not included) or a computer USB port.
- Indikatorlampen på USB-kablet viser opladningsstatus (se kablets instruktioner for specifik opladningsfunktion).
- Opladning tager typisk cirka 60-90 minutter. Overoplades ikke.
3.2 Installation af dronebatteri
- Sørg for, at dronen er slukket.
- Carefully insert the charged battery into the battery compartment on the drone.
- Ensure the battery is securely latched to prevent dislodging during flight.
3.3 Installation af batterier i fjernbetjeningen
- Åbn batterirummet på bagsiden af fjernbetjeningen.
- Isæt 3 AAA-batterier (medfølger ikke) i henhold til polaritetsmarkeringerne (+/-).
- Luk batterirummet.
3.4 Propeller Installation/Replacement
The drone comes with pre-installed propellers. If replacement is needed:
- Identify the correct propeller type (A or B) by checking the marking on the propeller and the drone arm.
- Gently pull off the damaged propeller.
- Press the new propeller firmly onto the motor shaft, ensuring it is fully seated.
4. Betjeningsvejledning
4.1 Pairing the Drone with the Remote Controller
- Placer dronen på en flad, plan overflade.
- Tænd dronen. Dronens indikatorlamper vil blinke.
- Tænd for fjernbetjeningen.
- Push the left joystick (throttle) all the way up, then pull it all the way down. The drone's lights will stop flashing and become solid, indicating successful pairing.
4.2 One-Key Take-off and Landing
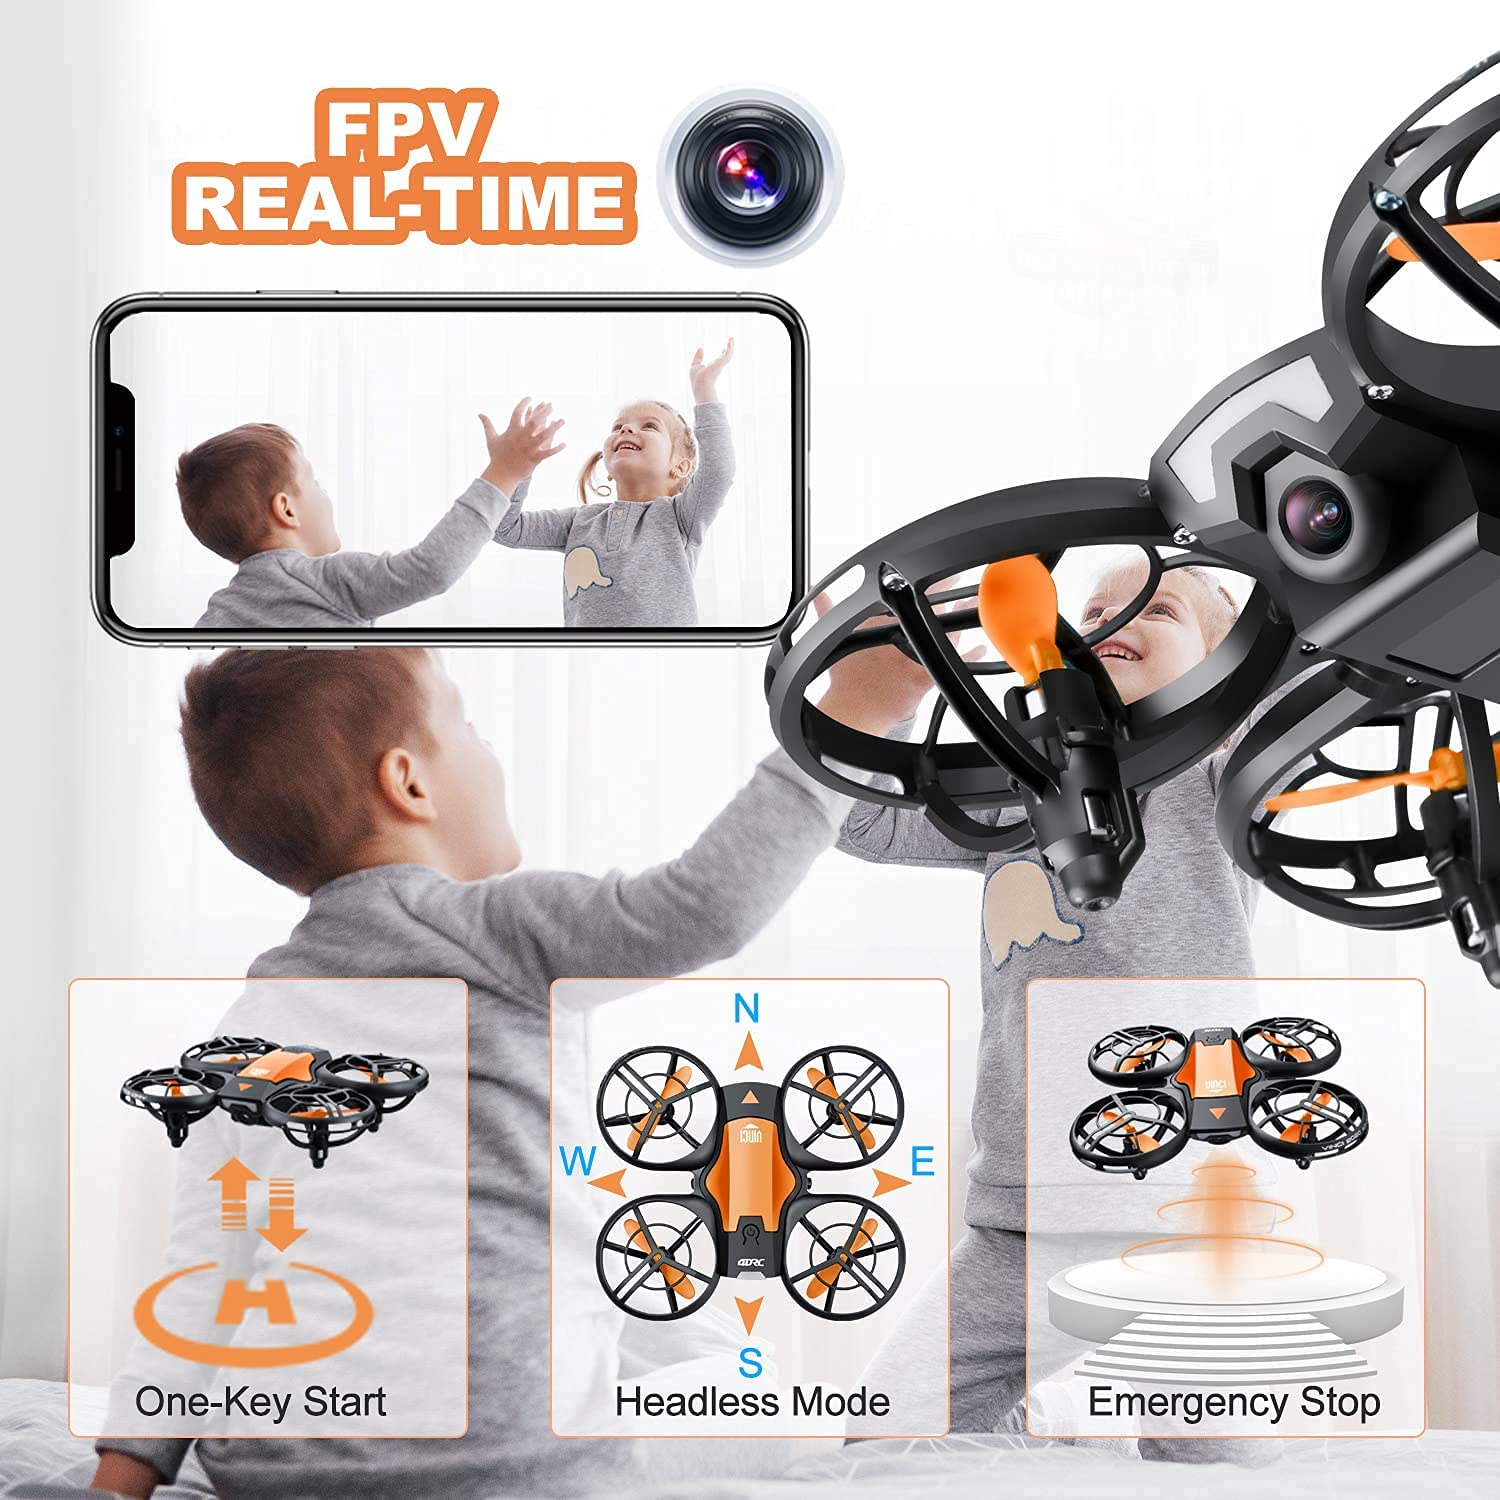
Figure 4.2: Visual representation of One-Key Start, Headless Mode, and Emergency Stop functions.
- Start: After pairing, press the One-Key Take-off button (usually indicated by an upward arrow or drone icon). The drone will automatically ascend to a stable hovering height.
- Landing: Press the One-Key Landing button (usually indicated by a downward arrow or drone icon). The drone will slowly descend and land automatically.
4.3 Grundlæggende flyvekontrol
| Kontrolpind | Handling | Drone Movement |
|---|---|---|
| Left Joystick (Throttle) - Up/Down | Push up/down | Stig op/ned |
| Left Joystick (Yaw) - Left/Right | Skub til venstre/højre | Drej til venstre/højre |
| Right Joystick (Pitch) - Up/Down | Push up/down | Fly Forward/Backward |
| Right Joystick (Roll) - Left/Right | Skub til venstre/højre | Fly Left/Right (Sideways) |
4.4 Hovedløs tilstand
In Headless Mode, the drone's orientation is irrelevant. The drone will move relative to the pilot's position. For example, pushing the right joystick forward will always make the drone fly away from the pilot, regardless of which way the drone's "head" (front) is facing.
- Aktivering: Press the Headless Mode button on the remote (refer to remote diagram if available). The drone will beep to confirm activation.
- Deaktivering: Press the Headless Mode button again.
4.5 360° vendinger

Figure 4.5: The drone executing a 360-degree flip maneuver.
To perform a 360° flip:
- Ensure the drone is flying at a sufficient height (at least 2-3 meters).
- Press the 360° Flip button (usually indicated by a circular arrow icon).
- Immediately push the right joystick in the desired flip direction (forward, backward, left, or right). The drone will perform a flip in that direction.
4.6 Trajectory Flight (Tap Fly)

Figure 4.6: Using the mobile application to set a custom flight path for the drone.
This feature allows you to draw a flight path on your smartphone screen, and the drone will automatically follow it.
- Download and install the 4DRC companion app (refer to packaging or quick start guide for QR code/app name).
- Connect your smartphone to the drone's Wi-Fi network (usually named "4DRC_XXXXXX").
- Open the app and select the Trajectory Flight mode.
- Draw your desired path on the screen. The drone will then fly along the specified route.
4.7 FPV Camera and App Usage

Figure 4.7: The 720P HD camera provides real-time FPV view to a connected smartphone.
The drone's 720P HD camera transmits live video to your smartphone via Wi-Fi.
- Ensure your smartphone is connected to the drone's Wi-Fi network.
- Open the 4DRC app. The live video feed from the drone's camera will appear on your screen.
- Use the app interface to take photos or record videos. Files are typically saved directly to your phone's gallery.
4.8 Nødstop
In case of an emergency or loss of control, press the Emergency Stop button on the remote controller. This will immediately cut power to the motors, causing the drone to fall. Use this function only when necessary to prevent damage or injury.
5. Sikkerhedsretningslinjer
- Brug altid dronen i åbne områder, væk fra mennesker, dyr, bygninger og forhindringer.
- Hold altid synslinjen i forhold til dronen.
- Flyv ikke i stærk vind, regn eller andre ugunstige vejrforhold.
- Hold fingre og hår væk fra roterende propeller.
- Sørg for, at batterierne er fuldt opladet før hver flyvning.
- Forsøg ikke at modificere eller adskille dronen eller dens komponenter.
- Hold opsyn med børn under droneoperation.
- Adhere to local regulations regarding drone usage.
6. Vedligeholdelse
- Rensning: Use a soft, dry cloth to clean the drone after each use. Avoid water or harsh chemicals.
- Propeller: Regularly inspect propellers for damage (bends, cracks). Replace damaged propellers immediately using the spare parts provided.
- Batterier: Store batteries in a cool, dry place. Do not store fully charged or completely depleted for long periods. Charge them periodically if not in use.
- Opbevaring: When not in use, store the drone and remote controller in a safe, dry place, away from direct sunlight and extreme temperatures.
7. Fejlfinding
| Problem | Mulig årsag | Løsning |
|---|---|---|
| Dronen reagerer ikke på fjernbetjeningen. | Not paired; low battery (drone/remote). | Re-pair the drone and remote; charge/replace batteries. |
| Drone driver afsted under flyvning. | Ikke kalibreret på en plan overflade; stærk vind. | Recalibrate the drone; fly in calm conditions. |
| Poor FPV video quality or no feed. | Weak Wi-Fi signal; app not connected. | Ensure strong Wi-Fi connection; restart app and drone. |
| Kort flyvetid. | Batteriet er ikke fuldt opladet; gammelt batteri. | Sørg for fuld opladning; overvej at udskifte batteriet, hvis det er gammelt. |
| Propellerne drejer ikke. | Obstruction; motor damage; low battery. | Check for obstructions; charge battery. If problem persists, contact support. |
8. Specifikationer
| Feature | Detalje |
|---|---|
| Mærke | 4DRC |
| Model | V8 Mini-drone |
| Kontroltype | Gesture control, Remote control |
| Maksimal rækkevidde | 120 fod |
| Materiale | ABS |
| Trådløs kommunikation | Wi-Fi |
| Batteritype | Lithium Ion |
| Flyvetid | Op til 20 minutter (med 2 batterier) |
| Produktdimensioner | 13L x 11W x 4H Centimeter |
| Varens vægt | 430 g |
9. Garanti og support
For warranty information or technical support, please refer to the contact details provided on the product packaging or the official 4DRC webwebstedet. Behold din købskvittering som købsbevis.


