1. Introduktion
This manual provides comprehensive instructions for the installation, operation, and maintenance of your Rampage ZUKO Metal Panel Gaming Case. Please read this manual carefully before using the product to ensure proper functionality and to prevent damage.
Rampage ZUKO is a gaming computer case designed for optimal performance and aesthetics. It features a robust metal panel construction, a tempered glass side panel, and comes equipped with a pre-installed 600W 80 Plus Bronze certified power supply and four LED fans for efficient cooling and visual appeal.
2. Sikkerhedsoplysninger
- Always disconnect the power supply from the wall outlet before performing any installation, maintenance, or cleaning procedures.
- Håndter de indvendige komponenter forsigtigt for at undgå skader forårsaget af elektrostatisk udladning (ESD). Overvej at bruge en antistatisk håndledsrem.
- Do not open the power supply unit (PSU) as it contains high voltage komponenter.
- Sørg for tilstrækkelig ventilation omkring kabinettet for at forhindre overophedning.
- Hold produktet væk fra vand, fugt og ekstreme temperaturer.
- Avoid placing heavy objects on the case.
3. Pakkens indhold
Bekræft at alle varer er til stede i pakken:
- Rampage ZUKO Gaming Case with pre-installed 600W 80 Plus Bronze PSU
- 4 x Pre-installed LED Fans (3 front, 1 rear)
- Tilbehørsæske (indeholder skruer, kabelbindere og andre små dele)
- Brugervejledning (dette dokument)
4. Produktet er slutview
Familiarize yourself with the key features and components of your Rampage ZUKO case.
4.1 Ekstern View

Rampage ZUKO case features a sleek design with a metal front panel and a tempered glass side panel, allowing for a clear view of internal components and LED lighting.
4.2 Frontpanel

The front panel incorporates a mesh design for optimal airflow, behind which three LED fans are mounted. The top I/O panel provides convenient access to essential ports and controls.
4.3 Øverste I/O-panel

Det øverste I/O-panel indeholder:
- Power knap
- Nulstil knap
- LED Control Button (for fan lighting)
- Hovedtelefonstik
- Mikrofon-stik
- 2 x USB 2.0 porte
- 1 x USB 3.0 port
4.4 Bagpanel

The rear panel features a pre-installed exhaust LED fan, multiple expansion slots for add-in cards, and the cutout for the integrated power supply unit.
4.5 Intern indretning
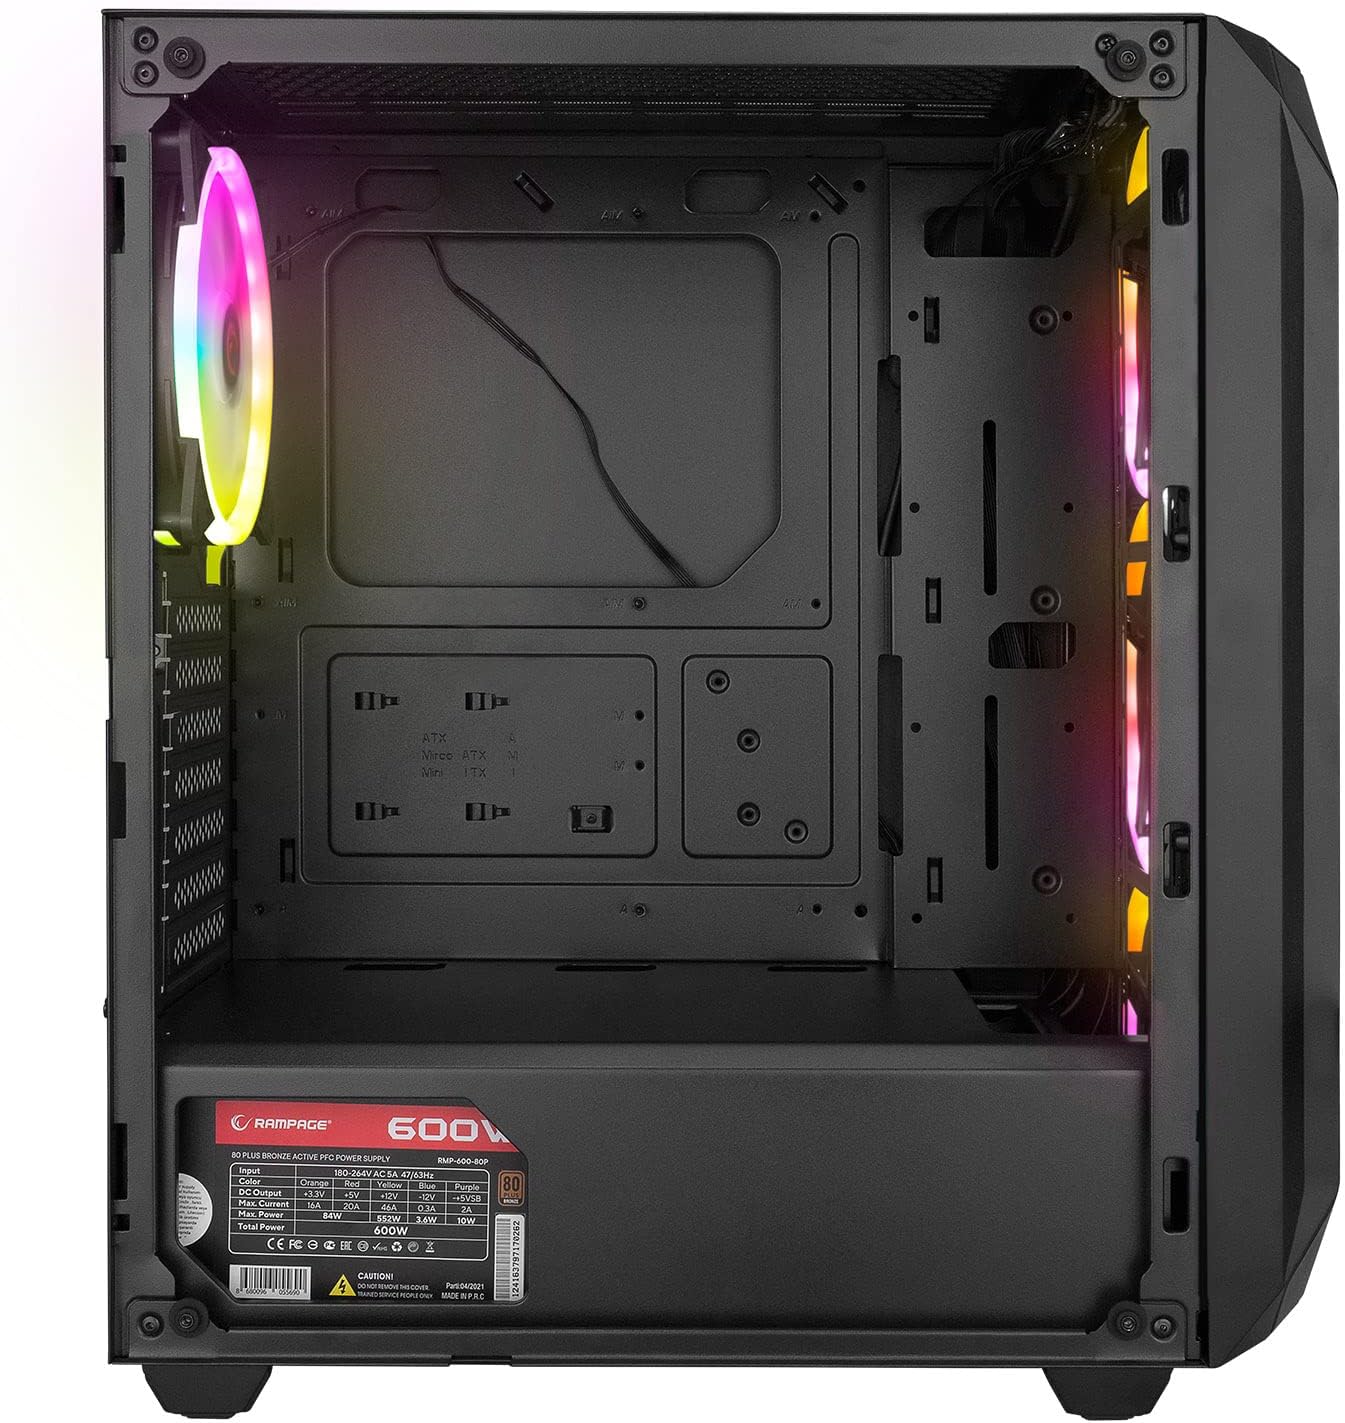
The interior provides ample space for standard ATX, Micro-ATX, and Mini-ITX motherboards, graphics cards, and storage drives. A dedicated shroud covers the power supply, aiding in a clean build and improved airflow.
4.6 Strømforsyningsenhed (PSU)
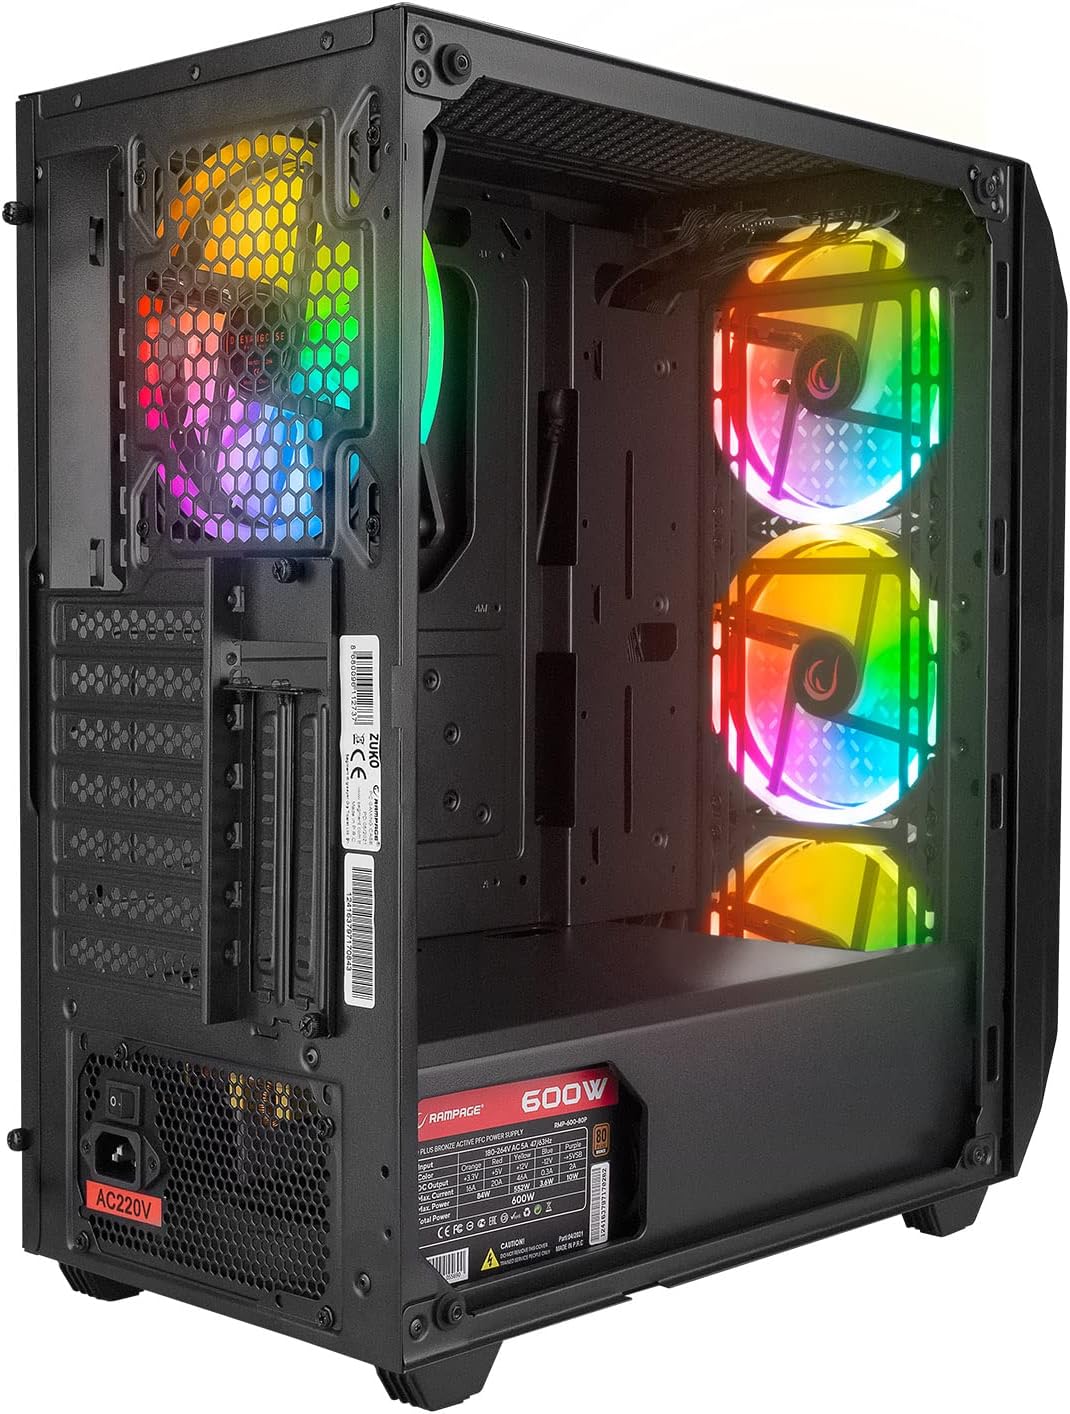
The case comes with a pre-installed 600W 80 Plus Bronze certified power supply, providing reliable and efficient power to your components.
5. Opsætning og installation
Follow these steps to install your computer components into the Rampage ZUKO case.
5.1 Forberedelse af sagen
- Placer etuiet på en flad, stabil overflade.
- Remove the tempered glass side panel by unscrewing the four thumb screws and carefully lifting it away. Place it on a soft, non-abrasive surface to prevent scratches.
- Remove the right-side metal panel by unscrewing the two thumb screws at the rear and sliding it backward.
5.2 Installation af bundkort
- Install the I/O shield (if not pre-installed on your motherboard) into the cutout at the rear of the case.
- Juster dit bundkort med afstandsstykkerne inde i kabinettet. Sørg for, at afstandsstykkerne passer til dit bundkorts formfaktor (ATX, Micro-ATX, Mini-ITX).
- Fastgør bundkortet med de medfølgende skruer.
5.3 Installation af lagerdrev
- Locate the 2.5" SSD/HDD mounting points behind the motherboard tray or in the PSU shroud area.
- Locate the 3.5" HDD drive cage (usually under the PSU shroud).
- Mount your storage drives using the appropriate screws.
5.4 Installation af grafikkort og udvidelseskort
- Fjern de nødvendige dæksler til udvidelsespladserne fra bagsiden af kabinettet.
- Indsæt dit grafikkort eller andre udvidelseskort i de tilsvarende PCIe-stik på dit bundkort.
- Fastgør kortene med skruer.
5.5 Kabelstyring
Utilize the cable routing holes and tie-down points behind the motherboard tray to manage cables. This improves airflow and aesthetics.
5.6 Connecting Front Panel Cables
Connect the front panel cables (Power SW, Reset SW, HDD LED, Power LED, USB 2.0, USB 3.0, HD Audio, and LED control button cable) to the corresponding headers on your motherboard. Refer to your motherboard manual for exact pin layouts.
6. Betjeningsvejledning
6.1 Tænd
- Ensure all components are correctly installed and all necessary power cables are connected.
- Connect the power cord to the PSU and then to a wall outlet.
- Sæt tænd/sluk-knappen på strømforsyningen i positionen 'ON'.
- Press the Power Button on the top I/O panel of the case.
6.2 LED Fan Control
Rampage ZUKO case includes pre-installed LED fans. Use the dedicated LED Control Button on the top I/O panel to cycle through available lighting modes or turn the LEDs on/off. Please note that some models may feature fixed LED colors or limited lighting patterns, as reported by some users. The functionality of the LED button depends on the specific fan controller integrated with the fans.
7. Vedligeholdelse
Regular maintenance helps ensure optimal performance and longevity of your computer case.
7.1 Rengøring af støvfiltre
The case is equipped with dust filters (e.g., on the top and under the PSU). Periodically remove and clean these filters to prevent dust buildup, which can restrict airflow and lead to overheating. Clean them with compressed air or by rinsing with water and allowing them to dry completely before reinstallation.
7.2 Generel rengøring
Tør ydersiden af kabinettet af med en blød, tør klud.amp cloth. Avoid using harsh chemicals or abrasive materials that could damage the finish or tempered glass. For internal cleaning, use compressed air to remove dust from components and fans.
8. Fejlfinding
Dette afsnit omhandler almindelige problemer, du kan støde på.
8.1 Ingen strøm
- Sørg for, at netledningen er korrekt tilsluttet både strømforsyningen og stikkontakten.
- Verify that the PSU's power switch is in the 'ON' position.
- Check all internal power connections, especially the 24-pin motherboard power and 8-pin CPU power cables.
- Confirm that the front panel Power SW cable is correctly connected to the motherboard header.
8.2 Fans Not Spinning / LEDs Not Working
- Check that the fan power cables are securely connected to the motherboard or fan controller.
- Ensure the LED control cable from the front panel is connected to the appropriate header (if applicable) or the fan controller.
- As noted in Section 6.2, some models may have fixed LED colors or limited functionality, meaning the LED button might not change colors but only cycle through patterns or turn them on/off.
8.3 Overophedningsproblemer
- Ensure all case fans are spinning correctly and oriented for proper airflow (front fans intake, rear fan exhaust).
- Clean any dust buildup from the dust filters and internal components.
- Verify that there is adequate space around the case for air circulation.
9. Specifikationer
| Feature | Specifikation |
|---|---|
| Mærke | Rampalder |
| Model | ZUKO |
| Sagstype | Gaming Mid-Tower |
| Materiale | Metal, hærdet glas |
| Farve | Sort |
| Dimensioner (pakke) | 50 x 47.4 x 27.4 cm |
| Produktets vægt | 8.5 kilo |
| Pre-installed PSU | 600W 80 Plus Bronze |
| Forudinstallerede ventilatorer | 4 x LED Fans (3 Front, 1 Rear) |
| Bundkort support | ATX, Micro ATX, Mini ITX |
| Front I / O-porte | 2 x USB 2.0, 1 x USB 3.0, HD Audio (Headphone/Mic), Power, Reset, LED Control |
| Afkølingsmetode | Luft |
| Anbefalet brug | Spil |
10. Garanti og support
For warranty information and technical support, please refer to the warranty card included with your product or visit the official Rampalder webwebsted. Gem din købsbevis til garantikrav.


