1. Introduktion
The FLITI Galaxy Lights Projector 2.0 creates an immersive visual experience with its advanced nebula and galaxy projection capabilities. This device features a wide coverage area, integrated Bluetooth speaker, and various customizable settings including timing, brightness, and lighting modes. This manual provides detailed instructions for the safe and effective use of your projector.
2. Sikkerhedsoplysninger
- Strømkilde: Brug kun den medfølgende strømadapter. Sørg for, at lydstyrkentage matcher produktspecifikationerne.
- Vandeksponering: This product is not waterproof. Avoid exposure to water or high humidity to prevent electric shock or damage.
- Ventilation: Do not block ventilation openings. Ensure adequate airflow around the device.
- Rensning: Afbryd strømmen før rengøring. Brug en blød, tør klud. Brug ikke flydende rengøringsmidler.
- Børn: Opbevares utilgængeligt for små børn. Dette er ikke legetøj.
- Demontering: Do not attempt to disassemble or repair the unit yourself. Contact qualified service personnel for assistance.
- Direct Eye Exposure: Avoid direct eye exposure to the laser light.
3. Pakkens indhold
Tjek venligst pakken for følgende varer:
- FLITI Galaxy Lights Projector 2.0 Unit
- Fjernbetjening
- USB strømkabel
- Brugermanual
4. Produktet er slutview
Familiarize yourself with the components of your FLITI Galaxy Lights Projector 2.0.

Figure 4.1: FLITI Galaxy Lights Projector 2.0 with remote control.

Figure 4.2: Key features of the Galaxy Projector, including adjustable rotation speed, timer, sound, and angle.
4.1. Main Unit Features
- Projektionsobjektiv: Projects nebula and star patterns.
- Kontrolknapper: Located on the unit for basic functions (Power, Mode, Volume, etc.).
- USB-C-port: Til strømindgang.
- Højttaler: Integrated Bluetooth speaker.
- Justerbar base: Allows for angle adjustment of the projection.
4.2. Fjernbetjeningsfunktioner
The included remote control provides full functionality for operating the projector:
- Tænd/sluk
- Nebula/Galaxy Light Mode Selection
- Star Light On/Off
- Brightness Adjustment (5 levels)
- Rotation Speed Adjustment (5 levels)
- Timer Settings (1H/2H/4H auto-off)
- Bluetooth Speaker Volume Control
- Music Playback Controls (Play/Pause, Next/Previous Track)
5. Opsætning
5.1. Strømtilslutning
- Connect the provided USB power cable to the USB-C port on the projector.
- Plug the other end of the USB cable into a compatible USB power adapter (not always included) and then into a wall outlet.
- The projector will power on automatically or can be turned on using the power button on the unit or remote.
5.2. Placering
For optimal projection, place the projector on a flat, stable surface. Adjust the angle of the projector using its base to direct the light patterns onto your desired surface (ceiling, wall, etc.). The projector offers a wide coverage area, suitable for various room sizes.
6. Betjeningsvejledning
6.1. Tænd/sluk
Press the power button on the projector unit or the remote control to turn the device on or off.
6.2. Adjusting Light Modes

Figur 6.1: Eksamples of various lighting effects and modes.
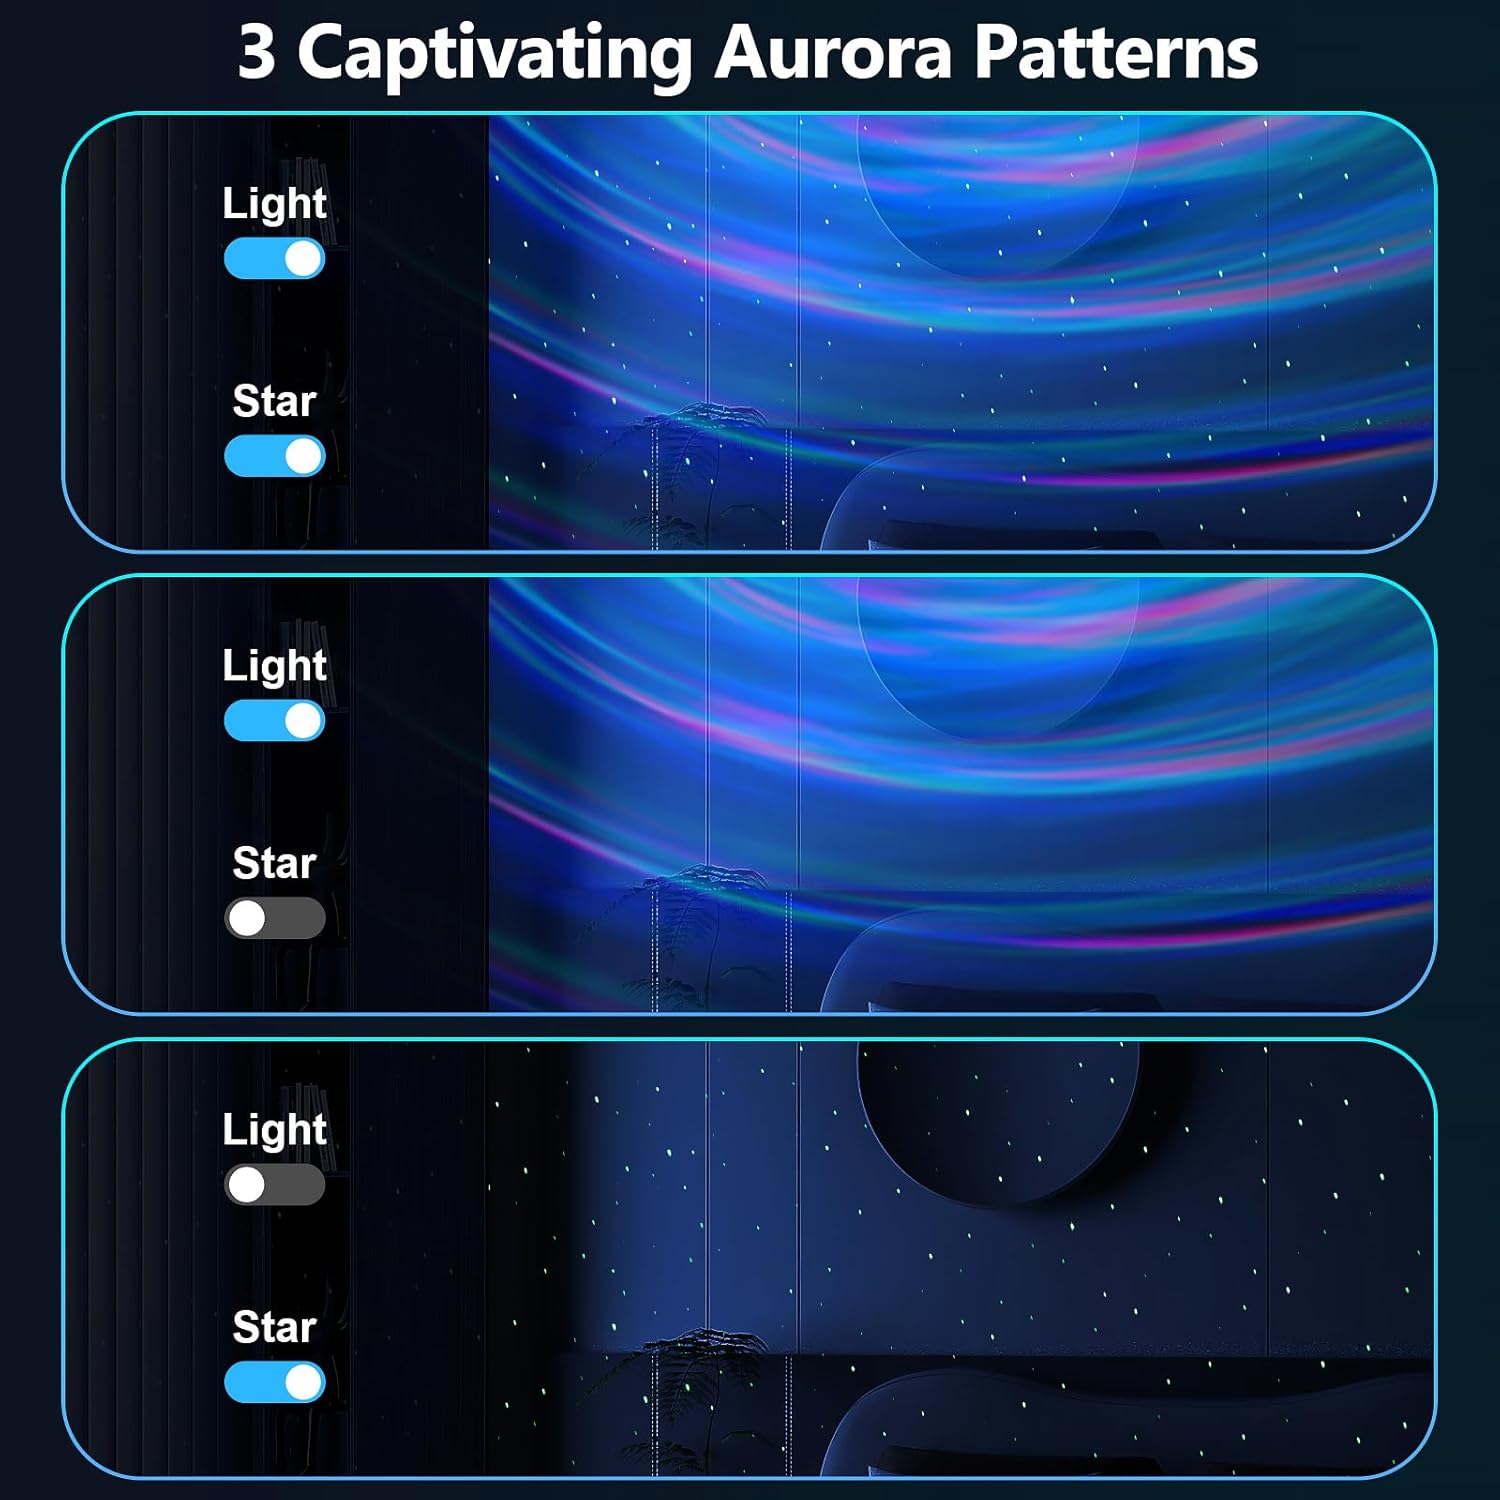
Figure 6.2: Aurora patterns with independent light and star controls.
Use the dedicated buttons on the remote control to cycle through different nebula colors, galaxy shapes, and star patterns. You can combine nebula and star effects or display them independently. The projector offers 14 lighting effects and 4 lighting modes.
6.3. Brightness and Rotation Speed

Figure 6.3: Brightness and flow speed adjustment controls.
- Lysstyrke: Use the brightness adjustment buttons on the remote to select from 5 levels of light intensity.
- Rotationshastighed: Adjust the rotation speed of the nebula effects using the corresponding buttons on the remote. There are 5 speed levels available.
6.4. Timer funktion
The projector includes a timer function for automatic shut-off. Use the timer buttons on the remote control to set the device to turn off after 1 hour, 2 hours, or 4 hours. If no timer is set, the device will automatically turn off after approximately 4 hours.
6.5. Bluetooth-højttaler
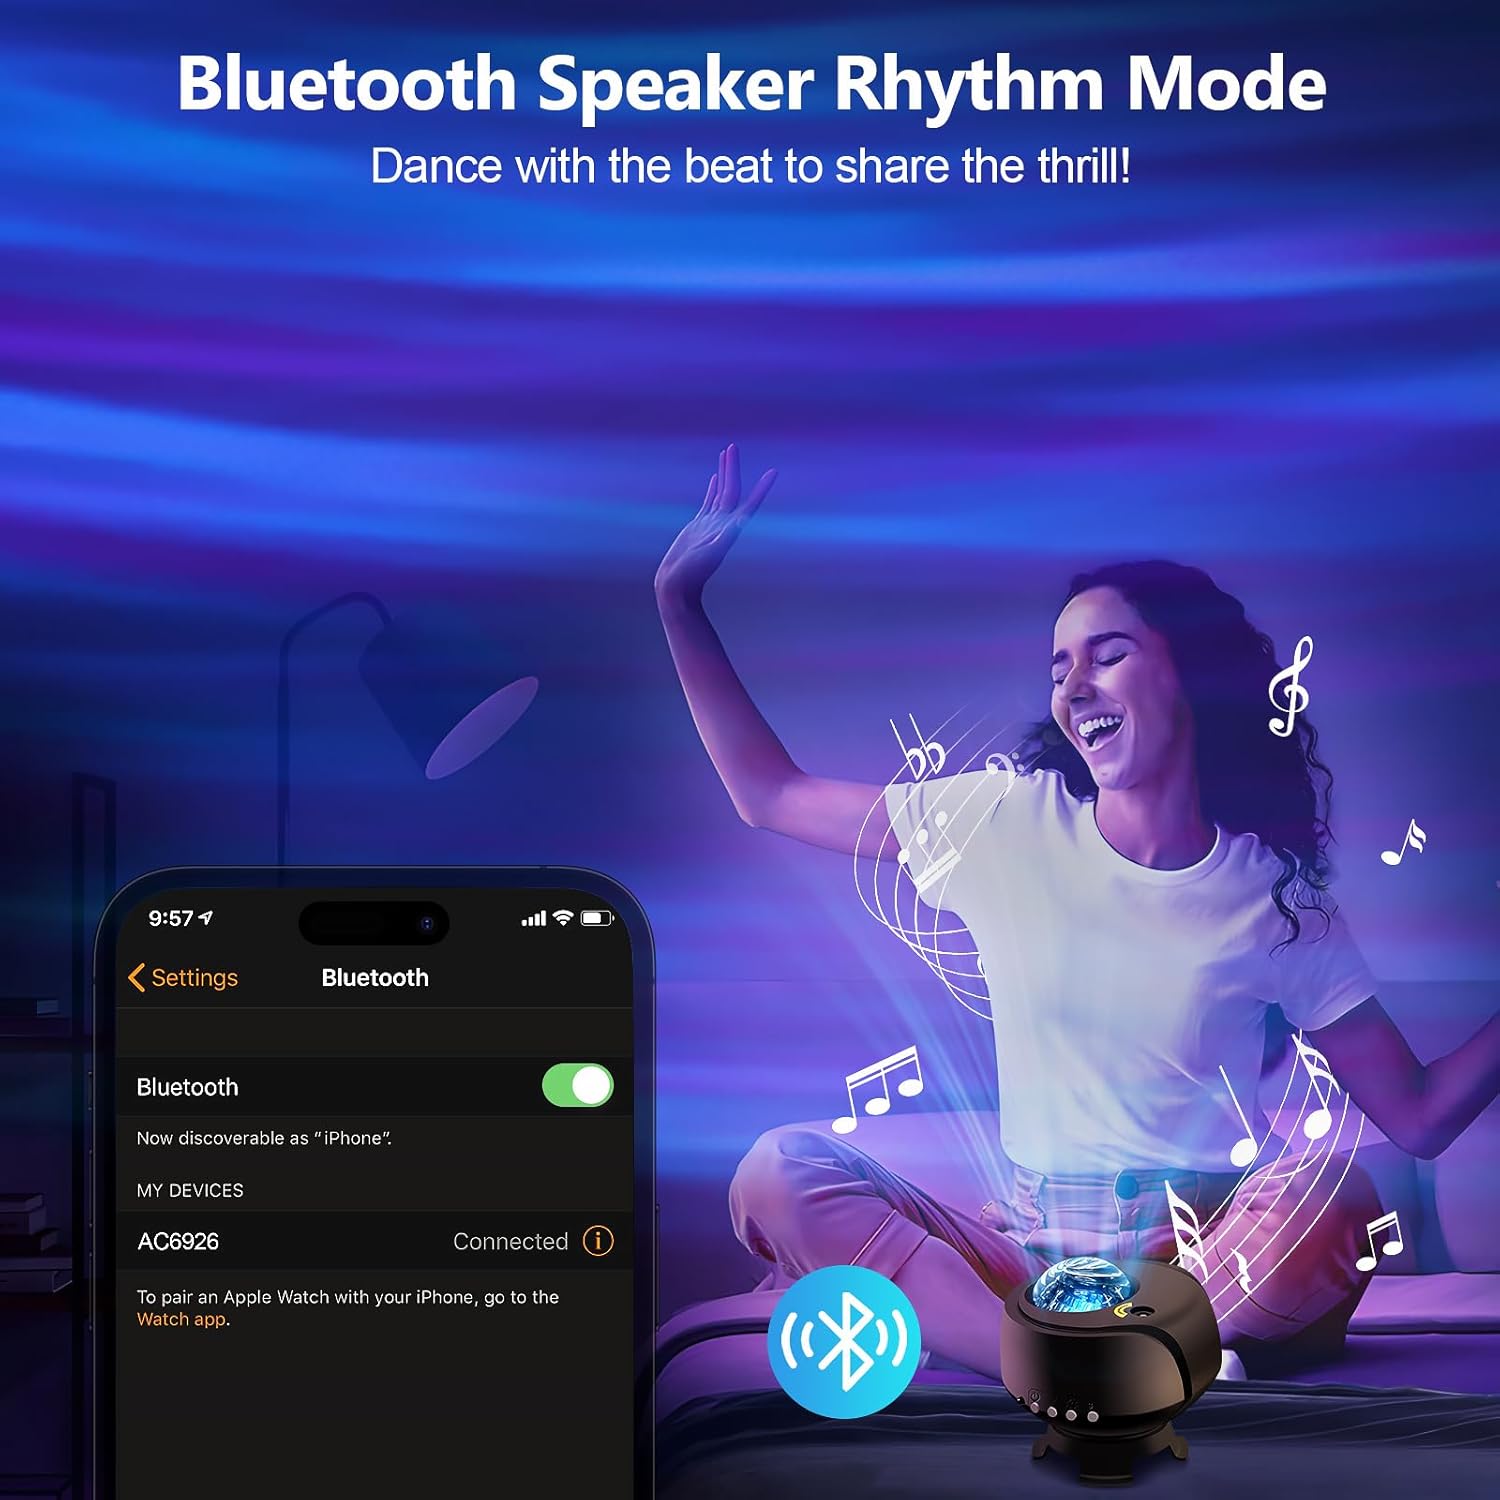
Figure 6.4: Bluetooth speaker connection interface.
- Sørg for, at projektoren er tændt.
- On your smartphone or other Bluetooth-enabled device, search for available Bluetooth devices.
- Select "AC6926" (or similar device name) from the list to pair.
- Once paired, you can play audio through the projector's speaker.
- Use the remote control to adjust volume and control music playback (play/pause, next/previous track).
7. Vedligeholdelse
7.1. Rensning
To clean the projector, first ensure it is unplugged from the power source. Use a soft, dry, lint-free cloth to wipe the exterior surfaces. Do not use abrasive cleaners, solvents, or chemical sprays, as these can damage the finish or internal components. Keep the projection lens clean for clear images.
7.2. Opbevaring
When not in use, store the projector in a cool, dry place, away from direct sunlight and extreme temperatures. Keep it in its original packaging or a protective case to prevent dust accumulation and damage.
8. Fejlfinding
| Problem | Mulig årsag | Løsning |
|---|---|---|
| Projektoren tænder ikke. | Ingen strømforbindelse eller defekt kabel. | Ensure the USB power cable is securely connected to both the projector and a working power outlet. Try a different USB adapter or cable. |
| Lights are dim or not projecting clearly. | Brightness setting is low; lens is dirty; room is too bright. | Increase brightness using the remote. Clean the projection lens with a soft cloth. Use in a darker environment for best results. |
| Bluetooth opretter ikke forbindelse. | Projector not in pairing mode; device not discoverable; incorrect device selected. | Ensure the projector is on. Check your device's Bluetooth settings and ensure it's discoverable. Select the correct device name (e.g., "AC6926"). Restart both devices if necessary. |
| Projector turns off unexpectedly. | Timer function is active; automatic shut-off. | Check if a timer (1H/2H) is set. The projector has an automatic 4-hour shut-off feature if no timer is manually set. This is a design feature and not a malfunction. |
| Fjernbetjening virker ikke. | Battery depleted; obstruction; not pointed correctly. | Replace the remote control battery. Ensure there are no obstructions between the remote and the projector. Point the remote directly at the projector's sensor. |
9. Specifikationer
| Feature | Detalje |
|---|---|
| Modelnummer | galakse lys-1 |
| Mærke | FLITI |
| Farve | Sort-A |
| Form | Rund |
| Materiale | Acrylonitril Butadien Styren (ABS) |
| Finish Type | Poleret |
| Lyskildetype | Projektor |
| Strømkilde | Elektrisk med ledning |
| Voltage | 240 volt |
| Varens vægt | 1.07 pund (0.49 kilo) |
| Produktdimensioner | 4.5 cm L x 4 cm B x 4.5 cm H |
10. Garanti og support
FLITI products are designed for quality and reliability. For specific warranty details and customer support, please refer to the warranty card included with your product or visit the official FLITI website. If you encounter any issues or have questions regarding your FLITI Galaxy Lights Projector 2.0, please contact our customer service team for assistance.


