1. Introduktion
The Keychron Q1 Knob Version is a fully customizable mechanical keyboard designed for an enhanced typing experience. Featuring a 75% layout and a solid full aluminum frame, it offers premium comfort and extensive customization possibilities. This manual provides detailed instructions for setting up, operating, maintaining, and troubleshooting your Keychron Q1 keyboard.

2. Hvad er der i æsken
Upon unboxing your Keychron Q1 Knob Version keyboard, please ensure all the following components are present:
- 1x Fully Assembled Keyboard (including Aluminum Case, PCB, Steel Plate, Sound Absorbing Foam, Case Foam)
- 16x pakninger (8 installeret og 8 i kassen)
- 4 sæt x Stabilisatorer
- 1 sæt x taster (Double-Shot OSA PBT)
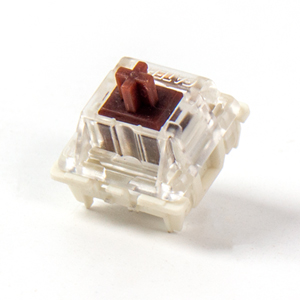
- 1 set x Switches (Gateron G Pro Brown Switch)
- 1x Type-C til Type-C kabel
- 1x Type-A til Type-C adapter
- 1x Aftrækker
- 1x Keycap aftrækker
- 1 x skruetrækker
- 1x Hex-nøgle
Note: All tools are typically placed on the bottom of the box.

3. Opsætning
3.1 Tilslutning af tastaturet
To connect your Keychron Q1 keyboard to your computer:
- Find USB-C-porten på bagsiden af tastaturet.
- Tilslut den ene ende af det medfølgende Type-C til Type-C-kabel til tastaturet.
- Connect the other end of the cable to a compatible USB-C port on your computer. If your computer only has USB-A ports, use the included Type-A to Type-C adapter.
- Tastaturet er plug-and-play og burde blive genkendt automatisk af dit operativsystem.
3.2 Operativsystemskift
The Keychron Q1 features a physical switch on the back to toggle between Windows/Android and Mac/iOS modes. Ensure this switch is set to the correct operating system for optimal key mapping and functionality.
4. Betjeningsvejledning
4.1 Grundlæggende nøglefunktioner
The Keychron Q1 features a standard 75% layout. Most keys function as labeled. Refer to the keycap legends for primary and secondary functions (accessed via the 'Fn' key).
4.2 Knapfunktionalitet
The integrated knob on the top right of the keyboard is primarily used for multimedia control. By default, it controls volume:
- Roter med uret: Øg lydstyrken
- Drej mod uret: Sænk lydstyrken
- Tryk ned: Slå lyd fra/til
The knob's function can be customized using the VIA software (see Section 5.1).

4.3 Backlight Control
The Keychron Q1 features south-facing RGB backlighting. You can cycle through various lighting effects and adjust brightness directly on the keyboard using key combinations. Specific key combinations for lighting control are typically found in the included quick start guide or on the Keychron webwebsted.

5. Tilpasning og avancerede funktioner
5.1 QMK/VIA-programmerbarhed
The Keychron Q1 supports QMK and VIA firmware, allowing for extensive customization of key assignments, macros, and lighting effects. VIA is a user-friendly graphical interface for configuring your keyboard without needing to flash firmware.
Sådan bruger du VIA:
- Download VIA-softwaren fra den officielle Keychron webwebsted eller brug web-baseret VIA-konfigurator.
- Connect your Keychron Q1 keyboard.
- The software should automatically detect your keyboard. You can then remap keys, create macros, adjust lighting, and customize the knob's function across different layers.

5.2 Hot-swap-kontakter
The Keychron Q1 features hot-swappable sockets, allowing you to change mechanical switches without soldering. This provides flexibility to customize your typing feel with various 3-pin and 5-pin MX mechanical switches.
For at udskifte kontakter:
- Use the included keycap puller to carefully remove the keycap from the desired switch.
- Use the included switch puller to gently grasp the top and bottom clips of the switch and pull it straight up.
- Align the pins of the new switch with the holes on the PCB and press it firmly into place until it clicks. Ensure the pins are not bent.
- Sæt tastaturdækslet på igen.


5.3 Dobbeltpakningsdesign
The Keychron Q1 features an innovative double-gasket design. This structure incorporates silicone pads between the top and bottom cases, in addition to the gaskets on the plate. This design enhances typing flexibility, improves the overall typing sound profile, and significantly reduces sound resonance and noise from metal-on-metal impact.

5.4 Double-shot PBT Keycaps
The Q1 comes with durable double-shot PBT keycaps in Keychron's unique OSA profile. Denne profile is designed to provide a comfortable and subtle fingertip feel. PBT material offers excellent oil resistance, ensuring the keycaps maintain their texture and legends over long-term use.

6. Vedligeholdelse
6.1 Rengøring
Regular cleaning helps maintain the performance and appearance of your keyboard:
- Generel rengøring: Brug en blød, fnugfri klud lidt damprengøres med vand eller en mild rengøringsopløsning for at tørre tastaturerne og rammen af. Undgå for meget fugt.
- Fjernelse af støv: Brug trykluft til at blæse støv og snavs væk mellem tasterne.
- Dyb rengøring (taster): For thorough cleaning, remove the keycaps using the keycap puller and wash them with warm, soapy water. Ensure they are completely dry before re-attaching.
6.2 Vedligeholdelse af kontakter og stabilisatorer
While Gateron G Pro switches are pre-lubed, over time, you may consider re-lubing switches or stabilizers for optimal smoothness and sound. This is an advanced maintenance step and requires specific lubricants and tools.
7. Fejlfinding
Hvis du støder på problemer med dit Keychron Q1-tastatur, kan du prøve følgende fejlfindingstrin:
- Tastaturet reagerer ikke:
- Sørg for, at USB-C-kablet er korrekt tilsluttet til både tastaturet og computeren.
- Prøv en anden USB-port på din computer.
- Test med et andet USB-C-kabel.
- Verify the OS switch on the back of the keyboard is set to the correct operating system (Windows/Mac).
- Specifikke taster virker ikke:
- Carefully remove the keycap and then the switch using the provided tools.
- Undersøg kontaktstifterne for bøjninger eller skader. Ret dem forsigtigt ud, hvis de er bøjede.
- Reinsert the switch firmly. If the issue persists, try swapping it with a known working switch from another less-used key.
- Problemer med baggrundsbelysning:
- Sørg for, at tastaturet er korrekt strømforsynet.
- Cycle through lighting modes and brightness levels using the keyboard's built-in shortcuts.
- Check VIA software settings for lighting configurations.
- VIA-software registrerer ikke tastatur:
- Ensure the latest version of VIA is installed or use the web-baseret konfigurator.
- Verify the keyboard is connected and the OS switch is correctly set.
- Sometimes, a specific JSON file for the keyboard model needs to be loaded into VIA. Refer to the Keychron support page for your Q1 model.
For yderligere hjælp, besøg venligst den officielle Keychron-support. webwebstedet eller konsulter deres fællesskabsfora.
8. Specifikationer
| Feature | Detalje |
|---|---|
| Produktdimensioner | 12.93 x 5.71 x 1.41 tommer |
| Varens vægt | 5.92 pund |
| Fabrikant | Keychron |
| Varemodelnummer | Keychron Q1 |
| Mærke | Keychron |
| Kompatible enheder | Laptop, PC, Mac |
| Forbindelsesteknologi | USB-C |
| Tastaturbeskrivelse | Spil |
| Særlige funktioner | QMK/VIA, Fully Customizable, Full Aluminum, Hot-swappable |
| Farve (afbrydertype) | Hot-swap Gateron G Pro Brown Switch |
| Antal nøgler | 82 |
| Tastatur baggrundsbelysning | RGB |
| Stil | Moderne |
9. Garanti og support
Keychron products are typically covered by a limited warranty. For detailed information regarding warranty terms, conditions, and duration, please refer to the official Keychron webwebstedet eller garantikortet, der følger med dit produkt.
For technical support, frequently asked questions, and additional resources, please visit the official Keychron support page. You can also find the official user guide in PDF format her.
Keychron also maintains an active online community where users can share tips, troubleshoot issues, and discuss product features.


