1. Introduktion
The Raspberry Pi 4 Model B (2GB) is a powerful, compact single-board computer designed for a wide range of applications, from desktop computing to embedded projects. It offers enhanced processing power, improved multimedia capabilities, and expanded connectivity compared to previous models. This manual provides essential information for setting up, operating, and maintaining your Raspberry Pi 4 Model B.

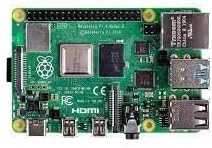
Image 1.1: The Raspberry Pi 4 Model B (2GB) single-board computer, showcasing dens kompakte design og forskellige porte.
2. Pakkens indhold
Upon opening your Raspberry Pi 4 Model B package, you should find the following:
- Raspberry Pi 4 Model B (2GB) board
Note: Additional accessories such as a power supply, microSD card, HDMI cables, and a case are typically sold separately.
3. Produktfunktioner
The Raspberry Pi 4 Model B (2GB) includes several key features:
- Processor: Broadcom BCM2711, Quad core Cortex-A72 (ARM v8) 64-bit SoC @ 1.5 GHz
- VÆDDER: 2 GB LPDDR4-3200 SDRAM
- Trådløs forbindelse: 2.4 GHz and 5.0 GHz IEEE 802.11ac wireless, Bluetooth 5.0, BLE
- Ethernet: Gigabit Ethernet
- USB-porte: 2 USB 3.0 ports; 2 USB 2.0 ports
- GPIO: Standard 40-pin GPIO header (fully backwards compatible with previous boards)
- Video og lyd: 2 micro-HDMI ports (up to 4Kp60 supported), 2-lane MIPI DSI display port, 2-lane MIPI CSI camera port, 4-pole stereo audio and composite video port
- Opbevaring: MicroSD-kortslot til operativsystem og datalagring
4. Opsætningsvejledning
4.1. Nødvendige komponenter (ikke inkluderet)
- USB-C Power Supply (5V/3A recommended)
- MicroSD Card (minimum 8GB, Class 10 recommended)
- HDMI Cable(s) (micro-HDMI to standard HDMI)
- USB-tastatur og mus
- Skærm eller TV med HDMI-indgang
4.2. Installation af operativsystemet
- Download the Raspberry Pi Imager software from the official Raspberry Pi webwebsted (www.raspberrypi.com/software/).
- Insert your microSD card into your computer's card reader.
- Open Raspberry Pi Imager, select your desired operating system (e.g., Raspberry Pi OS), and choose your microSD card as the destination.
- Click "Write" and wait for the process to complete.
- Safely eject the microSD card from your computer.
4.3. Hardwareforbindelse
- Insert the prepared microSD card into the card slot on the underside of the Raspberry Pi.
- Tilslut dit USB-tastatur og din mus til USB-portene på Raspberry Pi'en.
- Connect your monitor(s) to the micro-HDMI ports using appropriate cables. The Raspberry Pi 4 supports up to two displays.
- (Optional) Connect an Ethernet cable for wired network access.
- Finally, connect the USB-C power supply to the Raspberry Pi. The device will power on automatically.
Billede 4.3.1: Et nærbillede view of the Raspberry Pi 4 Model B's various ports, including USB, Ethernet, and micro-HDMI.
5. Betjeningsvejledning
5.1. First Boot and Initial Configuration
On the first boot, the Raspberry Pi OS will guide you through an initial setup wizard. This includes setting your country, language, timezone, creating a user password, connecting to Wi-Fi, and updating the software. Follow the on-screen prompts to complete these steps.
5.2. Desktop Environment
Once configured, you will be presented with the Raspberry Pi OS desktop environment. This is similar to other desktop operating systems, allowing you to launch applications, browse the web, administrere files og mere.
5.3. Nedlukning
To safely shut down your Raspberry Pi, click the Raspberry Pi icon in the top-left corner of the screen, then select Nedlukning. Always shut down the system properly before disconnecting power to prevent data corruption on the microSD card.
6. Vedligeholdelse
- Softwareopdateringer: Regularly update your operating system and installed software to ensure optimal performance and security. This can typically be done via the terminal using commands like
sudo apt updateogsudo apt full-upgrade. - Køling: The Raspberry Pi 4 can generate heat under heavy load. Consider using a heatsink or a fan case to ensure proper cooling and prevent thermal throttling, especially for demanding applications.
- Strømforsyning: Use a high-quality 5V/3A USB-C power supply to ensure stable operation. Insufficient power can lead to instability.
- MicroSD-kortpleje: Avoid frequently writing large amounts of data to the microSD card to prolong its lifespan. Consider using a USB SSD for heavy data operations.
7. Fejlfinding
- Ingen skærmoutput: Ensure micro-HDMI cables are securely connected and your monitor is set to the correct input. Try a different micro-HDMI port or cable.
- Power LED blinker: This often indicates an insufficient power supply. Ensure you are using a 5V/3A USB-C power supply.
- Wi-Fi/Bluetooth-problemer: Check your network settings in the Raspberry Pi OS. Ensure the device is within range of your Wi-Fi router.
- Systemustabilitet/nedbrud: This could be due to overheating (ensure proper cooling), a corrupted microSD card (try re-flashing the OS), or an inadequate power supply.
- Generelle spørgsmål: The Raspberry Pi community forums and documentation are excellent resources for troubleshooting specific problems.
8. Specifikationer
| Feature | Detalje |
|---|---|
| Processor | Broadcom BCM2711, Quad core Cortex-A72 (ARM v8) 64-bit SoC @ 1.5 GHz |
| VÆDDER | 2 GB LPDDR4-3200 SDRAM |
| Trådløs type | 802.11ac, Bluetooth 5.0, BLE |
| Ethernet | Gigabit Ethernet |
| USB-porte | 2 USB 3.0 ports, 2 USB 2.0 ports |
| Video output | 2 micro-HDMI ports (up to 4Kp60) |
| Lydudgang | 4-polet stereolyd og kompositvideo-port |
| GPIO-header | Standard 40-pin GPIO header |
| Opbevaring | MicroSD-kortslot |
| Operativsystem | Linux (e.g., Raspberry Pi OS) |
| Varens vægt | 2.11 ounce |
9. Garanti og support
For warranty information and technical support, please refer to the official Raspberry Pi website or contact your retailer. The Raspberry Pi community also provides extensive resources, forums, and documentation for assistance with projects and troubleshooting.
Officiel Webwebsted: www.raspberrypi.com


