1. Introduktion
Thank you for choosing the Marathon Paris Wireless Weather Station. This device provides accurate indoor and outdoor temperature and humidity readings, along with a 12-hour weather forecast. Its radio-controlled time feature ensures precise timekeeping. This manual will guide you through the setup, operation, and maintenance of your new weather station.
1.1 Pakkens indhold
- Marathon Paris Weather Station (Main Unit)
- Trådløs udendørs sensor
- Strømadapter
- 4 x AA Batteries (for main unit and sensor)
- Brugervejledning (dette dokument)

Image: Contents of the Marathon Paris Weather Station package, showing the main display unit, the wireless outdoor sensor, a power adapter, and four AA batteries.
2. Sikkerhedsoplysninger
Please read the following safety guidelines carefully before using your weather station:
- Do not expose the main unit to extreme temperatures, direct sunlight, or high humidity.
- The outdoor sensor is weather-resistant but should not be submerged in water.
- Brug kun den angivne batteritype (AA), og sørg for korrekt polaritet under installationen.
- Bland ikke gamle og nye batterier eller forskellige typer batterier.
- Bortskaf brugte batterier ansvarligt i henhold til lokale regler.
- Hold enheden væk fra stærke magnetiske felter.
- Forsøg ikke selv at skille eller reparere enheden. Kontakt kvalificeret servicepersonale.
- Rengør enheden med en blød, tør klud. Brug ikke slibende rengøringsmidler eller opløsningsmidler.
3. Opsætning
3.1 Batteriinstallation
Both the main unit and the outdoor sensor require batteries for operation.
- Åbn batteridækslet på bagsiden af hovedenheden.
- Insert 2 x AA batteries, observing the correct polarity (+ and - markings).
- Luk batterirummets dæksel.
- Repeat steps 1-3 for the wireless outdoor sensor, inserting 2 x AA batteries.
Alternatively, the main unit can be powered by the included power adapter. Insert the adapter into the DC port on the main unit and plug it into a wall outlet. The outdoor sensor always requires batteries.
3.2 Sensor Pairing and Initial Setup
After installing batteries, the main unit will automatically attempt to connect with the outdoor sensor and receive the radio-controlled time signal.
- Place the outdoor sensor within a reasonable range of the main unit (typically up to 30 meters/100 feet in open air). Avoid placing it near large metal objects or electrical appliances that may interfere with the signal.
- The main unit will display outdoor temperature and humidity once a connection is established. This may take a few minutes.
- The radio-controlled time signal (DCF77 from Frankfurt, Germany) will be automatically received. This process can take several hours, especially during initial setup. Ensure the main unit is placed near a window or in an area with good signal reception.
- Once the time is synchronized, the weather station is ready for use.

Image: The Marathon Paris Weather Station main display unit and its accompanying wireless outdoor sensor, ready for placement.
4. Betjeningsvejledning
4.1 Display overview
The main unit features a clear LCD display showing various weather and time information.
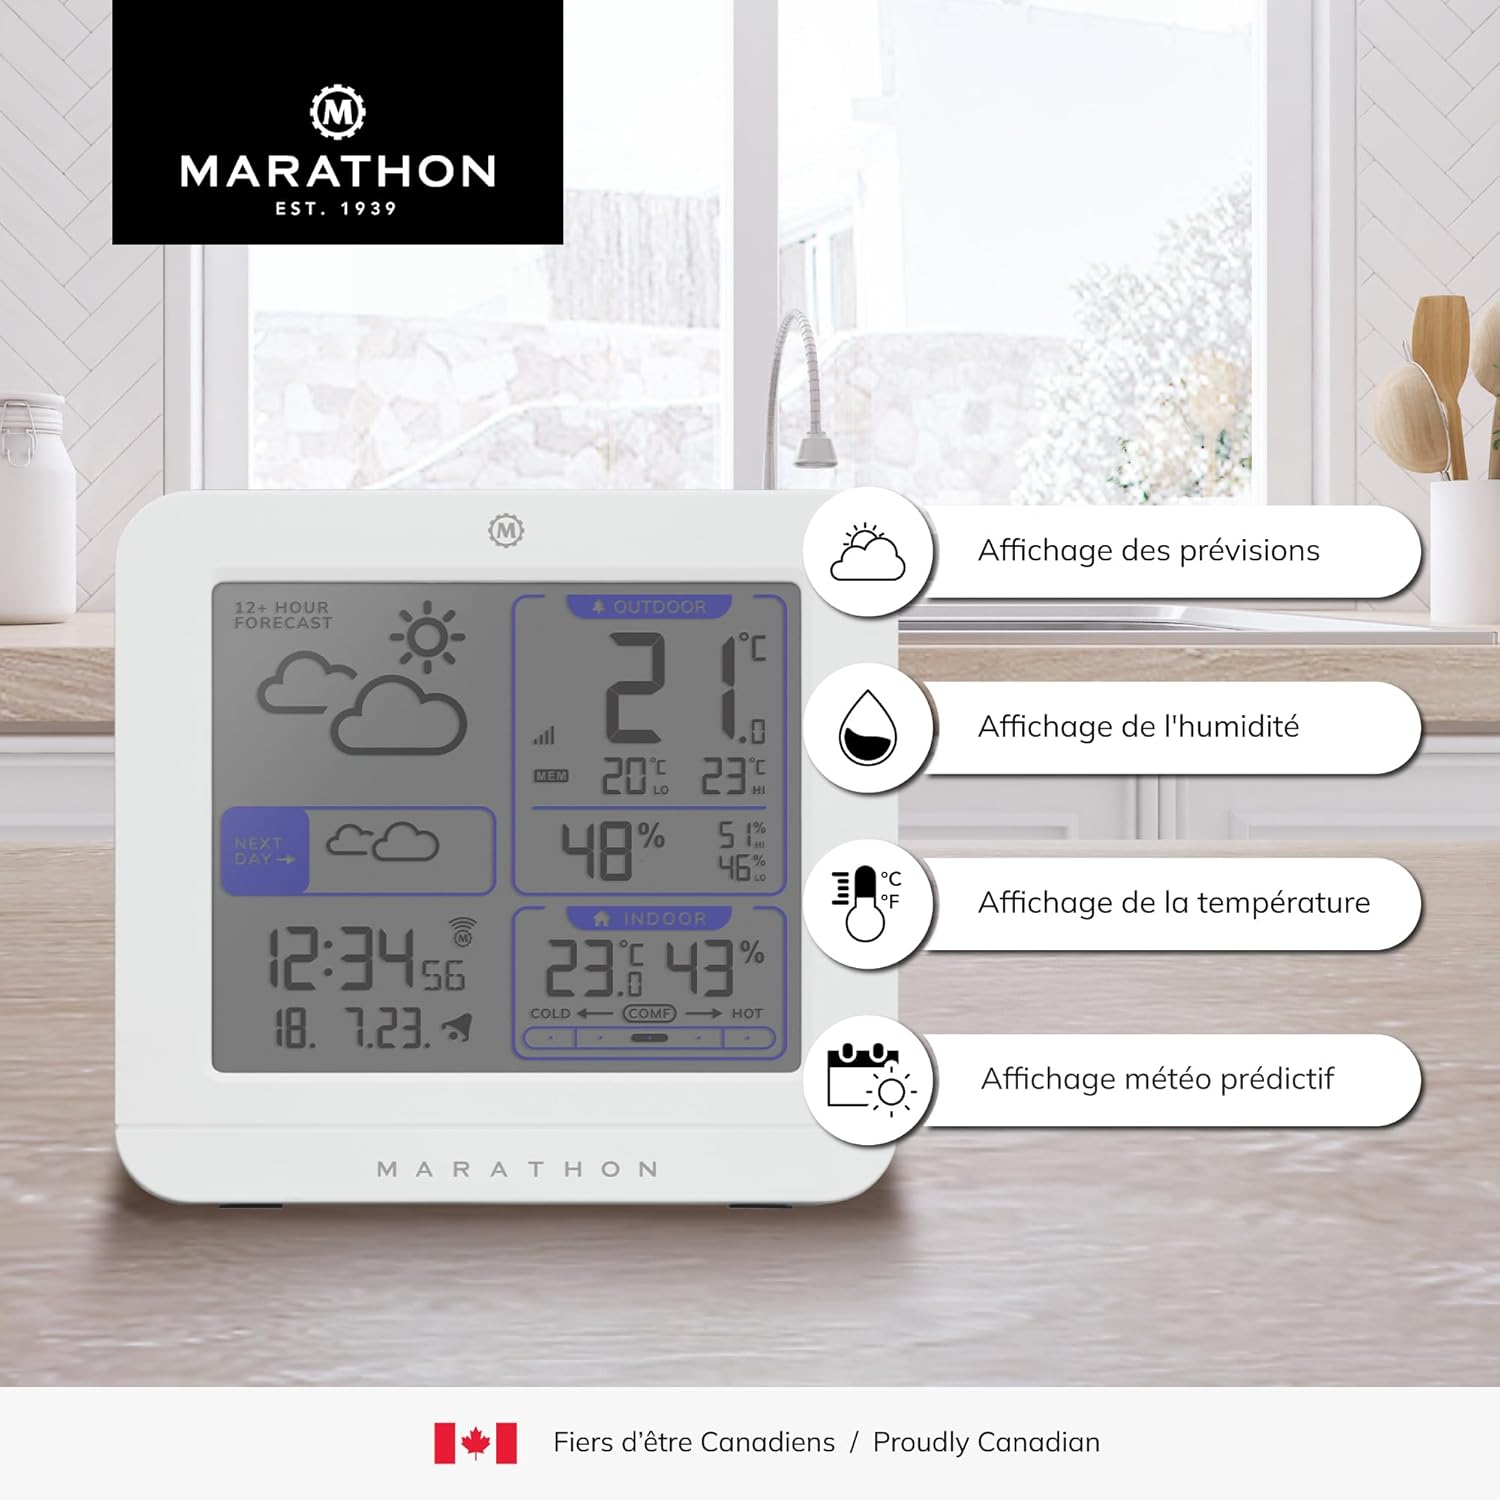
Billede: Detaljeret view of the Marathon Paris Weather Station display, highlighting sections for weather forecast, humidity, temperature, and predictive weather icons.
- 12+ Hour Forecast: Displays animated weather icons (sunny, partly cloudy, cloudy, rainy, snowy).
- Udendørs sektion: Shows current outdoor temperature and humidity, along with daily high/low records.
- Indendørs sektion: Shows current indoor temperature and humidity, along with daily high/low records and comfort level indicator.
- Tid og dato: Displays the current time (radio-controlled) and date.
- Next Day Forecast: Indicates the forecast for the following day.
4.2 Setting Time and Date (Manual Adjustment)
While the unit is designed for automatic radio-controlled time synchronization, you can manually set the time and date if needed.
- Press and hold the "SET" button (location may vary, refer to physical unit for exact button).
- The hour digits will flash. Use the "+" or "-" buttons to adjust the hour.
- Press "SET" again to confirm and move to the minute setting. Adjust minutes using "+" or "-".
- Continue pressing "SET" to cycle through year, month, day, and 12/24 hour format settings, adjusting each with "+" or "-".
- Press "SET" one last time to exit the setting mode.
4.3 Understanding Weather Forecasts
The weather station predicts weather conditions for the next 12-24 hours based on changes in atmospheric pressure. The forecast icons are:
- ☀ Solrig
- ☁ Delvis skyet
- ☁️ Overskyet
- ☂ Regnfuld
- ❄ Snefyldt

Image: Visual representation of various weather conditions that the station can forecast, including sunny, rainy, and cloudy skies.
4.4 Temperature and Humidity Readings
The station displays current indoor and outdoor temperature in Celsius or Fahrenheit, and humidity as a percentage. It also records the minimum and maximum values for the last 24 hours.
- Press the "C/F" button to switch between Celsius and Fahrenheit.
- The "MIN/MAX" button allows you to view the recorded minimum and maximum temperature and humidity values. Press once to view maximums, press again to view minimums. Hold to clear records.
- The indoor section includes a comfort level indicator (COLD, COMP, HOT) based on indoor temperature and humidity.

Image: A close-up of the comfort level indicator on the display, showing a gauge that ranges from cold to hot, with a pointer indicating the current comfort zone based on temperature and humidity.
4.5 Sprogindstillinger
The weather station supports 8 languages for its display messages.
- Supported languages include: German, French, Spanish, Italian, Dutch, Danish, Russian, and English.
- To change the language, refer to the specific button (e.g., "LANGUAGE" or "MODE") and follow the on-screen prompts. Typically, you will press and hold the button, then use "+" or "-" to cycle through options, and press the button again to confirm.
5. Vedligeholdelse
- Rensning: Tør hovedenheden og sensoren af med en blød kludamp cloth. Do not use abrasive cleaners or solvents, as they may damage the display or casing.
- Udskiftning af batteri: Udskift batterierne i både hovedenheden og udendørssensoren, når indikatoren for lavt batteriniveau vises på displayet. Udskift altid alle batterier på samme tid med nye af samme type.
- Opbevaring: Hvis enheden opbevares i en længere periode, skal alle batterier fjernes for at forhindre lækage.
6. Fejlfinding
If you encounter issues with your weather station, please refer to the table below for common problems and solutions.
| Problem | Mulig årsag | Løsning |
|---|---|---|
| Intet display på hovedenheden. | Batteries are dead or incorrectly inserted; power adapter not connected. | Check battery polarity, replace batteries, or ensure power adapter is securely connected. |
| Udendørstemperatur/fugtighed vises ikke eller er unøjagtig. | Sensor out of range; sensor batteries low; interference; sensor not paired. | Move sensor closer to main unit; replace sensor batteries; relocate units away from interference sources; re-pair sensor (refer to manual for specific re-pairing steps if needed). |
| Time not synchronizing (radio-controlled). | Poor signal reception; interference; unit not in range of signal. | Place unit near a window; avoid electronic devices; allow up to 24 hours for initial synchronization. |
| Vejrudsigten virker forkert. | Forecast is based on atmospheric pressure changes, not real-time satellite data. | Understand that the forecast is a prediction based on local pressure trends and may not always match official forecasts. |
7. Specifikationer
| Feature | Detalje |
|---|---|
| Modelnummer | BA030020-EU1 |
| Dimensioner (hovedenhed) | 12 x 5 x 13 cm (L x B x H) |
| Vægt | 520 gram (ca.) |
| Strømkilde (hovedenhed) | 4 x AA Batteries or Power Adapter |
| Strømkilde (udendørs sensor) | 2 x AA batterier |
| Materiale | Plast |
| Forbindelse | 433 MHz radiofrekvens |
| Tidssynkronisering | Radiostyret (DCF77) |
| Temperaturområde (indendørs) | 0°C til 50°C (32°F til 122°F) |
| Temperaturområde (udendørs) | -20°C til 60°C (-4°F til 140°F) |
| Fugtighedsområde | 20% til 95% RH |
| Speciel funktion | Weather Resistant Outdoor Sensor |
| Understøttede sprog | German, French, Spanish, Italian, Dutch, Danish, Russian, English |

Image: Dimensions of the Marathon Paris Weather Station main unit, showing its width and height measurements.
8. Garanti og kundesupport
Marathon products are designed for reliability and performance. For warranty information, please refer to the warranty card included in your product packaging or visit the official Marathon website. If you require technical assistance or have questions not covered in this manual, please contact Marathon customer support through their official channels.
For de mest opdaterede supportoplysninger, besøg venligst: www.marathonwatch.com


