1. Introduktion
This manual provides comprehensive instructions for the setup, operation, and maintenance of your Bushnell Prime L20 Low Glow Trail Camera. Designed for wildlife monitoring and scouting, this camera captures high-quality images and videos with minimal disturbance to its environment. Please read this manual thoroughly to ensure optimal performance and longevity of your device.
2. Pakkens indhold
Bekræft at alle varer er til stede i din pakke:
- Bushnell Prime L20 Low Glow Trail Camera
- Adjustable Mounting Strap
- Brugervejledning (dette dokument)
3. Kamerakomponenter
Familiarize yourself with the key components of your trail camera:

Figur 1: Forside view of the Bushnell Prime L20 Low Glow Trail Camera, showing the lens, PIR sensor, and IR LEDs.
- Linse: Optager billeder og videoer.
- Low Glow IR LEDs: Provide illumination for night vision without a visible flash.
- PIR Motion Sensor: Registrerer bevægelse for at udløse optagelse.
- Kontrolpanel: Located inside the camera, features an LCD display and navigation buttons for settings.
- Batterirum: Houses 8 AA batteries (not included).
- SD-kortplads: Accepts standard SD cards for storage (up to 32GB recommended).
- External Power Port: For optional external power sources.
- Monteringspunkter: For attaching the camera to a tree or other surfaces using the provided strap or compatible accessories.
4. Indledende opsætning
4.1 Batteriinstallation
The Bushnell Prime L20 requires 8 AA batteries for operation. For best performance and battery life, use high-quality alkaline or lithium batteries.

Figure 2: Battery compartment with 8 AA batteries.
- Open the camera's front cover by unlatching the side clips.
- Locate the battery tray at the bottom of the camera.
- Isæt 8 AA-batterier, og sørg for at polerne (+/-) vender korrekt som angivet inde i batterirummet.
- Securely close the battery tray and the camera's front cover.
4.2 Installation af SD-kort
A standard SD card (not included) is required to store photos and videos. The camera supports cards up to 32GB.
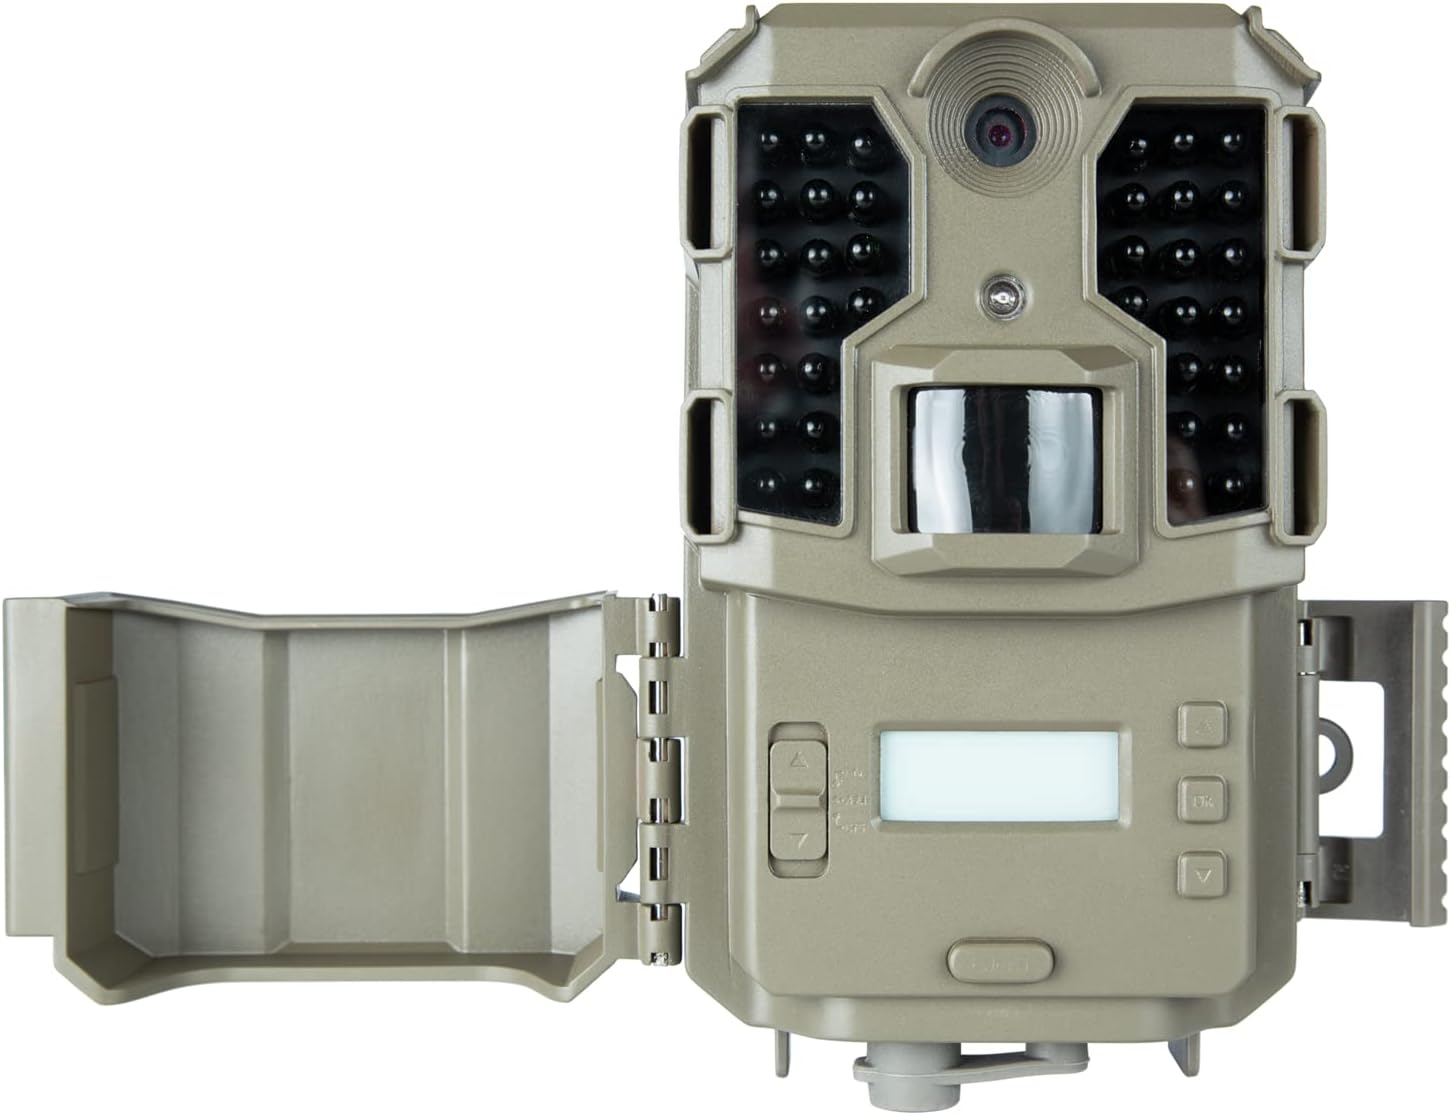
Figure 3: Internal controls and SD card slot.
- With the camera open, locate the SD card slot on the side of the control panel.
- Sæt SD-kortet i med metalkontakterne nedad, indtil det klikker på plads.
- It is recommended to format the SD card using the camera's menu before first use to ensure compatibility and optimal performance.
4.3 Montering af kameraet
The camera can be mounted using the included strap or a compatible tree bracket.

Figur 4: Montering af kameraet på et træ.
- Før monteringsstroppen gennem rillerne på bagsiden af kameraet.
- Securely fasten the camera to a tree or post at the desired height and angle.
- Sørg for, at kameraet er stabilt og peger mod det område, du vil overvåge.
5. Betjeningsvejledning
5.1 Tænd/sluk
To power on the camera, slide the power switch (located inside the camera) from 'OFF' to 'ON'. The LCD screen will illuminate. To power off, slide the switch back to 'OFF'.
5.2 Menunavigation
Use the navigation buttons (MENU, OK, Up/Down/Left/Right arrows) on the control panel to access and adjust settings.
- Press the 'MENU' button to enter the settings menu.
- Use the Up/Down arrow buttons to scroll through menu options.
- Press 'OK' to select an option or enter a sub-menu.
- Use the Left/Right arrow buttons to change values or settings.
- Press 'MENU' again to exit the current menu or save changes.
5.3 Photo and Video Settings
Customize your camera's capture preferences:
- Billedindstillinger: Choose between 3MP, 12MP, and 20MP resolutions for still photos.
- Videoopløsning: Select 1080p at 30 FPS for detailed video recording.
- Udløserhastighed: The camera features a 0.4-second trigger speed with a 1-second recovery rate.
- Date, Time, and Temp Stamps: Enable these options to overlay capture details on every photo.
6. Vedligeholdelse
6.1 Rengøring
Regularly clean the camera lens and PIR sensor window with a soft, lint-free cloth to ensure clear images and proper motion detection. Avoid abrasive cleaners.
6.2 Batterilevetid
The camera offers an approximate 12-month battery life with optimal usage. Replace batteries when the low battery indicator appears on the display.
6.3 Opbevaring
Når kameraet ikke er i brug, skal det opbevares køligt og tørt. Fjern batterierne, hvis det opbevares i længere perioder, for at forhindre lækage.
7. Fejlfinding
If you encounter issues with your camera, refer to the table below for common problems and solutions:
| Problem | Mulig løsning |
|---|---|
| Kameraet tænder ikke | Check battery polarity and ensure batteries are fully charged. Verify the power switch is in the 'ON' position. |
| No photos/videos captured | Ensure SD card is inserted correctly and formatted. Check PIR sensor sensitivity settings. Verify camera is armed (switch in 'ON' position). |
| Dårlig billed-/videokvalitet | Clean the camera lens and PIR sensor window. Adjust image/video resolution settings. Ensure adequate lighting for daytime captures. |
| Kort batterilevetid | Use high-quality alkaline or lithium batteries. Reduce the number of photos/videos captured per trigger event. |
8. Tekniske specifikationer
| Feature | Specifikation |
|---|---|
| Modelnummer | 119930M |
| Billedopløsning | 3MP, 12MP, 20MP |
| Video opløsning | 1080p @ 30 FPS |
| Udløserhastighed | 0.4 sekunder |
| Gendannelsesrate | 1 sekund |
| Night Vision Range | 100 feet (36 Low Glow LEDs) |
| Vandtætning | IPX6 |
| Strømkilde | 8 AA batterier (medfølger ikke) |
| Batterilevetid | Op til 12 måneder |
| Dimensioner | 8.66 x 5.91 x 2.76 tommer |
| Vægt | 1.19 pund |
9. Garanti og support
9.1 Garantioplysninger
Your Bushnell Prime L20 Low Glow Trail Camera is covered by a manufacturer's warranty against defects in materials and workmanship. Please refer to the product packaging or the official Bushnell webwebstedet for specifikke garantivilkår.
9.2 Kundesupport
For technical assistance, troubleshooting, or product inquiries, please visit the official Bushnell Store or contact their customer service department. You can find more information at: Bushnell-butikken på Amazon


