1. Introduktion
Tak for købetasing the BUFFBEE Digital Alarm Clock FM Radio with Wireless Charging. This device combines a digital alarm clock, FM radio, 10W fast wireless charger, and a USB charging port into a single unit. It features five distinct wake-up sounds, adjustable volume control, and a full brightness dimmer for optimal comfort in your bedroom environment. Please read this manual carefully to ensure proper setup and operation.

Figure 1.1: BUFFBEE Digital Alarm Clock with a smartphone wirelessly charging on top.
2. Opsætning
2.1 Strømtilslutning
- Connect the provided power adapter to the DC 9V port on the back of the alarm clock.
- Sæt strømadapteren i en almindelig stikkontakt. Urdisplayet lyser.
- Note: The internal battery backup is for saving time and alarm settings only. The device requires a continuous power connection to function.
2.2 Indstilling af klokkeslæt
- Tryk og hold på TID knappen på toppanelet. Timecifrene vil begynde at blinke.
- Brug UP (▲) eller NED (▼) buttons to adjust the hour.
- Tryk på TID button again to confirm the hour and proceed to set the minutes. The minute digits will flash.
- Brug UP (▲) eller NED (▼) buttons to adjust the minutes.
- Tryk på TID knappen én gang til for at gemme tidsindstillingen.
2.3 Indstilling af alarmen
- Tryk og hold på ALARM knappen. Alarmtimecifrene vil begynde at blinke.
- Brug UP (▲) eller NED (▼) buttons to adjust the alarm hour.
- Tryk på ALARM button again to confirm the hour and proceed to set the alarm minutes. The minute digits will flash.
- Brug UP (▲) eller NED (▼) buttons to adjust the alarm minutes.
- Tryk på ALARM button one more time to save the alarm time.
- For at aktivere eller deaktivere alarmen skal du kort trykke på ALARM knappen. Et alarmikon vises på displayet, når den er aktiveret.

Figure 2.1: Rear panel with power and USB connections.
3. Betjeningsvejledning
3.1 Trådløs opladning
The top surface of the alarm clock features a 10W fast wireless charging pad. This is compatible with 5W, 7.5W, and 10W wireless-enabled phones.
- Place your wireless-enabled smartphone directly on the charging pad located on the top of the clock.
- Ensure the phone is centered on the charging pad for optimal connection.
- A lightning icon will appear on the clock's display to indicate that your phone is charging.

Figure 3.1: Wireless charging in progress.

Figure 3.2: Wireless charging compatibility.
3.2 USB-opladningsport
An additional USB port is located on the back of the unit for charging other devices, such as smartwatches or non-wireless charging phones.
- Connect your device's USB charging cable to the USB port on the back of the alarm clock.
- Tilslut den anden ende af kablet til din enhed.

Figure 3.3: Simultaneous wireless and USB charging.
3.3 FM-radiofunktion
The alarm clock includes an FM radio with a frequency range of 87.5-108.0 MHz.
- For at tænde FM-radioen skal du trykke på RADIO knap.
- To scan for stations, press and hold the UP (▲) eller NED (▼) buttons. The radio will automatically tune to the next available station.
- For at indstille manuelt skal du kort trykke på UP (▲) eller NED (▼) knapper.
- For at gemme en forudindstillet station skal du trykke på og holde RADIO button until the preset number flashes, then use the UP (▲) eller NED (▼) buttons to select a preset slot. Press RADIO igen for at bekræfte.
- For at genkalde en forudindstillet station skal du kort trykke på RADIO -knappen for at gennemgå gemte forudindstillinger.
- Adjust the radio volume using the volume control dial or buttons (if present, otherwise use general volume controls).
- To improve FM reception, ensure the radio antenna on the back of the unit is fully extended.
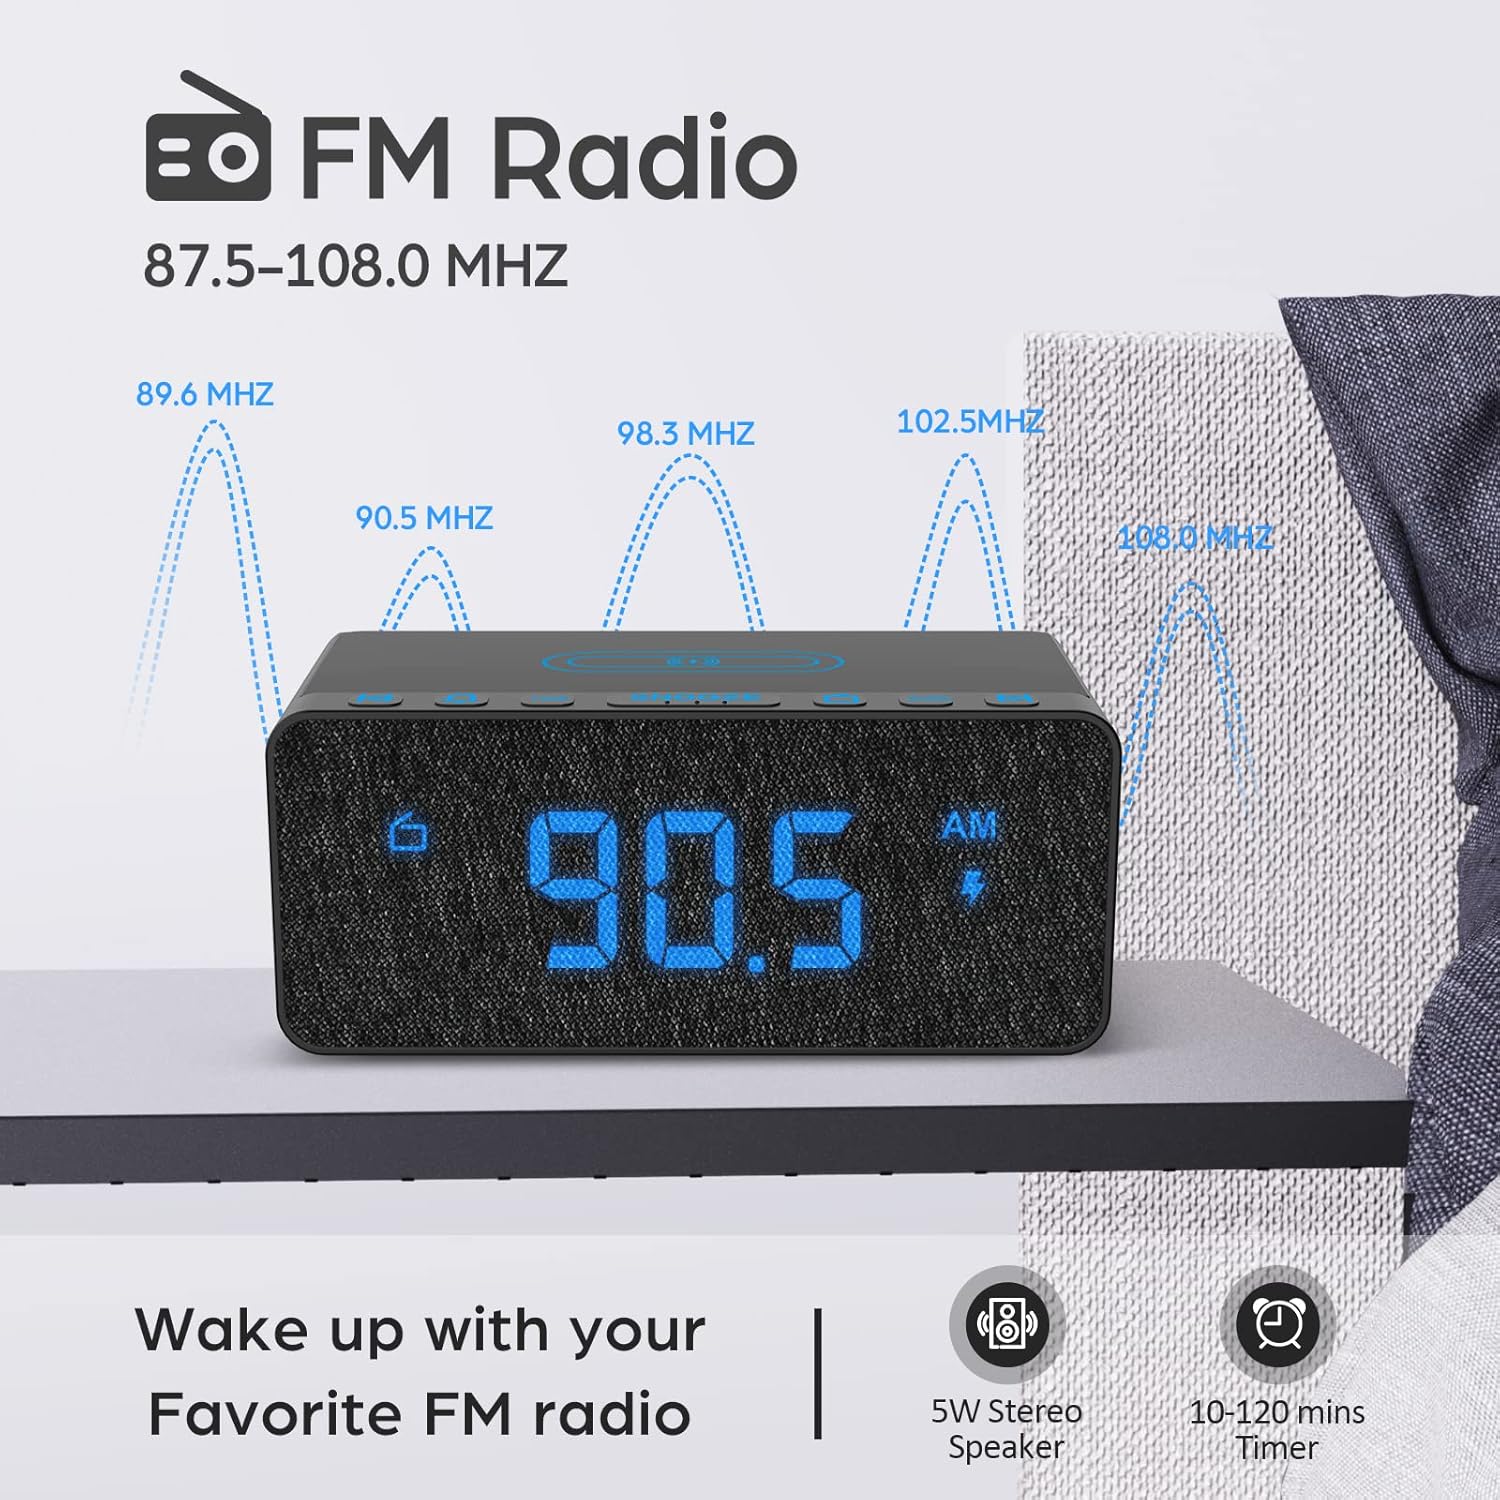
Figure 3.4: FM Radio display.
3.4 Alarm Sounds and Volume
The alarm clock offers 5 distinct wake-up sounds and adjustable alarm volume (0-15 levels).
- When setting the alarm, after setting the time, you can select the alarm sound.
- Tryk på ALARM LYDER button to cycle through the available sounds: Beep, Bird Sound, Bells, Piano Sound, or FM Radio.
- To adjust the alarm volume, use the dedicated volume buttons or dial on the unit.

Figure 3.5: Available alarm sounds.
3.5 Skærmdæmper
The display brightness can be adjusted from 0% to 100% to suit your preference.
- Find VIS DIMMER switch or dial, typically on the back or side of the unit.
- Adjust the switch/dial to increase or decrease the display brightness.

Figur 3.6: Justering af skærmens lysstyrke.
3.6 kontroller overview
For a visual guide to the top panel controls, please refer to the video below.
Video 3.1: Overståetview of BUFFBEE Digital Alarm Clock features and top panel controls, including time setting, alarm, radio, and snooze functions.
4. Vedligeholdelse
4.1 Rengøring
- Brug en blød, tør klud til at rengøre enheden.
- Do not use liquid cleaners, abrasive cleaners, or chemical sprays, as these may damage the surface or internal components.
- Sørg for, at enheden er taget ud af stikkontakten før rengøring.
4.2 Generel pleje
- Undgå at udsætte enheden for ekstreme temperaturer, direkte sollys eller høj luftfugtighed.
- Do not disassemble the unit. Any repairs should be performed by qualified personnel.
- Hold enheden væk fra vand eller andre væsker.
5. Fejlfinding
- Sp.: Hvorfor er skærmen tom efter tilslutning?
- A: Please check if the DISPLAY DIMMER switch on the back of the unit is set to the HIGH position. If it is set to a very low position, the display may appear blank in bright environments.
- Q: How can I tell if my phone is wirelessly charging?
- A: A lightning icon will appear on the alarm clock's display when a compatible phone is correctly placed on the wireless charging pad and is actively charging.
- Q: Does the battery backup allow the clock to work without a power cord?
- A: No, the battery backup is solely for saving the time and alarm settings during a power outage. The device requires the power cord to be plugged in for full functionality (display, radio, charging, alarm sound).
- Q: Which phones are supported by wireless charging?
- A: The wireless charger is compatible with most Qi-enabled smartphones, including but not limited to: iPhone 13/13 Pro/13 Pro Max/13 Mini/12/12 Pro/12 Pro Max/12 Mini/11/11 Pro/11 Pro Max/X/XS/XS Max/XR/8/8+/SE; Samsung S21/S21+/21 Ultra/S20/S20+/S20 Ultra/S10/S10+/S10E/S9/S9+/S8/S8+/S7/S7+/S6/S6E; Note 20/20 Ultra/Note 10/10 Pro/Note 9/8/5; Google Nexus 4/5/6, and other wireless-enabled phones.
6. Specifikationer
| Mærke | BUFFBEE |
| Model | B09LCCJZ3H |
| Display Type | Digital |
| Stil | Moderne |
| Særlige funktioner | Adjustable Brightness, Charging Port, Music |
| Produktdimensioner | 6.9 cm B x 2.8 cm H |
| Strømkilde | Elektrisk med ledning |
| Værelsestype | Soveværelse |
| Indendørs/Udendørs brug | Indendørs |
| Rammemateriale | Acrylonitril-butadienstyren |
| Batterier medfølger | No (for operation, backup only) |
| Vækkeur | Ja |
| Antal genstande | 1 |
| Driftstilstand | Elektrisk |
| Varens vægt | 14.9 ounce |
| UPC | 766891334623 |
7. Garantioplysninger
BUFFBEE products are designed and manufactured to the highest quality standards. This product is covered by a limited warranty against defects in materials and workmanship for a period of one (1) year from the original date of purchase. This warranty does not cover damage caused by accident, misuse, abuse, improper installation or operation, or unauthorized repairs. Please retain your proof of purchase for warranty claims.
8. Kundesupport
If you have any questions, concerns, or require assistance with your BUFFBEE Digital Alarm Clock, please contact our customer support team. For the most up-to-date contact information, please visit the official BUFFBEE webwebstedet eller se emballagen på dit produkt.
Online support: Visit the BUFFBEE Store on Amazon

