Indledning
Thank you for choosing the HEABOLI HP88 4K Dual Dash Cam. This device is designed to provide high-quality video recording for both the front and rear of your vehicle, enhancing your driving safety and providing crucial evidence in case of incidents. Featuring advanced capabilities such as 4K front recording, 1080P rear recording, built-in Wi-Fi, GPS for live speed tracking, a 3-inch IPS touch screen, Sony Night Vision, HDR technology, and 24-hour parking mode, the HP88 offers a comprehensive solution for your vehicle surveillance needs. Please read this manual thoroughly to ensure proper installation and optimal performance.
Hvad er der i æsken
- 1 x HEABOLI HP88 Dash Cam (Front and Rear units)
- 1 x biloplader
- 1 x brugermanual
- 1 x GPS Magnetic Bracket
- 1 x USB-kabel
- 1 x Trim Pry Tool
- 4 x Cable Fixers
- 1 x Electrostatic Film
- 2 x Double-sided Adhesives
Opsætning
1. Montering af Dash Cam
The front dash cam unit attaches to your windshield via the GPS magnetic bracket. Clean the windshield area thoroughly before applying the electrostatic film and then the adhesive mount. The magnetic design allows for easy attachment and detachment of the main camera unit from the mount.

Figure 1: Front dash cam unit with magnetic bracket and Type-C port for stable transmission.
2. Tilslutning af bakkameraet
Connect the rear camera to the main unit using the provided cable. Route the cable discreetly along the vehicle's headliner and A-pillars, using the trim pry tool to tuck it under panels. The rear camera is typically mounted on the rear windshield.

Figure 2: Illustration of front and rear dash cam units and their connection.

Figure 3: Dash cam installation showing cable routing for the rear camera.
3. Strømtilslutning
Plug the car charger into your vehicle's cigarette lighter socket and connect the USB cable to the dash cam's magnetic bracket. The dash cam will power on automatically when the vehicle starts.
4. SD Card Installation & Formatting
Insert a high-endurance micro SD memory card (U3 level or above, up to 256GB) into the designated slot on the dash cam. It is crucial to format the SD card within the dash cam's settings before first use and periodically thereafter to ensure stable operation and prevent recording issues.

Figure 4: Proper insertion of the micro SD card into the dash cam.
5. Installationsvideoguide
Video 1: Official HEABOLI Dash Cam Installation Guide. This video demonstrates the step-by-step process of installing the dash cam, including mounting the units and routing cables for a clean setup.
Betjeningsvejledning
1. Tænd/sluk
The dash cam automatically powers on and begins recording when your vehicle's ignition is turned on. It will power off automatically when the ignition is turned off. You can also manually power it on or off using the power button on the device.
2. Berøringsskærmsgrænseflade
The 3-inch IPS touch screen provides an intuitive interface for navigating settings, viewi live footage, and playing back recorded videos. Swipe gestures allow you to switch between front, rear, or combined camera views.

Figure 5: The dash cam's 3-inch IPS touch screen for easy control and viewing.
3. Wi-Fi-forbindelse og appbrug
The built-in Wi-Fi allows you to connect the dash cam to your smartphone via the "Heaboli" mobile app (available on iOS and Android). Through the app, you can:
- Levende view foo i realtidtage fra begge kameraer.
- Change dash cam settings.
- Edit and dub videos.
- Download recorded filedirekte til din telefon.
- Share videos on social media.
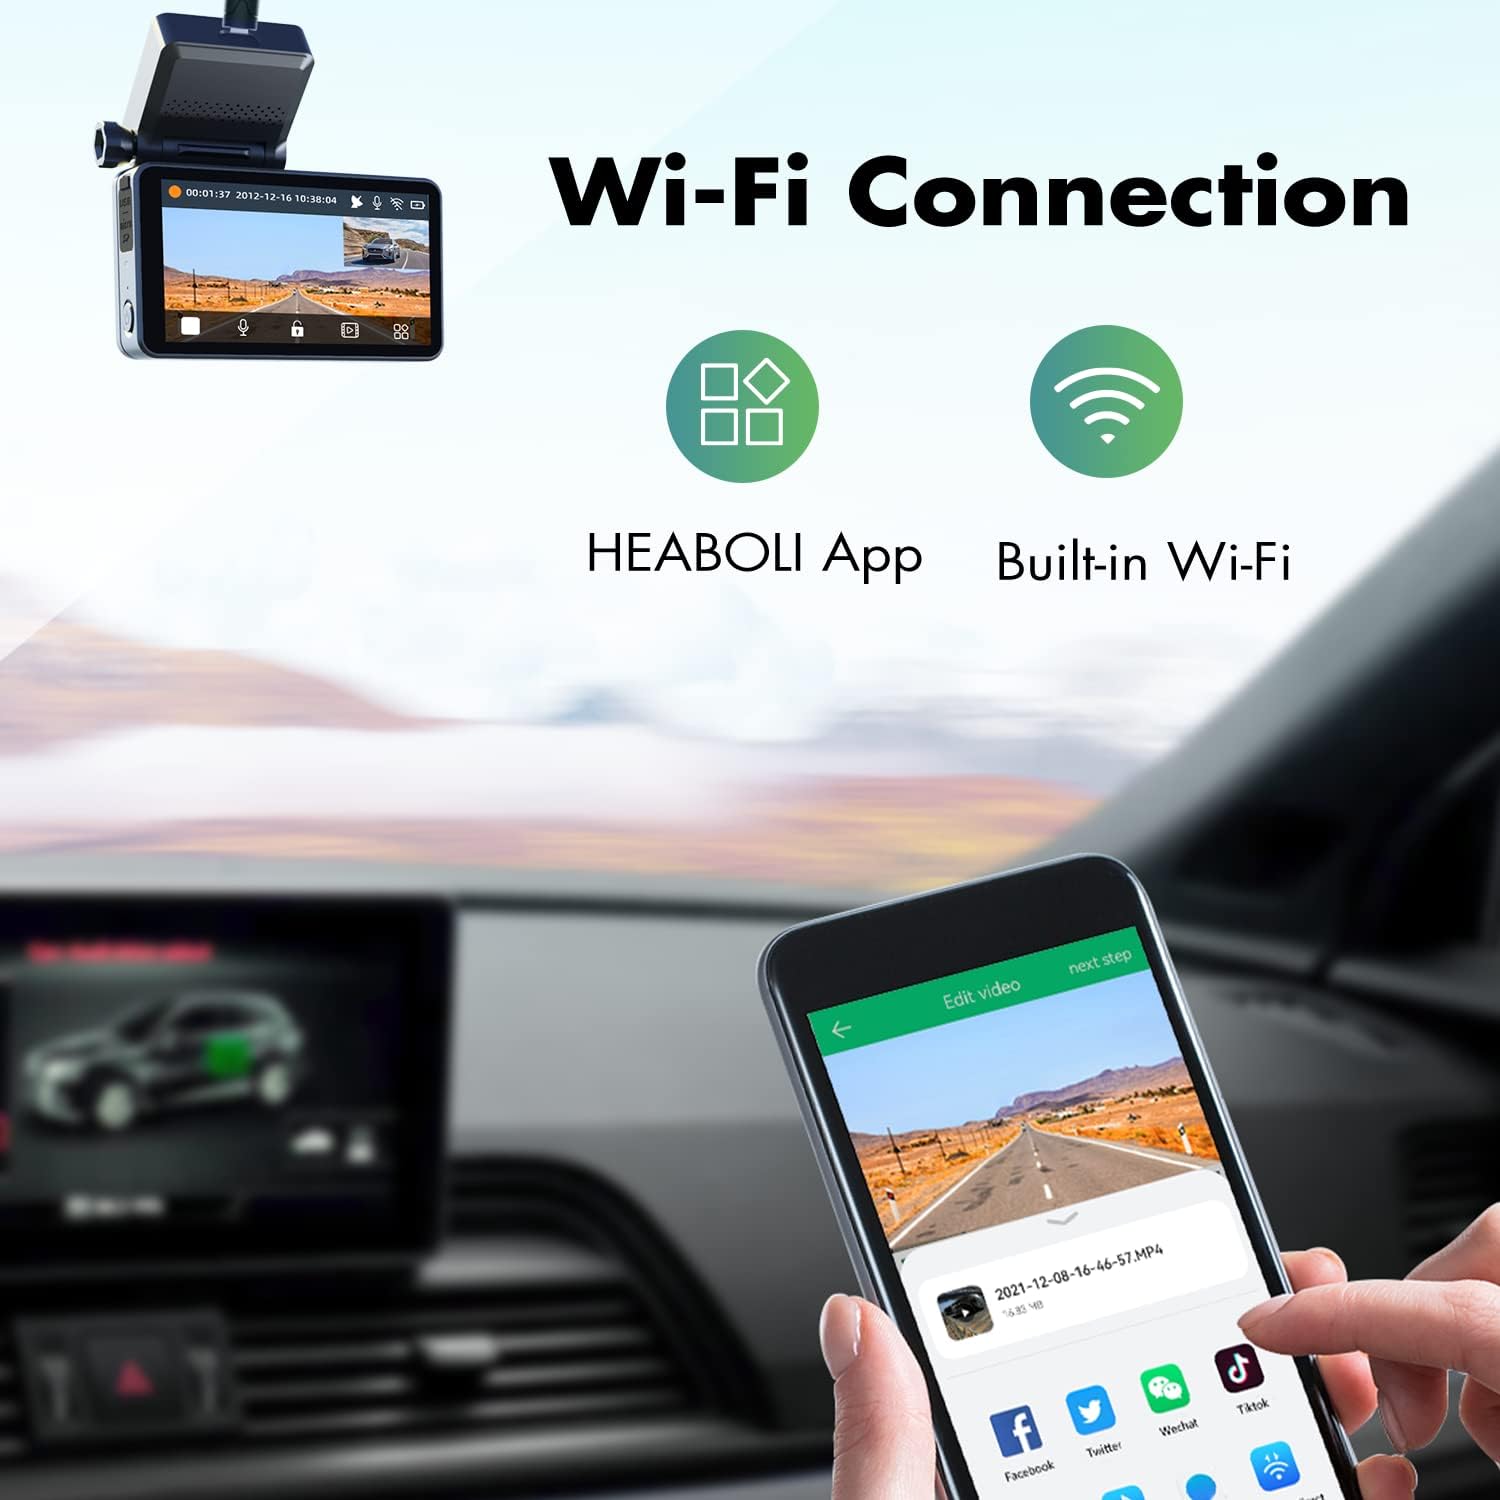
Figure 6: The Heaboli mobile app provides seamless control and access to your dash cam footage.

Figur 7: Detaljeret view of the Heaboli app interface for managing recordings and settings.
4. GPS sporing
The built-in GPS module records your driving route, speed, and vehicle location. This information can be viewed during video playback on the mobile app or a computer, providing valuable data for accident reconstruction or travel logs.

Figure 8: GPS logger functionality displaying driving route and speed on a map.
5. Night Vision & HDR Technology
Equipped with a Sony IMX335 sensor and HDR technology, the dash cam excels in low-light conditions. It captures clear details like license plates and road signs even at night, ensuring reliable recording around the clock.

Figure 9: Enhanced night vision and HDR technology for clear recordings in challenging light conditions.
6. 24-Hour Parking Mode
The built-in 300mAh battery enables the dash cam's 24-hour parking monitor. When the car engine is off, the camera will automatically turn on and record a 30-second video upon detecting any collision around the vehicle, providing surveillance even when parked.

Figure 10: The 24-hour parking mode feature, activated by collision detection.
7. Loop-optagelse
The dash cam supports loop recording, which means it continuously records and overwrites the oldest footage when the SD card is full. Important videos triggered by G-sensor (collision detection) or manual locking are protected from being overwritten.

Figure 11: Loop recording ensures continuous video capture without manual deletion.
Opretholdelse
1. SD-kortstyring
To maintain optimal performance and prevent data corruption, it is recommended to format your micro SD card regularly (e.g., once a week or every other week, depending on usage and card size). This helps clear accumulated emergency files and ensures smooth recording.
2. Rensning
Gently wipe the camera lenses with a soft, lint-free cloth to ensure clear video quality. Avoid using abrasive cleaners or solvents. Keep the dash cam body clean and free from dust.
Fejlfinding
- Dash Cam tænder ikke: Ensure the car charger is properly connected and the vehicle's ignition is on. Check the power button.
- SD Card Error/Recording Issues: Format the SD card within the dash cam settings. Ensure you are using a high-endurance U3 level micro SD card. Replace the SD card if the issue persists.
- Problemer med Wi-Fi-forbindelse: Ensure the "Heaboli" app is updated to the latest version. Restart both the dash cam and your smartphone.
- Dårlig videokvalitet: Clean the camera lenses. Ensure the protective film is removed from the lenses. Check video resolution settings.
- Dash Cam Falling from Windshield: Re-apply the electrostatic film and double-sided adhesive. Ensure the windshield surface is clean and dry before application.
Specifikationer
| Feature | Beskrivelse |
|---|---|
| Forreste kameraopløsning | 4K UHD |
| Bagkameraopløsning | 1080P |
| Sensor | Sony IMX335 |
| Vise | 3 tommer IPS touchskærm |
| Forbindelse | Built-in Wi-Fi, GPS Enabled |
| Vidvinkel | Foran 170°, bagpå 150° |
| Opbevaring | Supports Micro SD Card up to 256GB (U3 or above) |
| Parkeringstilstand | 24-Hour Parking Monitor (built-in 300mAh battery) |
| Driftstemperatur | -4°F til 140°F (-20°C til 60°C) |
| Dimensioner | 3.12 x 1 x 1.6 tommer |
| Varens vægt | 1.3 pund |
Garanti & Support
For warranty information and technical support, please refer to the official HEABOLI website or contact their customer service directly. Details can typically be found on the product packaging or within the "Heaboli" mobile application.