1. Introduktion
This manual provides detailed instructions for the operation and maintenance of your COMICA BoomX-D2 PRO Wireless Lavalier Microphone system. Please read this manual thoroughly before use to ensure proper functionality and to maximize your product experience.
The COMICA BoomX-D2 PRO is a 2.4GHz wireless microphone system designed for high-quality audio recording across various platforms including cameras, smartphones, and computers. Key features include 16GB internal storage, multiple output modes (Safety, Mono, Stereo), and one-click noise cancellation.
2. Hvad er der i æsken
The COMICA BoomX-D2 PRO package includes the following components:
- 2 x sendere (TX)
- 1 x modtager (RX)
- 1 x bæretaske
- 2 x 3.5mm Mic Audio Input Cables
- 1 x 3.5mm TRS-TRRS Audio Cable (for Smartphones)
- 1 x 3.5mm TRS-TRS Audio Cable (for Cameras)
- 1 x 3-in-1 Charging/Output Cable
- 2 x Wind Muffs
- 1 x Nulstil pin
- 1 x bærbar taske
- 1 x brugermanual
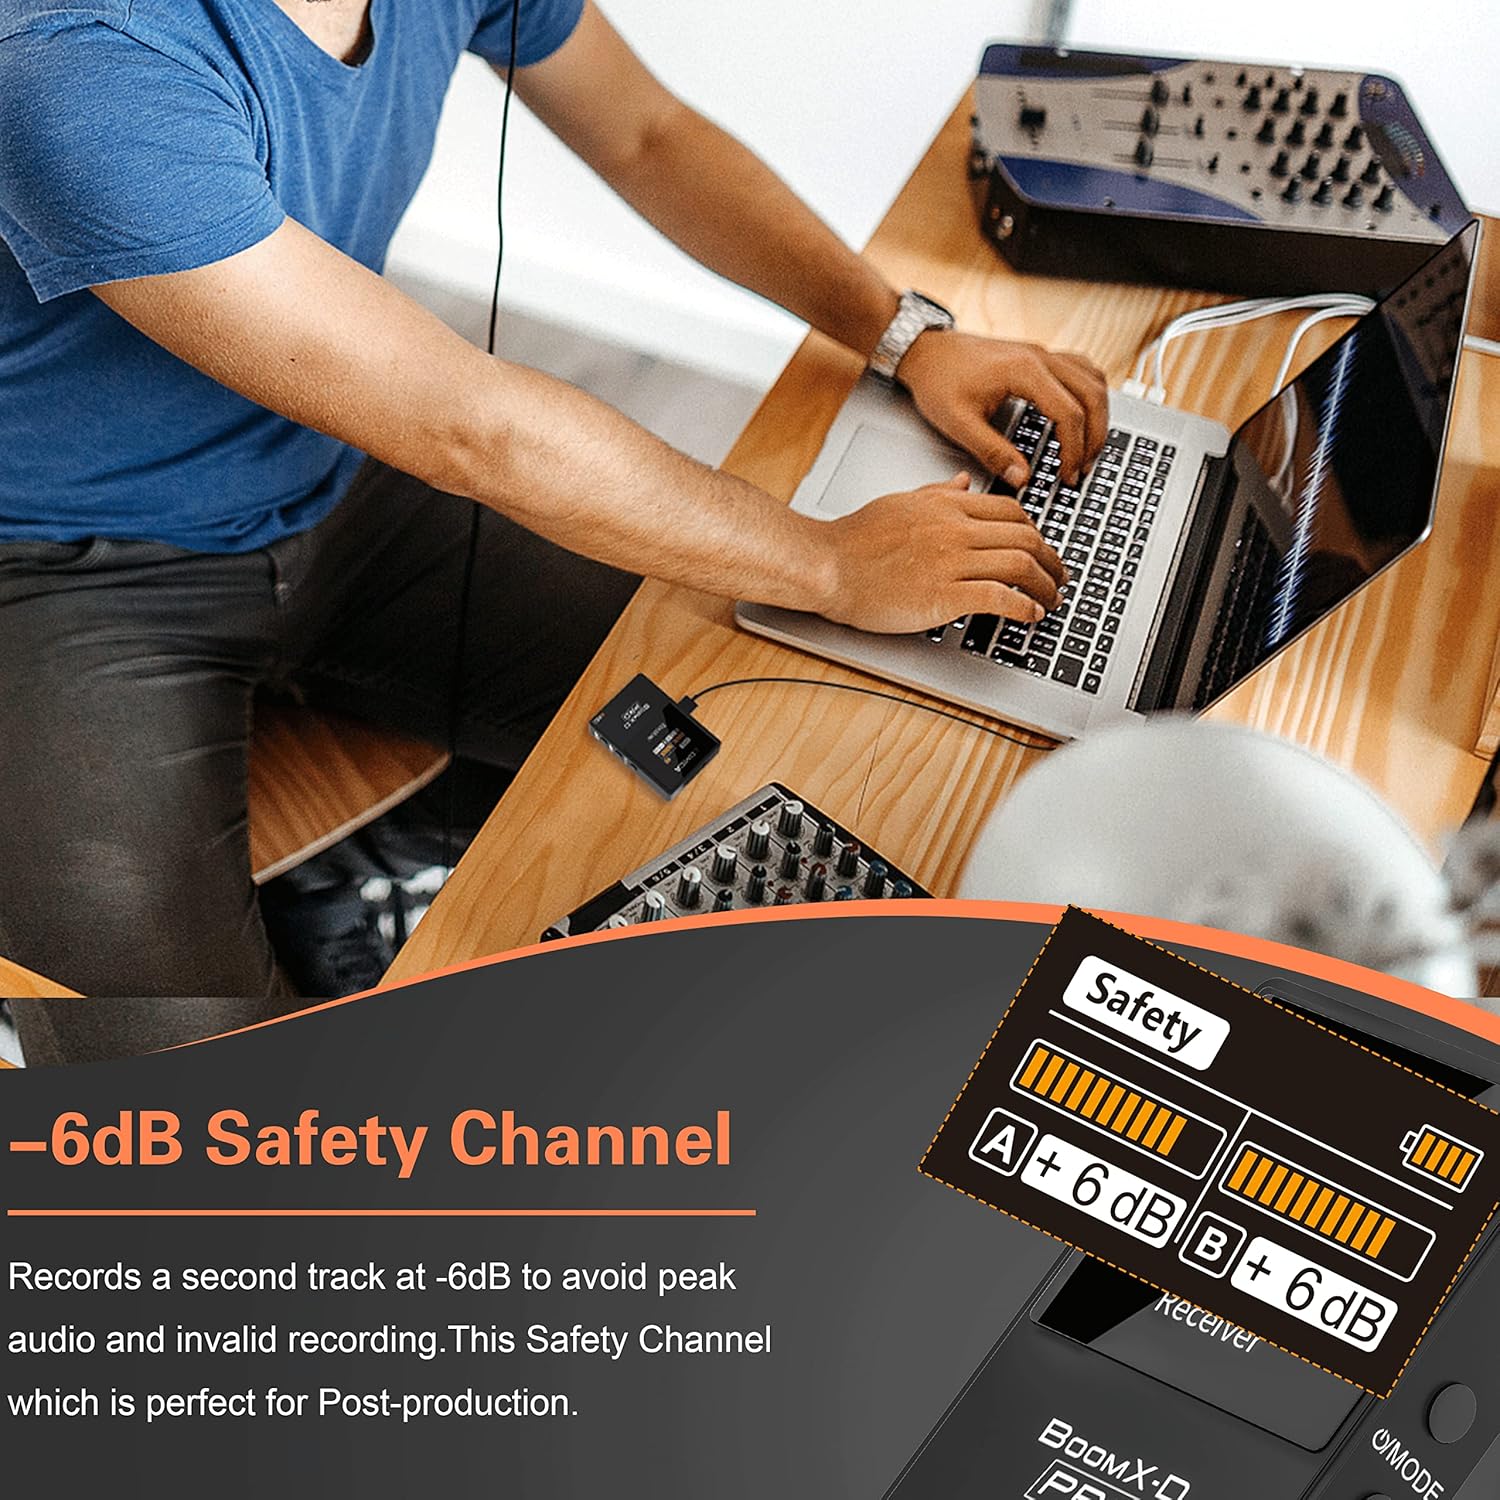
Image: All components included in the COMICA BoomX-D2 PRO Wireless Lavalier Microphone system package.
3. Produktet er slutview
3.1. Sender (TX)
- Indbygget mikrofon: Omnidirectional condenser microphone for 360° sound pickup.
- 3.5mm MIC IN Port: For connecting external lavalier microphones.
- REC-knap: Long-press to start/stop internal recording.
- Tænd/sluk-knap: Short press to mute/unmute, long press to power on/off.
- USB-C-port: For charging and data transfer (orange cable for data).
- Skærm: Shows battery level, recording status, and audio levels.
3.2. Modtager (RX)
- 3.5 mm TRS-udgang: For connecting to cameras or other audio devices.
- 3.5 mm hovedtelefonstik: Til lydovervågning i realtid.
- Tænd/sluk-knap: Long press to power on/off, short press to switch between Mono, Stereo, and Safety modes.
- Lydstyrke +/- knapper: Juster udgangslydstyrken.
- USB-C-port: For charging and digital output.
- Skærm: Shows battery levels, audio levels, and selected output mode.

Billede: Detaljeret view of the transmitter and receiver units, showing their various controls and connection points.
4. Opsætningsvejledning
4.1. Tænd/sluk
- To power on, long-press the Power button on both the TX and RX units.
- To power off, long-press the Power button on both units.
4.2. Parring
The TX and RX units are pre-paired at the factory. If re-pairing is needed:
- Power on both the TX and RX units.
- On the RX unit, short press the 'Pair' button. The pairing indicator will flash.
- On the TX unit, short press the 'Pair' button. The pairing indicator will flash.
- Once successfully paired, the indicators on both units will turn solid blue.
4.3. Tilslutning til enheder
Use the appropriate cable to connect the RX unit to your recording device:
- For kameraer: Use the 3.5mm TRS-TRS Audio Cable. Connect one end to the RX 'OUT' port and the other to your camera's MIC IN port.
- Til smartphones: Use the 3.5mm TRS-TRRS Audio Cable. Connect one end to the RX 'OUT' port and the other to your smartphone's 3.5mm jack. For iPhones without a 3.5mm jack, a Lightning adapter (not included) is required. For USB-C smartphones, a USB-C to 3.5mm adapter (not included) is required.
- Til computere/bærbare computere: Use the 3-in-1 Charging/Output Cable (orange end for data). Connect the USB-C end to the RX unit and the USB-A end to your computer. The system will function as an audio interface.

Image: The receiver unit mounted on a camera, demonstrating a typical setup for video recording.
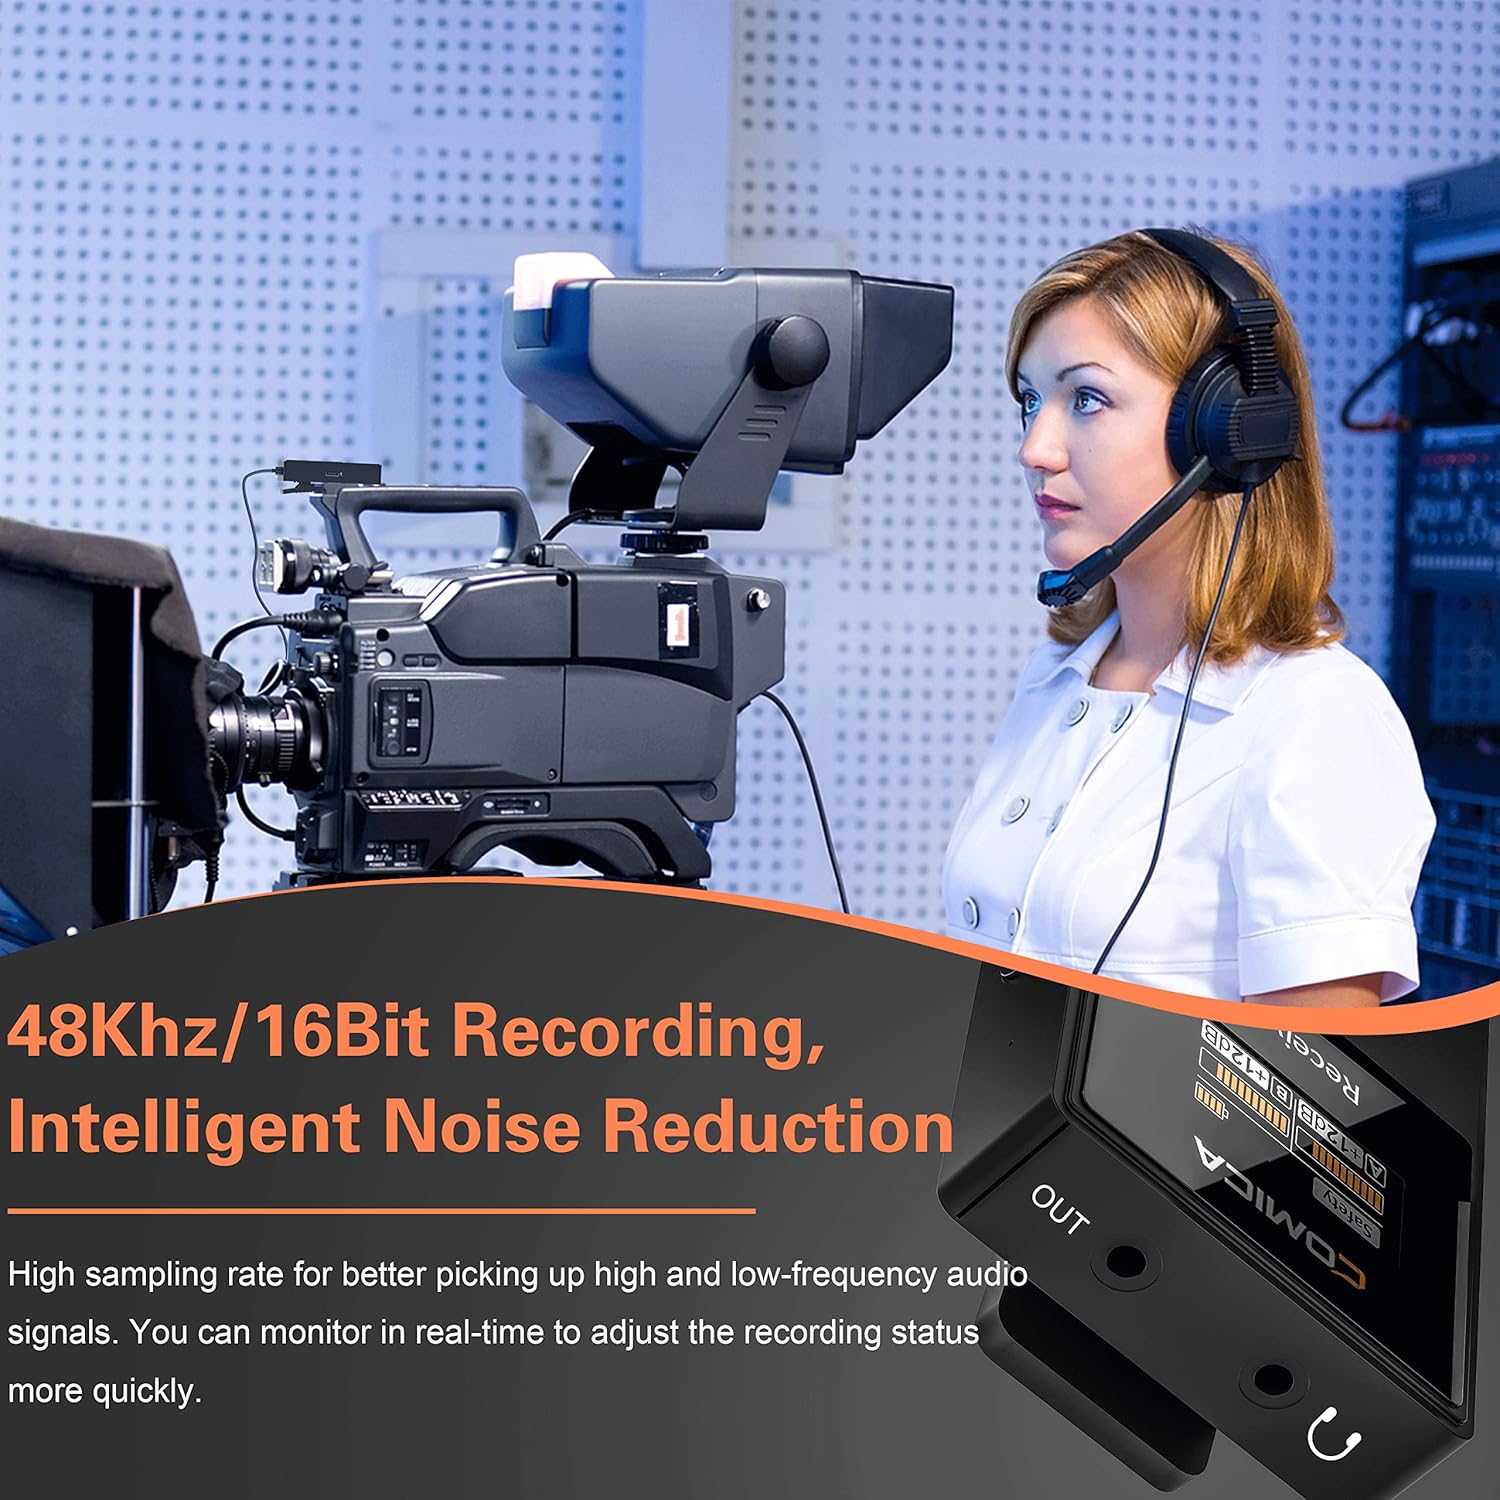
Image: An illustration of the different cables provided for connecting the microphone system to various devices.
4.4. Using Built-in or External Lav Mic
- The TX unit has a built-in omnidirectional microphone. For direct use, simply clip the TX unit to your clothing.
- To use an external lavalier microphone, plug the 3.5mm Mic Audio Input Cable into the TX 'MIC' port. Ensure the external mic is securely connected.
5. Driftstilstande
The RX unit supports three output modes: Mono, Stereo, and Safety. Short press the 'Power/Mode' button on the RX unit to cycle through these modes.
5.1. Mono-tilstand
In Mono mode, audio from both transmitters (TX1 and TX2) is mixed into a single mono track. This is ideal for single-person recordings or when you want both audio sources combined into one channel.
5.2. Stereotilstand
In Stereo mode, audio from TX1 is recorded to the left channel and audio from TX2 is recorded to the right channel. This allows for independent control and mixing of each audio source during post-production.
5.3. Sikkerhedstilstand
Safety mode records two separate tracks. One track is the standard audio, and the second track is recorded at -6dB lower volume. This provides a backup audio track to prevent clipping or distortion in case the main audio level is too high.

Image: Visual representation of the different audio output modes available on the receiver unit.
5.4. One-click Noise Cancellation
The TX units feature a DSP denoise chip for one-click noise cancellation. Short press the noise cancellation button on the TX unit to activate or deactivate this feature. This helps to reduce environmental noise for clearer audio.

Image: A graphic demonstrating the effect of the one-click noise cancellation feature on audio quality.
5.5. Internal Recording (16GB Storage)
Each TX unit has 16GB of internal storage, capable of storing up to 48 hours of uncompressed audio. To start internal recording, long-press the 'REC' button on the TX unit. Long-press again to stop recording.
For at overføre optaget files to a computer, connect the TX unit to your computer using the orange 3-in-1 Charging/Output Cable. Ensure the TX unit is powered on during file overførsel.

Image: A transmitter unit connected to a laptop, illustrating the process of transferring internally recorded audio files.
5.6. Real-time Monitoring & Muting
- Plug headphones into the RX 3.5mm headphone jack for real-time audio monitoring.
- Short press the Power/Mute button on the TX unit to quickly mute or unmute the microphone during recording.
6. Opladning og batterilevetid
The COMICA BoomX-D2 PRO units are powered by built-in Lithium Polymer batteries.
- Use the provided 3-in-1 Charging/Output Cable to charge both TX units and the RX unit simultaneously.
- The battery life for the transmitters is approximately 4.5 hours, and for the receiver, it is approximately 6 hours.
- The charging case itself can provide additional charges to extend operational time.
- Battery level indicators are displayed on the screens of both TX and RX units.

Image: The three units (two transmitters and one receiver) being charged simultaneously using the included 3-in-1 USB-C cable.
7. Specifikationer
| Feature | Detalje |
|---|---|
| Varens vægt | 1.02 ounces (29 gram) |
| Mikrofon formfaktor | Lavalier |
| Varedimensioner (L x B x H) | 0.79 x 0.79 x 0.39 tommer |
| Strømkilde | Batteridrevet (1 Lithium Polymer batteri inkluderet) |
| Materiale | Metal, Plast |
| Signal-støjforhold | 70 dB |
| Hardware platform | Videokamera, kamera, smartphone |
| Antal kanaler | 2 |
| Forbindelsesteknologi | 2.4 GHz |
| Connector Type | 3.5 mm Jack |
| Polar mønster | Omnidirektionel |
| Audio Følsomhed | 12 decibel |
| Særlige funktioner | 16GB Internal Recording, Built-in or External Lav Mic, Dual-Channel Lossless Pickup, One-click Noise Cancellation, Safety, Mono, and Stereo Output |
8. Fejlfinding
- Ingen lyd/lav lydstyrke:
- Ensure both TX and RX units are powered on and successfully paired (solid blue indicator).
- Kontrollér alle kabelforbindelser mellem RX-enheden og din optageenhed.
- Verify the volume levels on the RX unit are adjusted appropriately.
- Confirm the recording device's input settings are correct and the microphone is selected.
- Audio Distortion/Clipping:
- Switch the RX unit to Safety Mode to record a backup track at a lower volume.
- Reduce the input gain on your recording device if possible.
- Interferens/dårligt signal:
- Ensure the TX and RX units are within the specified operating range (up to 328' in open areas).
- Avoid obstacles between the TX and RX units.
- Minimize interference from other 2.4GHz devices.
- Internal Recording Issues:
- Ensure the TX unit has sufficient battery life.
- Check if the 16GB storage is full. Older files will be overwritten if recording continues.
- Ved overførsel files, ensure the orange 3-in-1 cable is used and the TX unit is powered on.
9. Vedligeholdelse
- Keep the units clean and dry. Avoid exposure to moisture, dust, and extreme temperatures.
- Use a soft, dry cloth to clean the exterior of the units.
- Store the system in its provided carry case when not in use to protect it from damage.
- Regularly check cables for any signs of wear or damage.
- Ensure the charging contacts on the units and in the charging case are clean to maintain proper charging.
10. Garanti og support
COMICA offers a 365-day replacement and lifetime service for its products. For warranty claims, technical support, or any inquiries, please contact COMICA customer service through their official channels or the retailer where the product was purchased.
You can visit the official COMICA Store for more information and support: COMICA Store
11. Officielle produktvideoer
Below are official product videos from the seller demonstrating features and usage of the COMICA BoomX-D2 PRO.
After Owning for 2 Years - Mic Test and Detailed Unboxing
Video: A comprehensive review and unboxing of the COMICA BoomX-D2 PRO, including a microphone test, after two years of ownership.
comica BoomX-D PRO Lav Mic and Built-in Mic
Video: Demonstration of both the lavalier microphone and the built-in microphone capabilities of the COMICA BoomX-D PRO.
comica BoomX-D PRO Wireless Lavalier Microphone
Video: En overview of the COMICA BoomX-D PRO Wireless Lavalier Microphone system and its features.


