1. Introduktion
This manual provides essential information for the safe and effective use of your LASER TREE Laser Engraver Module. This module is designed for precision engraving and cutting on a variety of materials. Please read this manual thoroughly before operation to ensure proper setup, usage, and maintenance.
2. Sikkerhedsoplysninger
WARNING: This is a Class 4 laser product. Direct exposure to the laser beam can cause severe eye and skin damage. Always wear appropriate laser safety glasses (OD 6+) when operating this module. Never look directly into the laser beam or its reflections.
- Ensure the work area is well-ventilated to dissipate fumes and smoke generated during engraving/cutting.
- Keep flammable materials away from the laser module during operation.
- Do not leave the laser module unattended while in operation.
- Sørg for korrekt jordforbindelse af alt tilsluttet udstyr.
- Hold børn og kæledyr væk fra operationsområdet.
- Familiarize yourself with emergency shutdown procedures for your engraving machine.
3. Produktfunktioner
- Optical Power: 4W (4000mW) for efficient engraving and cutting.
- Bølgelængde: 450nm blue-violet light, providing clear visibility for precise positioning.
- Justerbar brændvidde: Easily adjust focus between 20mm and 50mm for optimal engraving quality and efficiency.
- Original Diode with FAC: Ensures high stability, efficiency, and quality of the laser output.
- Kompakt design: Small and convenient for integration into various DIY engraving machines, three-axis engraving machines, and 3D printers.
- PWM Modulation Support: Compatible with 5V PWM modulation for power control.
- Nem installation: Features an XH2.54-3P socket for pluggable control line installation.

Figur 3.1: Overview of the LASER TREE Laser Engraver Module.

Figure 3.2: Demonstrates the 450nm 20W module's adjustable focus and its ability to cut 1-2mm plywood in a single pass.
4. Specifikationer
| Specifikation | Værdi |
|---|---|
| Mærke | LASER TRÆ |
| Modelnummer | 450nm 20W |
| Optical Power Output | 4W (4000mW) |
| Bølgelængde | 450 nm |
| Materiale | Aluminium |
| Farve | Sort |
| Module Size (L*W*H) | 35mm * 35mm * 99.6mm |
| Adjustable Focus Range | 20 mm - 50 mm |
| Input bindtage | DC 12V |
| Indgangsstrøm | 1.6A (1.4-1.8A) |
| Effektjustering | Support 5V PWM modulation |
| Indgangsport | XH2.54-3P stikkontakt |
| Varens vægt | 3.53 ounce |
| Driftstilstand | Automatisk |
| Laser klasse | Klasse 4 |

Figure 4.1: Detailed specifications and dimensions of the laser module.

Figure 4.2: Technical drawing showing dimensions and the XH2.54-3P wiring diagram for DC 12V, GND, and 5V PWM connections.
5. Opsætning
The LASER TREE Laser Engraver Module is designed for easy integration into compatible laser engraving and cutting machines. Follow these general steps for setup:
- Montering: Securely attach the laser module to your engraving machine's gantry or designated mounting bracket. Ensure it is stable and aligned correctly. The module features four M3 tapped holes for mounting.
- Ledningsføring: Connect the provided 3-pin cable to the XH2.54-3P socket on the laser module. Connect the other end to your machine's control board, ensuring correct polarity for DC 12V, Ground (GND), and 5V PWM signal. Refer to your machine's manual for specific wiring instructions.
- Strømforsyning: Connect your machine to a stable DC 12V power supply capable of providing at least 1.6A (1.4-1.8A recommended).
- Softwarekonfiguration: Configure your engraving software (e.g., LightBurn, GRBL) to recognize and control the laser module. Set appropriate power and speed settings for your desired material and effect.
- Fokusjustering: Before starting any job, adjust the laser's focal length. The adjustable focus range is 20mm to 50mm. Rotate the lens barrel to achieve the smallest, sharpest laser dot on your material for optimal engraving or cutting.
Video 5.1: This video demonstrates the laser module's cutting capability, showing it in operation on a material and measuring the cut depth. It highlights the precision and power of the 4W optical laser.
6. Betjeningsvejledning
Once the laser module is set up and configured, you can begin your engraving or cutting projects. Always ensure safety precautions are followed.
- Materiale placering: Place your material securely on the engraving bed. Ensure it is flat and properly positioned according to your software's workspace.
- Focus Verification: Double-check the laser focus for the specific material thickness. A precise focus is critical for clean cuts and sharp engravings.
- Test Engraving/Cutting: It is recommended to perform small test engravings or cuts on scrap material to determine optimal power and speed settings before starting your main project.
- Start drift: Initiate the engraving or cutting process through your machine's control software. Monitor the process closely.
- Ventilation: Maintain continuous and adequate ventilation throughout the operation to remove smoke and debris.
- Færdiggørelse: Once the job is complete, allow the laser module to cool down before handling. Remove the finished material and clean the work area.
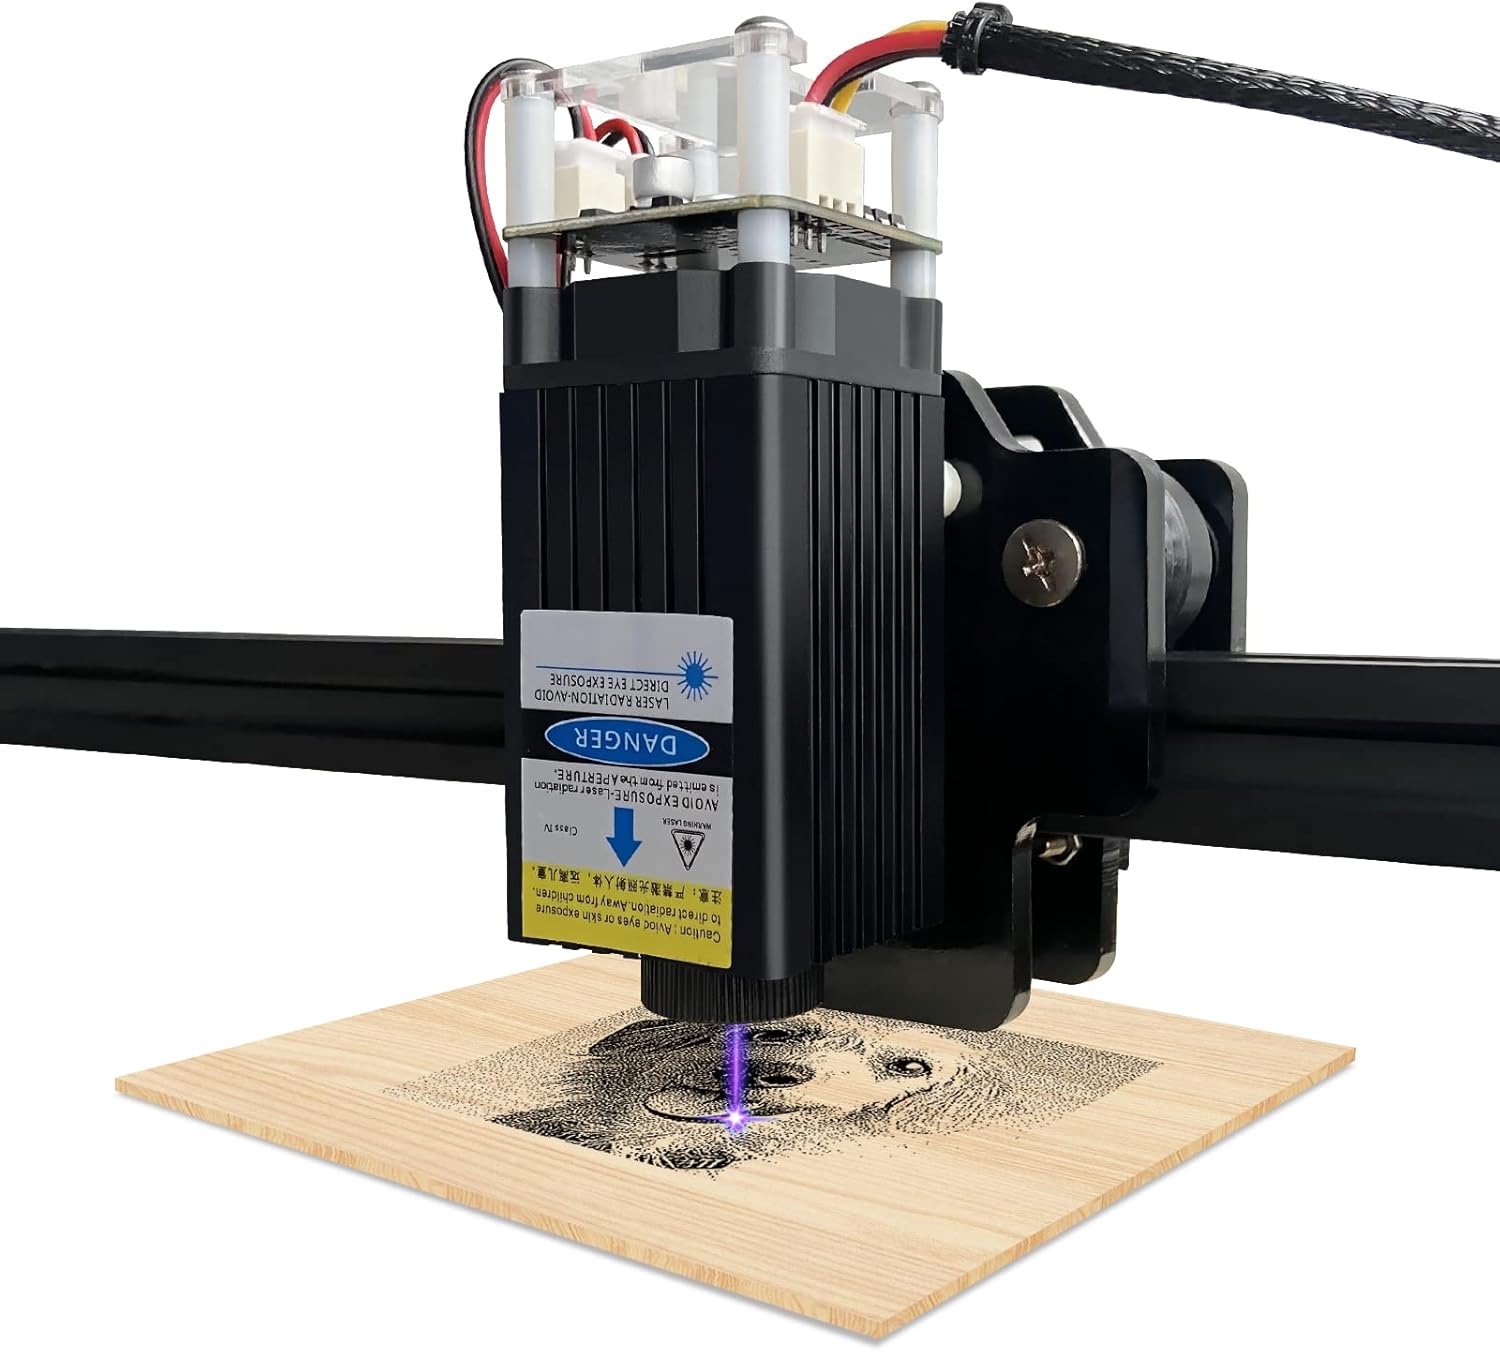
Figure 6.1: The laser module actively engraving a design onto a piece of wood, demonstrating its operational capability.
Video 6.1: This video showcases the LT-20W-A laser module performing engraving tasks, illustrating its precision and effectiveness on various materials.
Kompatible materialer:
The laser module is suitable for engraving and cutting a wide range of materials, including:
- MDF
- Træ
- Papir
- Læder
- Bambus
- Plastic (non-transparent, non-blue/purple)
- Gummi
- Alumina
- Rustfrit stål (til gravering)
Note:
- The module is generally unable to engrave blue, purple, white, or transparent materials.
- Aluminum without an oxide layer cannot be engraved.

Figure 6.2: A display of various materials, including MDF, leather, stainless steel, paper, wood, and acrylic, that have been successfully engraved or cut by the laser module.
7. Vedligeholdelse
Regular maintenance ensures the longevity and optimal performance of your laser module.
- Rengøring af linser: Periodically clean the laser lens using a soft, lint-free cloth and a small amount of lens cleaning solution. Avoid abrasive materials that could scratch the lens.
- Fjernelse af støv: Use compressed air to gently blow away dust and debris from the module's heatsink and fan to maintain efficient cooling.
- Tilslutningskontrol: Regularly inspect all electrical connections (power, PWM) to ensure they are secure and free from corrosion.
- Opbevaring: When not in use, store the laser module in a clean, dry environment, away from direct sunlight and extreme temperatures.
8. Fejlfinding
If you encounter issues with your laser module, refer to the following common problems and solutions:
| Problem | Mulig årsag | Løsning |
|---|---|---|
| Laseren affyrer ikke | No power, incorrect wiring, software issue, faulty module | Check power supply (12V DC), verify wiring connections (GND, 12V, PWM), ensure software is sending PWM signal, contact support if module is suspected faulty. |
| Weak engraving/cutting | Incorrect focus, low power setting, material incompatibility, dirty lens | Adjust focus for a sharp dot, increase laser power in software, ensure material is compatible, clean the laser lens. |
| Inkonsistente resultater | Unstable mounting, material movement, power fluctuations | Ensure module is securely mounted, material is clamped firmly, use a stable power source. |
| Overophedning | Blocked fan/heatsink, prolonged high power use | Clean fan and heatsink, ensure proper ventilation, allow module to cool between long operations. |
If you encounter any problems not listed here or require further assistance, please feel free to contact LASER TREE customer support directly. We are committed to providing comprehensive after-sales service and will assist you with troubleshooting and problem resolution.
9. Garanti og support
LASER TREE stands behind the quality of its products. Our modules are designed to be compatible with PWM signal controlled laser engraver/cutter machines, CNC machines, and 3D printers. However, due to the variety of brands and models, not all machines may be plug-and-play.
For pre-sale consultations regarding module compatibility or any issues encountered during use, please contact our customer support team. We are dedicated to ensuring user satisfaction and will provide prompt assistance to resolve any concerns.
For yderligere ressourcer kan du henvise til den officielle Brugervejledning (PDF) tilgængelig online.


