Indledning
This manual provides essential information for the safe operation, maintenance, and troubleshooting of your eufy RoboVac X8 robot vacuum cleaner. Please read this guide thoroughly before using the product and retain it for future reference.
Pakkens indhold
Bekræft at alle komponenter er til stede i pakken:
- RoboVac X8 Unit
- Opladningsbase
- AC strømadapter
- Sidebørster (2)
- Ekstra filter
- Rengøringsværktøj
- Kabelbindere (5)
- Owner's Manual and other documents
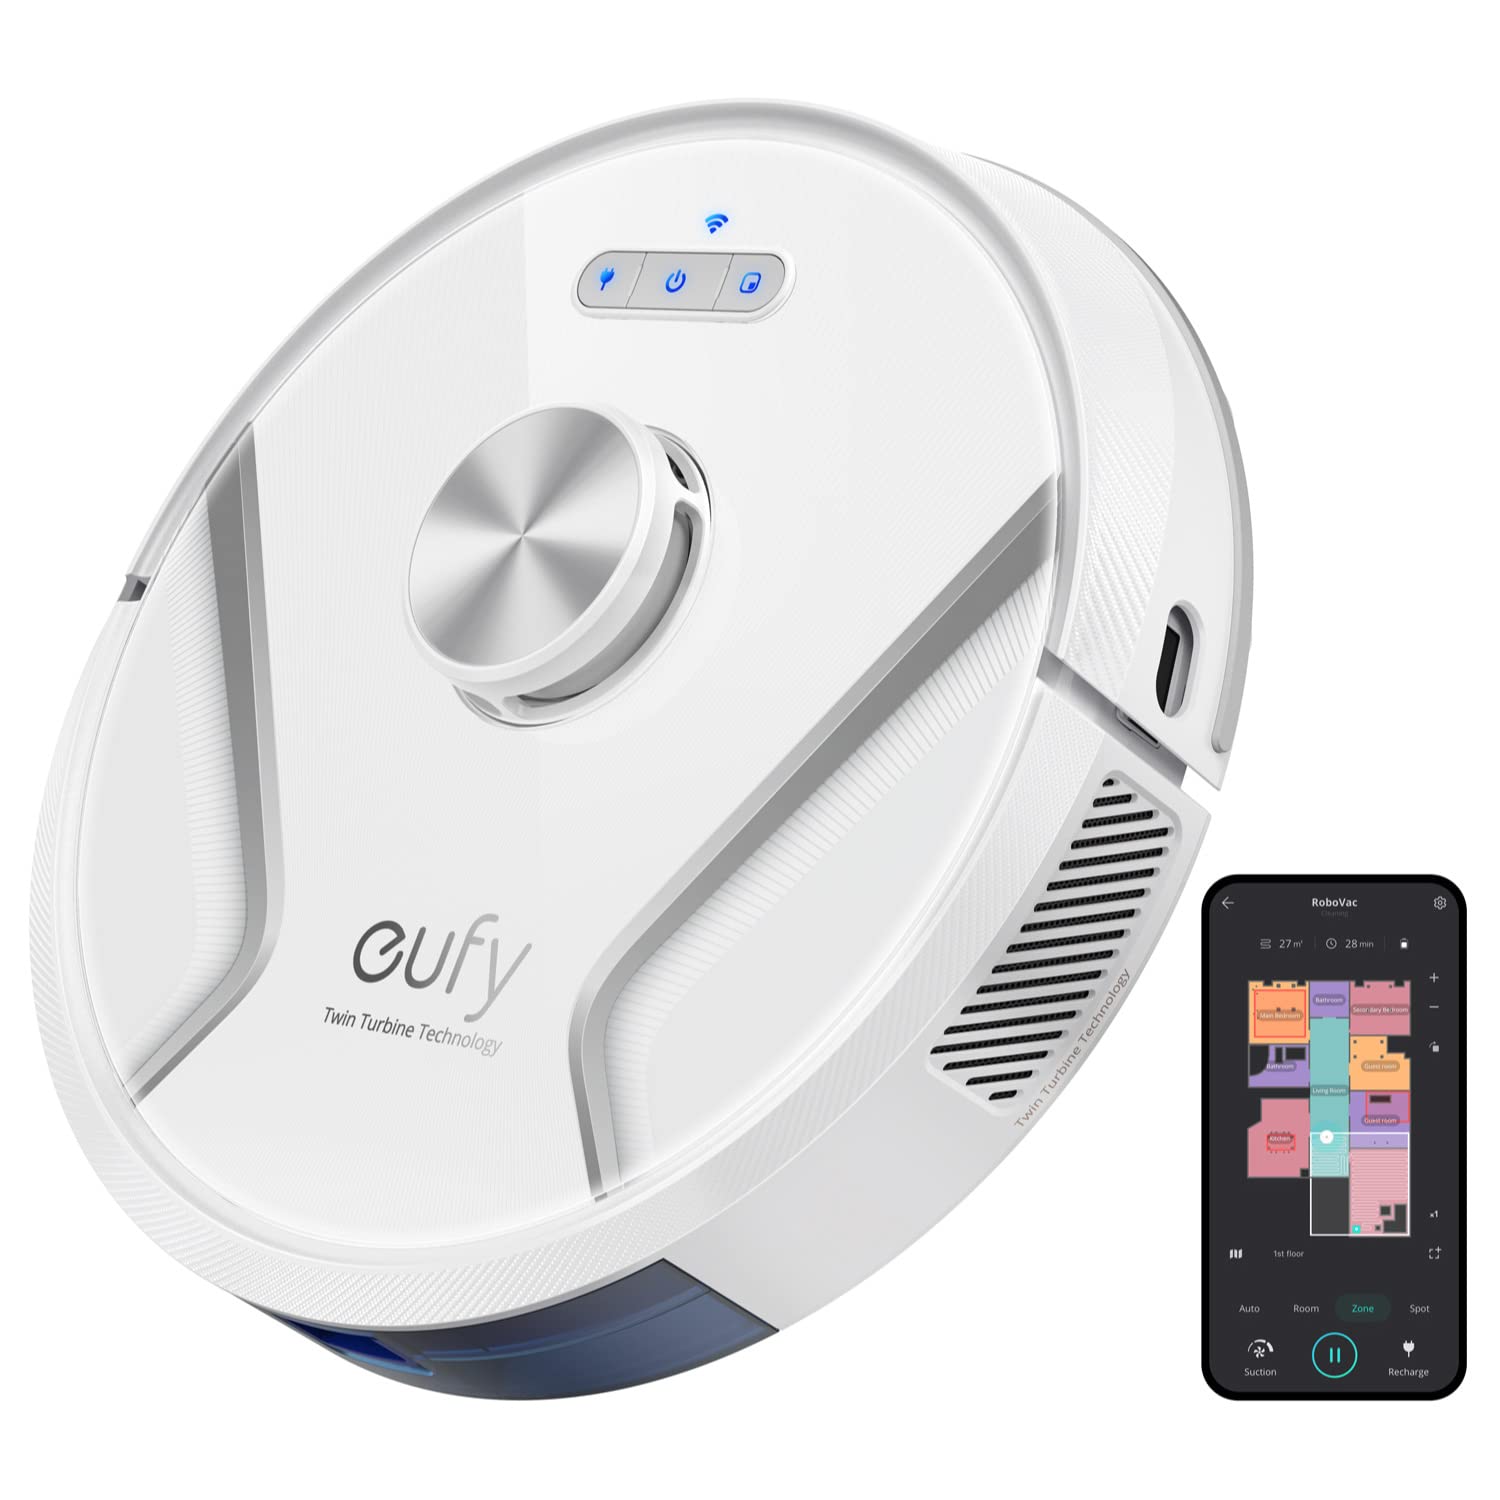
Image: The eufy RoboVac X8 robot vacuum with its charging base, power adapter, and other included accessories.
Produktegenskaber
- Twin-Turbine Technology: Equipped with two turbines, each generating 2000 Pa of suction power, for enhanced debris and pet hair pickup.
- iPath Laser Navigation: Utilizes advanced LiDAR technology to scan and map your home, enabling intelligent navigation and obstacle avoidance for efficient cleaning.
- AI. Map 2.0 Technology: Supports saving maps for multiple floors, allowing the RoboVac to recognize and clean different levels of your home.
- UltraPack Dust Compression: Compresses dust within the dust box, increasing its capacity and reducing the frequency of emptying.
- App kontrol: Manage cleaning schedules, select specific rooms, define no-go zones, and view real-time maps directly from your smartphone.
- Voice Activated Control: Compatible with Google Assistant and Amazon Alexa for convenient voice commands.
- BoostIQ-teknologi: Automatically increases suction power when transitioning from hard floors to carpets for deeper cleaning.
Opsætningsvejledning
- Unpack the RoboVac: Carefully remove the RoboVac and all accessories from the packaging.
- Installer sidebørster: Attach the two side brushes to the posts on the bottom of the RoboVac until they click into place.
- Position the Charging Base: Place the charging base on a hard, level surface against a wall. Ensure there is at least 3 ft (1 m) of clear space to the front and 1 ft (0.3 m) to either side of the charging base. Connect the AC power adapter to the charging base and a wall outlet.
- Indledende opkrævning: Place the RoboVac on the charging base. Ensure the charging pins on the RoboVac align with those on the base. The indicator lights will illuminate to show charging status. Fully charge the RoboVac before first use (approximately 5-6 hours).
- Download the eufyHome App: Søg efter "eufyHome" in the App Store (iOS) or Google Play (Android) and download the app.
- Opret forbindelse til Wi-Fi: Follow the in-app instructions to connect your RoboVac to your home Wi-Fi network. This enables smart features and remote control.

Image: The RoboVac X8 actively mapping its environment using iPath Laser Navigation.
Betjeningsvejledning
Start af en rengøring
- Manuel start: Press the power button on the RoboVac or the "Clean" button in the eufyHome app to start a cleaning cycle.
- Planlagt rengøring: Use the eufyHome app to set up daily or weekly cleaning schedules.
- Rengøring af pletter: Place the RoboVac directly over a concentrated area of dirt and select the spot cleaning mode via the app or the spot clean button on the unit (if available).
Using the eufyHome App
The eufyHome app provides comprehensive control over your RoboVac X8:
- Realtidskortlægning: View the RoboVac's cleaning path and current location.
- Tilpasset rengøring: Vælg specifikke rum eller zoner til rengøring.
- No-Go zoner: Draw virtual boundaries on the map to prevent the RoboVac from entering certain areas.
- Sugeeffektjustering: Choose from various suction modes (e.g., Standard, Max, BoostIQ).
- Rengøringshistorik: Review past cleaning reports.

Image: A visual representation of the RoboVac X8's AI. Map 2.0 technology, showing its ability to map and navigate multiple floors.

Image: A smartphone displaying the eufyHome app interface, illustrating various control options like no-go zones, real-time mapping, and zone cleaning.
Opretholdelse
Regular maintenance ensures optimal performance of your RoboVac X8. Always power off the RoboVac and disconnect it from the charging base before performing any maintenance.
Tømning af støvopsamleren
- Press the release button on the top cover to open it.
- Pull out the dust collector.
- Open the dust collector cover and empty its contents into a trash bin.
- Close the dust collector cover and reinsert it into the RoboVac until it clicks into place.
Rengøring af filteret
- Remove the filter from the dust collector.
- Tap the filter to remove dust and debris.
- Rinse the filter under running water. Allow it to air dry completely before reinserting.
Cleaning the Rolling Brush and Side Brushes
- Use the cleaning tool to cut and remove any hair or debris tangled around the rolling brush.
- Gently pull the side brushes to remove them. Clean any hair or debris from the brushes and their posts. Reattach them securely.
Fejlfinding
| Problem | Mulig årsag | Løsning |
|---|---|---|
| RoboVac tænder ikke. | Lavt batteri eller ikke opladet. | Place RoboVac on the charging base and ensure it is fully charged. |
| RoboVac sidder ofte fast. | Obstacles (cables, small objects) or tight spaces. | Clear the cleaning area of obstacles. Use the app to set no-go zones for problematic areas. |
| Dårlig rengøringsevne. | Full dust collector, dirty filter, or tangled brushes. | Empty the dust collector. Clean or replace the filter. Clean the rolling brush and side brushes. |
| Kan ikke oprette forbindelse til Wi-Fi. | Incorrect Wi-Fi password, 5GHz network, or poor signal. | Ensure correct 2.4GHz Wi-Fi network and password. Move RoboVac closer to the router. Restart RoboVac and router. |
| RoboVac falder ned ad trappen. | Cliff sensors are dirty or malfunctioning. | Clean the cliff sensors on the bottom of the RoboVac with a dry cloth. |
Specifikationer
- Modelnavn: X8
- Varemodelnummer: T2262121
- Produktdimensioner: 13.58 x 13.58 x 3.85 tommer
- Varens vægt: 7.72 pund
- Batteri: 1 Lithium Ion batteri påkrævet
- Overfladeanbefaling: Tæppe, hårde gulve
- Speciel funktion: Taskeløs
- Farve: Hvid
Garanti og support
The eufy RoboVac X8 comes with a worry-free 12-month warranty. For technical support, warranty claims, or additional information, please refer to the contact details provided in the included owner's manual or visit the official eufy support webwebsted.


