1. Introduktion
Thank you for choosing the WORX MakerX 20V Mini Grinder WX741.9. This compact and versatile tool is designed for precise cutting, grinding, and sanding tasks. Featuring a brushless motor for extended life and efficiency, and compatible with the WORX PowerShare system, it offers portability and convenience for various projects. Please read this manual thoroughly before operating the tool to ensure safe and effective use.
2. Sikkerhedsinstruktioner
Følg altid grundlæggende sikkerhedsforanstaltninger for at reducere risikoen for brand, elektrisk stød og personskade, når du bruger elværktøj.
- Bær øjenbeskyttelse: Brug altid passende øjenbeskyttelse, såsom sikkerhedsbriller, for at beskytte mod flyvende genstande.
- Brug høreværn: Use ear protection during extended operation to prevent hearing damage.
- Sikkert arbejdsemne: Altid clamp eller på anden måde fastgør emnet for at forhindre bevægelse under drift.
- Bevar et fast greb: Hold the tool firmly with both hands if possible, or with one hand if designed for single-hand operation, ensuring stable control.
- Hold arbejdsområdet rent: Rodede områder indbyder til ulykker. Sørg for, at din arbejdsplads er godt oplyst og fri for forhindringer.
- Undgå utilsigtet start: Ensure the switch is in the off position before connecting to a power source or battery pack, picking up or carrying the tool.
- Brug korrekt tilbehør: Only use accessories specifically designed and rated for this tool. Incorrect accessories can be hazardous.
- Inspicer værktøjet før brug: Check for damaged parts, misalignment, binding of moving parts, breakage of parts, and any other condition that may affect the tool's operation.
- Afbryd strømmen: Always disconnect the tool from the PowerShare hub or remove the battery pack before making any adjustments, changing accessories, or storing the tool.
3. Pakkens indhold
Bekræft, at alle nedenstående varer er inkluderet i din pakke. Hvis der mangler eller er beskadigede varer, bedes du kontakte kundesupport.
- WORX MakerX 20V Mini Grinder WX741.9 (Bare Unit)
- (1) Cutting wheel 50 mm x 10 mm
- (1) Flap wheel sander 50mm x 10mm
- (1) Grinding wheel 50 mm x 10 mm
- (1) Sekskantnøgle
- (1) M4*10 Skrue
- (1) Skrue clamp M4*10
- (2) ST2.0*10 Screws

Image 3.1: The WORX MakerX Mini Grinder WX741.9 shown with its various included accessories, including cutting, grinding, and sanding wheels, a hex key, and mounting hardware.
4. Opsætning
4.1 Connecting to PowerShare Hub
The MakerX Mini Grinder WX741.9 is a bare unit and requires a WORX PowerShare 20V battery and MakerX hub (sold separately) for operation. Connect the grinder's cable to the output port on the MakerX hub.

Image 4.1: A user connecting the power cable of the MakerX Mini Grinder to the MakerX PowerShare hub, which provides power from a 20V battery.
4.2 Attaching Accessories (Wheels)
To attach a cutting, grinding, or sanding wheel:
- Ensure the tool is disconnected from the PowerShare hub.
- Press and hold the spindle lock button (if present) or use the hex key to loosen the retaining screw/nut.
- Place the desired wheel onto the spindle, ensuring it is seated correctly.
- Secure the wheel with the retaining screw/nut, tightening it firmly with the hex key. Do not overtighten.
- Verify the wheel is securely attached and spins freely without wobble before use.
5. Betjeningsvejledning
Before operating, ensure you have read and understood all safety instructions. Always wear appropriate personal protective equipment (PPE).
5.1 Tænd/sluk og hastighedskontrol
Once connected to the PowerShare hub, turn on the hub. The grinder itself may have an on/off switch. The PowerShare hub typically features a variable speed dial to adjust the rotational speed of the grinder. Start at a lower speed and increase as needed for the material and task.
5.2 Skæreoperationer
For cutting, use the appropriate cutting wheel. Position the wheel perpendicular to the material. Apply light, consistent pressure, allowing the tool to do the work. Avoid forcing the tool, which can lead to kickback or damage to the wheel.

Image 5.1: The MakerX Mini Grinder being used to precisely cut ceramic tiles, showcasing its suitability for detailed tasks.

Image 5.2: The MakerX Mini Grinder in action, cutting a metal pipe, illustrating its capability for metalwork.
5.3 Grinding Operations
When grinding, use the appropriate grinding wheel. Hold the tool at a slight angle to the workpiece. Move the tool smoothly across the surface to achieve an even finish. Be mindful of sparks and debris, especially when working with metal.

Image 5.3: A user performing a grinding operation with the MakerX Mini Grinder, demonstrating proper handling and safety gear.

Image 5.4: The MakerX Mini Grinder being used to remove rust from a metal garden tool, highlighting its utility for restoration and surface preparation.
5.4 Slibning
For sanding, attach the flap wheel sander. Use gentle, even pressure and move the tool in a consistent pattern to avoid uneven sanding marks. This tool is ideal for fine detail sanding or preparing surfaces.
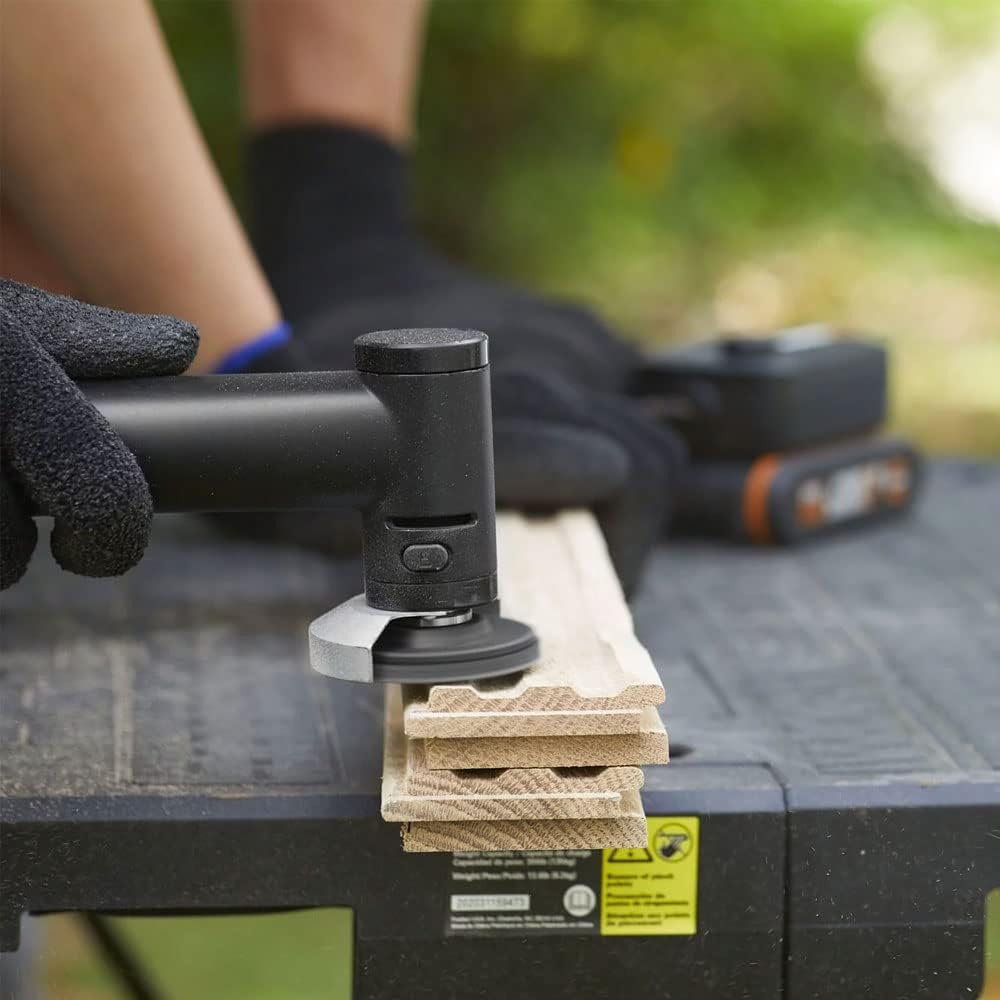
Image 5.5: The MakerX Mini Grinder equipped with a sanding attachment, being used to smooth a wooden surface.
6. Vedligeholdelse
Regelmæssig vedligeholdelse sikrer optimal ydeevne og forlænger levetiden på dit værktøj.
- Rensning: After each use, disconnect the tool from the power source and clean the exterior with a soft, damp cloth. Use compressed air to clear dust from ventilation openings. Do not use harsh chemicals or abrasive cleaners.
- Tilbehørsinspektion: Regularly inspect cutting, grinding, and sanding wheels for wear, cracks, or damage. Replace worn or damaged accessories immediately.
- Opbevaring: Store the tool and its accessories in a dry, secure place, out of reach of children.
7. Fejlfinding
If you encounter issues with your MakerX Mini Grinder, refer to the following common problems and solutions:
| Problem | Mulig årsag | Løsning |
|---|---|---|
| Værktøjet starter ikke | Not connected to PowerShare hub; PowerShare hub not turned on; Battery discharged; Faulty connection. | Ensure grinder is securely connected to the hub. Turn on the PowerShare hub. Check battery charge level and recharge if necessary. Inspect cable and connections for damage. |
| Poor cutting/grinding/sanding performance | Worn or incorrect accessory; Insufficient speed setting; Excessive pressure. | Replace worn accessory. Ensure the correct accessory is used for the task. Adjust speed setting on the PowerShare hub. Apply lighter, consistent pressure. |
| Overdreven vibration eller støj | Accessory not properly seated or damaged; Loose components. | Disconnect power and re-seat the accessory. Inspect accessory for damage and replace if necessary. Check for any loose screws or parts. |
8. Specifikationer
Technical specifications for the WORX MakerX 20V Mini Grinder WX741.9:
- Mærke: WORX
- Modelnummer: WX741.9
- Voltage: 20 Volts (via PowerShare hub)
- Strømkilde: Battery Powered (via WORX PowerShare 20V battery and MakerX hub)
- Anbefalede anvendelser: Cutting, grinding, sanding
- Farve: Sort/Hvid
- Speciel funktion: Compact design, Brushless Motor
- Varens vægt: Cirka 0.4 kilogram (14.1 ounces)
- Maksimal rotationshastighed: 24,000 RPM
- Minimum Rotational Speed: 14,000 RPM
- Produktmål (L x B x H): 2.83 x 1.26 x 7.4 tommer
- Materiale: Plast
9. Garanti og support
For warranty information, technical support, or to purchase replacement parts and accessories, please visit the official WORX webwebstedet eller kontakt deres kundeserviceafdeling. Gem din købskvittering som købsbevis i tilfælde af garantikrav.
WORX kundesupport: Please refer to the contact information provided with your PowerShare hub or on the official WORX webwebsted.


