1. Introduktion
This manual provides comprehensive instructions for the installation, operation, and maintenance of your Defiant GA7X2D01AAP Castle Satin Nickel Single Cylinder Electronic Keypad Deadbolt. This electronic deadbolt offers enhanced security and convenience through keyless entry technology, eliminating the need for traditional keys. It is designed for ease of use and reliable performance, suitable for residential applications.
Please read this manual thoroughly before installation and operation to ensure proper functionality and to maximize the lifespan of your product.
2. Opsætning og installation
The Defiant GA7X2D01AAP deadbolt is designed for simple installation without the need for hard wiring. It is compatible with doors ranging from 1-3/8 inches to 1-3/4 inches in thickness. Ensure you have the necessary tools, such as a screwdriver, before beginning the installation process.
2.1 Pakkens indhold
Kontroller, at alle komponenter er til stede, før installationen påbegyndes:
- Electronic Keypad Assembly (Exterior)
- Indvendig deadbolt-samling
- Dødbolt lås
- Slagplade
- Monteringsskruer
- 2 x fysiske nøgler
- Installationsskabelon (hvis inkluderet)

Figure 2.1: Included components, showing the two physical keys, the strike plate, and a cylindrical mounting ring.
2.2 Batteriinstallation
The deadbolt operates on 4 AA batteries (not included). It is recommended to use new, high-quality alkaline batteries for optimal performance.
- Remove the battery cover from the interior deadbolt assembly.
- Indsæt 4 AA-batterier, og sørg for korrekt polaritet (+/-).
- Sæt batteridækslet på igen.
2.3 Fysiske installationstrin
Follow these general steps for physical installation. Refer to the detailed instructions provided in your product packaging for specific drilling and mounting procedures.
- Prepare the door: Ensure the door is properly bored for a deadbolt. The deadbolt is designed for standard door preparations.
- Install the latch: Insert the deadbolt latch into the door edge. Ensure the "UP" arrow (if present) is facing upwards.
- Install the exterior keypad assembly: Feed the cable from the exterior keypad through the door hole and align the keypad with the latch.
- Install the interior assembly: Connect the cable from the exterior keypad to the interior assembly. Secure the interior assembly to the door using the provided mounting screws.
- Install the strike plate: Secure the strike plate to the door frame, ensuring it aligns correctly with the deadbolt latch.
- Test the lock: After installation, test the deadbolt using both the keypad and the physical key to ensure smooth operation.

Figur 2.2: Side view of the deadbolt latch mechanism, showing how it fits into the door edge.
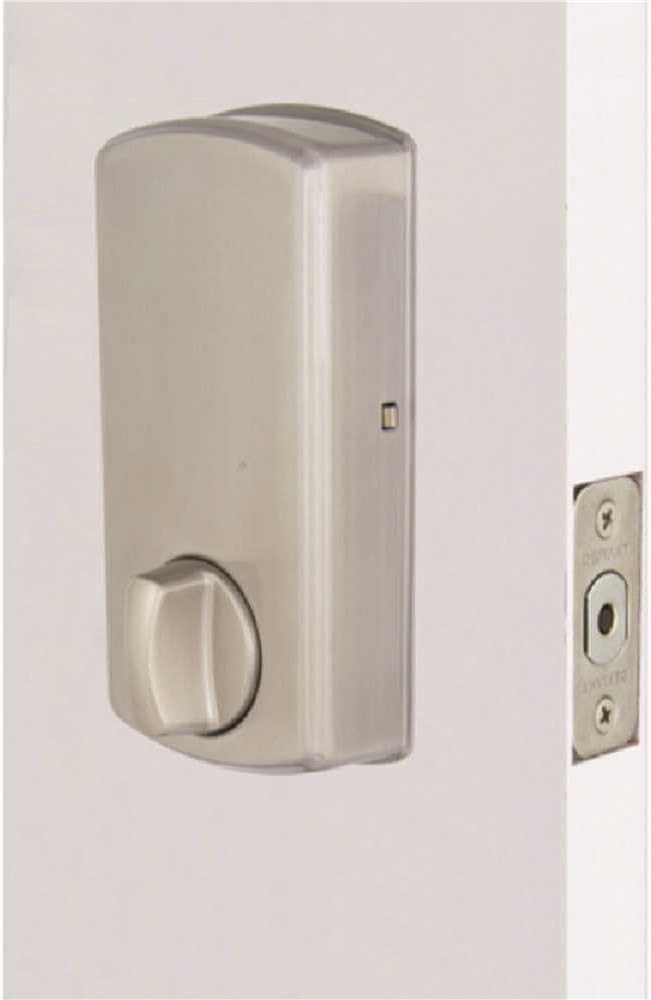
Figur 2.3: Interiør view of the deadbolt, showing the thumb turn and battery compartment.
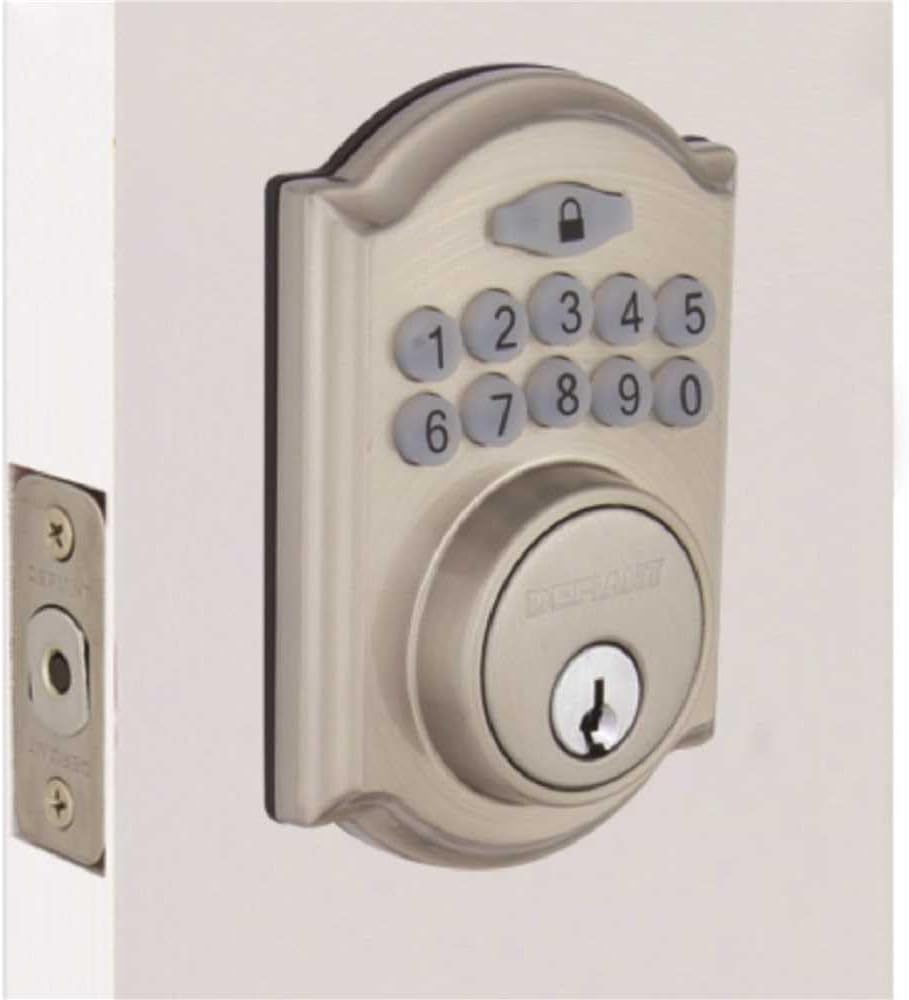
Figure 2.4: The Defiant electronic deadbolt installed on a door, providing a visual of the complete exterior assembly.
3. Betjeningsvejledning
Your Defiant electronic deadbolt offers convenient keyless access and customizable security features.
3.1 Tastatur overview

Figure 3.1: The electronic keypad, featuring a backlit display for improved visibility in low light conditions.
The keypad is backlit for increased visibility, making it easy to operate in low-light conditions.
3.2 Setting User Codes
Refer to your product's specific programming guide for detailed steps on how to set, change, and delete user codes. Typically, this involves entering a master code followed by a sequence to add or modify user codes.
3.3 Låsning og oplåsning
- Sådan låses op: Indtast en gyldig brugerkode på tastaturet. Deadbolten vil blive trukket tilbage.
- At låse: Press the lock button on the keypad, or use the thumb turn on the interior side.
3.4 Automatisk låsefunktion
The deadbolt features an auto-lock function with an adjustable delay, typically ranging from 10 to 99 seconds. This feature automatically locks the deadbolt after a set period once it has been unlocked, providing added security. Consult your programming guide to enable and adjust this setting.
3.5 Ferietilstand
User codes can be temporarily deactivated as needed, which is useful for vacation periods or when you want to restrict access without deleting codes. Refer to your programming guide for instructions on activating and deactivating vacation mode.
4. Vedligeholdelse
Regular maintenance ensures the longevity and reliable operation of your electronic deadbolt.
4.1 Rengøring
Clean the exterior of the deadbolt with a soft, damp klud. Undgå at bruge slibende rengøringsmidler, opløsningsmidler eller barske kemikalier, da disse kan beskadige overfladen og de elektroniske komponenter.
4.2 Udskiftning af batteri
The deadbolt is equipped with a low battery indicator. When the batteries are low, the indicator will alert you, typically through a series of beeps or a flashing light. Replace all 4 AA batteries promptly when this occurs to ensure continuous operation. Always use new, high-quality alkaline batteries.
- Fjern batteridækslet på den indvendige del.
- Fjern gamle batterier, og bortskaf dem i henhold til lokale regler.
- Isæt nye AA-batterier, og overhold den korrekte polaritet.
- Sæt batteridækslet på igen.
4.3 Mechanical Check
Periodically check the screws and mounting hardware to ensure they are tight. Ensure the deadbolt latch moves freely and smoothly without obstruction. Lubricate the latch mechanism with a silicone-based lubricant if necessary, avoiding oil-based lubricants that can attract dust.
5. Fejlfinding
This section addresses common issues you might encounter with your electronic deadbolt.
5.1 Keypad Not Responding / No Power
- Tjek batterier: The most common cause. Replace all 4 AA batteries with new ones.
- Batteriorientering: Sørg for, at batterierne er isat med korrekt polaritet (+/-).
- Løs forbindelse: Verify that the cable connecting the exterior keypad to the interior assembly is securely plugged in.
5.2 Deadbolt Does Not Lock or Unlock
- Forkert kode: Ensure the correct user code is being entered.
- Lavt batteri: Replace batteries if the low battery indicator is active.
- Fejljustering: Check if the deadbolt latch and strike plate are properly aligned. Adjust the strike plate if necessary.
- Obstruktion: Ensure there are no obstructions in the door frame or latch mechanism.
- Programming Issue: If codes are not working, try reprogramming them according to the programming guide.
5.3 Auto-Lock Not Functioning
- Feature Enabled: Verify that the auto-lock feature is enabled in the lock's programming.
- Delay Setting: Check the auto-lock delay setting. It might be set to a longer duration than expected.
5.4 Keypad Backlight Not Working
- Batterier: Low batteries can affect backlight performance. Replace batteries.
- Sensor: Some keypads have a light sensor. Ensure it's not obstructed or in an unusually bright environment that would prevent the backlight from activating.
6. Specifikationer
| Feature | Detalje |
|---|---|
| Mærke | trodsig |
| Modelnavn | GA7X2D01AAP |
| Låsetype | Elektronisk tastatur Dødbolt |
| Materiale | Zink |
| Slutte | Satin nikkel |
| Dimensioner (L x B x H) | Cirka 5 x 5 x 5 tommer |
| Varens vægt | Cirka 10.1 pund |
| Strømkilde | 4 x AA batterier (medfølger ikke) |
| Dørtykkelseskompatibilitet | 1-3/8 in. til 1-3/4 in. |
| Sikkerhedsgrad | ANSI/BHMA klasse 3 |
| Inkluderede komponenter | Electronic Deadbolt, 2 Keys |
| Særlige funktioner | Backlit Keypad, Auto-Lock (adjustable delay), Low Battery Indicator, Vacation Mode |
7. Garanti og support
7.1 Produktgaranti
The Defiant GA7X2D01AAP Electronic Keypad Deadbolt is backed by a 1 års garanti fra købsdatoen. Denne garanti dækker materiale- og fabrikationsfejl ved normal brug. Gem venligst din købsbevis i tilfælde af garantikrav.
The warranty does not cover damage resulting from improper installation, misuse, abuse, neglect, unauthorized repairs, or acts of nature.
7.2 Kundesupport
For technical assistance, troubleshooting beyond this manual, or warranty inquiries, please contact Defiant customer support. Refer to the contact information provided in your product packaging or visit the official Defiant webwebstedet for de mest opdaterede supportoplysninger.
When contacting support, please have your product model number (GA7X2D01AAP) and proof of purchase readily available.


