1. Introduktion
This manual provides detailed instructions for the Brinno BCC2000 Lite Construction Bundle, featuring the TLC2020 Time Lapse Camera, ATH1000 Waterproof Housing, and ACC1000P Mounting Clamp. Please read this manual thoroughly before using the product to ensure proper operation and longevity.
2. Pakkens indhold
The Brinno BCC2000 Lite Construction Bundle includes the following items:
- Brinno TLC2020 Time Lapse-kamera
- Brinno ATH1000 Waterproof Housing
- Brinno ACC1000P Mounting Clamp Kit
- 2 stropper
- SD-kort
- 2 AA Batteries (Note: 4 AA batteries are required for camera operation. Please ensure you have sufficient batteries.)
- Micro USB kabel
- Brugermanual

Figure 2.1: Items included in the Brinno BCC2000 Lite Construction Bundle.
3. Produktfunktioner
3.1 TLC2020 Time Lapse Camera
- HDR FHD Video: Captures high-quality 1080p time-lapse videos.
- Automatic Processing: Images are automatically processed into ready-to-share time-lapse videos, eliminating the need for extensive post-editing.
- Lang batterilevetid: Powered by 4 AA batteries, the TLC2020 can record for up to 99 days non-stop (at a 5-minute interval).
- Flexible Schedule Setup: Allows setting specific days and times for recording to optimize battery life and capture only desired footage.
- 2 tommer skærm: For easy menu navigation and live view.

Figure 3.1: The TLC2020 camera offers extended battery life for prolonged recording.
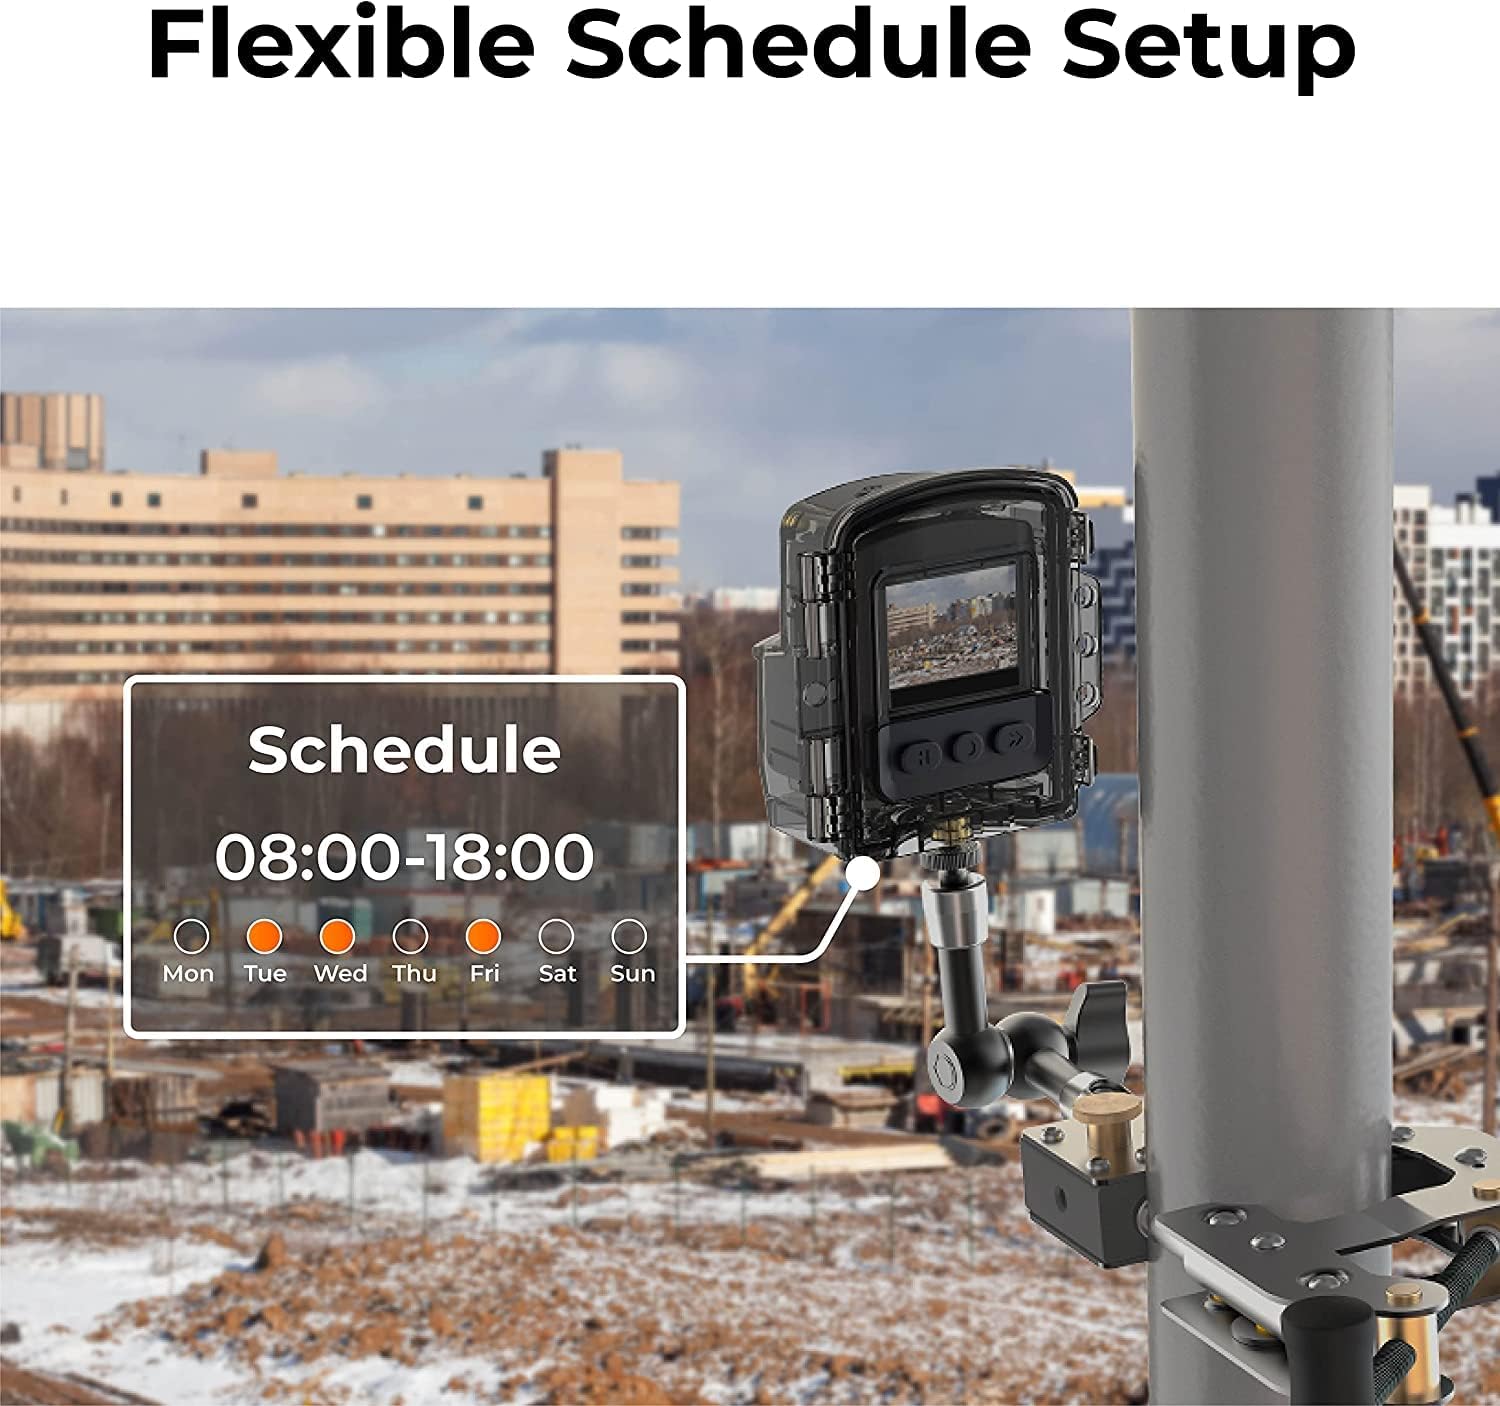
Figure 3.2: The camera's flexible schedule setup allows for customized recording periods.
3.2 ATH1000 Waterproof Housing
- IP67-klassificeret: Provides robust protection against dust and water ingress, suitable for outdoor environments.
- Four-Season Protection: Designed to protect the camera in various weather conditions.
3.3 ACC1000P Mounting Clamp
- Holdbar konstruktion: Made from stainless steel for secure and stable mounting.
- Alsidig montering: Equipped with two grip options for sturdy installation on both flat and cylindrical surfaces.
- Justerbar rækkevidde: Clamping range between 0.04 inches to 10.6 inches with the extension pole.
- 360-Degree Rotating Joint: Allows for flexible positioning and angle adjustment.

Figure 3.3: The camera and housing are securely mounted with the ACC1000P clamp, offering protection in various conditions.

Figure 3.4: The ACC1000P clamp provides versatile mounting options for different surfaces and angles.
4. Opsætning og installation
4.1 Inserting Batteries and SD Card
- Open the battery compartment cover on the TLC2020 camera.
- Indsæt 4 AA-batterier, og sørg for korrekt polaritet.
- Insert the Micro SD card into the designated slot until it clicks into place.
- Luk batterirummets dæksel forsvarligt.
4.2 Montering af kameraet
- Place the TLC2020 camera inside the ATH1000 Waterproof Housing. Ensure the housing is properly sealed.
- Attach the ATH1000 Waterproof Housing to the ACC1000P Mounting Clamp.
- Secure the ACC1000P Mounting Clamp to your desired surface (e.g., pole, beam, flat surface) using the appropriate grip and tightening mechanism. Adjust the 360-degree rotating joint to achieve the desired camera angle.

Figure 4.1: The Brinno TLC2020 camera securely mounted in its housing with the clamp.
5. Betjening
5.1 Tænding og indledende indstillinger
- Press and hold the power button on the camera for 3 seconds to turn it on.
- Use the menu buttons to navigate to the System Settings.
- Set the correct date and time for accurate time-lapse recording.
5.2 Configuring Recording Settings
- Interval: Select the desired time interval between captured frames (e.g., 5 seconds, 1 minute, 5 minutes). This determines the speed of your final time-lapse video.
- Skema: Utilize the scheduling feature to set specific start and end times for recording, as well as specific days of the week. This helps conserve battery life and captures only relevant periods.
- Billedindstillinger: Adjust exposure, white balance, saturation, contrast, and sharpness as needed for your environment.
- Firmwareopdatering: Ensure the camera firmware is updated to the latest version for optimal performance.
5.3 Start og stop af optagelse
- After configuring all settings, press the 'OK' button or the designated record button to start the time-lapse recording.
- The camera will begin capturing images at your set interval.
- To stop recording, press the 'OK' button or the designated record button again.
5.4 Accessing Recorded Files
- Remove the Micro SD card from the camera.
- Insert the Micro SD card into a computer or card reader to access the recorded time-lapse video files (AVI format).
- Alternatively, connect the camera directly to a computer using the Micro USB cable to transfer files.
6. Vedligeholdelse og pleje
- Regularly check the ATH1000 Waterproof Housing for any signs of damage or wear to ensure its integrity.
- Clean the camera lens and housing window with a soft, lint-free cloth. Avoid abrasive materials.
- Ensure the battery compartment is dry and free of debris before closing.
- Når de ikke er i brug i længere perioder, skal batterierne fjernes for at forhindre lækage.
7. Fejlfinding
7.1 Kameraet tænder ikke
- Kontroller, om batterierne er isat korrekt og fuldt opladet.
- Ensure 4 AA batteries are used, as specified.
- Try replacing with new batteries.
7.2 Optagelsesproblemer
- Verify that the Micro SD card is properly inserted and has sufficient free space.
- Check the recording schedule and interval settings.
- Ensure the camera's firmware is up to date.
7.3 Dårlig billedkvalitet
- Clean the camera lens and the waterproof housing's front window.
- Adjust image settings such as exposure, contrast, and sharpness in the camera menu.
- Ensure adequate lighting conditions for optimal capture.
8. Specifikationer
| Feature | Specifikation |
|---|---|
| Mærke | Brinno |
| Modelnummer | TLC2020C |
| Videooptagelsesopløsning | 1080p |
| Flash-hukommelsestype | Micro SD (up to 128GB supported) |
| Skærmstørrelse | 2 tommer |
| Forbindelsesteknologi | USB |
| Særlige funktioner | IP67, Weather Resistant |
| Strømkilde | 4 AA batterier |
| Varens vægt | 3.18 pund (pakke) |
| Produktdimensioner | 6.7 x 12.4 x 8.4 cm (pakke) |
9. Garanti og support
For garantioplysninger og teknisk support henvises til den officielle Brinno-side. website or contact Brinno customer service. Keep your purchase receipt for warranty claims.


