1. Introduktion
This manual provides detailed instructions for the setup, operation, and maintenance of your iDOO 20Pods Indoor Herb Garden Grow Light System. Please read this manual thoroughly before operating the device to ensure proper function and optimal plant growth. Retain this manual for future reference.
2. Produktkomponenter
The iDOO 20Pods Indoor Herb Garden system includes the following components:
- Main Base Tray
- Adjustable Height Grow Light Stand
- 34-Watt LED Grow Light Panel
- 4 Removable Water Tanks (each with capacity for multiple pods)
- Plant Pods/Sponges (for seed germination)
- Power Adapter with Timer Controller
- Liquid Plant Food (Part A and Part B)

Billede 2.1: Overview of the iDOO 20Pods Indoor Herb Garden system with plants.
3. Opsætningsvejledning
- Udpak komponenter: Tag forsigtigt alle varer ud af emballagen, og sørg for, at alle komponenterne, der er anført i afsnit 2, er til stede.
- Assemble Grow Light Stand: Insert the adjustable height grow light stand into the designated slots on the main base tray. Ensure it is securely seated.
- Attach LED Grow Light: Connect the LED grow light panel to the top of the adjustable stand. The light should be positioned directly above where the water tanks will sit.
- Place Water Tanks: Position the four removable water tanks onto the main base tray.
- Insert Plant Pods: Place the provided plant pods or sponges into the openings on the water tank lids. If using seeds, place them into the center of each sponge.
- Fyld vandtanke: Fill each water tank with fresh water up to the indicated maximum fill line. Avoid overfilling.
- Tilslut strøm: Plug the power adapter into the grow light panel, then plug the adapter into a standard electrical outlet.

Image 3.1: Illustration of the adjustable height feature and water tank dimensions.
4. Betjeningsvejledning
4.1. Watering and Nutrient Solution
The iDOO system utilizes hydroponics, meaning plants grow in water with added nutrients. Each water tank has a visual window to monitor water levels.
- Indledende udfyldning: After setup, fill tanks with water.
- Adding Nutrients: Once seeds have sprouted (typically after 1-2 weeks), add the liquid plant food (Part A and Part B) according to the instructions on the bottles. Follow the recommended dosage for your plant type.
- Genopfyldning: Regularly check the water level through the visual window. Refill with fresh water as needed. Replenish nutrient solution every 2-3 weeks, or as plants require.

Image 4.1: Water tanks with visible water level indicators.
4.2. Betjening af vækstlys
The 34-Watt LED grow light simulates natural sunlight, providing the necessary spectrum for plant photosynthesis.
- Lysspektrum: The light panel includes Red, Blue, and White LEDs.
- Rød belysning: Primarily supports flowering, fruiting, and overall yield.
- Blå belysning: Promotes leaf and budding growth.
- White Lighting: Provides balanced light distribution and supports general plant health.
- Justering af højde: As plants grow, adjust the height of the LED grow light to maintain an optimal distance (typically 4-6 inches) from the top of the plants. This ensures adequate light exposure without burning the foliage.
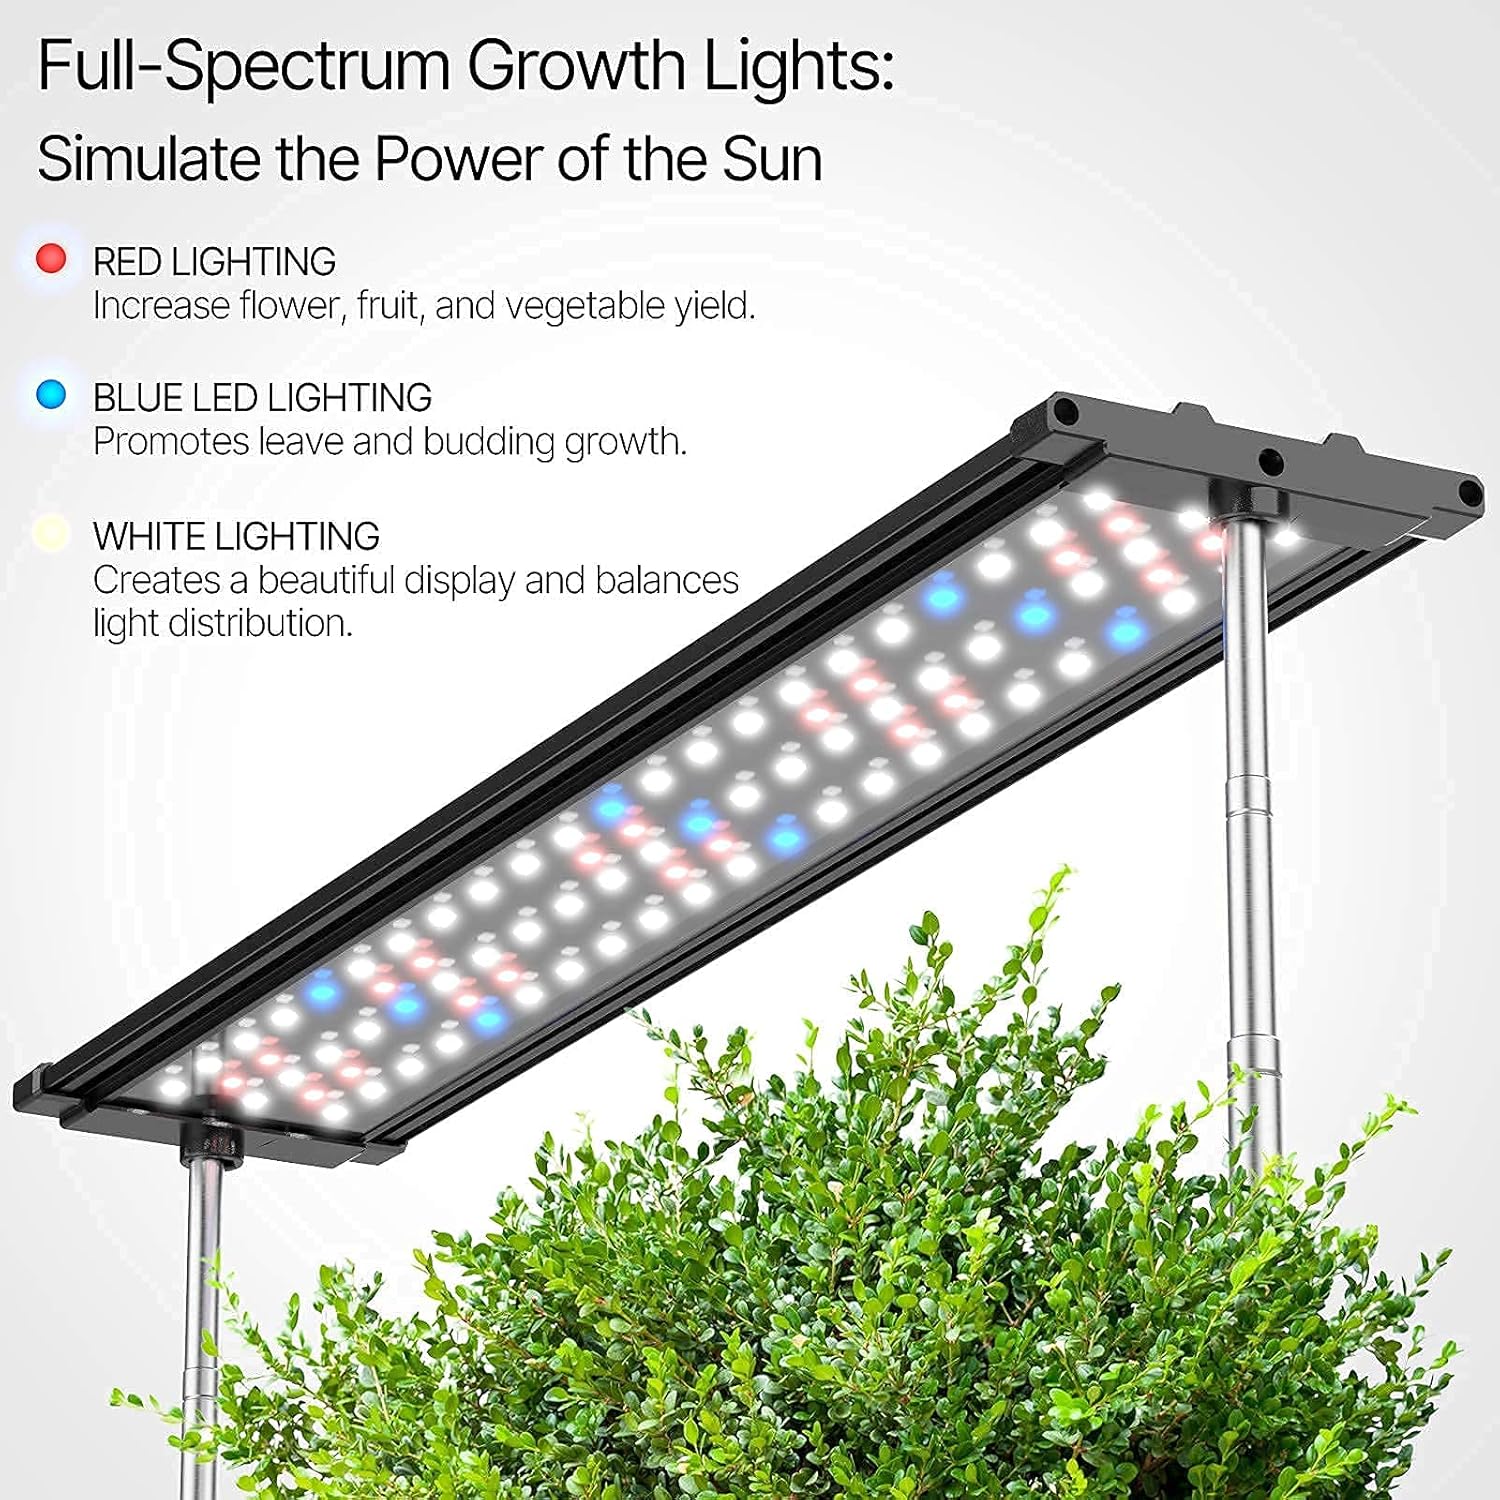
Billede 4.2: Detaljeret view of the full-spectrum LED grow light.
4.3. Timerindstilling
The system features a timer controller to automate the light cycle.
- Standard cyklus: The recommended setting is 16 hours ON and 8 hours OFF for most plants.
- Brugerdefineret indstilling: Use the timer controller to adjust the lighting duration based on the specific needs of your plants. Refer to plant-specific growing guides for optimal light cycles.
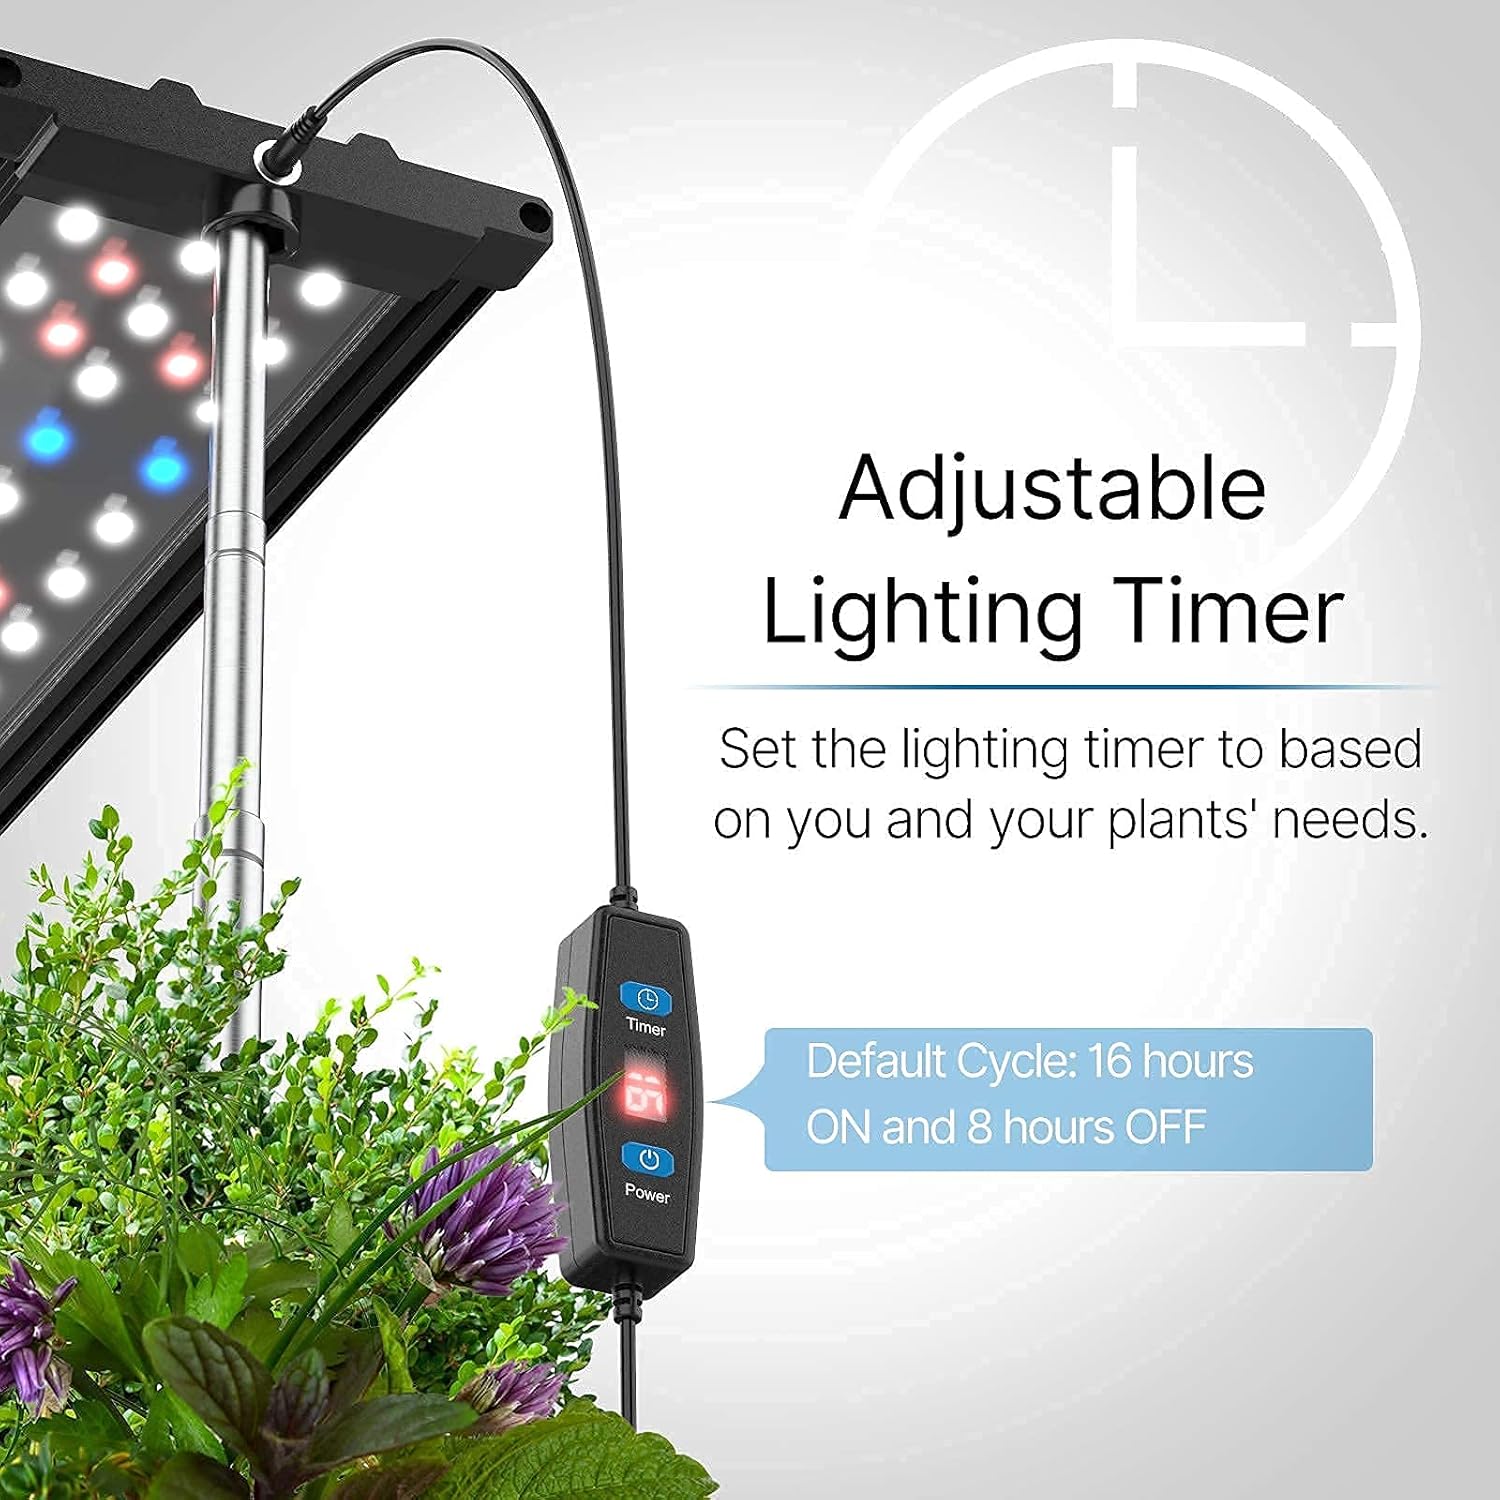
Image 4.3: The timer controller for setting light cycles.
5. Vedligeholdelse
Regular maintenance ensures the longevity of your system and the health of your plants.
- Vandstand: Check daily and refill with fresh water as needed.
- Nutrient Solution: Replace the entire water and nutrient solution every 2-3 weeks to prevent nutrient imbalance and algae growth.
- Rensning: Periodically clean the water tanks and base tray to remove any mineral buildup or algae. Disconnect power before cleaning.
- Beskæring: Prune plants regularly to encourage bushier growth and prevent them from growing too close to the light.
- Plant Pod Replacement: Replace plant pods/sponges when starting new seeds or if they become degraded.
6. Fejlfinding
Se følgende almindelige problemer og løsninger:
| Spørgsmål | Mulig årsag | Løsning |
|---|---|---|
| Poor plant growth or wilting | Insufficient nutrients, incorrect light cycle, low water level, stagnant vand. | Ensure proper nutrient dosage. Verify light timer settings. Refill water. Consider adding an air pump for water circulation if plants show signs of root rot or lack of oxygen. |
| Algae growth in water tanks | Excess light exposure to water, high nutrient levels, infrequent water changes. | Ensure tank lids are properly covering openings. Change water and nutrient solution regularly. Clean tanks thoroughly. |
| Grow light not turning on | Power connection issue, timer setting error, faulty adapter/light. | Check all power connections. Verify timer settings. Test with a different outlet. If issue persists, contact customer support. |
| Plants growing too tall, touching light | Light height not adjusted, lack of pruning. | Adjust the grow light to a higher position. Prune plants to encourage lateral growth. |
7. Specifikationer
- Model: iDOO 20Pods Indoor Herb Garden
- Grow Light: 34-Watt Full-Spectrum LED
- Plant Capacity: Up to 20 plant pods (4 removable water tanks)
- Justerbar højde: Up to 26.77 inches (approximately 70 cm)
- Timer: Free timing setting, recommended 16 hours ON / 8 hours OFF cycle
- ASIN: B095CDZ1T5
8. Sikkerhedsoplysninger
- Always disconnect the power adapter before cleaning or performing maintenance.
- Do not immerse the grow light panel or power adapter in water.
- Keep the system away from direct heat sources or open flames.
- Sørg for, at netledningen ikke er i klemme eller beskadiget.
- Dette produkt er kun beregnet til indendørs brug.
- Opbevares utilgængeligt for børn og kæledyr.
9. Garanti og support
For warranty information or technical support, please refer to the product packaging or contact iDOO customer service directly. Keep your purchase receipt for warranty claims.


