1. Produktet er slutview
The GuliKit Kingkong Pro NS09 is a versatile wireless Bluetooth controller designed for an enhanced gaming experience across multiple platforms. It features advanced technologies such as electromagnetic joysticks, patented buttons, and an AI key for automated operations, ensuring precision, durability, and convenience.

Figur 1: Forside view of the GuliKit Kingkong Pro NS09 Wireless Controller.
Nøglefunktioner:
- Multi-platform kompatibilitet: Supports Nintendo Switch, Switch Lite, Windows PC (X-input/D-input), and Android devices.
- Patented Electromagnetic Joysticks: Designed for precision and drift-free performance.
- Patented Buttons: Features excellent conductive rubber for durability and responsiveness (50 million presses).
- APG (Auto Pilot Gaming) Button: Allows recording and replaying up to 10 minutes of operations for repetitive tasks.
- Exclusive FPS Mode: Provides 100% no dead zone on stick center and outer ring area for enhanced aiming.
- Hall Sensing ZR/ZL Analog Triggers: Offers highly accurate, contactless, and long-life trigger performance.
- Bevægelsesregistrering: Built-in acceleration sensor and 6-axis gyroscope for immersive gameplay on Switch.
- Justerbar vibration: Dual vibration motors provide realistic haptic feedback.
- Knapper, der kan tilpasses: Quick interchange of A-B/X-Y button functions and adjustable joystick sensitivity.
Pakkeindhold:
- GuliKit Kingkong Pro NS09 Controller
- Controller Carry Case
- USB-C kabel
- Brugervejledning (dette dokument)
2. Specifikationer
| Feature | Detalje |
|---|---|
| Model | Smart Kingkong Pro Controller NS09 |
| Platforme | Switch, Windows X-input, Windows D-input, Android |
| Forbindelse | Bluetooth / USB-C cable |
| Transmissionsafstand | Op til 10 meter (Bluetooth) |
| Frekvensområde | 2.402GHZ - 2.480GHZ |
| Batteritype | Built-in Li-ion Polymer Battery |
| Batterikapacitet | 900mAh |
| Batterilevetid | Cirka 14 timer |
| Opladningstid | Cirka 2.5 timer |
| Indgangsport | USB-C |
| Input bindtage | 5V |
| Produktets vægt | 214 g |
| Produktdimensioner | 16.26 x 12.95 x 7.98 cm |
3. Opsætning og tilslutning
3.1 Opladning af controlleren
Before first use, fully charge the controller. Connect the supplied USB-C cable to the controller's USB-C port and the other end to a USB power source (e.g., a computer USB port, a USB wall adapter). The charging indicator lights will provide feedback on the charging status. A full charge takes approximately 2.5 hours.
3.2 Connecting to Nintendo Switch / Switch Lite
- Gå til HOME-menuen på din Nintendo Switch.
- Vælg "Controllere" > "Skift greb/rækkefølge".
- Press and hold the pairing button on the GuliKit Kingkong Pro NS09 controller until the indicator lights begin to flash rapidly.
- Once connected, the player indicator light(s) on the controller will illuminate solid.
The controller supports motion sensing on the Switch. Ensure your Switch system is updated to version 1.0.0 or above for optimal compatibility.

Figure 2: The controller is compatible with multiple platforms including Switch, Windows, and Android.
3.3 Connecting to Windows PC
The controller supports both X-input and D-input modes for Windows PC. It is compatible with Windows 7 or above.
- Bluetooth-forbindelse: Ensure your PC has Bluetooth enabled. Put the controller into pairing mode (refer to controller manual for specific button combination, usually holding a specific button until lights flash). Select the controller from your PC's Bluetooth device list.
- USB-C kablet forbindelse: Connect the controller to your PC using the supplied USB-C cable. The PC should automatically detect and install the necessary drivers.
3.4 Forbindelse til Android-enheder
The controller is compatible with Android 4.0 or above.
- Aktiver Bluetooth på din Android-enhed.
- Put the GuliKit Kingkong Pro NS09 controller into Bluetooth pairing mode.
- Søg efter available Bluetooth devices on your Android device and select the controller to pair.
4. Betjeningsvejledning
4.1 Grundlæggende kontroller
The controller features standard gamepad buttons, including two analog joysticks, a D-pad, A/B/X/Y action buttons, shoulder buttons (L/R), and analog triggers (ZR/ZL). Familiarize yourself with the layout for optimal use.
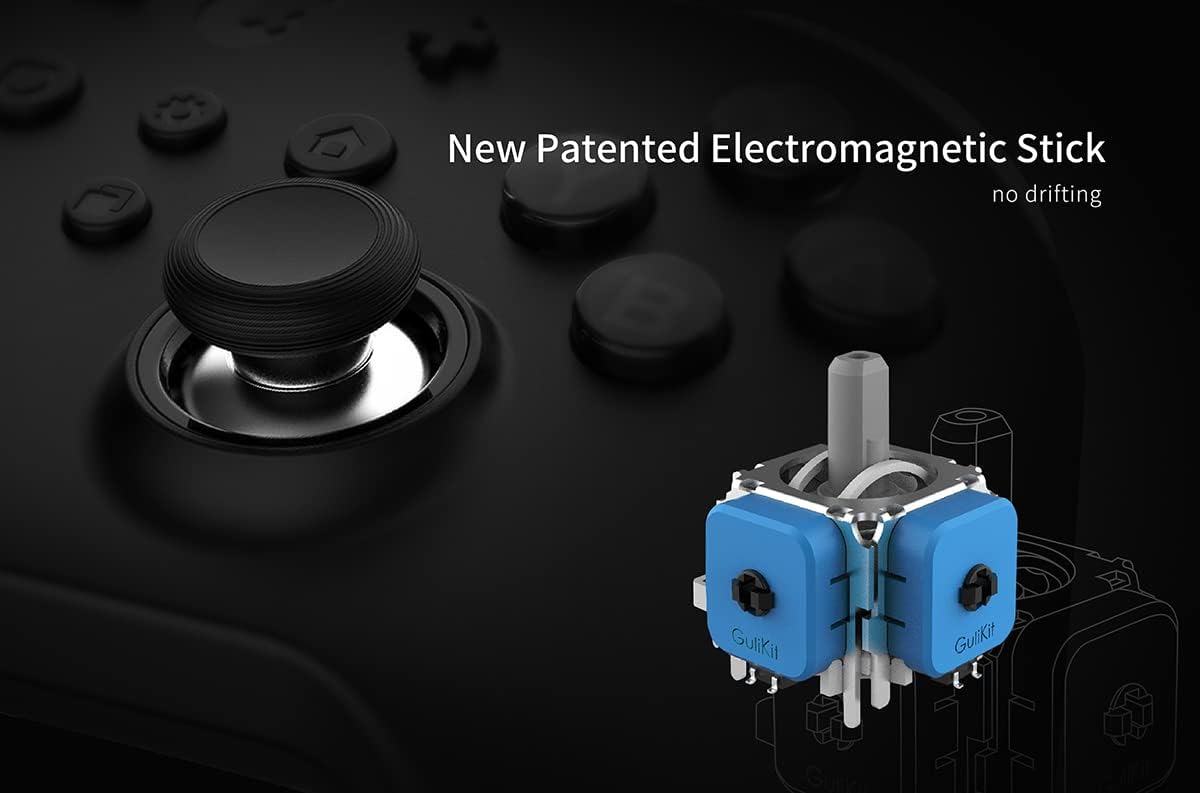
Figure 3: The new patented electromagnetic stick design ensures no drifting.

Figure 4: The new patented button offers excellent conductive rubber feel and ultra-long life (50 million times).
4.2 Særlige funktioner
4.2.1 APG (Auto Pilot Gaming) Button
The dedicated AI button allows you to record and replay a sequence of operations, up to 10 minutes in length. This feature is ideal for automating repetitive in-game tasks or complex combos.
- At optage: Press the APG button once to start recording. Perform your desired actions. Press the APG button again to stop recording.
- Til afspilning: Press the APG button to execute the recorded sequence.

Figure 5: The Special AI Key allows recording and replaying operations for unique skill acquisition and more playing ways.
4.2.2 Exclusive FPS Mode
This patented technology provides a 100% no dead zone on the stick center and outer ring area, offering superior precision for aiming in First-Person Shooter (FPS) games. Consult the controller's specific instructions for activating and deactivating FPS mode, as it may involve a button combination.

Figure 6: Exclusive FPS mode provides 100% no dead zone on stick center and outer ring area for precise control.
4.2.3 Hall Sensing ZR/ZL Analog Triggers
The ZR and ZL triggers utilize Hall effect sensors, providing highly accurate, contactless, and long-lasting input. This design minimizes wear and tear while offering a precise and responsive feel.

Figure 7: Hall sensing ZR, ZL analog triggers offer high accuracy, contactless operation, and long life.
4.2.4 X-Y Button Function Interchange
The controller allows for quick interchange of the A-B and X-Y button functions to suit your gaming habits, whether playing on Switch or PC. Refer to the controller's specific button combination for this function, typically involving holding a specific button and pressing the desired interchange button.
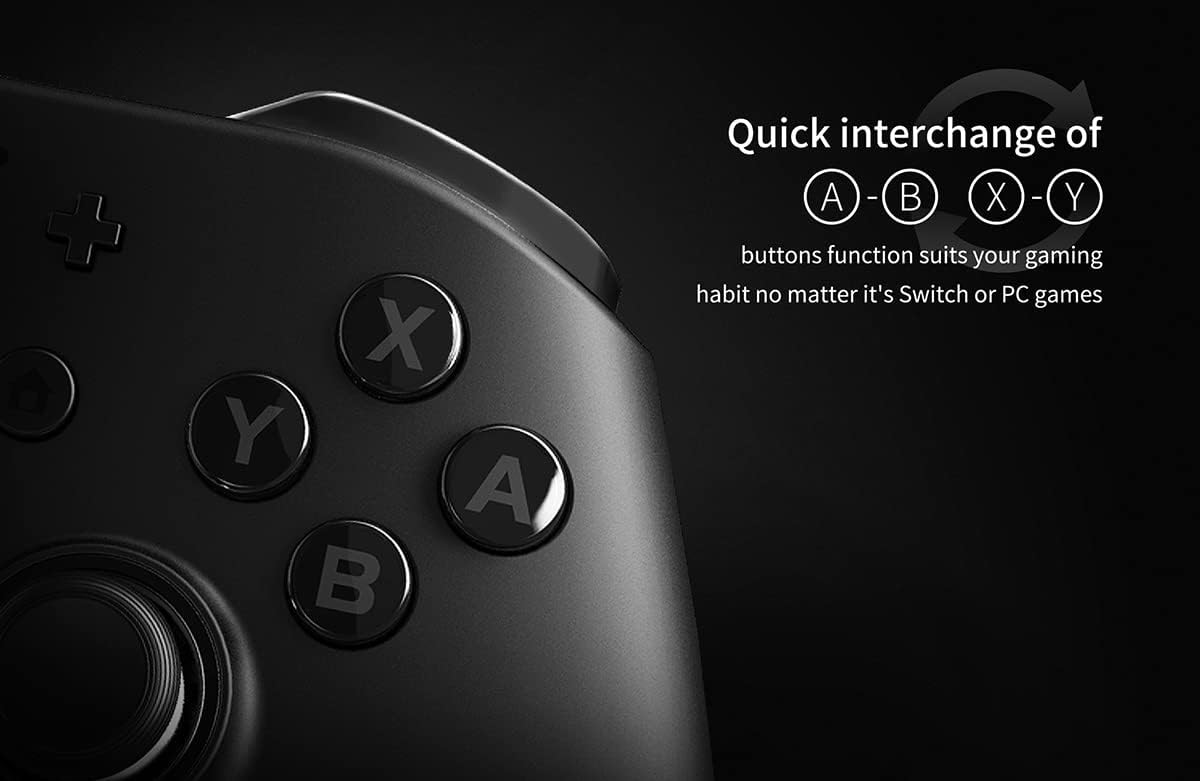
Figure 8: Quick interchange of A-B and X-Y button functions to suit different gaming habits.
4.2.5 Joystick Sensitivity Adjustment
The sensitivity of the joysticks (L3, R3, etc.) can be adjusted to prevent crosshair aiming errors and provide a more personalized control experience. Consult the controller's specific instructions for adjusting joystick sensitivity.
4.2.6 Vibration and Gyroscope Sensor
The built-in acceleration sensor and 6-axis gyroscope support motion sensing, particularly useful for games on the Nintendo Switch that utilize motion controls. The dual vibration motors provide tactile feedback for in-game events.

Figure 9: The controller features a built-in acceleration sensor and six-axis gyroscope to support motion sensing on Switch.
5. Vedligeholdelse og pleje
- Rensning: Brug en blød, tør klud til at rengøre controlleren. Ved genstridigt snavs, tør letampRengør kluden med vand. Undgå at bruge skrappe kemikalier, opløsningsmidler eller slibende rengøringsmidler.
- Opbevaring: Store the controller in a cool, dry place, away from direct sunlight and extreme temperatures. Use the provided carry case for protection when not in use or during travel.
- Batteripleje: To prolong battery life, avoid fully discharging the controller frequently. If storing for an extended period, charge the battery to about 50% every few months.
- Undgå dråber: Beskyt controlleren mod fald og stød, som kan beskadige de interne komponenter.
6. Fejlfinding
6.1 Forbindelsesproblemer
- Controlleren parres ikke: Ensure the controller is in pairing mode (indicator lights flashing rapidly). Check that Bluetooth is enabled on your device (Switch, PC, Android). Move the controller closer to the device.
- Intermitterende forbindelse: Ensure there are no strong interference sources nearby (e.g., Wi-Fi routers, other Bluetooth devices). Try re-pairing the controller.
- PC connection issues: For wired connection, try a different USB port or cable. For Bluetooth, ensure your PC's Bluetooth drivers are up to date.
6.2 Unresponsive Buttons/Joysticks
- No input: Ensure the controller is powered on and properly connected. Check battery level.
- Sticky buttons: Clean around the buttons with a soft, slightly damp cloth. Avoid liquid entering the controller.
- Joystick-drift: The GuliKit Kingkong Pro NS09 features electromagnetic joysticks designed to prevent drift. If you experience drift, try recalibrating the joysticks through your console/PC settings or consult the official GuliKit support for specific recalibration steps for this model.
6.3 Opladningsproblemer
- Controlleren oplader ikke: Ensure the USB-C cable is securely connected to both the controller and the power source. Try a different USB-C cable or power adapter. Verify the power source is active.
- Langsom opladning: Ensure you are using a 5V power source. Charging from a low-power USB port (e.g., some older PC USB 2.0 ports) may take longer.
6.4 Resetting the Controller
If the controller becomes unresponsive or exhibits unusual behavior, a soft reset may resolve the issue. Locate the small reset hole (usually on the back or bottom of the controller) and use a thin, pointed object (like a paperclip) to press the reset button inside. Hold for a few seconds, then release. Re-pair the controller if necessary.
7. Garanti og support
GuliKit products are manufactured to high quality standards. This product comes with a standard manufacturer's warranty against defects in materials and workmanship. The specific terms and duration of the warranty may vary by region and retailer. Please retain your proof of purchase for warranty claims.
For technical support, warranty inquiries, or further assistance, please visit the official GuliKit website or contact their customer service through the contact information provided with your product packaging or on their official website. When contacting support, please have your product model (NS09) and purchase details ready.


