Indledning
This manual provides essential information for the safe and effective use of your Philips Sneaker Cleaner GCA1000/60. Please read these instructions carefully before first use and retain them for future reference.
Produkt overview

The Philips Sneaker Cleaner, a compact, battery-powered device designed for effective sneaker cleaning.
The Philips Sneaker Cleaner is designed to simplify the process of cleaning various types of sneakers. It features a rotating brush head system powered by batteries, offering a convenient solution for maintaining footwear appearance. The device is supplied with three distinct brush heads, each tailored for specific material types.
Opsætning
1. Batteriinstallation
The Philips Sneaker Cleaner requires 4 AA batteries (included). To install, twist the bottom cap of the device counter-clockwise to open the battery compartment. Insert the batteries according to the polarity indicators (+/-) inside the compartment. Close the cap by twisting it clockwise until secure.
2. Attaching a Brush Head
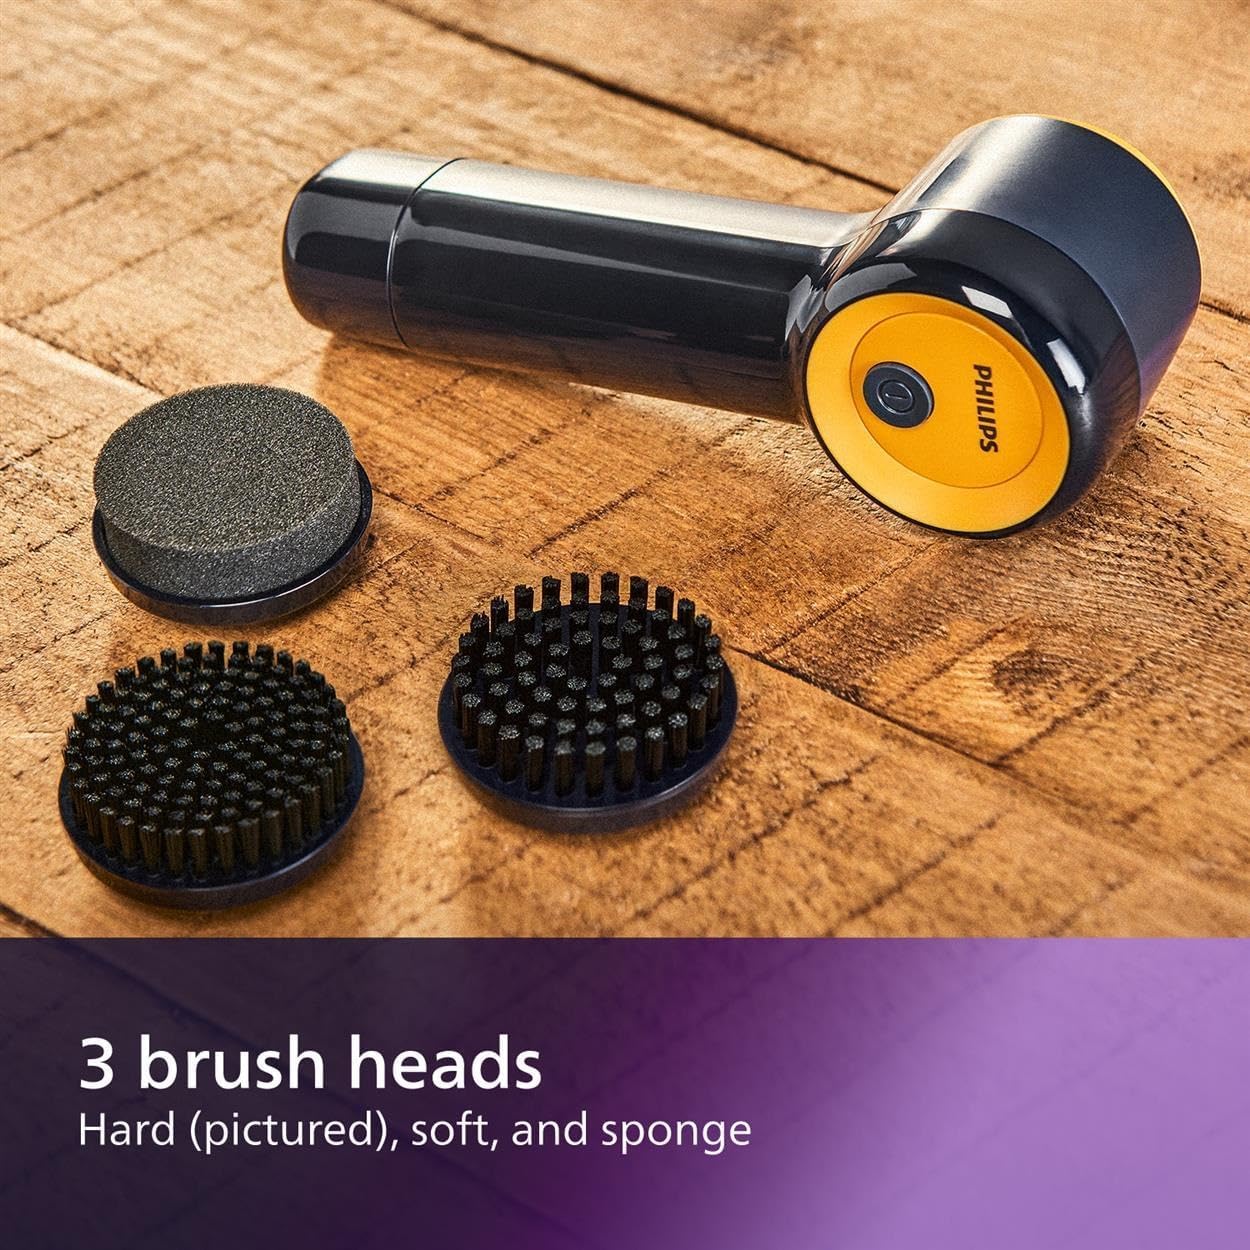
A view of the three brush heads included with the Philips Sneaker Cleaner: hard, soft, and sponge.
Select the appropriate brush head for the material you intend to clean. Align the brush head with the rotating shaft on the device and push it firmly until it clicks into place. Ensure the brush head is securely attached before operation.
Betjeningsvejledning
1. Selecting the Right Brush
- Hard Brush: Suitable for textured rubber and durable soles.
- Blød børste: Ideal for mesh and canvas materials.
- Svampebørste: Recommended for delicate materials such as PVC, leather, and suede.

The sponge brush being used on a sneaker, demonstrating its application for delicate materials.
2. Cleaning Procedure
- Wet the selected brush head with water.
- Apply a small amount of cleaning solution or soap directly to the wet brush head or the sneaker surface.
- Press the power button on the device to activate the rotating brush.
- Gently move the rotating brush over the dirty areas of your sneaker. Apply light pressure.
- After cleaning, switch off the device.
- Wipe the cleaned area of the sneaker with a clean, dry towel to remove excess moisture and dirt.

A user demonstrating the simple one-touch operation of the Philips Sneaker Cleaner on a sneaker.
3. Bærbarhed

The compact design of the Philips Sneaker Cleaner allows for easy storage and portability in a backpack.
Opretholdelse
1. Cleaning the Device and Brushes
- Fjern børstehovedet fra apparatet efter hver brug.
- Rinse the brush head thoroughly under running water to remove any dirt or cleaning solution residue.
- Allow the brush heads to air dry completely before storing or reattaching.
- Wipe the main body of the device with a damp klæde. Nedsænk ikke enheden i vand.
2. Opbevaring
Store the Philips Sneaker Cleaner and its brush heads in a dry place, away from direct sunlight and extreme temperatures. Ensure batteries are removed if the device will not be used for an extended period.
Fejlfinding
| Problem | Mulig årsag | Løsning |
|---|---|---|
| Enheden tændes ikke. | Batterierne er brugt op eller forkert installeret. | Kontroller batteripolariteten, eller udskift med nye AA-batterier. |
| Brush head is not rotating effectively. | Brush head is not securely attached or batteries are low. | Ensure brush head is clicked into place. Replace batteries if necessary. |
| Cleaning results are unsatisfactory. | Incorrect brush head used for material or insufficient cleaning solution. | Refer to 'Selecting the Right Brush' and ensure adequate cleaning solution is applied. |
Specifikationer
| Feature | Detalje |
|---|---|
| Modelnummer | GCA1000/60 |
| Produktdimensioner | 6.69 x 2.64 x 2.36 tommer; 12.38 ounce |
| Strømkilde | 4 AA batterier (medfølger) |
| Inkluderede komponenter | Hard Brush, Soft Brush, Sponge Brush |
| Kompatible materialer | Leather, Mesh, PVC, Rubber, Sponge, Suede |
| Fabrikant | Philips |
Officiel produktvideo
An official product video demonstrating the Philips Sneaker Cleaner in action, highlighting its features and ease of use.
Garanti og support
For garantioplysninger, produktregistrering eller teknisk support, besøg venligst den officielle Philips website or contact Philips customer service. Keep your purchase receipt as proof of purchase for warranty claims.
Du kan finde mere information og support på Philips-butik.


