1. Introduktion
This manual provides essential information for the safe and efficient operation of your iProda 2 in 1 Laptop, Model M1169YM. Please read this manual thoroughly before using the device and retain it for future reference. This convertible laptop features an 11.6-inch touchscreen, powered by an Intel N4100 processor, and runs on Windows 10 Pro.

Image: The iProda 2 in 1 Laptop can be used in multiple configurations, including traditional laptop, tent, stand, and tablet modes, showcasindens alsidighed.
2. Sikkerhedsoplysninger
Overhold følgende sikkerhedsforanstaltninger for at forhindre skader på din enhed eller personskade:
- Udsæt ikke enheden for ekstreme temperaturer, direkte sollys eller høj luftfugtighed.
- Undgå at tabe enheden eller udsætte den for kraftige stød.
- Use only the provided or approved power adapter for charging.
- Hold enheden væk fra vand og andre væsker.
- Forsøg ikke selv at skille enheden ad eller reparere den. Kontakt kvalificeret servicepersonale.
3. Pakkens indhold
Bekræft at alle varer er til stede i din pakke:
- iProda 2 in 1 Laptop (Model M1169YM)
- Strømadapter
- Brugervejledning (dette dokument)
4. Produktet er slutview
The iProda 2 in 1 Laptop is designed for versatility, offering multiple usage modes and essential connectivity options.
4.1. Nøglefunktioner
- 11.6-tommer IPS-berøringsskærm: A responsive 10-point precision touchscreen with 1920x1080 resolution for interactive use.
- Konvertibelt design: 360-degree hinge allows seamless transition between laptop, tablet, tent, and stand modes.
- Intel N4100-processor: Provides efficient performance for daily tasks.
- Windows 10 Pro: Pre-installed operating system for productivity and security.
- Udvidelig lagerplads: Supports M.2 2242 SSD for additional storage capacity.

Image: Key features of the iProda laptop, including its touchscreen, operating system, display specifications, and camera resolution.

Image: The laptop's 360-degree hinge allows it to convert into a tablet, enabling direct interaction via its precision touchscreen.
4.2. Porte og knapper
Familiarize yourself with the various ports and buttons on your laptop:
- Type-C port: Used for power supply and data transfer.
- Micro HDMI: Til tilslutning til eksterne skærme.
- Micro USB: Til tilslutning af USB-enheder.
- TF-kortslot: For expanding storage with a TF (MicroSD) card.
- Power knap: For at tænde/slukke enheden eller sætte den i dvaletilstand.
- Lydstyrkeknapper: To adjust audio output.
- Stik til øretelefoner: Til tilslutning af hovedtelefoner eller eksterne højttalere.

Billede: En detaljeret view of the laptop's side panels, indicating the location and function of each port and button for easy identification.
5. Opsætning
5.1. Opladning af batteriet
Before first use, fully charge the laptop's battery. Connect the provided power adapter to the Type-C port on the laptop and plug it into a power outlet. The charging indicator light will illuminate.
5.2. Første opstart og Windows-opsætning
- Tryk og hold tænd/sluk-knappen nede, indtil skærmen tændes.
- Følg instruktionerne på skærmen for at fuldføre den indledende opsætning af Windows 10 Pro, herunder valg af sprog, netværksforbindelse og oprettelse af brugerkonto.
6. Betjening af din bærbare computer
6.1. Brug af berøringsskærmen
The 10-point precision touchscreen allows for intuitive interaction with Windows 10 Pro. Use gestures such as tapping, swiping, pinching, and stretching to navigate, zoom, and interact with applications.
6.2. Tastatur og touchpad
The integrated keyboard and touchpad provide traditional input methods. The touchpad supports multi-touch gestures for scrolling, zooming, and switching applications.

Image: The laptop's full-size American keyboard and responsive touchpad, designed for comfortable typing and navigation.
6.3. Convertible Modes
The 360-degree hinge allows you to switch between various modes:
- Laptop-tilstand: Standardkonfiguration til indtastning og produktivitet.
- Tablettilstand: Fold the screen back completely for a tablet experience, ideal for browsing or drawing.
- Telttilstand: Position the laptop like a tent for media consumption or presentations.
- Standtilstand: Flip the keyboard face down to use the screen as a display, suitable for watching videos.

Image: The laptop configured in tent mode, demonstrating its flexibility for viewindhold uden at tastaturet er i vejen.
7. Lagerudvidelse
The laptop comes with 64GB eMMC storage. You can expand the storage capacity by installing an M.2 2242 SSD (128GB/256GB/512GB, not included).
7.1. Installing an M.2 2242 SSD
To install an M.2 2242 SSD:
- Power off the laptop and disconnect the power adapter.
- Carefully open the back cover of the laptop.
- Find M.2-stikket.
- Insert the M.2 2242 SSD into the slot and secure it with the appropriate screw (if provided).
- Sæt bagdækslet på igen.
- Upon booting, you may need to initialize and format the new SSD through Windows Disk Management.
Note: If you are unsure about this procedure, it is recommended to seek professional assistance.

Image: Visual representation of the M.2 SSD slot, illustrating how additional storage can be integrated into the laptop.
8. Forbindelse
8.1. Wi-Fi-forbindelse
The laptop supports dual-frequency 2.4GHz/5GHz Wi-Fi. To connect to a wireless network:
- Klik på Wi-Fi-ikonet i proceslinjen.
- Vælg det ønskede netværk fra listen.
- Indtast netværksadgangskoden, hvis du bliver bedt om det, og klik på 'Opret forbindelse'.
8.2. External Display (Micro HDMI)
Connect an external monitor or TV using a Micro HDMI to HDMI cable. Once connected, you can configure display settings (duplicate, extend, second screen only) through Windows display settings.
8.3. USB-enheder
Use the Micro USB port or the Type-C port (with an appropriate adapter) to connect peripherals such as a mouse, keyboard, or external storage devices.
9. Vedligeholdelse
9.1. Rensning
To clean the laptop, power it off and disconnect the power adapter. Use a soft, lint-free cloth slightly damprengøres med vand eller et skærmrensemiddel til skærmen. Undgå skrappe kemikalier eller slibende materialer.
9.2. Batteripleje
For at forlænge batterilevetiden:
- Undgå at aflade batteriet helt ofte.
- Do not expose the laptop to high temperatures.
- Hvis du opbevarer den bærbare computer i længere tid, skal du sørge for, at batteriet er opladet til omkring 50-70%.
10. Fejlfinding
Her er løsninger på almindelige problemer, du kan støde på:
| Problem | Løsning |
|---|---|
| Den bærbare computer tænder ikke. | Ensure the battery is charged. Connect the power adapter and try again. If still unresponsive, perform a hard reset by holding the power button for 10-15 seconds. |
| Skærmen er blank eller flimrer. | Restart the laptop. Check if an external display is connected and interfering. Update display drivers if possible. |
| Problemer med Wi-Fi-forbindelse. | Sørg for, at Wi-Fi er aktiveret. Genstart din router og den bærbare computer. Kontroller netværksindstillingerne i Windows. |
| Berøringsskærmen reagerer ikke. | Restart the laptop. Ensure the screen is clean. Check for any pending Windows updates or driver updates for the touchscreen. |
11. Specifikationer
Technical specifications for the iProda 2 in 1 Laptop (Model M1169YM):
| Feature | Detalje |
|---|---|
| Mærke | iProda |
| Modelnummer | M1169YM |
| Operativsystem | Windows 10 Pro |
| Skærmstørrelse | 11.6 tommer |
| Skærmopløsning | 1920 x 1080 pixels (1080p) |
| Processor | Intel N4100 (up to 2.4 GHz Burst Frequency) |
| VÆDDER | 4 GB DDR4 |
| Harddisk | 64 GB eMMC |
| Grafikkort | Integrated (UHD 600 Graphics) |
| Trådløs type | 2.4 GHz / 5 GHz Dual-frequency Wi-Fi |
| Gennemsnitlig batterilevetid | 8 Hours (3500mAh, 27Wh) |
| Varens vægt | 3.63 pund |
| Produktdimensioner | 11.99 x 11.6 x 0.5 tommer |
| Forbindelsesteknologi | HDMI, USB Type-C, Micro USB |
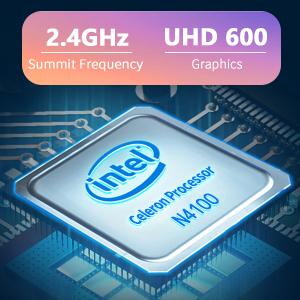
Image: The Intel Celeron N4100 processor, central to the laptop's performance, highlighting its clock speed and integrated graphics capabilities.

Image: The laptop's battery specifications, indicating its power capacity for extended use.
12. Garanti og support
For warranty information and technical support, please refer to the documentation included with your purchase or visit the official iProda website. Contact information for customer service can typically be found on the manufacturer's support page.


