1. Vigtige sikkerhedsinstruktioner
Always observe basic safety precautions to reduce the risk of fire, electric shock, and personal injury when operating power tools. Read all instructions carefully before use.
- Sikkerhed på arbejdsområdet: Hold dit arbejdsområde rent og godt oplyst. Rodede eller mørke områder indbyder til ulykker. Brug ikke elværktøj i eksplosive atmosfærer, f.eks. i nærheden af brandfarlige væsker, gasser eller støv.
- Elektrisk sikkerhed: Stik på elværktøj skal passe til stikkontakten. Modificer aldrig stikket på nogen måde. Undgå kropskontakt med jordforbundne overflader såsom rør, radiatorer, komfurer og køleskabe.
- Personlig sikkerhed: Brug altid øjenbeskyttelse. Brug høreværn ved længere tids brug. Klæd dig korrekt på; bær ikke løstsiddende tøj eller smykker. Hold hår, tøj og handsker væk fra bevægelige dele.
- Brug og pleje af værktøj: Tving ikke elværktøjet. Brug det korrekte elværktøj til din anvendelse. Tag stikket ud af strømkilden, før du foretager justeringer, skifter tilbehør eller opbevarer elværktøj.
- Opretholdelse: Vedligehold elværktøj. Kontroller for forskydning eller binding af bevægelige dele, brud på dele og andre forhold, der kan påvirke værktøjets funktion. Hvis det er beskadiget, skal elværktøjet repareres inden brug.
2. Produktet er slutview og komponenter
The Hecht Professional Pillar Drill is designed for precise drilling operations. Familiarize yourself with its main components for safe and effective use.

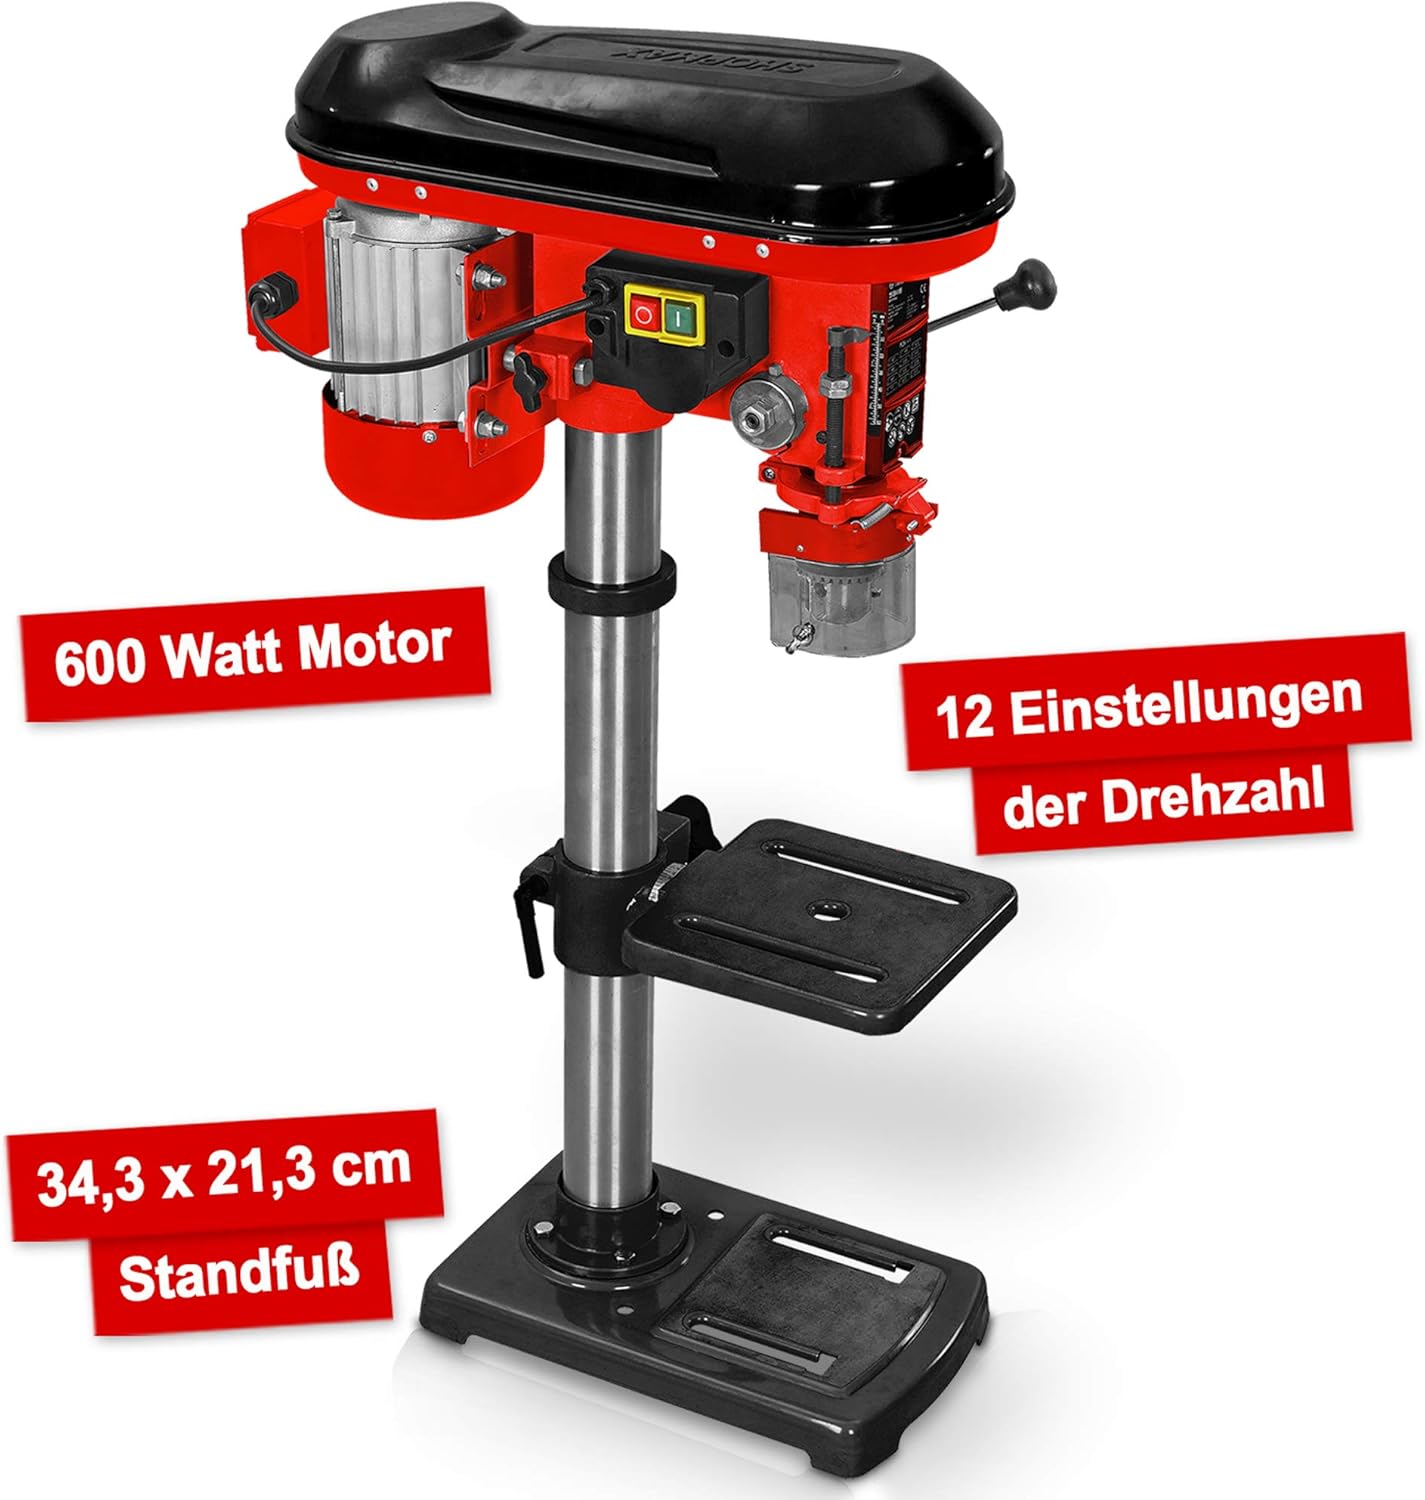
- Motorhus: Contains the 600W motor and belt drive system.
- Hovedsamling: Includes the chuck, spindle, and depth stop.
- Kolonne: The main support structure for the head assembly and drilling table.
- Drilling Table: Adjustable in height and angle for versatile drilling.
- Bundplade: Provides stability and features mounting slots for securing to a workbench.
- chuck: Holds the drill bits securely (3-16 mm capacity).
- Speed Adjustment Lever: Used to change the drilling speed.
- Feed Handles: Used to lower the chuck and drill bit into the workpiece.
- Tænd/sluk-knap: Power control for the drill.
- Chip Protection Guard: Transparent guard for safety during operation.
3. Opsætning og montering
Follow these steps to assemble and set up your pillar drill before initial use.
- Udpakning: Tag forsigtigt alle komponenter ud af emballagen. Kontroller for eventuelle skader eller manglende dele.
- Montering af bundplade: Place the base plate on a stable, level workbench. Secure it using appropriate bolts through the elongated slots on the base.
- Kolonnesamling: Mount the column securely onto the base plate according to the provided hardware.
- Drilling Table Attachment: Slide the drilling table assembly onto the column. Adjust its height and secure it with the locking handle.
- Head Assembly Mounting: Carefully place the head assembly onto the top of the column and secure it.
- Montering af borepatron: Insert the chuck onto the spindle taper. Use a rubber mallet to gently tap it into place, ensuring a firm fit.
- Chip Guard: Attach the transparent chip protection guard around the chuck area.

4. Betjeningsvejledning
Understand how to properly operate your pillar drill for optimal performance and safety.
4.1 Selecting Drill Bits
Choose the appropriate drill bit for the material and desired hole size. The chuck accommodates bits from 3 mm to 16 mm. Ensure the drill bit is sharp and free from damage.
4.2 Montering af borehoveder
- Ensure the drill is unplugged.
- Open the chuck jaws using the chuck key.
- Insert the drill bit into the chuck, ensuring it is centered and seated firmly.
- Tighten the chuck jaws securely with the chuck key. Remove the chuck key immediately after tightening.
4.3 Justering af hastighed
The drill features 12 speed settings, adjustable via a belt drive system. Select the speed appropriate for your material and drill bit size. Lower speeds are generally for larger bits and harder materials, while higher speeds are for smaller bits and softer materials.


4.4 Adjusting Drilling Table
The drilling table can be adjusted in height and tilted up to +/- 45 degrees. Loosen the locking handle, position the table as required, and then securely tighten the handle.

4.5 Indstilling af boredybde
Use the depth stop mechanism to set the desired drilling depth. This ensures consistent hole depths for repetitive tasks.
4.6 Boreprocedure
- Secure the workpiece firmly to the drilling table using clampeller en skruestik. Hold aldrig emnet i hånden.
- Adjust the table height and angle, and set the drilling depth.
- Vælg den passende hastighed.
- Turn on the drill using the On/Off switch.
- Slowly lower the drill bit into the workpiece using the feed handles, applying steady, even pressure.
- Når den ønskede dybde er nået, trækkes borekronen ud af emnet.
- Turn off the drill.
5. Vedligeholdelse
Regelmæssig vedligeholdelse sikrer din søjleboremaskines lange levetid og sikre drift.
- Rensning: After each use, clean the drill of dust and chips. Use a brush or compressed air. Do not use solvents that may damage plastic parts.
- Smøring: Periodically lubricate moving parts such as the column, spindle, and depth stop mechanism with light machine oil.
- Bæltespænding: Check the tension of the drive belt regularly. Adjust if necessary to prevent slippage and ensure proper power transmission. Refer to the belt diagram inside the motor housing cover.
- Vedligeholdelse af borepatron: Keep the chuck jaws clean and free of debris. If the chuck becomes stiff, clean and lightly lubricate it.
- Elektrisk ledning: Inspect the power cord for any damage. Replace if frayed or cut.
6. Fejlfinding
This section addresses common issues you might encounter with your pillar drill.
| Problem | Mulig årsag | Løsning |
|---|---|---|
| Boremaskinen starter ikke | Ingen strømforsyning; Defekt kontakt; Motorproblem | Check power connection and circuit breaker; Inspect switch for damage; Consult qualified service personnel. |
| Overdreven vibration | Loose mounting; Unbalanced drill bit; Worn bearings | Tighten mounting bolts; Replace or re-center drill bit; Consult service personnel for bearing replacement. |
| Borehovedet glider i patronen | Chuck not tightened sufficiently; Oily chuck jaws; Damaged chuck jaws | Tighten chuck firmly with key; Clean chuck jaws; Replace chuck if damaged. |
| Motoren overophedes | Overloading; Insufficient ventilation; Prolonged use | Reduce load; Ensure clear ventilation; Allow motor to cool down. |
| Unøjagtig boring | Loose workpiece; Worn drill bit; Misaligned table | Secure workpiece firmly; Replace drill bit; Check and adjust table alignment. |
7. Specifikationer
Technical data for the Hecht Professional Pillar Drill.
| Feature | Specifikation |
|---|---|
| Fabrikant | Hecht |
| Varemodelnummer | Standbohrmaschine Hecht |
| Strømkilde | Elektrisk med ledning |
| Voltage | 230 volt |
| Max Power | 600 watt |
| Maksimal rotationshastighed | 2700 RPM |
| Antal hastigheder | 12 |
| Max Chuck Størrelse | 16 mm |
| Materiale | Metal |
| Farve | Red Pillar Drill |
| Pakkedimensioner | 71 x 45 x 27 cm |
| Vægt | 23 kilograms (approx.) |
| Brugsmiljø | Indendørs |
| Referencenummer | 8595614925655 |
8. Garanti og support
For warranty information, please refer to the documentation provided with your purchase or contact the retailer. For technical support or spare parts inquiries, please contact Hecht customer service or your authorized dealer.
Please have your model number (Standbohrmaschine Hecht) and reference number (8595614925655) available when contacting support.


