1. Introduktion
This manual provides essential instructions for the safe and efficient use of your Ulefone Armor X7 Pro Dual SIM smartphone. The Armor X7 Pro is designed for durability, featuring IP68/69K water, dust, and drop resistance, making it suitable for challenging environments. Please read this manual thoroughly before operating your device.

Figure 1: Ulefone Armor X7 Pro, showing the front display and the textured back panel with camera module.
2. Produktet er slutview
2.1 Enhedskomponenter
Familiarize yourself with the key components of your Ulefone Armor X7 Pro.

Figur 2: Forside view of the Ulefone Armor X7 Pro, highlighting the display, front camera, and earpiece.
- Forreste kamera: Til selfies og videoopkald.
- Højttaler: Til lyd under opkald.
- Vise: 5-inch screen for interaction.
- Mikrofon: Til stemmeinput.

Figur 3: Tilbage view of the Ulefone Armor X7 Pro, showing the main camera, flash, and fingerprint sensor.
- Hovedkamera: Til optagelse af fotos og videoer.
- LED-blitz: Provides illumination for photos and can serve as a flashlight.
- Fingeraftrykssensor: For secure device unlocking and authentication.
- Højttaler: Til lydudgang.
2.2 Robust design
The Armor X7 Pro features a robust construction designed to withstand harsh conditions. Its reinforced corners and durable casing provide protection against drops, dust, and water ingress.
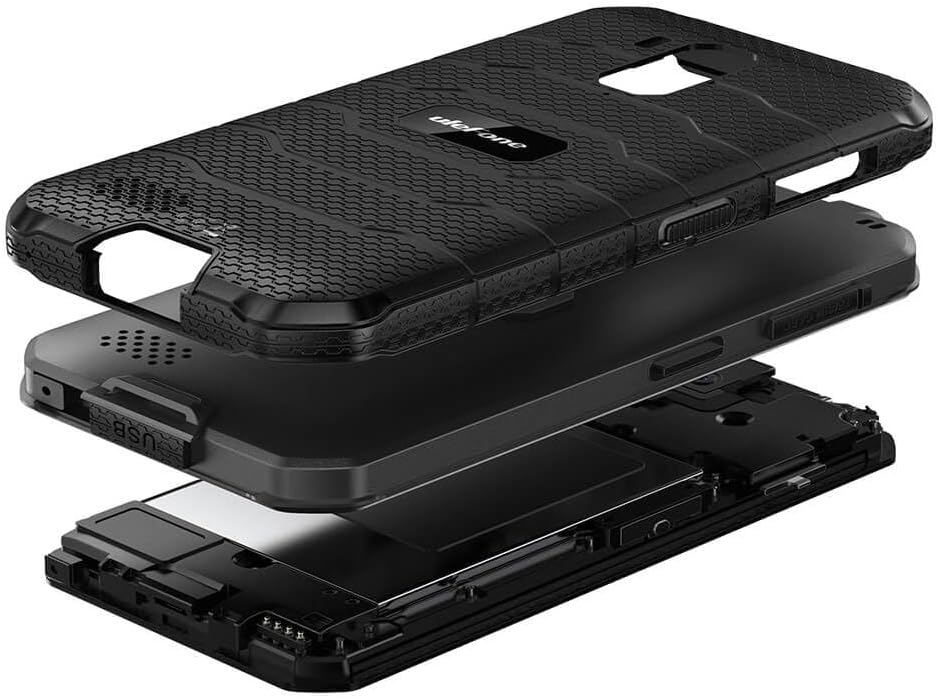
Figur 4: Eksploderet view illustrating the multi-layered rugged construction of the Ulefone Armor X7 Pro.
3. Opsætning
3.1 Installation af SIM-kort og MicroSD-kort
- Find SIM-kortbakken på siden af enheden.
- Brug det medfølgende SIM-kortudløserværktøj til at åbne bakken.
- Carefully place your Nano-SIM cards and/or a MicroSD card into the designated slots. Ensure the gold contacts face downwards.
- Gently push the tray back into the device until it clicks into place. Ensure the tray is fully sealed to maintain water and dust resistance.
3.2 Opladning af enheden
Before first use, fully charge your Ulefone Armor X7 Pro.
- Tilslut USB-kablet til opladningsporten på din telefon.
- Connect the other end of the USB cable to a power adapter, then plug the adapter into a power outlet.
- Opladningsindikatoren vises på skærmen.
3.3 Tænd/sluk
- For at tænde: Tryk og hold tænd/sluk-knappen nede, indtil Ulefone-logoet vises.
- For at slukke: Tryk på tænd/sluk-knappen, og hold den nede, indtil strømindstillingerne vises på skærmen, og vælg derefter 'Sluk'.
4. Betjeningsvejledning
4.1 Grundlæggende navigation
Use touch gestures such as tap, swipe, pinch, and spread to navigate the interface.
4.2 Foretage opkald og sende beskeder
- Opkald: Åbn appen 'Telefon', indtast nummeret, og tryk på opkaldsikonet.
- Beskeder: Open the 'Messages' app, tap 'Start chat', enter the recipient and your message.
4.3 Brug af kameraet
Open the 'Camera' app. Tap the shutter button to take a photo or the video icon to record a video. Swipe left or right to switch between modes.
4.4 Lås op med fingeraftryk
Sådan konfigurerer du oplåsning med fingeraftryk:
- Go to 'Settings' > 'Security & location' > 'Fingerprint'.
- Følg instruktionerne på skærmen for at registrere dit fingeraftryk.
- Once registered, you can unlock your device by placing your finger on the sensor.
4.5 Netværksforbindelse
- Wi-Fi: Go to 'Settings' > 'Network & internet' > 'Wi-Fi'. Turn Wi-Fi on and select a network to connect.
- Mobildata: Go to 'Settings' > 'Network & internet' > 'Mobile network'. Ensure 'Mobile data' is enabled.
5. Vedligeholdelse
5.1 Rengøring af din enhed
Brug en blød, fnugfri klud til at rengøre telefonens skærm og kabinet. Undgå at bruge skrappe kemikalier eller slibende materialer.
5.2 Vand- og støvafvisende (IP68/IP69K)
The Ulefone Armor X7 Pro is rated IP68/IP69K, meaning it is resistant to dust and can withstand water immersion up to 1.5 meters for 30 minutes. It can also handle high-pressure, high-temperature water jets. To maintain this resistance:
- Ensure all port covers (USB, SIM tray) are securely closed.
- Do not expose the device to water if any port covers are open or damaged.
- Hvis enheden bliver våd, skal den tørres grundigt, inden du oplader den eller åbner porte.
- Avoid exposing the device to saltwater or other liquids that may corrode components.
5.3 Pleje af batterier
- Undgå ekstreme temperaturer, da disse kan forringe batteriets levetid.
- Use only Ulefone-approved chargers and cables.
- Batteriet må ikke punkteres eller beskadiges.
6. Fejlfinding
Hvis du støder på problemer med din enhed, kan du prøve følgende løsninger:
| Problem | Løsning |
|---|---|
| Enheden tænder ikke | Sørg for, at batteriet er opladet. Tryk på tænd/sluk-knappen og hold den nede i mindst 10 sekunder for at fremtvinge en genstart. |
| Dårligt netværkssignal | Kontrollér installationen af SIM-kortet. Flyt til et område med bedre netværksdækning. Genstart enheden. |
| Batteriet aflades hurtigt | Luk ubrugte apps. Reducer skærmens lysstyrke. Deaktiver Wi-Fi/Bluetooth, når de ikke er i brug. |
| Apps går ned eller fryser | Clear app cache/data in Settings. Update apps. If persistent, consider a factory reset (back up data first). |
If problems persist, contact Ulefone customer support.
7. Specifikationer
Key technical specifications for the Ulefone Armor X7 Pro:
- Model: UF-AX7P/BK
- Dimensioner: 0.57 x 3.11 x 5.91 tommer
- Vægt: 8.3 ounces (234 gram)
- Skærmstørrelse: 5 tommer
- VÆDDER: 4 GB
- Hukommelseslagringskapacitet: 32 GB
- Mobilteknologi: 4G
- Trådløs netværksteknologi: GSM
- Antal SIM-kortpladser: Dobbelt SIM
- Biometric Security Feature: Fingeraftryksgenkendelse
- Vand-/støvmodstand: IP68/69K
- Fabrikant: Ulefone
8. Garanti og support
8.1 Garantioplysninger
Your Ulefone Armor X7 Pro comes with a two-year warranty against factory defects. This warranty covers manufacturing faults and material defects under normal use. It does not cover damage caused by misuse, accidents, unauthorized modifications, or normal wear and tear.
8.2 Kundesupport
For technical assistance, warranty claims, or further inquiries, please visit the official Ulefone website or contact their customer service department. Refer to your purchase documentation for specific contact details.


