1. Introduktion
This manual provides essential information for the safe and effective use of your Secura Chainsaw Chain and Guide Set. This set is specifically designed for the Scheppach CSH46 chainsaw and includes four high-quality semi-chisel chains and one laminated guide bar with a riveted sprocket. Please read these instructions carefully before installation and operation to ensure proper fit, performance, and safety.
The primary purpose of this manual is to guide you through identifying the correct chain and guide bar specifications, installation, basic maintenance, and troubleshooting.
2. Vigtige sikkerhedsoplysninger
Always prioritize safety when working with chainsaws and their accessories. Failure to follow safety guidelines can result in serious injury.
- Læs motorsavens manual: Always refer to your chainsaw's original instruction manual for specific safety warnings, operation procedures, and maintenance schedules.
- Personligt beskyttelsesudstyr (PPE): Always wear appropriate PPE, including safety glasses, hearing protection, gloves, safety helmet, and protective legwear, when operating or maintaining a chainsaw.
- Strømafbrydelse: Before performing any installation, maintenance, or inspection on the chain or guide bar, ensure the chainsaw's engine is off and the spark plug cap is disconnected (for gasoline models) or the battery is removed (for electric/cordless models).
- Skarpe kanter: Chainsaw chains have sharp cutting edges. Handle them with extreme care to prevent cuts.
- Korrekt pasform: Ensure the replacement chain and guide bar are the correct specifications for your chainsaw. An incorrect fit can lead to chain derailment, kickback, and severe injury.
3. Produktkomponenter
Your Secura Chainsaw Chain and Guide Set includes the following items:
- 4x Chainsaw Chains: Semi-chisel type, 3/8LP pitch, 62 drive links, 1.3mm (.050") gauge.
- 1x Guide Bar: Laminated with riveted sprocket, 45cm (18 inch) cutting length.
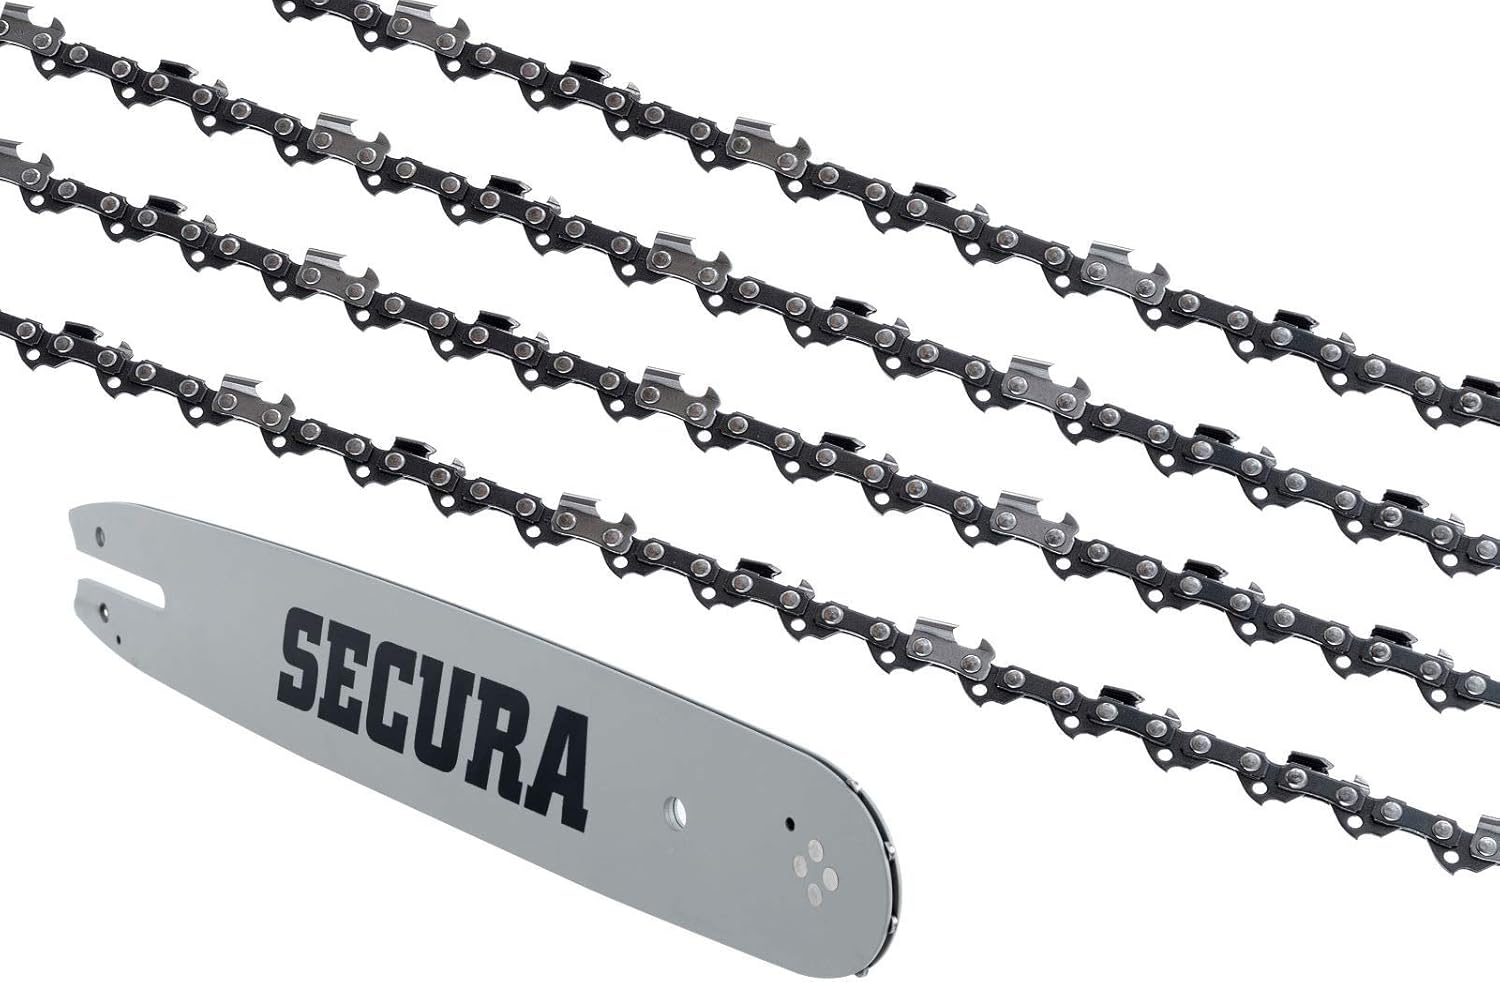
Billede 1: Overview of the Secura Chainsaw Chain and Guide Set, showing multiple chains and one guide bar.

Image 2: Visual representation of the chain specifications: 4x HM-Sägeketten (SC Saw Chains), 3/8" LP Pitch, 62 Treibglieder (Drive Links), 1.3 mm Nutbreite (Gauge).
4. Compatibility and Measurement
It is crucial to verify the specifications of your existing chainsaw chain and guide bar to ensure this Secura set is compatible. Chainsaw chains are defined by three main parameters: Pitch, Måler, og Antal Drev-links. The guide bar is defined by its Skærelængde.
4.1. Measuring Cutting Length
The cutting length refers to the usable length of the guide bar, from the chainsaw housing to the tip of the bar. It is ikke the total length of the guide bar.

Image 3: Illustration demonstrating how to correctly measure the cutting length (Schnittlänge / Longueur de Coupe) of a chainsaw guide bar, from the chainsaw body to the tip of the bar. An incorrect measurement method showing the full bar length is also depicted as 'wrong'.
4.2. Measuring Chain Specifications (Pitch, Drive Links, Gauge)
These three measurements are critical for selecting the correct chain:
- Pitch: The distance between three consecutive rivets divided by two. Common pitches are 3/8" LP (Low Profile), .325", and 3/8". This set is 3/8LP.
- Drev links: The number of links on the chain that fit into the guide bar groove. Count these carefully. This set has 62 drive links.
- Måler: The thickness of the drive links, which fits into the guide bar groove. Common gauges are 1.1mm (.043"), 1.3mm (.050"), 1.5mm (.058"), and 1.6mm (.063"). This set has a 1.3mm (.050") gauge.

Image 4: Diagram illustrating how to measure key chainsaw chain dimensions: Pitch (Teilung), Drive Links (Treibglieder), and Chain Gauge (Nutbreite).
Verify these measurements against your existing chain and guide bar to ensure compatibility with the Secura set.
5. Opsætning og installation
Follow these general steps for installing the new chain and guide bar. Always refer to your chainsaw's specific manual for detailed instructions.
- Klargøring af motorsaven: Ensure the chainsaw is turned off, the spark plug cap is disconnected (gas models) or battery removed (electric/cordless models), and the chain brake is disengaged.
- Fjern gamle komponenter: Løsn sværdmøtrikkerne og fjern koblingsdækslet. Fjern forsigtigt den gamle kæde og sværdet.
- Ren: Clean any sawdust, debris, and old oil from the clutch area, guide bar groove, and oiling holes.
- Install New Guide Bar: Place the new Secura guide bar onto the guide bar studs. Ensure the oiling holes on the bar align with the chainsaw's oil outlet.
- Installer ny kæde: Carefully place the new Secura chain around the drive sprocket and into the groove of the guide bar. Ensure the cutting edges of the chain are facing in the correct direction of rotation (usually indicated by an arrow on the chainsaw housing or chain itself).
- Replace Clutch Cover: Reinstall the clutch cover and hand-tighten the bar nuts.
- Juster kædespænding: Adjust the chain tension using the tensioning screw. The chain should be snug against the guide bar but still able to be pulled freely by hand. There should be no sag on the underside of the guide bar. A properly tensioned chain will have the drive links fully seated in the guide bar groove, but you should be able to pull the chain up slightly (about 2-3mm) in the middle of the bar.
- Spænd sværdmøtrikkerne: Fully tighten the bar nuts.
- Check Oiling: Start the chainsaw (briefly, in a safe area) and check that the chain oiler is functioning correctly. Hold the tip of the guide bar over a light-colored surface; a line of oil should appear.

Billede 5: Nærbillede view of the chainsaw chain properly seated on the guide bar, illustrating correct installation.
6. Betjening
Once the chain and guide bar are correctly installed and tensioned, and the oiler is confirmed to be working, you can operate your chainsaw according to its manufacturer's instructions. Always ensure the chain is sharp and properly lubricated for efficient and safe cutting.
7. Vedligeholdelse
Regular maintenance of your chainsaw chain and guide bar will extend their lifespan and ensure safe operation.
7.1. Kædeslibning
The semi-chisel chains in this set are designed to be easy to sharpen. A sharp chain cuts efficiently and safely. A dull chain will produce fine sawdust instead of chips, require more force, and can cause kickback. Use a round file of the correct diameter (typically 4.0mm or 5/32" for 3/8LP chains) and a flat file for the depth gauges. Maintain the correct filing angles as specified by the chain manufacturer.
7.2. Vedligeholdelse af sværd
- Clean Groove: Regularly clean the guide bar groove to remove sawdust and debris that can impede chain movement and oil flow.
- Tjek for grater: File off any burrs that form on the guide bar rails.
- Flip Bar: Vend sværdet med jævne mellemrum for at sikre jævn slitage på begge sider.
- Lubricate Sprocket (if applicable): If your guide bar has a nose sprocket, ensure it is lubricated regularly with a grease gun.
8. Fejlfinding
Common issues related to chainsaw chains and guide bars:
- Chain Not Cutting Efficiently: Likely a dull chain. Sharpen or replace the chain.
- Chain Smoking: Insufficient chain oil or dull chain. Check oil reservoir, oiler function, and chain sharpness.
- Kædeafsporing: Incorrect chain tension (too loose), worn guide bar, or incorrect chain/bar combination. Check tension, inspect guide bar for wear, and verify compatibility.
- Ujævnt snit: One side of the chain is duller than the other, or the guide bar rails are unevenly worn. Sharpen chain evenly or inspect/replace guide bar.
- Overdreven vibration: Dull chain, incorrect chain tension, or damaged components. Inspect chain and guide bar.
9. Specifikationer
| Feature | Specifikation |
|---|---|
| Mærke | Secura |
| Compatible Chainsaw Model | Scheppach CSH46 |
| Secura Reference Number | 6588431 |
| Antal kæder | 4 |
| Kæde type | Semi-chisel |
| Kædehøjde | 3/8LP (Low Profile) |
| Antal Drev-links | 62 |
| Kædemålere | 1.3mm (.050 inches) |
| Guide Bar Length (Cutting Length) | 45 cm (18 tommer) |
| Styrestangstype | Laminated with riveted sprocket |
10. Garanti og support
Specific warranty information for this Secura Chainsaw Chain and Guide Set is not available in the provided product data. For warranty claims or technical support, please contact your retailer or the manufacturer directly using the contact information provided at the point of purchase.


