1. Introduktion
This manual provides detailed instructions for the safe and efficient operation, setup, and maintenance of your SINGER SC220 Electronic Sewing Machine. Please read this manual thoroughly before using the machine to ensure proper function and to prevent damage or injury. Keep this manual for future reference.
2. Vigtige sikkerhedsinstruktioner
Når du bruger et elektrisk apparat, skal grundlæggende sikkerhedsforanstaltninger altid følges, herunder følgende:
- Læs alle instruktioner, før du bruger denne symaskine.
- Hold fingrene væk fra alle bevægelige dele. Der kræves særlig forsigtighed omkring symaskinens nål.
- Brug altid den rigtige stingplade. Den forkerte plade kan få nålen til at knække.
- Træk eller skub ikke i stoffet under syning. Dette kan afbøje nålen og få den til at knække.
- Sluk symaskinen, når du foretager justeringer i nåleområdet, f.eks. trådning af nålen, skift af nål, trådning af spolen eller skift af trykfoden.
- Træk altid stikket til symaskinen ud af stikkontakten, når du fjerner dæksler, smører, eller når du foretager andre brugerservicejusteringer, der er nævnt i instruktionsmanualen.
- Brug aldrig symaskinen, hvis ledningen eller stikket er beskadiget, hvis den ikke fungerer korrekt, eller hvis den er blevet tabt eller beskadiget.
- Må ikke anvendes, hvor der anvendes aerosolprodukter (spray), eller hvor der indgives ilt.
- Dette apparat er ikke beregnet til brug af personer (inklusive børn) med nedsatte fysiske, sensoriske eller mentale evner, eller mangel på erfaring og viden, medmindre de har fået opsyn eller instruktion i brugen af apparatet af en person, der er ansvarlig for deres sikkerhed.
3. Produktet er slutview
The SINGER SC220 is an electronic sewing machine designed for various sewing tasks. It features an electronic screen for stitch selection and an integrated LED light for improved visibility.
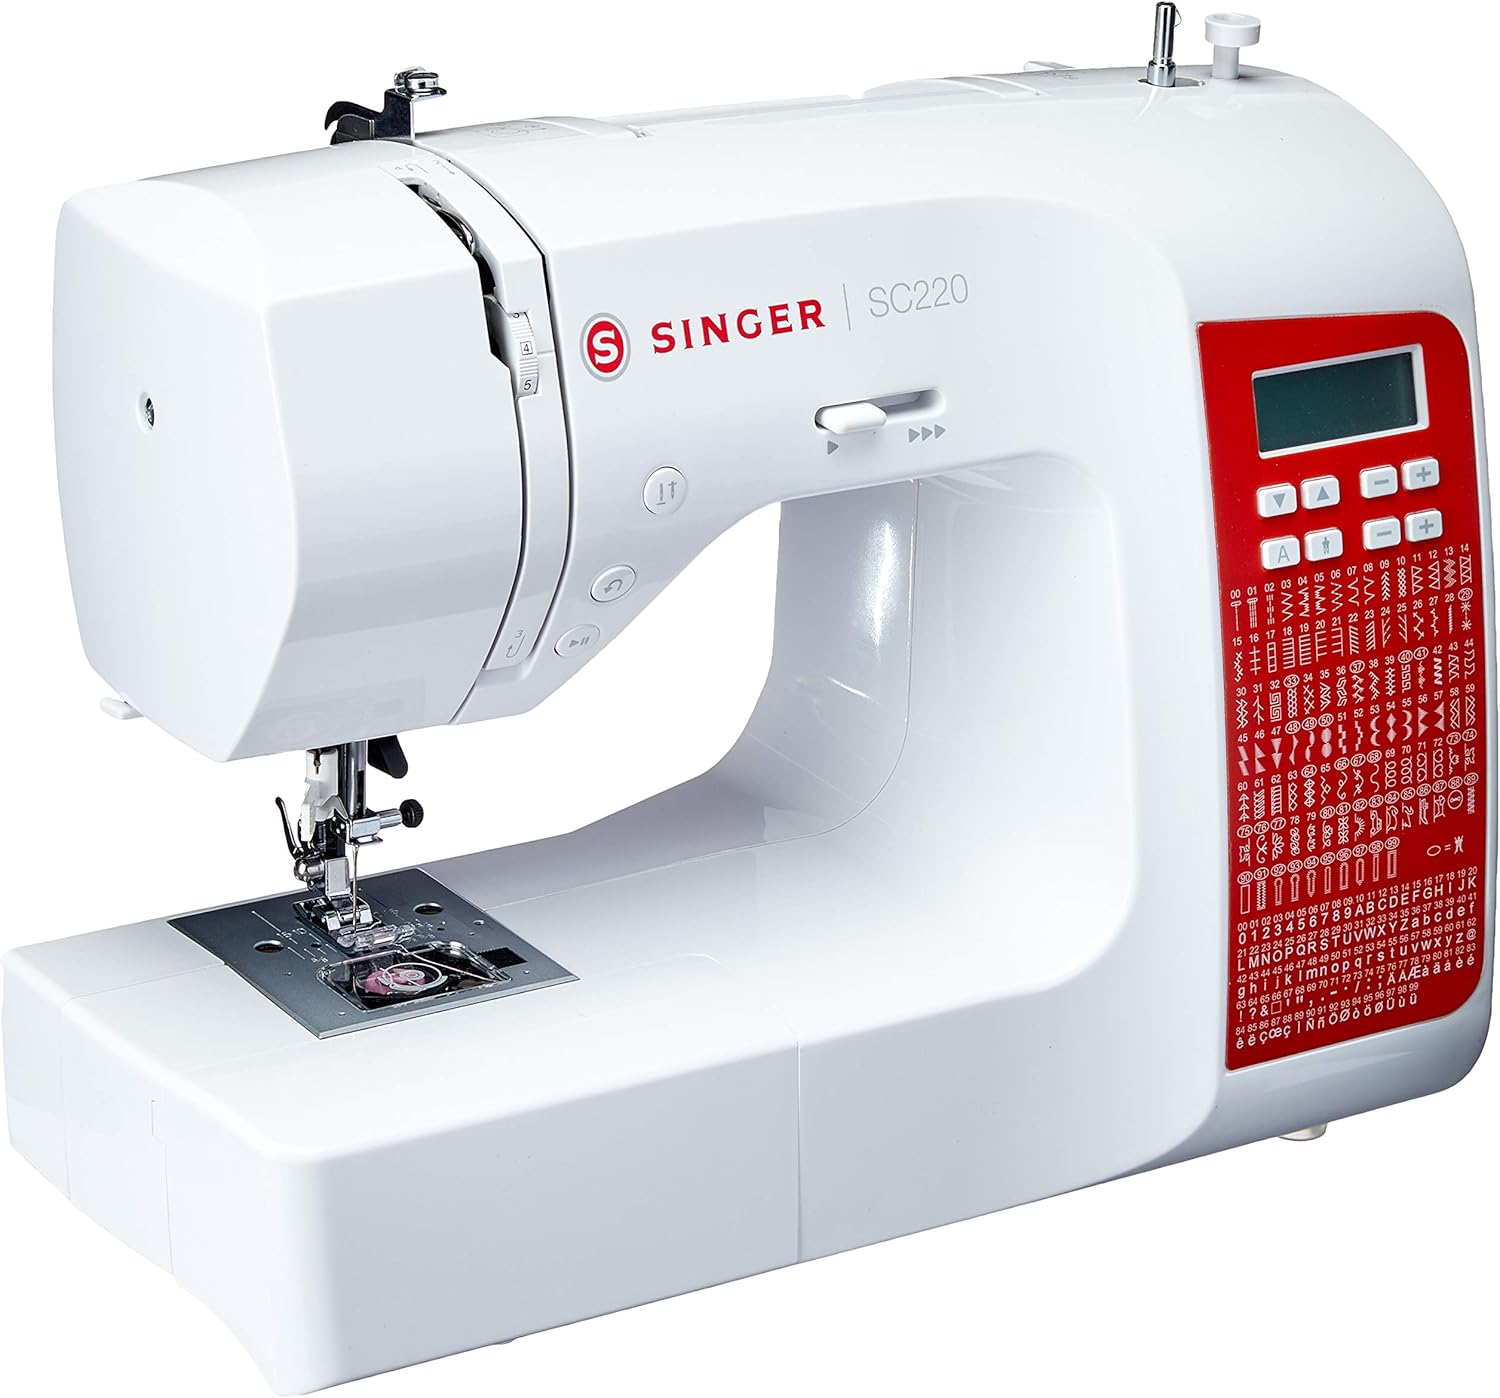
Figur 3.1: Samlet set view of the SINGER SC220 Electronic Sewing Machine. This image shows the machine from a front-right angle, highlighting its compact design, the SINGER logo, model number SC220, and the red control panel with an electronic display and stitch selection buttons.
Nøglefunktioner:
- Electronic Stitch Selection: Easily choose from a variety of stitches using the electronic screen and control buttons.
- Overlock Stitch Capability: Finish seams professionally to prevent fraying.
- Automatic Bobbin Winding: Simplifies the bobbin preparation process.
- Integreret LED lys: Oplyser syområdet for bedre udsyn.
- Fri arm: Giver mulighed for nem syning af cylindriske genstande som ærmer og buksekanter.

Figur 3.2: Front view of the SINGER SC220. This image provides a clear view of the machine's front, including the electronic display, stitch selection buttons, and a comprehensive stitch chart printed on the red panel.

Figur 3.3: Close-up of the needle area and bobbin case. This image details the presser foot, needle, and the transparent cover for the drop-in bobbin system, essential for threading and maintenance.
4. Opsætning
4.1 Udpakning og placering
- Tag forsigtigt maskinen ud af emballagen.
- Placer maskinen på en stabil, flad overflade.
- Sørg for tilstrækkelig belysning og plads til komfortabel betjening.
4.2 Tilslutning af strøm og fodpedal
- Locate the power cord and foot pedal.
- Insert the foot pedal plug into the corresponding jack on the right side of the machine.
- Insert the power cord plug into the power input jack on the right side of the machine.
- Sæt netledningen i en passende stikkontakt.

Figur 4.1: Bag view of the SINGER SC220. This image displays the back of the machine, clearly showing the power switch, the power cord input, and the foot pedal connection port.

Figur 4.2: The electronic foot pedal. This image shows the foot pedal used to control the sewing speed of the machine.
4.3 Spolning af spolen
- Læg en trådrulle på trådrulleholderen.
- Før tråden gennem den øverste trådfører og rundt om spolespændingsskiven.
- Placer en tom spole på spolevinderens spindel.
- Vikl tråden med uret flere gange rundt om spolen.
- Skub spolevinderen til højre.
- Press the foot pedal lightly to start winding. Stop when the bobbin is full.
- Klip tråden over og skub spindlen tilbage til venstre.
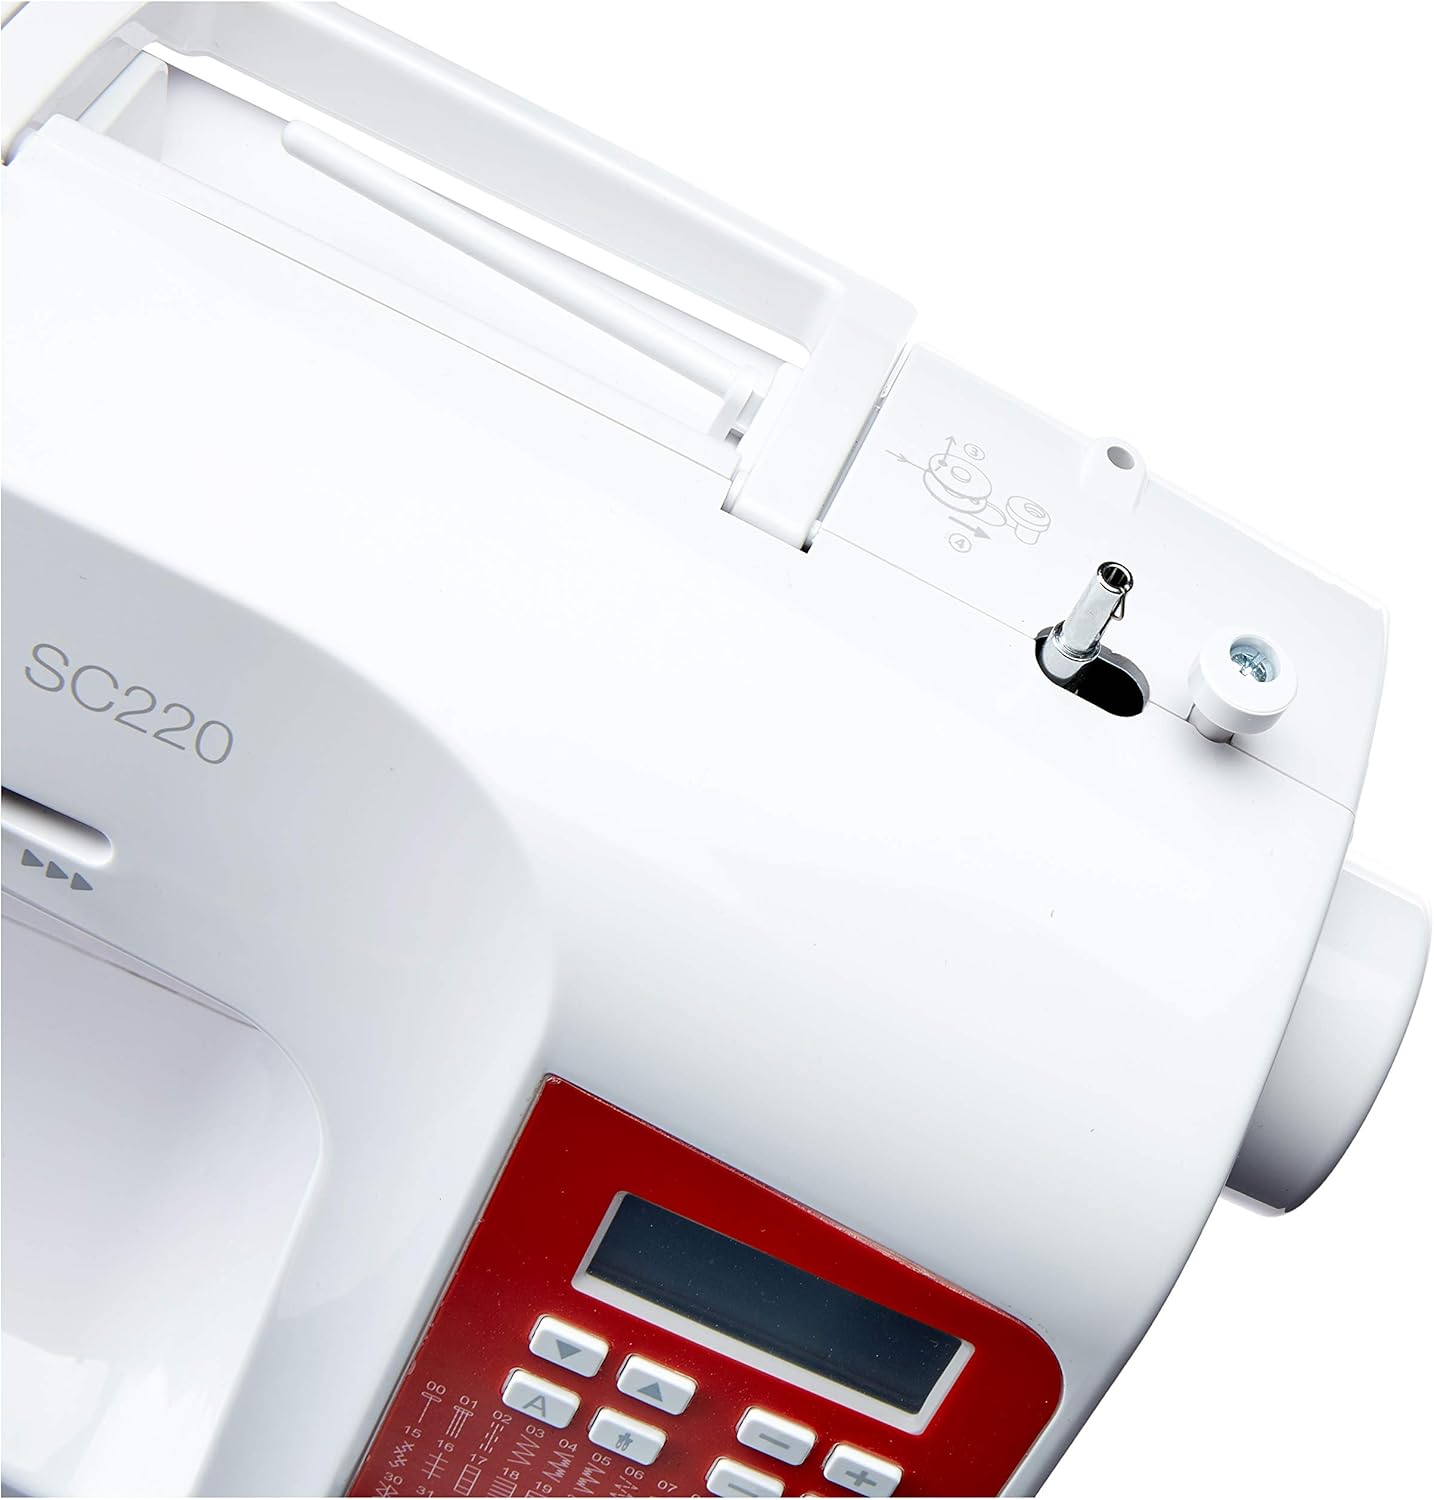
Figur 4.3: Top view of the SINGER SC220. This image illustrates the top of the machine, showing the spool pin, thread guides, and the bobbin winder mechanism.
4.4 Trådning af overtråden
- Løft trykfodsløfteren.
- Læg en trådrulle på trådrulleholderen.
- Følg den nummererede trådningssti, der er angivet på maskinen, og før tråden gennem alle føringsskiver og spændingsskiver.
- Bring the thread down through the take-up lever.
- Tråd nålen forfra og bagpå.
4.5 Isætning af spolen
- Åbn spoledækslet.
- Sæt den opviklede spole i spolekapslen, og sørg for, at tråden afvikles i den rigtige retning (normalt mod uret).
- Før undertråden gennem spændingsfjederen og ind i trådføreråbningen.
- Udskift spolens dækplade.
- Turn the handwheel towards you to lower and raise the needle, catching the bobbin thread. Pull both threads under the presser foot and to the back.
5. Betjeningsvejledning
5.1 Tænd/sluk
Locate the power switch on the right side of the machine (refer to Figure 4.1). Flip the switch to the 'I' position to turn on the machine and the LED light. Flip to 'O' to turn off.
5.2 Valg af sting
The SINGER SC220 features an electronic display and buttons for stitch selection. Refer to the stitch chart on the machine's front panel (Figure 3.2) to identify desired stitches.
- Use the '+' and '-' buttons to scroll through available stitch patterns.
- The selected stitch number will appear on the electronic display.
- The machine will automatically set the recommended stitch length and width for the chosen stitch. These can often be adjusted further using dedicated buttons if available.
5.3 Grundlæggende syning
- Læg stoffet under trykfoden.
- Sænk trykfoden.
- Tryk forsigtigt på fodpedalen for at begynde at sy. Jo hårdere du trykker, desto hurtigere syr maskinen.
- Før stoffet forsigtigt med begge hænder, og sørg for, at det fremføres jævnt. Træk eller skub ikke stoffet for hårdt.
- To reverse stitch (for securing seams), press and hold the reverse button (usually marked with a reverse arrow).
- When finished, raise the needle to its highest position, lift the presser foot, and pull the fabric out.
- Cut the threads using the thread cutter located on the side of the machine.
5.4 Brug af friarmen
To use the free arm, slide off the accessory storage compartment from the base of the machine. This exposes the narrow free arm, ideal for sewing cuffs, sleeves, and other small, circular items.
6. Vedligeholdelse
Regular maintenance ensures the longevity and optimal performance of your SINGER SC220 sewing machine.
6.1 Rengøring af spoleområdet
- Sluk og tag stikket ud af maskinen.
- Fjern nålen, trykfoden og spoledækslet.
- Carefully remove the bobbin case and hook race.
- Use a small brush (often included with the machine) to remove lint and dust from the bobbin area and feed dogs.
- Saml komponenterne igen.
6.2 Skift af nål
Change the needle regularly, especially after 8-10 hours of sewing or if it becomes bent or dull.
- Sluk og tag stikket ud af maskinen.
- Løsn nålen clamp skrue.
- Fjern den gamle nål.
- Sæt en ny nål i med den flade side mod maskinens bagside, og skub den så langt op som muligt.
- Spænd nålen clamp skrue sikkert.
6.3 Opbevaring
When not in use, cover the machine with a dust cover to protect it from dust and debris. Store in a dry, cool place.
7. Fejlfinding
This section addresses common issues you might encounter with your SINGER SC220.
| Problem | Mulig årsag | Løsning |
|---|---|---|
| Maskinen starter ikke | Power cord not plugged in; power switch off; bobbin winder engaged. | Check power connection; turn power switch on; disengage bobbin winder. |
| Springet søm over | Incorrect needle; bent needle; improper threading; wrong needle size for fabric. | Change needle; re-thread machine; use correct needle type/size. |
| Trådbrud | Improper threading; thread tension too tight; poor quality thread; bent needle. | Re-thread machine; adjust tension; use good quality thread; replace needle. |
| Stoffet fremføres ikke | Presser foot not lowered; feed dogs clogged with lint; stitch length set to zero. | Lower presser foot; clean feed dogs; adjust stitch length. |
| Needle breaking | Bent needle; pulling fabric forcefully; wrong needle size; needle not fully inserted. | Replace needle; guide fabric gently; use correct needle; ensure needle is fully inserted. |
8. Specifikationer
| Feature | Specifikation |
|---|---|
| Mærke | Sanger |
| Modelnummer | SC220 (230322123) |
| Farve | Hvid/rød |
| Produktmål (L x B x H) | 31 x 19 x 41 cm (12.2 x 7.5 x 16.1 tommer) |
| Materiale | Plast |
| Varens vægt | 5.3 kilo (11.7 lbs) |
| Strømkilde | Elektrisk med ledning |
| Elektrisk | Ja |
9. Garanti og support
For warranty information, please refer to the documentation included with your purchase or visit the official SINGER website. For technical support or service, contact SINGER customer service through their official channels.