Indledning
Thank you for choosing the Caso Design Four Slice Wide Slot Kitchen Toaster. This manual provides important information regarding the safe operation, maintenance, and troubleshooting of your new appliance. Please read this manual thoroughly before first use and keep it for future reference.
The Caso Design toaster is engineered for convenience and versatility, featuring wide slots to accommodate various bread types, precise browning control, and a detachable bun warmer. Its stainless steel construction ensures durability and a sleek appearance in your kitchen.
Vigtige sikkerhedsinstruktioner
- Læs alle instruktioner, før du bruger brødristeren.
- Rør ikke ved varme overflader. Brug håndtag eller knopper.
- For at beskytte mod elektrisk stød må ledning, stik eller brødrister ikke nedsænkes i vand eller anden væske.
- Tæt opsyn er nødvendigt, når et apparat bruges af eller i nærheden af børn.
- Træk stikket ud af stikkontakten, når det ikke er i brug, og før rengøring. Lad det køle af, før du sætter dele på eller af.
- Betjen ikke noget apparat med en beskadiget ledning eller stik, eller efter at apparatet ikke fungerer korrekt eller er blevet beskadiget på nogen måde.
- Brug af tilbehør, der ikke er anbefalet af apparatets producent, kan forårsage skader.
- Må ikke bruges udendørs.
- Lad ikke ledningen hænge ud over kanten af bordet eller bordpladen eller røre ved varme overflader.
- Må ikke placeres på eller i nærheden af en varm gas- eller elektrisk brænder eller i en opvarmet ovn.
- Der skal udvises ekstrem forsigtighed ved flytning af et apparat, der indeholder varm olie eller andre varme væsker.
- Brug ikke apparatet til andet end tilsigtet brug.
- For store fødevarer, metalfolieemballager eller bestik må ikke lægges i en brødrister, da de kan forårsage brand eller risiko for elektrisk stød.
- Der kan opstå brand, hvis brødristere er dækket eller rører brandbart materiale, herunder gardiner, gardiner, vægge og lignende, når de er i drift.
- Forsøg ikke at skubbe mad ud, når brødristeren er tilsluttet.
- Tag altid stikket ud af brødristeren efter brug.
- Betjen ikke uden opsyn.
Produkt overview
Familiarize yourself with the components of your Caso Design toaster.

Front view of the Caso Design Four Slice Toaster, showcasing its sleek stainless steel finish and wide slots.
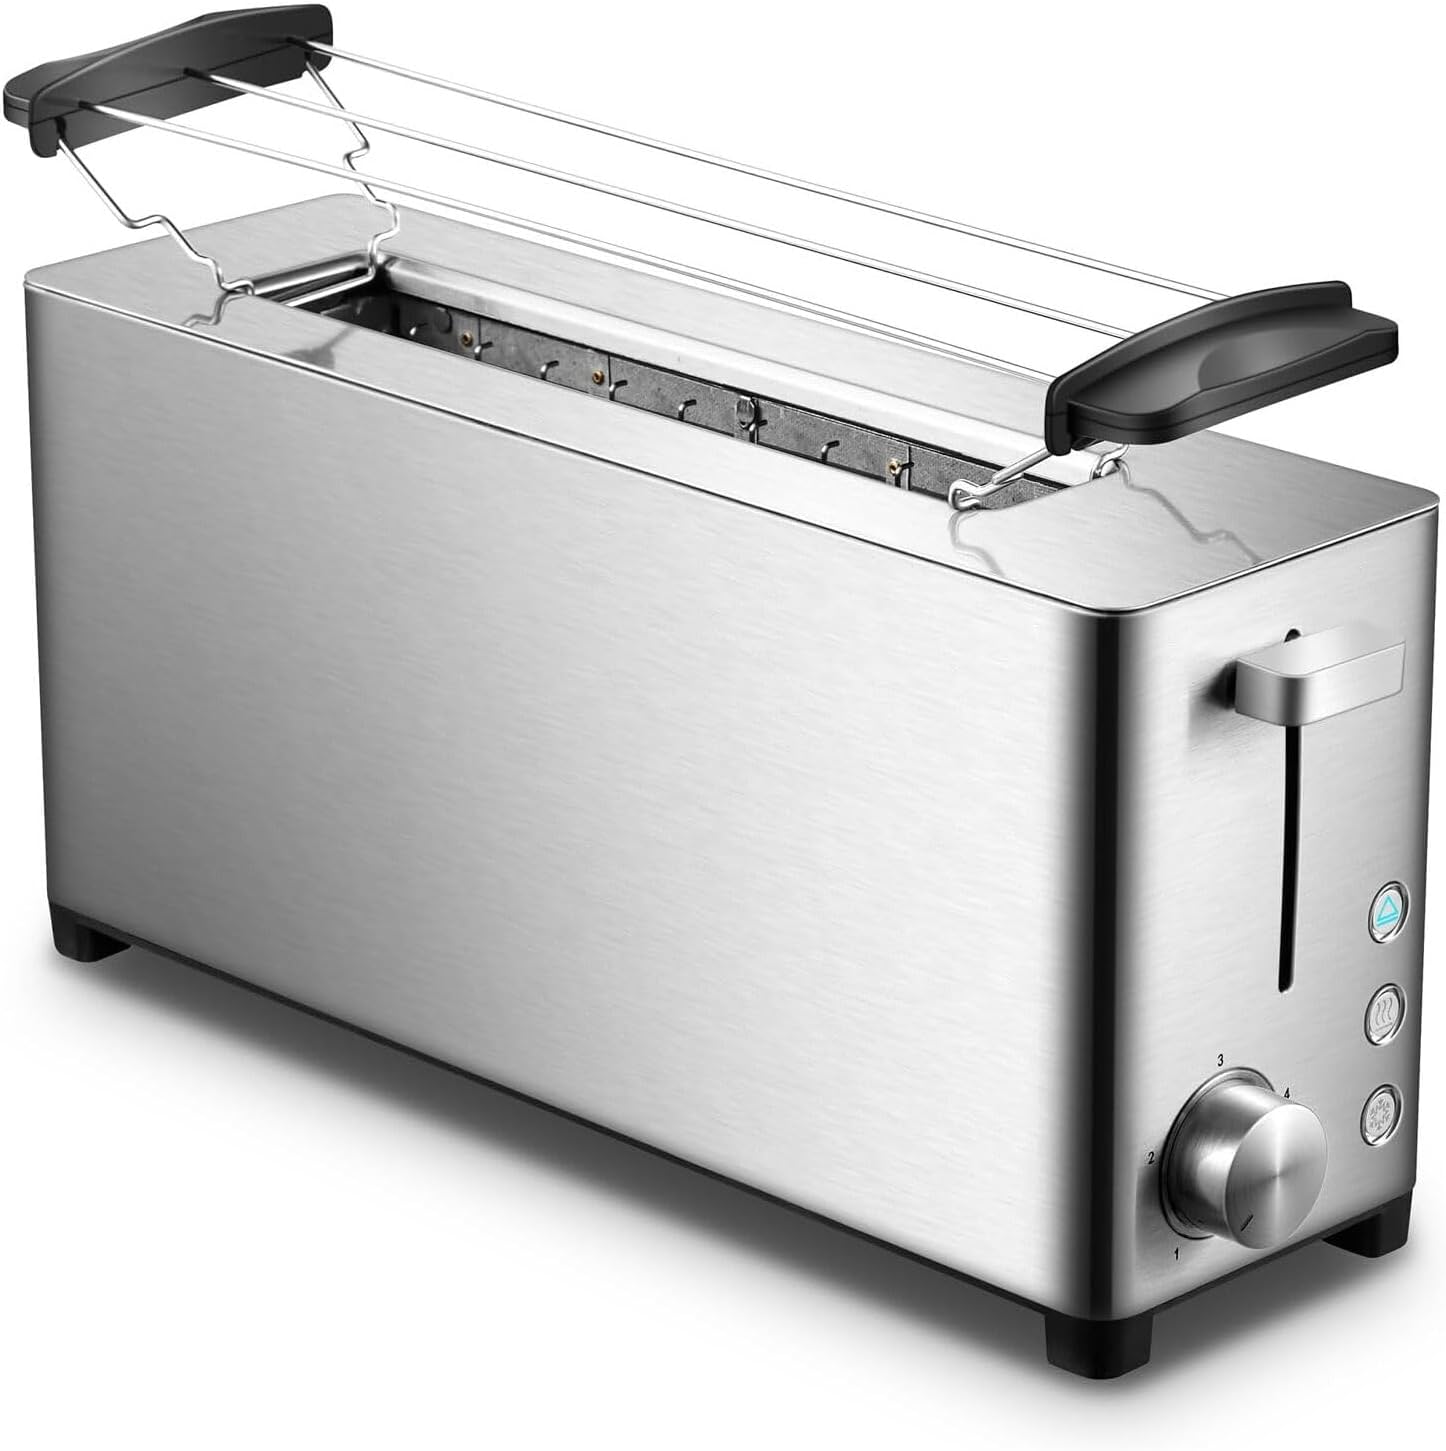
Vinklet view of the toaster, highlighting the browning control dial, cancel button, and defrost/bagel functions on the side panel.

The toaster with its detachable bun warmer accessory securely placed over the toasting slots, ready for use.

An image illustrating the dimensions of the Caso Design toaster: 7.1 inches deep, 15.6 inches wide, and 6.3 inches high.
Nøglekomponenter:
- Ristepladser: Fire brede riller til forskellige brødtyper.
- Browning-kontrolknap: Adjustable settings from 1 (light) to 6 (dark).
- Annuller knap: Stopper ristningscyklussen når som helst.
- Afrimningsknap: For toasting frozen bread.
- Bagel-knap: Toasts the cut side of bagels while warming the outer side.
- Krummebakke: Aftagelig bakke for nem rengøring af krummer.
- Bollevarmer: Detachable accessory for warming buns, croissants, or muffins.
- Håndtag: Lowers and raises bread into the toasting slots.
Opsætning
- Udpakning: Carefully remove the toaster and all accessories from the packaging. Retain packaging for future storage or transport.
- Placering: Placer brødristeren på en stabil, flad og varmebestandig overflade, væk fra brandfarlige materialer såsom gardiner eller vægge. Sørg for tilstrækkelig ventilation omkring apparatet.
- Første brug: Before first use, operate the toaster without bread on the highest setting (6) a few times to burn off any manufacturing residues. A slight odor or smoke may be present; this is normal and will dissipate. Ensure the area is well-ventilated.
- Strømtilslutning: Sæt netledningen i en standard 120V AC stikkontakt.
Betjeningsvejledning
Ristning af brød:
- Insert up to four slices of bread, bagels, or other items into the wide toasting slots. The self-centering guides will hold the bread in place.
- Select your desired browning level using the browning control dial, from 1 (lightest) to 6 (darkest).
- Press the lever down until it locks into place. The toasting cycle will begin.
- Once the selected browning level is achieved, the toast will automatically pop up.
- To stop the toasting cycle at any time, press the "Cancel" button.

Image showing bagels inserted into the wide toasting slots, demonstrating the toaster's capacity for larger items.
Using the Defrost Function:
The defrost function allows you to toast frozen bread without burning it.
- Place frozen bread into the toasting slots.
- Vælg det ønskede bruningsniveau.
- Press the lever down, then press the "Defrost" button. The indicator light for defrost will illuminate.
- The toaster will automatically adjust the toasting time to defrost and then toast the bread.
Using the Bagel Function:
Bagelfunktionen rister den skårne side af bagelen, mens den forsigtigt opvarmer ydersiden.
- Cut your bagel in half and place the cut sides facing inwards into the toasting slots.
- Vælg det ønskede bruningsniveau.
- Press the lever down, then press the "Bagel" button. The indicator light for bagel will illuminate.
- The toaster will complete the bagel cycle and automatically pop up.
Using the Detachable Bun Warmer:
The bun warmer is ideal for heating croissants, muffins, or other pastries that should not be directly toasted.
- Ensure the toaster is unplugged and cool. Carefully place the bun warmer accessory over the toasting slots.
- Place the items to be warmed on the bun warmer rack.
- Plug in the toaster and set the browning control to a low setting (e.g., 1 or 2).
- Press the lever down. The heating elements will warm the bun warmer.
- Monitor the items closely to prevent burning. Press the "Cancel" button when warmed to your preference.
- Carefully remove the warmed items. Allow the bun warmer to cool before handling or removing.

Image showing two buns placed on the detachable bun warmer accessory, demonstrating its use for warming pastries.
Vedligeholdelse og rengøring
Regelmæssig rengøring sikrer optimal ydeevne og forlænger din brødristers levetid.
- Tag altid stikket ud af brødristeren fra stikkontakten og lad den køle helt af, inden den rengøres.
- Krummebakke: The toaster features a convenient slide-out crumb tray located at the bottom. Pull out the tray, discard crumbs, and wipe it clean with a damp klud. Tør grundigt, inden du sætter den i igen.
- Ydre: Tør brødristerens yderside af med en blød, tør klud.amp cloth. For stubborn stains, a mild detergent can be used, but ensure no liquid enters the toasting slots. Dry thoroughly. Do not use abrasive cleaners or metal scouring pads.
- Indre: Do not attempt to clean the interior of the toaster or heating elements. If food becomes lodged in the slots, unplug the toaster and carefully turn it upside down to shake out the food. Never use metal objects to remove food.
- Opbevaring: Når brødristeren ikke er i brug, skal den opbevares et rent og tørt sted.

Image showing the slide-out crumb tray partially removed from the toaster, illustrating the ease of cleaning.
Fejlfinding
| Problem | Mulig årsag | Løsning |
|---|---|---|
| Brødristeren tænder ikke. | Ikke tilsluttet; stikkontakten virker ikke; håndtaget er ikke trykket helt ned. | Ensure the toaster is securely plugged into a working outlet. Press the lever down firmly until it locks. |
| Brødet ristes ikke jævnt. | Uneven bread thickness; crumb tray full. | Ensure bread slices are of uniform thickness. Clean the crumb tray. |
| Røg kommer fra brødristeren. | Crumbs accumulated; food lodged in slots; first use residue. | Unplug immediately. Clean crumb tray. If food is lodged, carefully remove after cooling. First use smoke is normal. |
| Toasten er for lys eller for mørk. | Browning setting incorrect. | Juster bruningsknappen til en højere indstilling for mørkere ristet brød eller en lavere indstilling for lysere ristet brød. |
| Håndtaget forbliver ikke nede. | Brødristeren er ikke tilsluttet; intern mekanismefejl. | Sørg for, at brødristeren er tilsluttet en stikkontakt. Kontakt kundesupport, hvis problemet fortsætter. |
Specifikationer
- Mærke: Caso Design
- Modelnummer: 11926
- Farve: Rustfri
- Materiale: Rustfrit stål
- Produktdimensioner: 7.1" D x 15.6" B x 6.3" H
- Wattage: 1300 watt
- Antal skiver: 4
- Speciel funktion: Cancel Function, Defrost Mode, Variable Browning Control
- Voltage: 120V
- Antal indstillinger: 6 (Browning Levels)
- Varens vægt: 3.94 pund
- Fremstillingsår: 2020
Garanti og support
Caso Design products are manufactured with high-quality materials and are subject to strict quality controls. For information regarding warranty coverage, please refer to the warranty card included with your product or visit the official Caso Design webwebsted.
For technical support, replacement parts, or any questions regarding your Caso Design Four Slice Wide Slot Kitchen Toaster, please contact Caso Design customer service.
Caso Design Officiel Webwebsted: www.casodesign.com


