1. Introduktion
Thank you for choosing the Cecotec Ready Warm 1200 Thermal Connected Electric Heater. This advanced heating solution is designed to provide efficient and comfortable warmth for rooms up to 10 m². Featuring 6 heating elements and 900 W of power, it ensures rapid heating. With its intuitive LED display, programmable timer, and convenient Wi-Fi control via your smartphone, managing your home's temperature has never been easier. This manual provides essential information for safe operation, installation, maintenance, and troubleshooting.
2. Vigtige sikkerhedsinstruktioner
Please read all safety warnings and instructions carefully before using this appliance to prevent electric shock, fire, injury, or property damage. Keep this manual for future reference.
- Sørg altid for, at varmelegemet er placeret på en stabil, plan overflade eller sikkert monteret på en væg.
- Do not cover the heater or block any air vents. Overheating can occur if the heater is covered.
- Keep combustible materials such as furniture, curtains, and paper at least 1 meter (3 feet) away from the front and sides of the heater.
- Brug ikke varmelegemet i badeværelser, vaskerum eller lignende indendørs steder, hvor der kan være vand til stede.
- Tag stikket ud af varmeapparatet, når det ikke er i brug, eller før rengøring.
- This appliance is equipped with an overheating protection system to ensure safety.
- Activate the child lock function to prevent accidental changes to settings by children.
- Brug ikke en varmelegeme med en beskadiget ledning eller et beskadiget stik, eller efter at varmelegemet ikke fungerer korrekt, er blevet tabt eller beskadiget på nogen måde.
- Indsæt eller lad ikke fremmedlegemer trænge ind i ventilations- eller udsugningsåbninger, da dette kan forårsage elektrisk stød eller brand eller beskadige varmeren.
3. Produktkomponenter
The Cecotec Ready Warm 1200 heater consists of the main unit and detachable feet for floor standing.

Figur 3.1: Front view of the Cecotec Ready Warm 1200 Thermal Connected Electric Heater, showcasing its slim design and control panel on the right side.
- Varmeelementer: 6 internal elements for efficient heat distribution.
- Kontrolpanel: Integrated LED display and touch buttons for operation.
- Afbryderen: Located on the side or bottom for main power control.
- Strømledning: Til tilslutning til en stikkontakt.
- Feet (optional): Two detachable feet for stable floor placement.
- Wall Mounting Brackets (optional): Til sikker vægmontering.
4. Opsætning og installation
The Ready Warm 1200 heater offers flexible installation options: it can be used as a freestanding unit with its feet or securely mounted to a wall.

Figur 4.1: Nærbillede view of the sturdy feet attached to the base of the heater, providing stability for floor standing.

Figur 4.2: The Cecotec Ready Warm 1200 heater positioned in a living room setting, demonstrating its compact size and aesthetic integration into a home environment.
4.1. Floor Standing Installation
- Pak forsigtigt varmeapparatet og alt tilbehør ud.
- Attach the two provided feet to the base of the heater using the screws. Ensure they are securely fastened.
- Place the heater on a firm, level surface, ensuring adequate clearance from walls and furniture as per safety instructions.
- Sæt netledningen i en passende stikkontakt.
4.2. Wall Mounting Installation
(Note: Wall mounting hardware and specific instructions may vary. Refer to the separate wall mounting kit instructions if included.)
- Identificér en passende vægplacering, og sørg for, at den er fri for elektriske ledninger, VVS og brandbare materialer.
- Mark the drilling points on the wall according to the provided wall mounting bracket template.
- Bor huller og isæt passende vægdyvler.
- Secure the wall mounting brackets to the wall.
- Carefully hang the heater onto the wall mounting brackets, ensuring it is securely locked in place.
- Sæt netledningen i en passende stikkontakt.
5. Betjeningsvejledning
5.1. Kontrolpanel overview
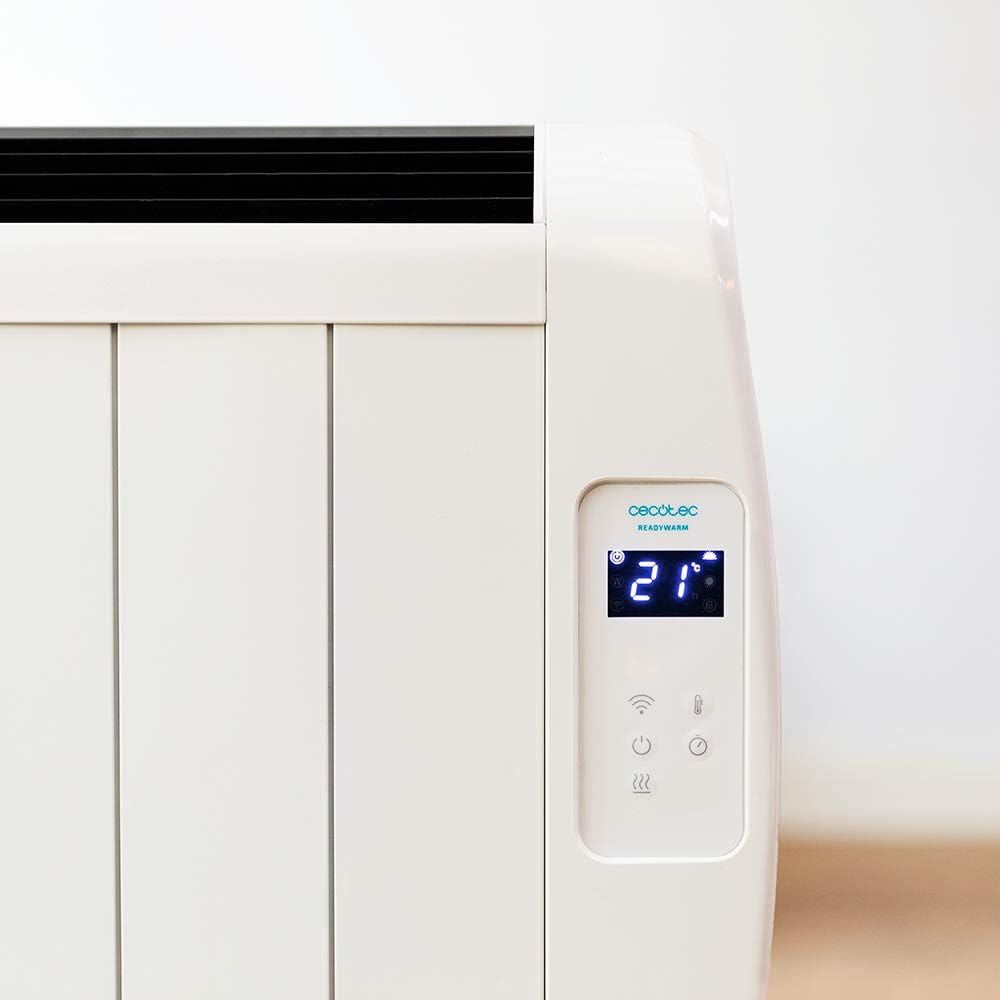
Figur 5.1: Detaljeret view of the heater's LED display, showing the current room temperature (21°C) and various control icons.

Figur 5.2: Detaljeret view of the heater's LED display, showing the timer function set to 4 hours, along with power and Wi-Fi indicators.
The control panel features an LED display and touch-sensitive buttons for easy operation.
- Tænd/sluk-knap (⏻): Tænder/slukker varmelegemet.
- Tilstandsknap (M): Cycles through available heating modes.
- Temperature/Timer Adjustment Buttons (+ / -): Adjusts desired temperature or timer settings.
- Wi-Fi-indikator: Viser status for Wi-Fi-forbindelse.
- Børnelås knap: Aktiverer/deaktiverer børnesikring.
5.2. Grundlæggende betjening
- Ensure the heater is plugged in and the main power switch (if present, usually on the side/bottom) is ON.
- Tryk på Power knap (⏻) on the control panel to turn on the heater. The LED display will illuminate.
- Displayet viser den aktuelle rumtemperatur.
5.3. Temperaturindstilling
- While the heater is ON, use the + or - knapper for at justere den ønskede temperatur.
- Temperaturen kan indstilles mellem 5°C og 40°C.
- Varmeapparatet vil automatisk opretholde den indstillede temperatur og tænde og slukke efter behov.
5.4. Valg af tilstand
The heater features 3 operating modes. Press the Mode knap (M) to cycle through them. Specific mode details are typically found in the full product manual, but common modes include:
- Komforttilstand: Maintains a comfortable, user-defined temperature.
- Øko-tilstand: Operates at a lower power setting to save energy while still providing warmth.
- Frostbeskyttelsestilstand: Maintains a minimum temperature (e.g., 5°C) to prevent pipes from freezing.
5.5. Timer funktion
The programmable timer allows you to set specific times for the heater to turn ON or OFF.
- Tryk på Timer knap (often integrated with mode or a dedicated icon).
- Brug + or - buttons to set the desired operating duration or delay.
- Confirm the setting. The heater will operate according to the programmed schedule.
5.6. Wi-Fi Control (Smartphone App)
Control your heater remotely using the dedicated smartphone application.

Figur 5.3: A hand holding a smartphone displaying the Cecotec ReadyWarm app interface, showing temperature control and other settings for the heater.
- Download the official Cecotec ReadyWarm app from your smartphone's app store (iOS or Android).
- Registrer en konto og log ind.
- Follow the in-app instructions to add your Ready Warm 1200 heater. This typically involves putting the heater into pairing mode (refer to the heater's display or specific app instructions).
- Once connected, you can control all functions, including power, temperature, modes, and timer, from your smartphone.
6. Vedligeholdelse og pleje
Regelmæssig rengøring og korrekt pleje vil sikre din varmeovns levetid og effektive drift.
- Før rengøring: Tag altid stikket ud af stikkontakten til varmelegemet, og lad det køle helt af, inden det rengøres.
- Udvendig rengøring: Tør de udvendige overflader af med en blød, damp klud. Brug ikke slibende rengøringsmidler, voks eller polermidler, da de kan beskadige overfladen.
- Fjernelse af støv: Use a vacuum cleaner with a brush attachment to remove dust from the air intake and exhaust vents.
- Opbevaring: Hvis varmeapparatet opbevares i længere tid, skal det tages ud af stikkontakten, rengøres grundigt og opbevares køligt og tørt, helst i originalemballagen.
- Nedsænk ikke varmeren i vand eller anden væske.
7. Fejlfinding
If you encounter any issues with your Cecotec Ready Warm 1200 heater, please refer to the table below for common problems and solutions.
| Problem | Mulig årsag | Løsning |
|---|---|---|
| Varmeapparatet tænder ikke. | Not plugged in; main power switch OFF; power outage. | Ensure power cord is securely plugged in. Check main power switch. Verify power supply. |
| Varmeapparatet holder op med at virke uventet. | Overophedningsbeskyttelse aktiveret; timeren er udløbet. | Unplug, allow to cool for 30 minutes, remove any obstructions. Check timer settings. |
| Varmeapparatet varmer ikke effektivt. | Temperature setting too low; room too large; vents blocked. | Increase desired temperature. Ensure heater is appropriate for room size. Clear any obstructions from vents. |
| Problemer med Wi-Fi-forbindelse. | Forkert Wi-Fi-adgangskode; router for langt væk; app ikke opdateret. | Re-enter Wi-Fi password. Move heater closer to router. Update app to latest version. Restart router and heater. |
| Displayet viser en fejlkode. | Intern funktionsfejl. | Note the error code and contact customer support. Do not attempt to repair. |
8. Specifikationer
Technical specifications for the Cecotec Ready Warm 1200 Thermal Connected Electric Heater (Model: 05373).
| Feature | Detalje |
|---|---|
| Modelnummer | 05373 |
| Mærke | Cecotec |
| Magt | 900 W |
| Varmeelementer | 6 |
| Anbefalet rumstørrelse | Op til 10 m² |
| Dimensioner (L x B x H) | 62.5 x 11 x 67.5 cm |
| Vægt | 4.3 kg |
| Kontrollere | LED Display, Touch Buttons, Wi-Fi App Control, Wireless Remote Control |
| Temperaturområde | 5°C - 40°C |
| Sikkerhedsfunktioner | Overophedningsbeskyttelse, børnesikring |
| Installationsmuligheder | Wall-mounted or Floor-standing (with included feet) |
9. Garanti og support
For information regarding warranty coverage, technical support, or service, please refer to the warranty card included with your product or visit the official Cecotec webForsøg ikke selv at reparere apparatet.
For yderligere assistance, kontakt venligst Cecotecs kundeservice.


