1. Introduktion
Welcome to the user manual for your GT Media V7 PRO Free to air FTA Digital Satellite TV HD Receiver. This manual provides comprehensive instructions for setting up, operating, and maintaining your device to ensure optimal performance and an enjoyable viewing experience. Please read this manual thoroughly before using the product.
2. Produktet er slutview
The GT Media V7 PRO is a versatile digital satellite TV receiver designed to provide high-definition free-to-air television. It supports DVB-S/S2/S2X standards, HEVC main 10 (10bit) decoding, and features such as BISS auto roll, Full PowerVu, VCM/ACM/Multi-stream/T2MI, Multi-PLP, and a smart card slot. It also supports full-speed USB 4G dongles for enhanced connectivity.

Figur 2.1: Forside view of the GT Media V7 PRO receiver, showcasing dens kompakte design og digitale display.

Figure 2.2: Rear panel of the receiver, detailing the various input and output ports including LNB IN, ANT IN, HD OUT, AV OUT, RF TO TV, USB, DC 12V, and Power switch.

Figur 2.3: Side view of the receiver with dimensions indicated, showing its compact size for easy placement.

Figure 2.4: The GT Media V7 PRO receiver alongside its remote control, highlighting the user interface components.

Figur 2.5: Nærbillede view of the remote control, showing button layout and functions for easy navigation.
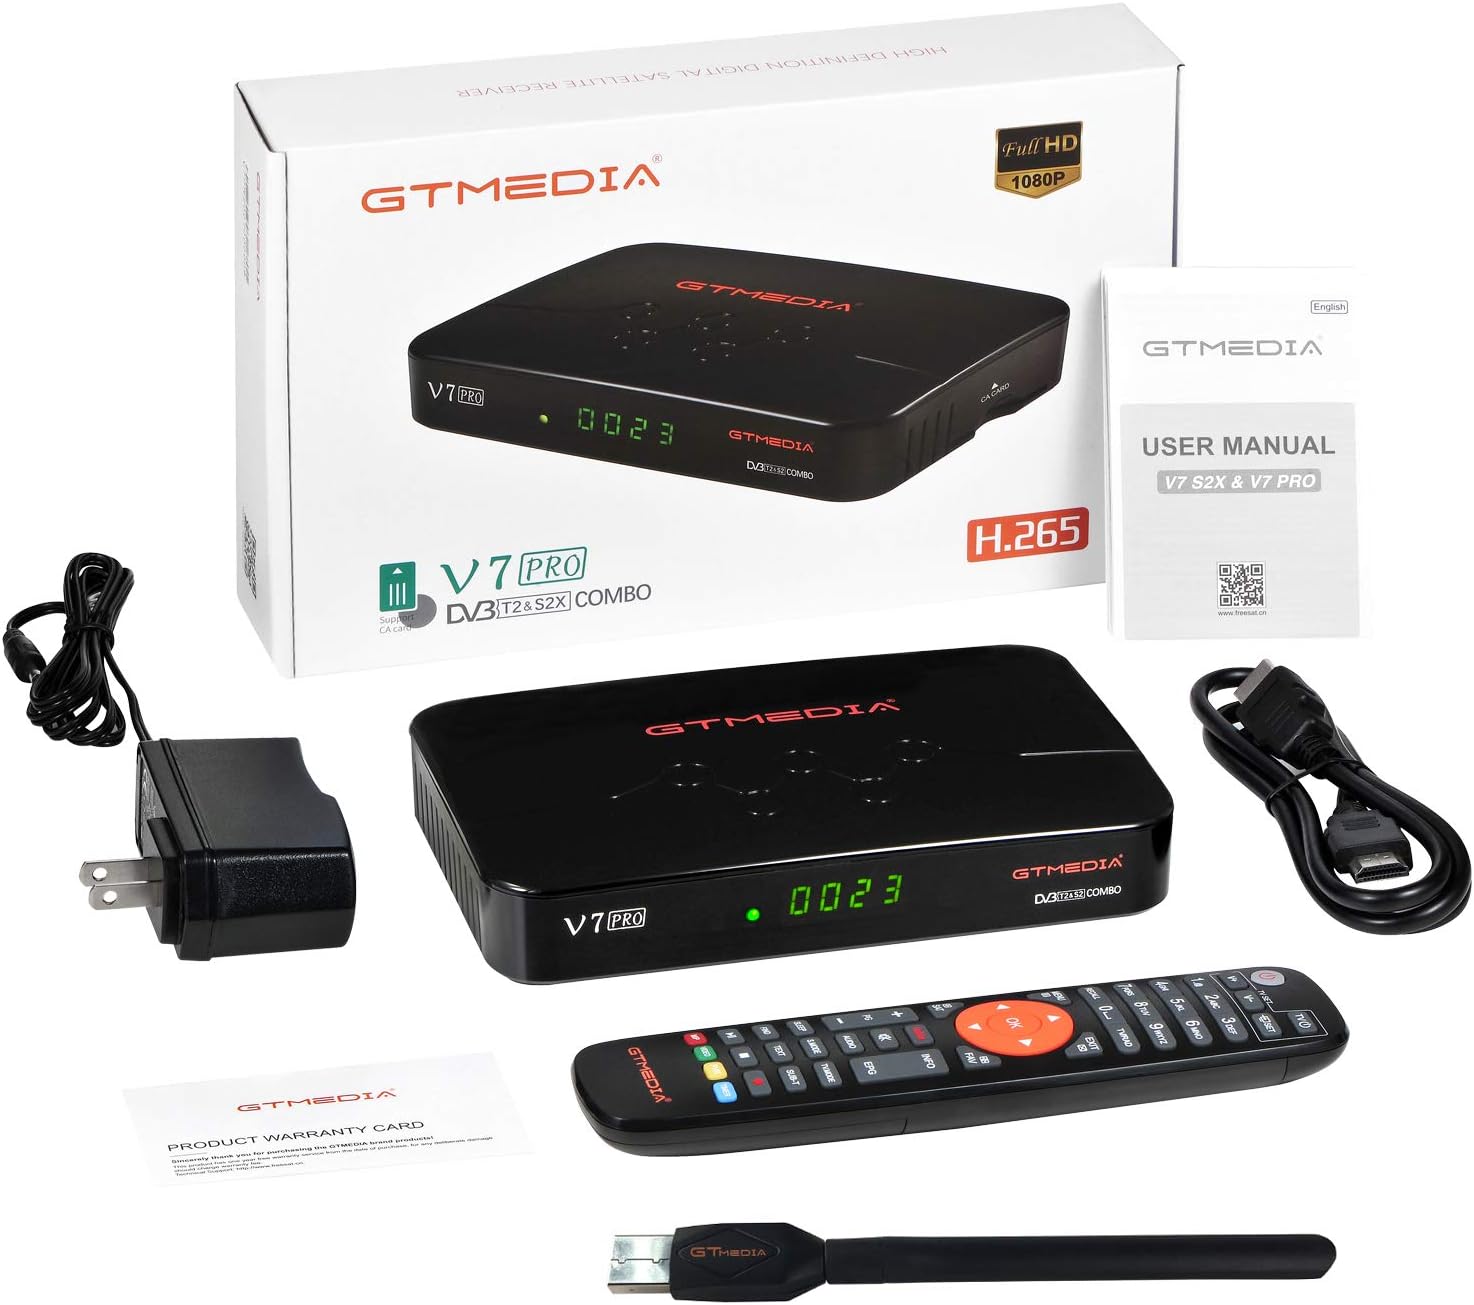
Figure 2.6: The product packaging and included accessories, such as the receiver, remote, power adapter, and user manual.
Produktvideo overståetview
Video 2.1: En officiel overview of the GT Media V7 PRO Free to air Digital Satellite TV HD Receiver, demonstrating its features and basic operation.
3. Opsætningsvejledning
- Tilslut til strøm: Plug the DC 12V power adapter into the receiver's DC 12V port and then into a power outlet.
- Tilslut til tv: Use an HDMI cable to connect the receiver's HD OUT port to an HDMI input on your television. Alternatively, use the AV OUT for older TVs.
- Tilslut antenne/LNB:
- For satellite reception, connect your satellite dish's LNB cable to the LNB IN havn.
- For terrestrial reception (DVB-T), connect your terrestrial antenna to the MYRE IND havn.
- Tilslut WiFi-antenne: If using Wi-Fi, plug the included USB WiFi antenna into one of the USB ports.
- Tænd: Flip the Power switch on the rear panel to the ON position. The receiver will boot up, displaying "boot" and then "Load" on its front panel.
- Initial Setup on TV: Follow the on-screen prompts to select your language and perform an initial channel scan. Refer to Section 4 for detailed channel search instructions.
Video 3.1: This video demonstrates the physical connections and initial boot-up sequence of the GT Media V7 PRO receiver.
4. Betjeningsvejledning
4.1 Kanalsøgning
To receive television channels, you must perform a channel scan. The receiver supports both Auto Search and Blind Scan functions.
- Tryk på MENU knappen på din fjernbetjening.
- Naviger til INSTALLERE og vælg Satellitliste or Terrestrisk afhængigt af din opsætning.
- Select the desired satellite (e.g., Hot Bird 13B) or ensure the correct terrestrial settings.
- Vælge Automatisk søgning for a quick scan or Blind Scan for a comprehensive search of all available channels.
- Confirm your selection to start the scan. Once complete, the found channels will be saved.
Video 4.1: This video illustrates the process of performing a channel search on the GT Media V7 PRO, including selecting satellites and initiating scans.
4.2 PVR and Multimedia Playback
The receiver supports PVR (Personal Video Recorder) functionality and multimedia playback via its USB 2.0 ports.
- PVR-optagelse: Connect a USB storage device (e.g., flash drive or external HDD) to a USB port. You can record live TV programs or set timer recordings.
- Timeshift TV Program: Pause live TV and resume later. Requires a connected USB storage device.
- Multimedieafspilning: Afspil forskellige medier files from your USB storage device, including:
- Images: JPG, BMP, PNG, GIF
- Audio: WMA, MP3
- Movies: TS, Mkv, MP4, Avi, Flv, f4v, m2ts, MOV, 3gp
- Access these features via the MEDIER menu on the receiver.
Video 4.2: This video demonstrates how to record programs and utilize the multimedia playback features of the GT Media V7 PRO.
4.3 Netværkskonfiguration
To access online features or use CS protocol, configure network settings.
- Ensure the USB WiFi antenna is connected.
- Trykke MENU og naviger til NETVÆRK.
- Vælge Netværkskonfiguration og derefter WiFi.
- Vælg dit Wi-Fi-netværk på listen, og indtast adgangskoden.
- The receiver also supports 3G/4G dongles via USB for mobile tethering hotspot functionality.
4.4 Firmwareopdatering
It is recommended to keep your receiver's firmware updated to ensure optimal performance and access to the latest features.
- Download den nyeste firmware file from the official GTMEDIA website (contact seller for URL).
- Kopier firmwaren file til rodmappen på et USB-flashdrev.
- Sæt USB-flashdrevet i receiverens USB-port.
- Trykke MENU og naviger til VÆRKTØJ.
- Vælge USB-opgradering og følg instruktionerne på skærmen.
- Vigtig: Sluk ikke for enheden under opgraderingsprocessen.
5. Vedligeholdelse
- Rensning: Brug en blød, tør klud til at rengøre modtagerens yderside. Brug ikke flydende rengøringsmidler eller slibende materialer.
- Ventilation: Ensure the receiver has adequate ventilation. Do not block the ventilation openings.
- Opbevaring: Hvis enheden opbevares i længere tid, skal den afbrydes fra strømmen og opbevares et køligt og tørt sted.
6. Fejlfinding
| Problem | Mulig årsag | Løsning |
|---|---|---|
| No picture/sound on TV. | Incorrect input selected on TV, loose HDMI/AV cable, power issue. | Check TV input source. Ensure all cables are securely connected. Verify power supply to the receiver. |
| "No Program Found" after scan. | Antenna/LNB not connected or misaligned, incorrect satellite/terrestrial settings. | Ensure antenna/LNB is properly connected and aligned. Double-check satellite/terrestrial settings in the Installation menu. Perform a Blind Scan. |
| Fjernbetjeningen reagerer ikke. | Dead batteries, obstructed IR sensor. | Replace batteries. Ensure no obstructions between remote and receiver's IR sensor. |
| Problemer med Wi-Fi-forbindelse. | Incorrect password, weak signal, USB WiFi antenna not properly inserted. | Re-enter Wi-Fi password. Ensure USB WiFi antenna is securely connected. Move receiver closer to router or use a Wi-Fi extender. |
7. Specifikationer
- Mærke: GTMEDIA
- Model: GTM-V7 PRO
- Farve: Sort
- Varens vægt: 1.34 pund
- Produktdimensioner: 4.92 x 7.09 x 1.18 tommer (12.5 x 18.0 x 3.0 cm)
- Forbindelse teknologi: HDMI, USB, Wi-Fi
- Samlet antal USB-porte: 2
- DVB Support: DVB-S/S2/S2X, HEVC main 10 (10bit)
- Funktioner: BISS auto roll, Full PowerVu, VCM/ACM/Multi-stream/T2MI, Multi-PLP, Smart card slot, USB 4G dongle support.
8. Garanti og support
For warranty information and technical support, please refer to the product warranty card included in your package or contact the seller directly. Keeping your purchase receipt is recommended for warranty claims.
For the latest firmware updates and additional resources, please visit the official GTMEDIA webwebsted eller kontakt deres kundesupport.


