1. Introduktion
Tak for købetasing the Crenova Home Video Projector. This projector is designed to deliver a superior visual experience with its native 1080P Full HD resolution, high contrast ratio, and bright LED lamp. It supports a large image display of up to 200 inches, making it ideal for home theater setups and outdoor movie nights. This manual provides detailed instructions for setup, operation, maintenance, and troubleshooting to ensure optimal performance and longevity of your device.
2. Sikkerhedsoplysninger
- Se ikke direkte ind i projektorlinsen, når lamp er tændt, da det skarpe lys kan forårsage øjenskader.
- Sørg for tilstrækkelig ventilation omkring projektoren. Bloker ikke ventilationsåbningerne.
- Brug kun den strømadapter, der følger med projektoren.
- Avoid placing the projector in areas with high humidity, dust, or extreme temperatures.
- Forsøg ikke selv at skille projektoren ad eller reparere den. Overlad al service til kvalificeret personale.
- Hold projektoren væk fra vand eller andre væsker.
3. Pakkens indhold
Kontroller venligst pakkens indhold ved udpakning. Hvis der mangler eller er beskadigede dele, skal du kontakte kundesupport.
- Crenova Home Video Projector (Model A6500)
- Strømkabel
- Fjernbetjening
- HDMI kabel
- Brugermanual
4. Produktet er slutview
4.1 Projektorkomponenter
Familiarize yourself with the main components of your Crenova projector.
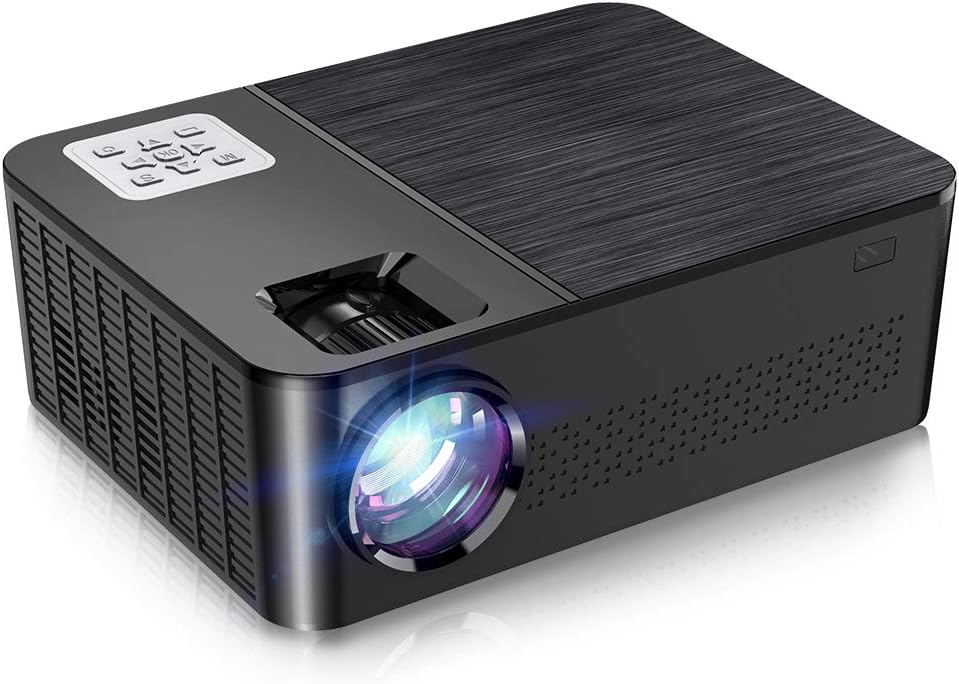
Figur 4.1: Forside og top view of the Crenova A6500 Projector, showing the lens and control panel.

Figur 4.2: Top-down view of the Crenova A6500 Projector surrounded by compatible multimedia devices, highlighting its various input ports.
4.2 Control Panel and Adjustments
The projector features an intuitive control panel on top and adjustment dials for focus and keystone correction.

Figur 4.3: Nærbillede view of the Crenova A6500 Projector, illustrating the focus ring and keystone correction dial for image clarity and shape adjustment.
5. Opsætning
5.1 Placering
Choose a flat, stable surface for the projector. The projection distance will determine the screen size. For optimal viewing, a screen size of 100"-120" is recommended with a projection distance of 10-13 feet (approximately 3-4 meters). The projector supports a wide range of screen sizes from 30" to 200" with projection distances from 1.5m to 6.5m.
5.2 Strømtilslutning
- Tilslut strømkablet til projektorens strømindgang.
- Sæt den anden ende af strømkablet i en stikkontakt.
- Strømindikatoren vil lyse.
5.3 Indledende tænding
Press the power button on the projector or the remote control to turn on the device. The fan will start, and the projector lamp vil lyse op.
6. Betjeningsvejledning
6.1 Kildevalg
After powering on, use the 'Source' button on the remote control or the projector's control panel to select your desired input source (e.g., HDMI1, HDMI2, USB, AV).
6.2 Menunavigation
Use the arrow keys on the remote control or control panel to navigate through the on-screen menu options. Press 'OK' or 'Enter' to confirm selections and 'Return' or 'Exit' to go back.
7. Forbindelse
The Crenova A6500 projector offers multiple connectivity options for various multimedia devices.
- HDMI: Connect your TV Stick, Chromecast, PC, laptop, PS4, Xbox, or other HDMI-enabled devices using an HDMI cable.
- USB: Indsæt et USB-drev for at afspille medier files direkte.
- Kablet spejling: The projector supports wired mirroring from multi-media devices. For iPhone, an extra Lightning to HDMI adapter is required (not included). For Android phones, a Micro USB/Type C to HDMI adapter is needed (not included), and the phone must support MHL function.Note: Copyrighted content from services like Hulu and Netflix cannot be mirrored or screencast due to protection protocols.
- TF-kort: Insert a TF (MicroSD) card to access media files.

Figure 7.1: Illustration of wired mirroring in use, showing a family enjoying content projected onto a large screen.
8. Image and Sound Adjustment
8.1 Fokus- og Keystone-korrektion
Fokus: Drej fokusringen nær objektivet, indtil det projicerede billede er klart og skarpt.
Keystone-korrektion: Use the keystone correction dial (±15°) to adjust the image shape if it appears trapezoidal. This corrects for projection angles where the projector is not perfectly perpendicular to the screen.
8.2 Zoomfunktion
The projector allows you to adjust the screen size from 75% to 100% using the remote control. This is useful for fine-tuning the image size without moving the projector, especially when ceiling mounted or in small rooms.
8.3 Image Quality and Sound
Experience remarkable image quality with native 1080P resolution and a 7000:1 high dynamic contrast ratio. The projector also supports Dolby sound and features a built-in HiFi speaker for an immersive audio experience.

Figure 8.1: Visual comparison demonstrating the superior clarity and detail of 1080P image quality with a higher contrast ratio.
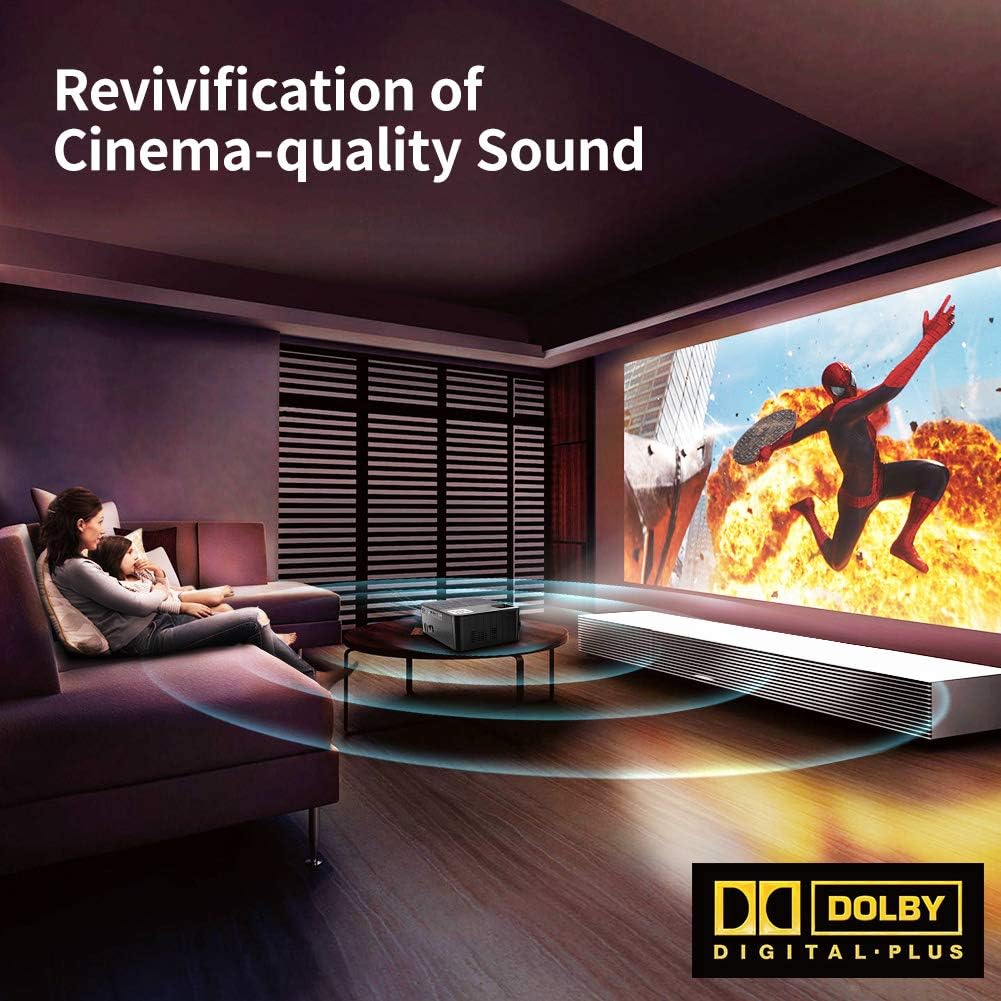
Figure 8.2: Depiction of the projector providing cinema-quality sound with Dolby Digital Plus support in a home environment.

Figure 8.3: An outdoor setting showcasing the projector's capability to display a massive large screen, perfect for outdoor entertainment.
9. Vedligeholdelse
- Rengøring af linser: Brug en blød, fnugfri klud, der er specielt designet til optiske linser, til forsigtigt at tørre projektorlinsen af. Undgå slibende materialer eller barske kemikalier.
- Rengøring af støvfilter: Regularly check and clean the dust filter to ensure proper airflow and prevent overheating. Refer to the diagram for filter location.
- Ventilation: Ensure the projector's ventilation ports are clear of obstructions.
- Lamp Liv: LED lamp has a life expectancy of 60,000 hours. No regular lamp udskiftning er typisk nødvendig ved normal brug.
10. Fejlfinding
| Problem | Mulig årsag | Løsning |
|---|---|---|
| Intet billede | Forkert indgangskilde valgt; Løs kabelforbindelse; Enheden er ikke tændt. | Vælg den korrekte inputkilde. Kontroller alle kabelforbindelser. Sørg for, at den tilsluttede enhed er tændt. |
| Ingen lyd | Volume too low or muted; Audio cable not connected; Source device audio settings. | Increase volume or unmute. Ensure audio cables are securely connected. Check audio output settings on the source device. |
| Billedet er sløret | Fokus ikke justeret; Projektoren er for tæt på/langt fra skærmen. | Adjust the focus ring. Adjust projection distance. |
| Billedet er trapezformet | Keystone ikke justeret. | Juster keystone-korrektionshjulet. |
| Projektoren overopheder eller slukker | Blokeret ventilation; Langvarig brug i varmt miljø. | Ensure ventilation ports are clear. Allow projector to cool down. Use in a well-ventilated area. |
11. Specifikationer
- Model: A6500
- Native opløsning: 1920 x 1080 (Fuld HD)
- Kontrastforhold: 7000:1
- Lysstyrke: 7000 Lumen
- Lamp Liv: 60,000 timer
- Projektionsstørrelse: 30" - 200"
- Projektionsafstand: 1.5 m - 6.5 m
- Keystone-korrektion: ±15° Manuel
- Zoom funktion: 75% - 100% (via remote control)
- Højttalertype: Built-In, Stereo (Dolby Supported)
- Forbindelse teknologi: HDMI, USB, TF Card
- Varens vægt: 7.61 pund (ca. 3.45 kg)
- Produktdimensioner: 14.37 x 6.1 x 13.78 tommer (ca. 36.5 x 15.5 x 35 cm)
12. Garanti og support
For detailed warranty information and customer support, please refer to the warranty card included in your package or visit the official Crenova webwebsted. Du kan også kontakte sælgeren direkte for at få hjælp.


