1. Introduktion
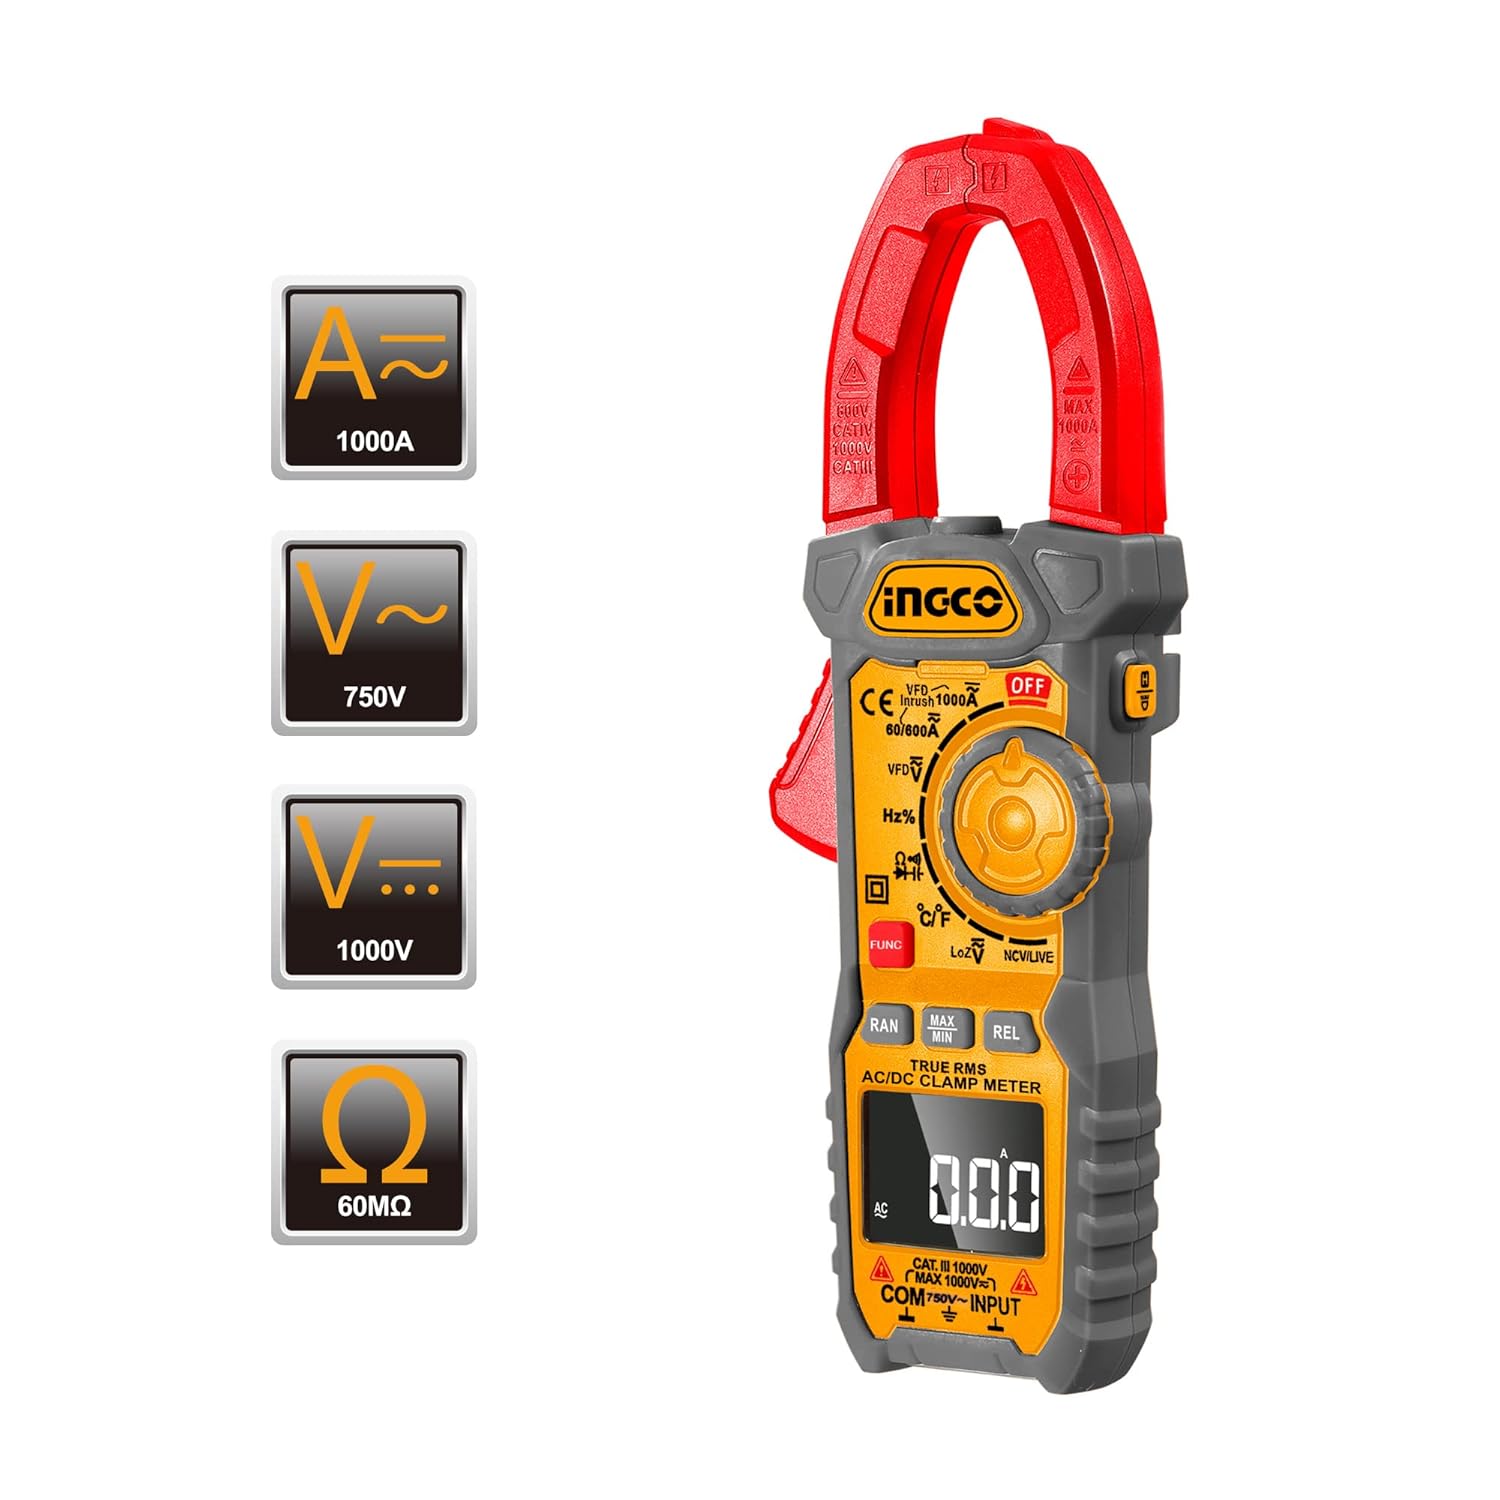
This manual provides essential information for the safe and effective operation of your INGCO 1000A Digital AC/DC Clamp Meter, Model Dm2002. Please read this manual thoroughly before use and retain it for future reference. This device is designed for measuring AC/DC current, AC/DC voltage, resistance, capacitance, continuity, frequency, temperature, inrush current, VFD, LOZ, and NCV.

Figur 1: INGCO 1000A Digital AC/DC Clamp Meter showing its measurement capabilities for 1000A AC current, 750V AC voltage, 1000V DC voltage, and 60MΩ resistance.
2. Sikkerhedsoplysninger
Always adhere to safety precautions when using electrical testing equipment. Failure to do so may result in injury or damage to the meter.
- Overskrid ikke de maksimale inputværdier, der er angivet for hvert måleområde.
- Ensure the test leads are in good condition and properly connected before making measurements.
- Do not use the meter if it appears damaged or if the battery cover is not properly closed.
- Frakobl altid testledningerne fra kredsløbet, før du skifter funktioner.
- Vær forsigtig, når du arbejder med vol.tagover 30V AC RMS, 42V peak eller 60V DC, da de udgør en risiko for stød.
- Brug passende personlige værnemidler (PPE), såsom sikkerhedsbriller og isolerede handsker.
- Brug ikke måleren i eksplosive gas-, damp- eller støvede omgivelser.
3. Produktet er slutview
Gør dig bekendt med komponenterne i din clamp måler.
Figur 2: Front view of the INGCO Clamp Meter, highlighting the clamp jaw, function dial, LCD display, and input terminals.
Nøglekomponenter:
- Clamp Kæbe: Anvendes til berøringsfri AC/DC-strømmåling.
- Funktionsvælger: Vælger den ønskede måletilstand.
- LCD-skærm: Viser måleaflæsninger, enheder og indikatorer.
- Indgangsterminaler: For connecting test leads (COM, VΩHzCAPTemp).
- Knapper: FUNC (Function), RAN (Range), MAX/MIN, REL (Relative), ZERO, HOLD, Backlight/Flashlight.

Figur 3: Detaljeret view of the function dial, showing various measurement modes including VFD, Hz%, °C/°F, LoZ, and NCV/LIVE.

Figur 4: Close-up of the control buttons, including RAN, MAX/MIN, REL/ZERO, and FUNC, used for advanced measurement options.
4. Opsætning
4.1 Batteriinstallation
- Sørg for, at måleren er slukket.
- Find batterirummet på bagsiden af måleren.
- Brug en skruetrækker til at åbne batteridækslet.
- Insert the required batteries (typically AAA, refer to the compartment label) observing correct polarity.
- Sæt batteridækslet på igen og fastgør det med skruen.

Figur 5: multi-view image showing the back of the clamp meter with the battery compartment open, indicating where batteries are inserted.
4.2 Tilslutning af testledninger
For bdtage, resistance, capacitance, continuity, frequency, and temperature measurements, connect the test leads:
- Indsæt den sorte testledning i KOM (common) input terminal.
- Indsæt den røde testledning i VΩHzCAPTemp indgangsterminal.
5. Betjeningsvejledning
5.1 Tænd/sluk
Turn the function dial from the OFF position to any desired measurement function to power on the meter. To power off, turn the dial back to the OFF position.
5.2 Automatisk slukning
The meter features an automatic power-off function. If no operation is performed for approximately 15 minutes, the meter will automatically shut down to conserve battery life. Press any button or turn the function dial to reactivate it.

Figur 6: Visual representation of the 15-minute auto power-off feature, designed to save battery life.
5.3 AC/DC strømmåling (Clamp Fungere)
- Drej funktionsvælgeren til A~ (AC-strøm) eller A= (DC-strøm) position.
- Tryk på clamp udløser for at åbne cl'enamp kæbe.
- Omslut kun én leder med clamp kæbe. Sørg for, at kæben er helt lukket.
- Aflæs den aktuelle værdi på LCD-displayet.
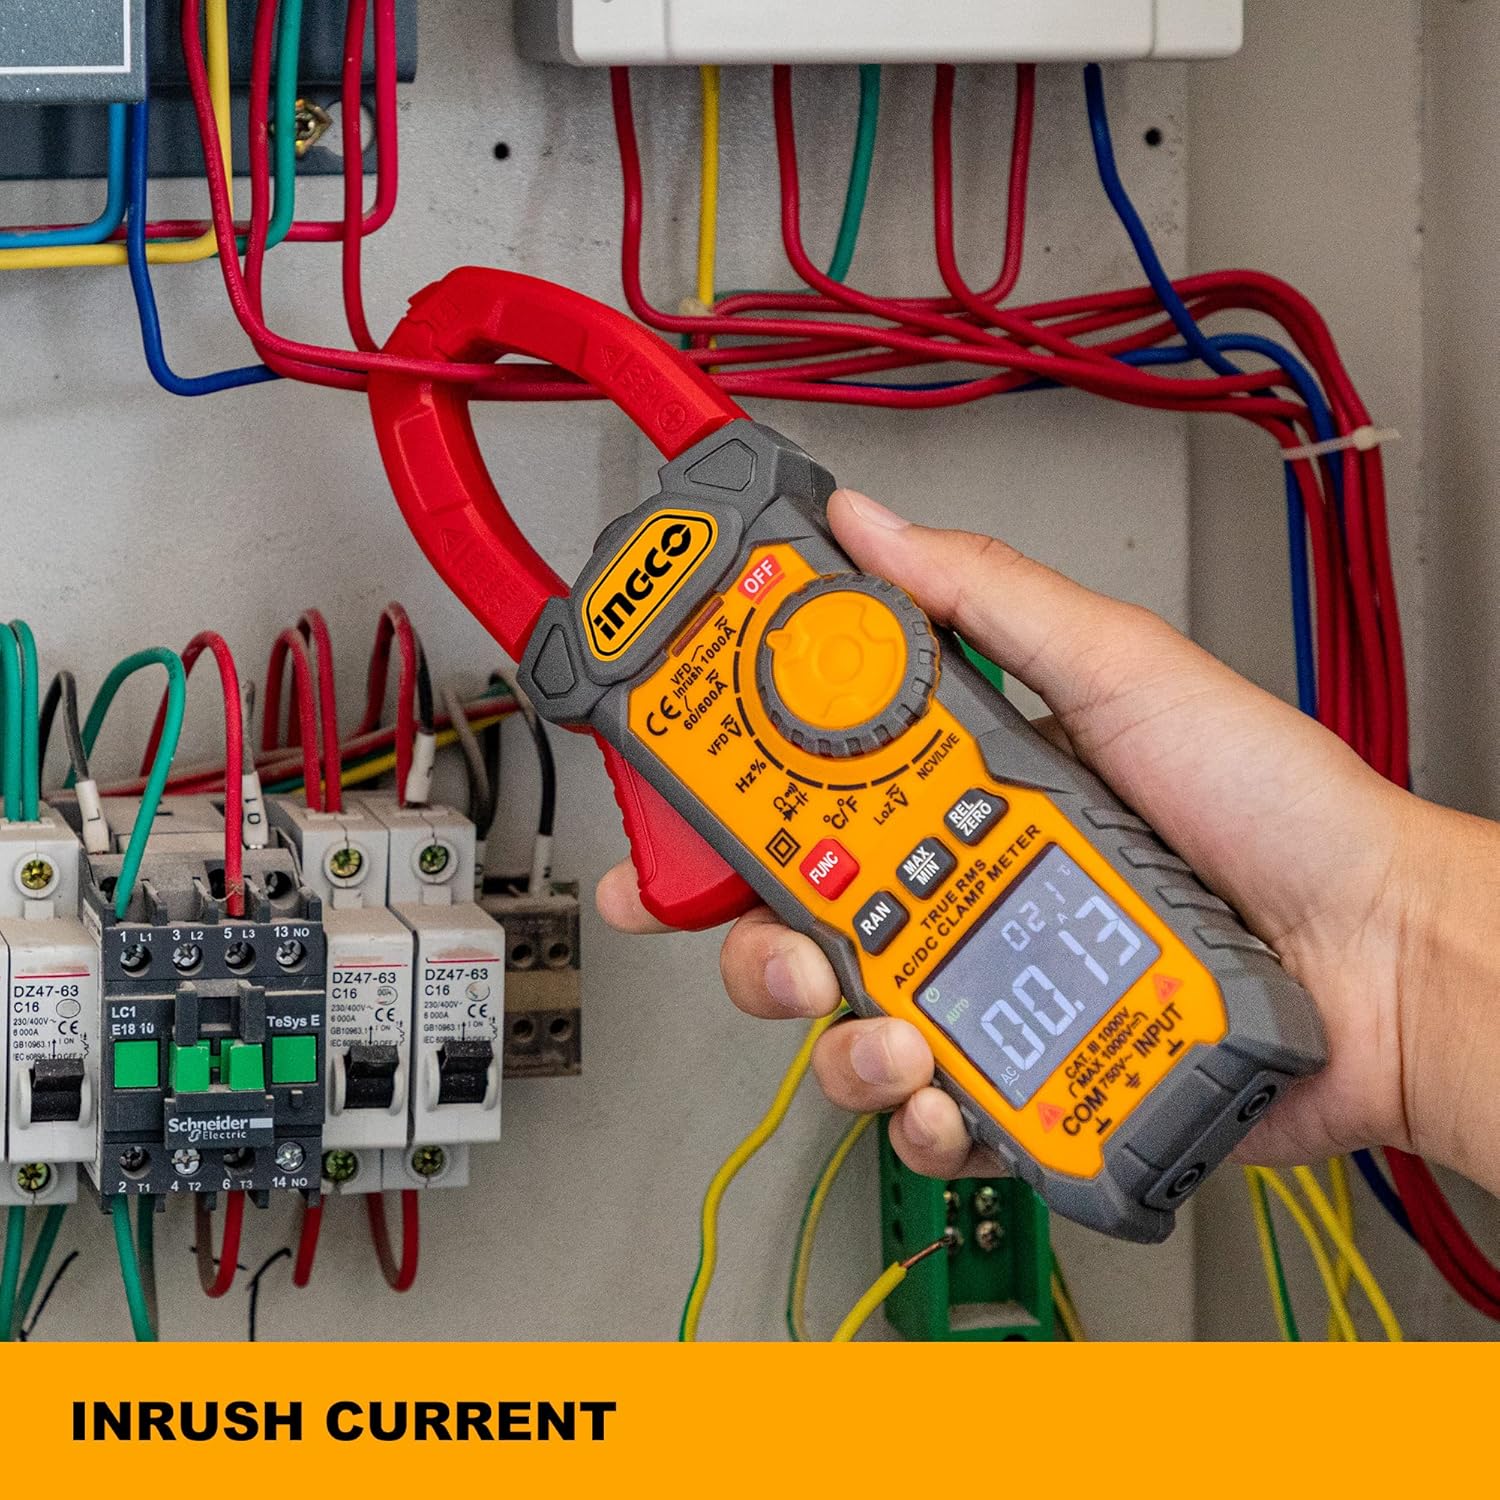
Figur 7: Klamp meter being used to measure inrush current within an electrical panel, demonstrating its non-contact current measurement capability.
5.4 AC/DC Voltage Måling
- Tilslut testledningerne som beskrevet i afsnit 4.2.
- Drej funktionsvælgeren til V~ (AC-volumentage) eller V= (DC bindtage) stilling.
- Tilslut testproberne parallelt til det kredsløb eller den komponent, der testes.
- Læs bindtage -værdi på LCD -displayet.

Figur 8: Klamp meter's test leads connected to a power strip, illustrating its use for accurate True-RMS voltage målinger.
5.5 Resistance, Capacitance, Continuity, Frequency, Temperature Measurement
- Tilslut testledningerne som beskrevet i afsnit 4.2.
- Turn the function dial to the appropriate position (Ω for Resistance, ∔ for Capacitance, for Continuity, Hz% for Frequency, °C/°F for Temperature).
- If multiple functions share a dial position, press the FUNK knappen for at bladre gennem dem.
- Connect the test probes to the component under test.
- Read the value on the LCD display. For continuity, a buzzer sounds if resistance is less than 30Ω.
5.6 Måling af indkoblingsstrøm
This function captures the peak current when a device is first powered on. It takes approximately 100ms to capture the inrush current.
- Drej funktionsvælgeren til A~ position.
- Tryk på INRUSH button (if available, or refer to specific model instructions for activation).
- Clamp the jaw around the single conductor of the device to be tested.
- Power on the device and observe the inrush current reading.
5.7 VFD-måling (variabel frekvensomformer)
This mode is designed for accurate voltage and frequency measurements on variable frequency drives.
- Drej funktionsvælgeren til VFD position.
- Tilslut testledningerne til kredsløbet.
- Læs bindtage and frequency values on the display.
5.8 LOZ (Low Impedance) Measurement
The LOZ function provides a low input impedance mode to eliminate ghost voltages, ensuring more accurate readings in certain circuits.
- Drej funktionsvælgeren til Ligge position.
- Tilslut testledningerne til kredsløbet.
- Læs bindtage -værdi på displayet.
5.9 NCV (kontaktfri volumen)tage) Registrering
This feature allows for quick detection of AC voltage uden direkte kontakt.
- Drej funktionsvælgeren til NCV/LIVE position.
- Move the top end of the meter near the conductor or outlet.
- The meter will beep and/or an LED will flash if AC voltage er opdaget.
5.10 Dataholdefunktion
Tryk på HOLDE knappen for at fryse den aktuelle aflæsning på displayet. Tryk igen for at deaktivere hold-funktionen.

Figur 9: Klamp meter's display showing a 'H' indicator, signifying that the data hold function is active, making readings easy to record.
5.11 Baggrundsbelysning og lommelygte
Press the backlight/flashlight button to illuminate the display for better visibility in low-light conditions. Press and hold the button to activate the flashlight function.
6. Vedligeholdelse
6.1 Rengøring
Tør måleren af med reklameamp klud og mildt rengøringsmiddel. Brug ikke slibemidler eller opløsningsmidler. Sørg for, at måleren er tør før brug.
6.2 Udskiftning af batteri
When the battery indicator appears on the display, replace the batteries as described in Section 4.1. Remove batteries if the meter will not be used for an extended period.
6.3 Opbevaring
Store the meter in a cool, dry place, away from direct sunlight and extreme temperatures. Keep it in its protective case when not in use.
7. Fejlfinding
| Problem | Mulig årsag | Løsning |
|---|---|---|
| Måleren tænder ikke. | Døde eller forkert installerede batterier. | Kontroller batteripolariteten; udskift batterierne. |
| No reading or unstable reading. | Incorrect function selected; poor test lead connection; out of range. | Select correct function; ensure leads are firmly connected; check if measurement is within meter's range. |
| Continuity buzzer not sounding. | Resistance is too high; continuity function not selected. | Sørg for, at modstanden er under 30Ω; vælg kontinuitetstilstand. |
| Inaccurate current reading. | Flere ledere i clamp jaw; jaw not fully closed. | Ensure only one conductor is clamped; close jaw completely. |
8. Specifikationer
| Feature | Specifikation |
|---|---|
| Modelnummer | Dm2002 |
| AC nuværende rækkevidde | Op til 1000A |
| DC strømområde | Op til 1000A |
| AC VoltagRækkevidde | Op til 750V |
| DC bindtagRækkevidde | Op til 1000V |
| Modstandsområde | Op til 60MΩ |
| Vis tæller | 6000 tæller |
| Ægte RMS | Ja |
| Inrush Current Capture | 100 ms |
| Automatisk sluk | Ca. 15 minutter |
| Kontinuitet Buzzer | < 30Ω |
| Produktdimensioner | 9.84 x 3.35 x 8.66 tommer |
| Varens vægt | 750 gram (1.65 pund) |
| Strømkilde | Batteridrevet |
| Fabrikant | Ingco |
9. Garanti og support
INGCO offers a 90-day refund or replacement policy for this clamp multimeter if you are not 100% satisfied. For any issues or support inquiries, please contact INGCO customer service via email. They aim to resolve concerns within 24 hours.
For further assistance, please visit the official Ingco store: Ingco Store on Amazon


