1. Introduktion
This manual provides detailed instructions for the installation, operation, and maintenance of your SpeaKa Professional Dual Monitor Mount, model SP-8986136. This monitor mount is designed for office and retail environments, offering flexible monitor positioning with 360° rotation and stepless adjustment. Please read this manual thoroughly before installation and use to ensure proper function and safety.
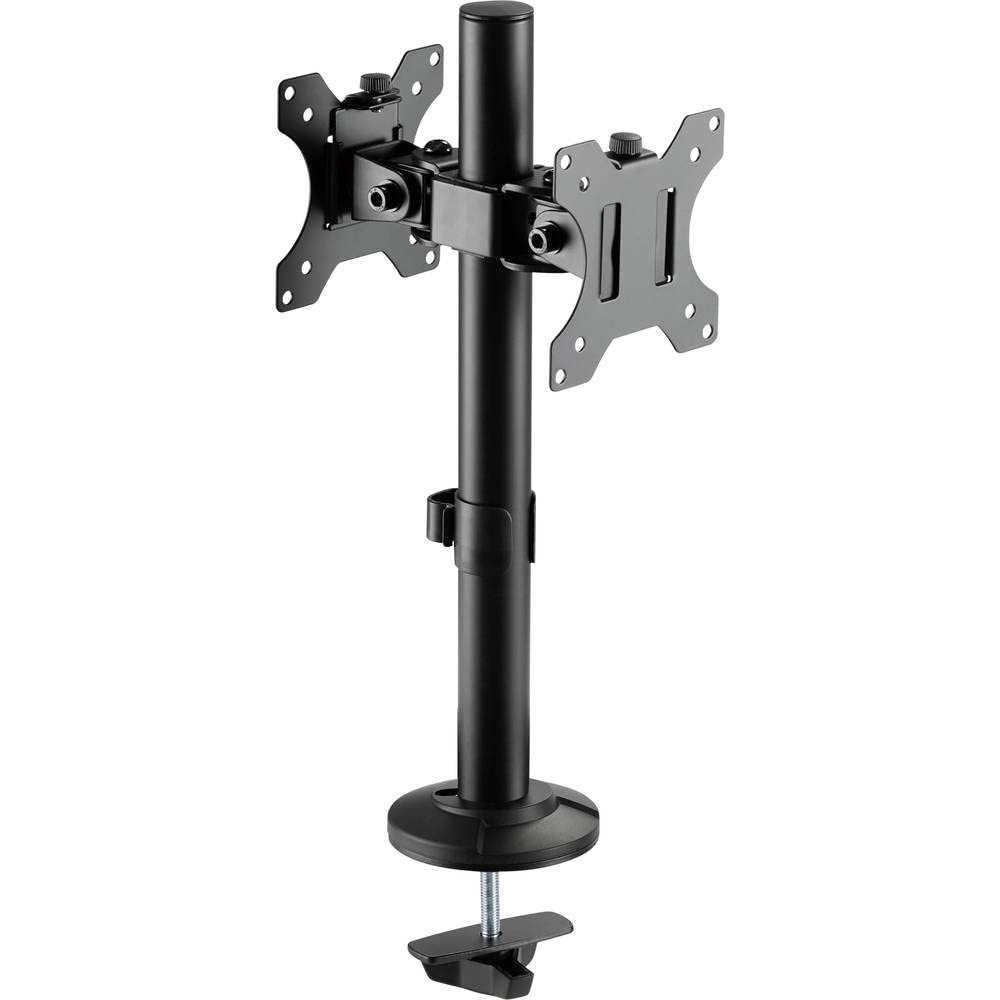
Figure 1: SpeaKa Professional Dual Monitor Mount (SP-8986136) overview.
2. Sikkerhedsoplysninger
- Sørg for, at alle komponenter er til stede og ubeskadigede før installation.
- Do not exceed the maximum weight capacity specified for the mount.
- Install the mount on a stable and sturdy surface capable of supporting the combined weight of the mount and monitors.
- Spænd alle skruer forsvarligt, men overspænd ikke for at undgå at gevindene bliver beskadiget.
- Hold børn og kæledyr væk under installationen.
- Hvis du støder på problemer, skal du kontakte en kvalificeret fagperson.
3. Pakkens indhold
Please verify that all parts are included in your package. If any parts are missing or damaged, contact customer support.
- Main Pole with Clamp Grundlag
- VESA Monitor Arms (2x)
- VESA Plates (2x)
- Optional Screw Base
- Hardware-sæt (skruer, skiver, unbrakonøgler)
- Kabelhåndteringsklip
4. Opsætning og installation
The SpeaKa Professional Dual Monitor Mount offers two installation options: a clamp base for most tables and desks, and a screw base for added security.
4.1. Valg af monteringsmulighed

Figur 2: Clamp base (left) and screw base (right) options.
- Clamp Grundlag: Ideal for desks with an edge. Provides strong support without drilling.
- Skruebase: Requires drilling a hole through the desk. Offers maximum stability and security.
4.2. Clamp Basisinstallation
- Fastgør clamp base to the bottom of the main pole.
- Placer hovedstangen på kanten af dit skrivebord.
- Spænd clamp skru den fast, indtil beslaget er sikkert fastgjort til skrivebordet. Sørg for, at det er stabilt og ikke vipper.
4.3. Screw Base Installation (Grommet Mount)
- If your desk has a grommet hole, ensure it is large enough for the screw base. If not, drill a suitable hole (consult desk manufacturer for recommendations).
- Attach the screw base to the bottom of the main pole.
- Insert the main pole through the grommet hole.
- Secure the screw base from underneath the desk using the provided hardware. Tighten firmly.
4.4. Montering af skærmarme og VESA-plader
- Slide the monitor arms onto the main pole at your desired height. Use the provided Allen key to tighten the set screw on each arm.
- Attach the VESA plates to the back of your monitors using the appropriate screws from the hardware kit. Ensure the VESA pattern (e.g., 75x75mm or 100x100mm) matches your monitor.
- Carefully slide the monitors (with VESA plates attached) onto the monitor arms. Secure them with the locking mechanism on the VESA plate.
5. Betjening og justeringer
The monitor mount allows for various adjustments to achieve an optimal viewoplevelse.
- Højdejustering: Loosen the set screw on the monitor arm, adjust the arm to the desired height on the main pole, and re-tighten the screw.
- Justering af hældning: The monitor can be tilted up to 90 degrees. Loosen the tilt knob on the VESA plate, adjust the monitor angle, and re-tighten.
- Drejejustering: The monitor arms can swivel horizontally along the main pole. The VESA plate also allows for 360-degree rotation, enabling portrait or landscape orientation.
- Kabelstyring: Use the integrated cable management clips on the main pole to route and organize your monitor cables for a tidy workspace.

Figur 3: Eksample of dual monitor application in a retail setting.
6. Vedligeholdelse
Regelmæssig vedligeholdelse sikrer din skærmbeslags levetid og sikker drift.
- Rensning: Tør holderen af med en blød kludamp klud. Undgå slibende rengøringsmidler eller opløsningsmidler.
- Tæthedskontrol: Kontrollér regelmæssigt alle skruer og forbindelser for at sikre, at de forbliver fastspændte. Spænd efter om nødvendigt.
- Vægt kapacitet: Do not add monitors that exceed the specified weight capacity.
7. Fejlfinding
| Problem | Mulig årsag | Løsning |
|---|---|---|
| Monitor wobbles or sags. | Screws are loose; mount not securely fastened to desk; monitor too heavy. | Check and tighten all screws on the VESA plate, monitor arm, and desk clamp/screw base. Ensure monitor weight is within limits. |
| Difficulty adjusting monitor position. | Justeringsknapper/skruer er for stramme. | Slightly loosen the relevant adjustment knob or screw (e.g., tilt knob, arm height screw) before attempting to adjust. Re-tighten after positioning. |
| Kablerne er rodede. | Cable management not utilized. | Route cables through the integrated cable management clips on the main pole. |
8. Specifikationer
| Modelnummer | SP-8986136 |
| Mærke | SpeaKa Professional |
| Monteringstype | Bordmontering (Clamp eller Grommet) |
| Bevægelsestype | Swivel, Tilt, Rotation (360°) |
| Maksimal hældningsvinkel | 90 grader |
| Kompatible enheder | Monitor (VESA compatible) |
| Farve | Sort |
| Varens vægt | 2.15 kilo |
| Pakkedimensioner | 46.3 x 35.2 x 10.1 cm |
| Første ledige dato | 24. juli 2020 |
9. Garantioplysninger
SpeaKa Professional products are designed for durability and performance. For specific warranty terms and conditions, please refer to the warranty card included with your product or visit the official SpeaKa Professional webwebsted. Gem din købsbevis til garantikrav.
10. Kundesupport
If you have any questions, require technical assistance, or need to report a missing/damaged part, please contact SpeaKa Professional customer support.
- Online support: Visit the official SpeaKa Professional webwebsted for ofte stillede spørgsmål og supportressourcer.
- Kontaktoplysninger: Se produktemballagen eller den officielle webwebstedet for aktuelle kontaktoplysninger (telefon, e-mail).


