1. Introduktion
This manual provides detailed instructions for the proper use and maintenance of your BOBLOV C19 Mini Body Camera. Please read this manual thoroughly before operating the device to ensure optimal performance and longevity.
The BOBLOV C19 is a compact body camera designed for various recording needs, featuring 1080P video recording, external memory support up to 256GB, and a long battery life.
2. Pakkens indhold
Bekræft, at alle nedenstående varer er inkluderet i din pakke:
- BOBLOV C19 Camera Body
- Removable Clips
- USB kabel
- Brugermanual
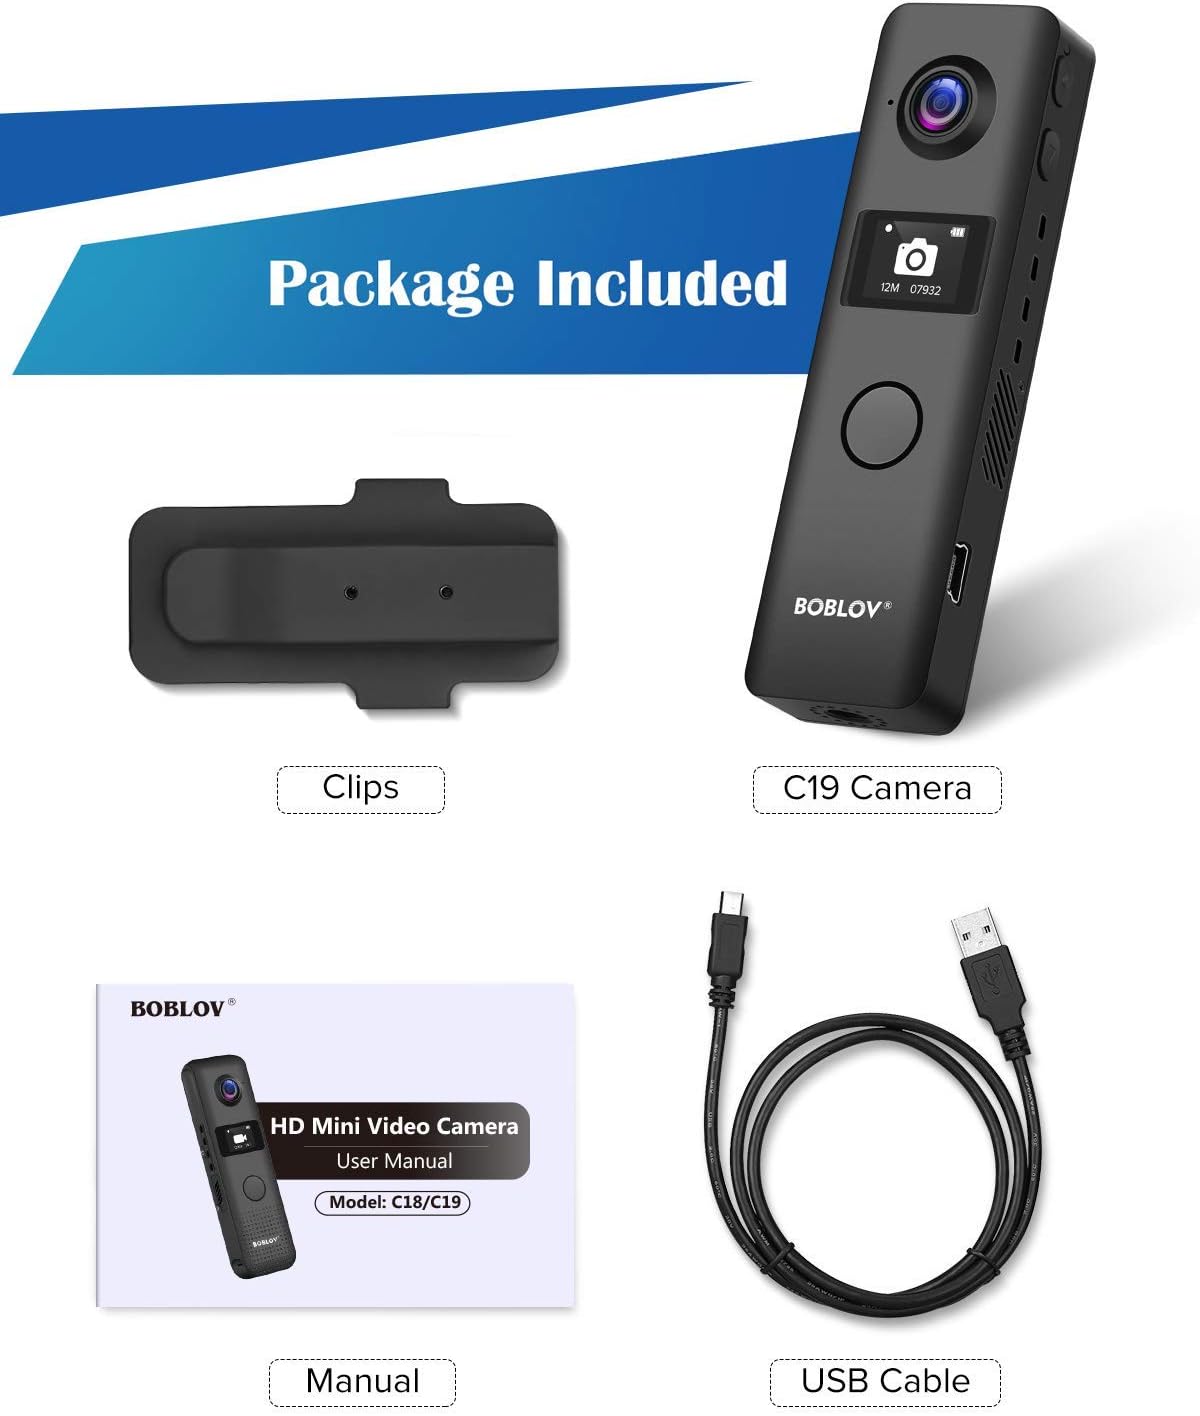
Figur 2.1: Included items in the BOBLOV C19 package. This image displays the C19 camera, two clips, a USB cable, and the user manual.
3. Produktet er slutview
Familiarize yourself with the physical components of your BOBLOV C19 camera.
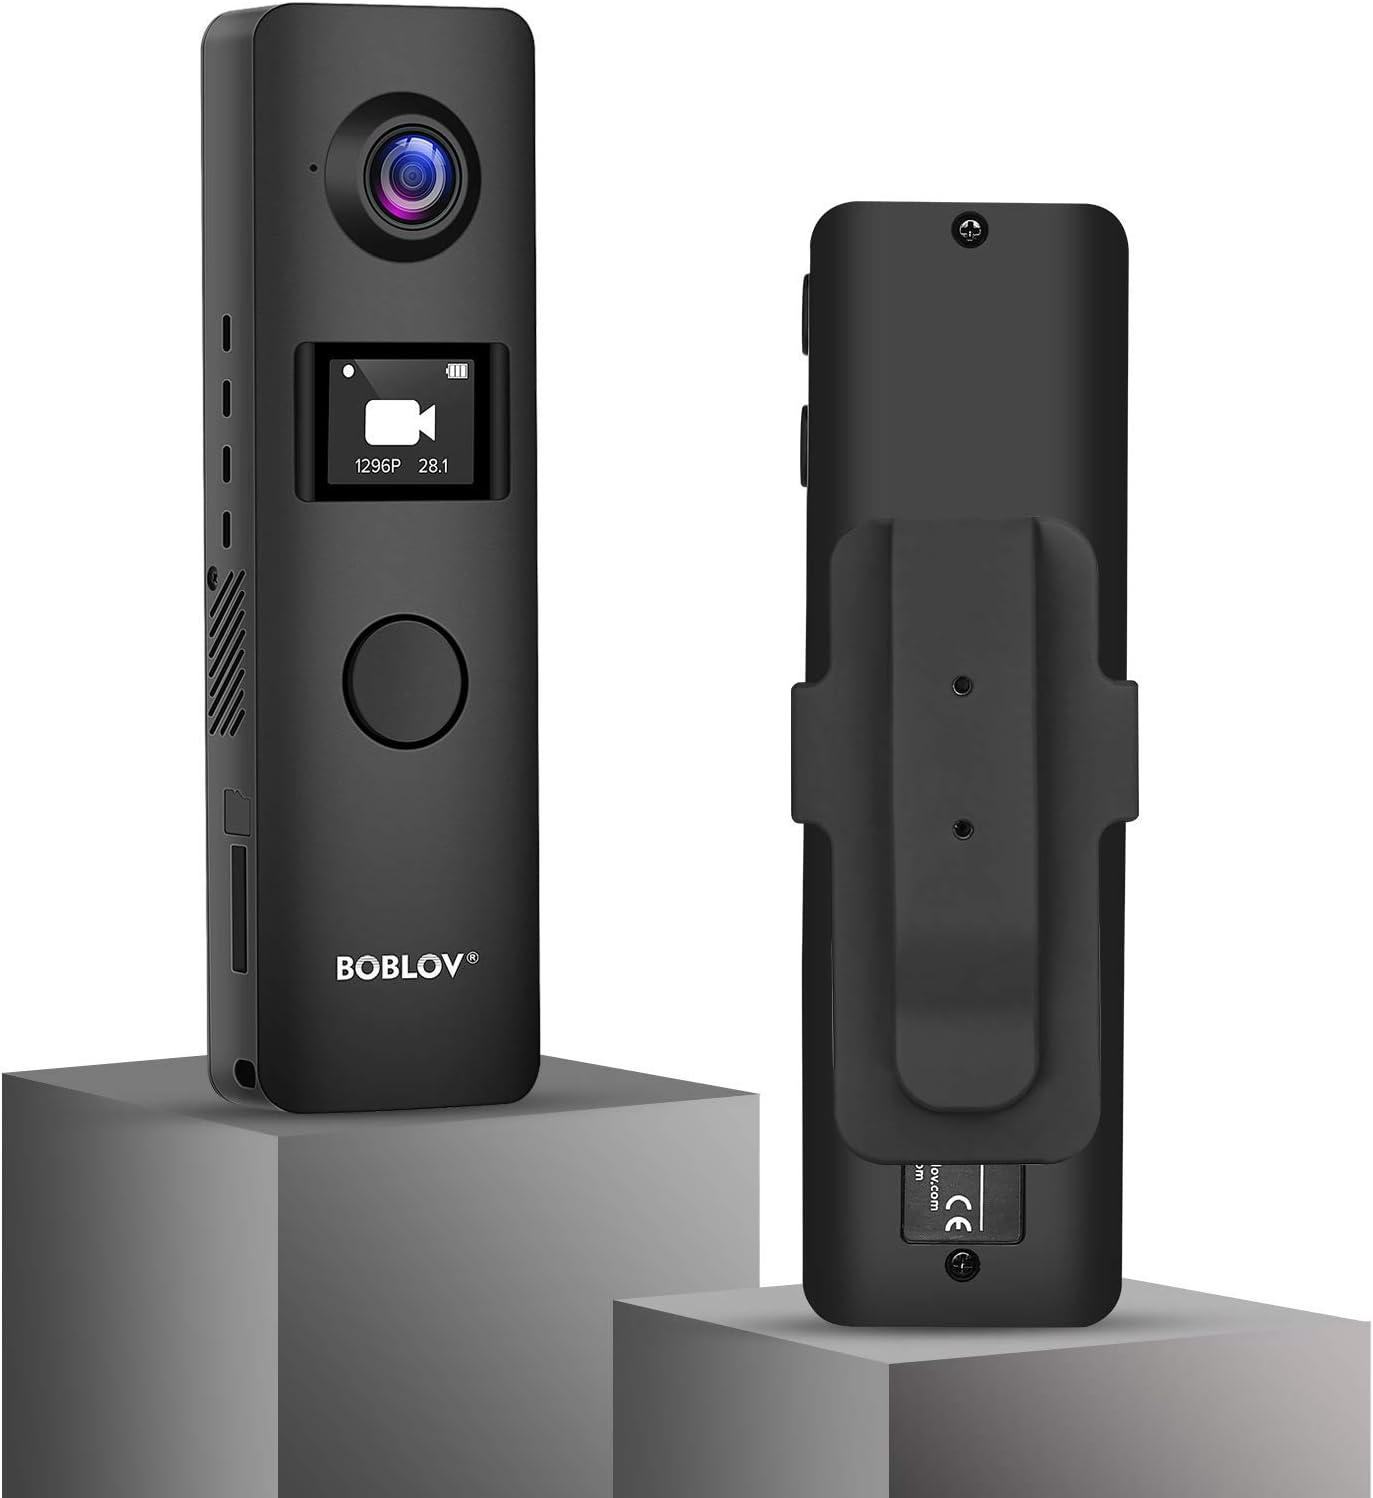
Figur 3.1: Forside og bagside view of the BOBLOV C19 Mini Body Camera. The front features the lens, OLED screen, and main recording button. The back shows the removable clip attachment point.

Figur 3.2: Dimensions of the BOBLOV C19 Mini Body Camera. The camera measures approximately 102mm (4 inches) in length, 30mm (1.2 inches) in width, and 12mm (0.5 inches) in depth, with a net weight of 53g (1.80 lb).

Figur 3.3: Labeled diagram of the BOBLOV C19 Mini Body Camera. This diagram highlights the Reset button, Power/Up button, Down button, OK Button/Recording button, USB port, SD Card Slot, Working Indicator, and 1/4 Screw Connection.
Nøglekomponenter:
- Linse: Optager video og billeder.
- OLED skærm: Displays recording status, menu options, and battery level.
- OK Button/Recording Button: Main button for starting/stopping recordings and confirming menu selections.
- Power/Up Button: Powers the device on/off and navigates up in menus.
- Ned-knap: Navigerer ned i menuer.
- USB-port: Til opladning og dataoverførsel.
- SD-kortplads: For external memory card insertion.
- Arbejdsindikator: LED-lys, der angiver enhedens status.
- 1/4 Screw Connection: For mounting the camera on tripods or other accessories.
4. Opsætning
4.1. Opladning af batteriet
Before first use, fully charge the camera's internal 1200mAh battery. Connect the camera to a USB power source using the provided USB cable. The charging time is approximately 2 hours.

Figur 4.1: The BOBLOV C19 supports recording while charging. A full charge takes approximately 2 hours, providing 3-4 hours of recording time (at 1080P with WiFi off).
4.2. Indsættelse af et hukommelseskort
The BOBLOV C19 supports external memory cards up to 256GB. A Class 10 or higher brand card is recommended for optimal performance. Ensure the camera is powered off before inserting or removing the memory card.
- Find SD-kortstikket på siden af kameraet.
- Insert the memory card with the gold contacts facing down until it clicks into place.
- For at fjerne det skal du forsigtigt skubbe kortet ind, indtil det springer ud.

Figur 4.2: The BOBLOV C19 supports external memory cards up to 256GB. A Class 10 card is recommended for reliable performance.
4.3. Attaching the Clip
The camera comes with removable clips that can be attached to the front or back, allowing for flexible mounting options. If the clip is attached to the front, the main recording button may be covered, requiring the use of the side buttons for recording.

Figur 4.3: The BOBLOV C19 features removable clips for versatile attachment. The image shows how the clip can be positioned on the camera, and notes that if the clip covers the front button, recording can be initiated via the side "Down" button.
5. Betjening
5.1. Tænd/sluk
- For at tænde: Press and hold the Power/Up button until the OLED screen illuminates.
- For at slukke: Press and hold the Power/Up button until the screen turns off.
5.2. Optagelse af video
The BOBLOV C19 can record video at various resolutions, including 1080P at 30fps.
- Ensure the camera is powered on and in video mode (indicated on the OLED screen).
- Press the large OK Button/Recording Button on the front to start recording. The working indicator will flash, and a recording icon will appear on the screen.
- Press the OK Button/Recording Button again to stop recording. The video file will be saved to the memory card.

Figur 5.1: The BOBLOV C19 features a large central button for easy one-touch recording. Pressing this button initiates or stops video recording.
5.3. Tage billeder
The camera can capture still images.
- Navigate to photo mode using the menu (see Section 5.5).
- Press the OK Button/Recording Button to take a photo.
5.4. Lydoptagelse
The camera also supports audio-only recording.
- Navigate to audio mode using the menu (see Section 5.5).
- Press the OK Button/Recording Button to start audio recording.
- Press the OK Button/Recording Button again to stop recording.
5.5. Indstillinger for OLED-skærmmenu
The OLED screen allows you to access and adjust various camera settings.
Figur 5.2: The OLED screen displays current mode (Video, Audio, Settings, Photo) and other relevant information.

Figur 5.3: Available menu options on the BOBLOV C19. These include Resolution, Image Size, Super Store, Loop Recording, Vibration, Video Time Detection, Power off, Indicator, Language, Date/Time, Unit ID, Format, and Version.
Use the Power/Up and Down buttons to navigate through the menu options, and the OK Button/Recording Button to select an option or confirm a setting.
5.6. Loop-optagelse
Kameraet understøtter loop-optagelse, som automatisk overskriver den ældste files when the memory card is full. This ensures continuous recording without manual deletion.

Figur 5.4: Illustration of the loop recording feature, which automatically deletes older files to make space for new recordings when the memory card is full.
5.7. Bevægelsesdetektion
The camera includes a motion detection feature. When enabled, the camera will automatically start recording when motion is detected within its field of view. Refer to the menu settings to enable or disable this function.
6. Vedligeholdelse
- Rensning: Brug en blød, tør klud til at rengøre kamerahuset. Brug en specialklud og -opløsning til objektivet. Undgå skrappe kemikalier.
- Opbevaring: Opbevar kameraet et køligt og tørt sted, væk fra direkte sollys og ekstreme temperaturer.
- Batteripleje: For at forlænge batteriets levetid bør du undgå at aflade batteriet helt ofte. Oplad kameraet regelmæssigt, selvom det ikke er i brug i længere perioder.
7. Fejlfinding
Almindelige problemer og løsninger:
- Kameraet tænder ikke:
- Sørg for, at batteriet er opladet. Tilslut kameraet til en strømkilde, og prøv igen.
- Perform a reset by gently pressing the reset button with a thin object (e.g., a paperclip).
- Recording stops unexpectedly or files are corrupted:
- Ensure a Class 10 or higher memory card is used. Lower class cards may not keep up with the data write speed.
- Format the memory card using the camera's menu settings or a computer.
- Check if the memory card is full. Enable loop recording or transfer files for at frigøre plads.
- Poor video quality in low light:
- The camera's low-light performance may be limited. Ensure adequate lighting for optimal video quality.
- Muffled or poor audio quality:
- Sørg for, at mikrofonen ikke er blokeret.
- Sound quality can be affected by clothing movement when worn on the body.
- Batterilevetiden er kortere end forventet:
- Recording at higher resolutions (e.g., 1080P) consumes more power.
- Ensure WiFi is off if not in use, as it can drain the battery faster.
- Batteriets ydeevne kan forringes over tid med gentagne opladningscyklusser.
8. Specifikationer
| Feature | Detalje |
|---|---|
| Mærke | BOBLOV |
| Modelnummer | C19 |
| Videooptagelsesopløsning | 1080p (up to 1296P with Novatek 96658 chipset) |
| Fotosensorteknologi | CCD or CMOS (IMX323 sensor) |
| Flash-hukommelsestype | SD (External, up to 256GB) |
| Videooptagelsesformat | MOV |
| Understøttet lydformat | AAC, MP3 |
| Forbindelsesteknologi | Kablet (USB) |
| Farve | Sort |
| Speciel funktion | Nattesyn |
| Batterikapacitet | 1200 mAh |
| Optagelsestid | Approx. 3-4 hours (1080P, WiFi off) |
| Opladningstid | Ca. 2 timer |
| Dimensioner | 102mm x 30mm x 12mm (4-1/8" x 1-1/8" x 1") |
| Vægt | 53g (1.80 lb) |
9. Garanti og support
For warranty information and technical support, please refer to the official BOBLOV webwebstedet eller kontakt deres kundeservice direkte. Gem din købskvittering som købsbevis i tilfælde af garantikrav.


